~Please also have a look at my other Star Wars costume reproductions! ~
Navigation menu for this costume:
Analysis of the costume – Making the headdress – Making the gown
I started making my headdress by going a pretty unusual route for the average costumer – I used my computer to create it.
I fired up Blender, a 3D modeling software which I know how to use quite well, and created a 3D version of the headdress on my computer, using reference photos of the original headdress on planes (3d term for ‚rectangles‘) in the scene.
As a reference for size, I also used a full-size 3D character, which has my actual size.
 Blender-made red invasion headdress. You can see the reference planes I used to model the headdress to the left and behind the figure.
After I finished the modeling of the headdress in Blender – which took about two days until I was satisfied – I exported it as a Wavefront Object and imported that self-made 3D headdress into Pepakura, where I basically disassembled the object into printable 2D shapes.
 Headdress in Pepakura; I just started the process of disassembling it into printable shapes.
Now, when that was finished, I printed the file with the 2D shapes out and started to assemble my 3D headdress from the computer in real life. I can’t even begin to tell you how cool that was – while it wasn’t the first time I worked with Blender (obviously not!); it was the first time I worked in earnest with Pepakura; and to see something that I created in 3D in a computer come to life in real life, outside the computer, was a really great experience.
After printing my headdress on regular paper, I glued the paper parts to carton, then cut them out and started assembling.
 With the aid of my wonderful son, we managed the assembly of the carton headdress in just under a day
(and in the process, we turned the living room in a paper and carton snippets mess!)
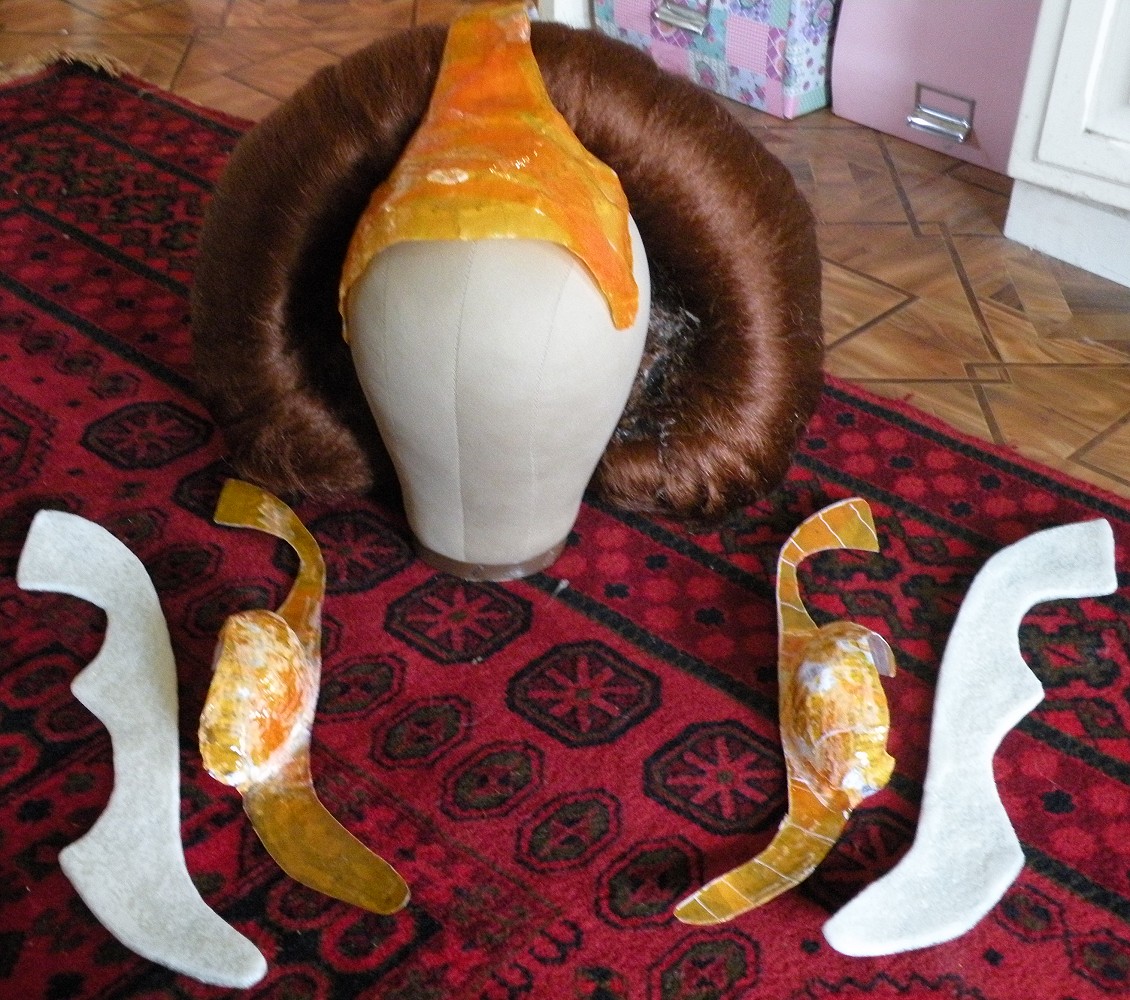
This is what the ‚hair‘ part of the headdress looked like after assembling:
 Note the two larger notches at the sides – that’s where the ‚ear eggs‘ will go later.
My son however suggested I wear the headdress this way:
 Queen Elk, or Elk Amidala? Uhm no…. but I HAD to snap a pic and share the humor! 😀
After we had completed the assembly, the headdress looked like this. Note that the ’swords‘ at the sides are still missing. Also, the ‚back‘ side shows a strip of paper running down from the center strip – this is to keep the hair roll in place, which is separate from the ‚cap‘ part of the headdress:
 |
 |
 |
The head on which the headdress is displayed, by the way, is a lifecast of my own head to make sure that the headdress will fit me. It’s covered with clear plastic film to make sure that at a later stage, the added epoxy resin won’t make the headdress stick to the head.
Here’s what the ‚cap‘ part looks like without the hair roll:

After the headdress was assembled like this, it still lacked stability.
So I drenched the carton construction inside and outside with epoxy resin, and, in the process, I also attached the two ’swords‘ at the sides – those were just two carton ’swords‘, now covered with a layer of epoxy resin drenched wool batting, which, if drenched with epoxy resin, provides a similar stability as glass fiber, just that it’s more drapeable and of course thicker, therefore adding to the thickness of the swords.
Here’s what the headdress looked like after being drenched with epoxy resin:
 |
 |
 |
The hair part is still detachable (and will remain so even when the headdress is completely finished).
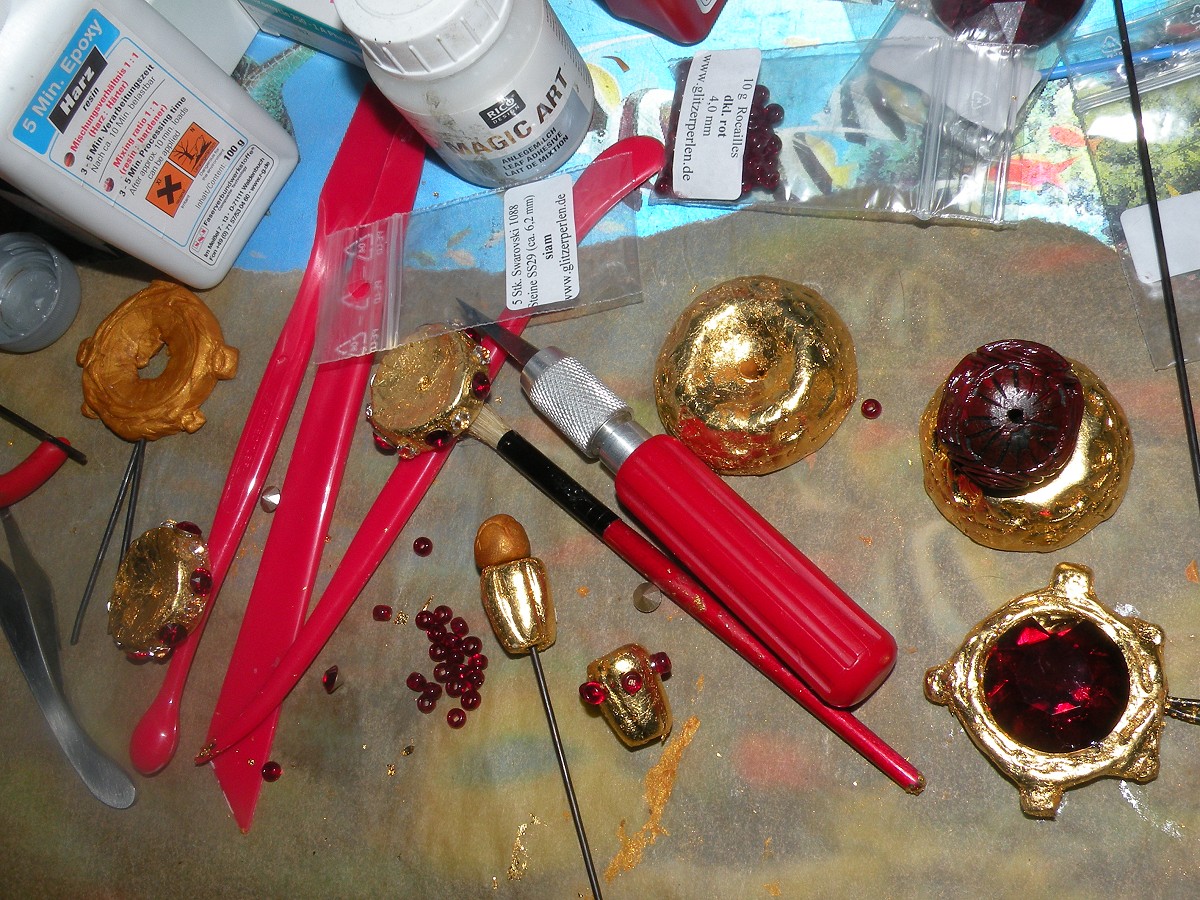
I also received some of the materials to decorate the ‚peak‘:
 Top left: Black carved cinnabar bead
(which I need to paint dark red – I wish I could have gotten one in red, but at the size I need – 30mm – I could only get the bead in black),
next to that: red pointed back Swarovski stones, 6mm, in Siam for the ‚peak‘;
Swarovski pointed back stones, 4mm, in Crystal Golden Shadow (also for the peak),
next to those: Swarovski Crystal Pearls, ‚White Pearl‘, in 3mm and 4mm (peak, again);
bottom right: red translucent glass beads for the peak and, last not least,
bottom center: My Swarovski 1201, 35mm in ‚Red Magma‘ for the center jewel!
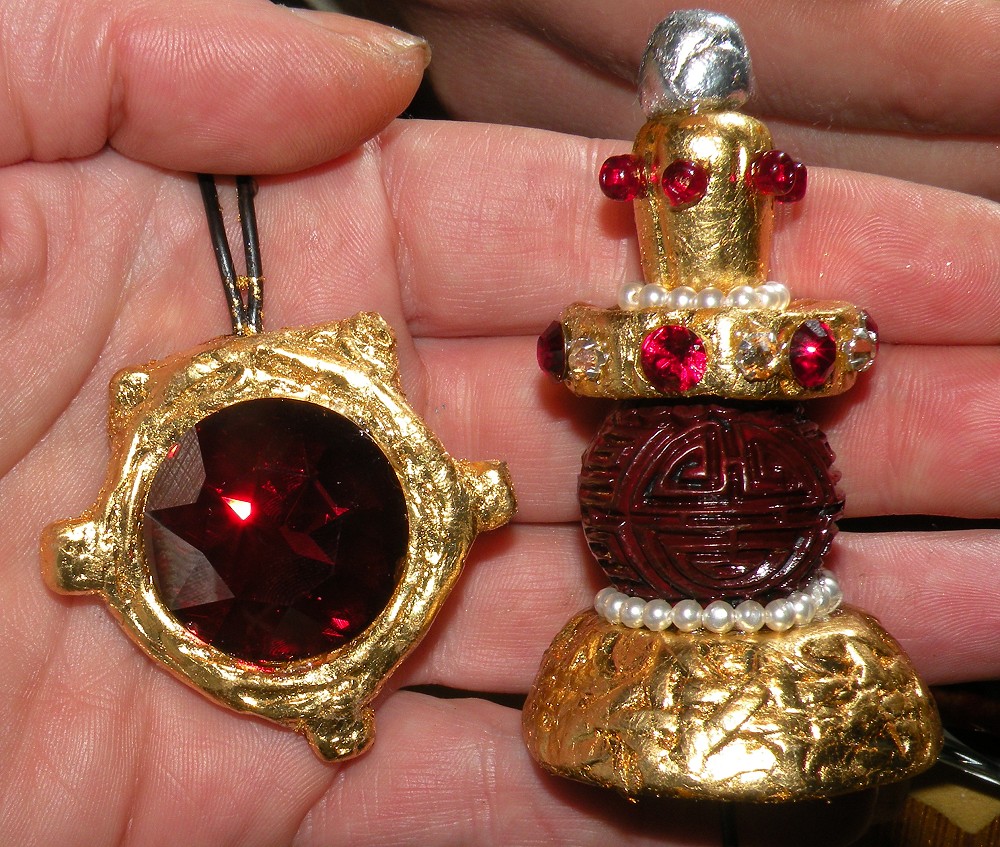
Better pics of the jewel and the carved cinnabar bead (and please excuse the appearance of my fingers – I worked with epoxy resin today…):


I made a small pouch for the materials to keep them safe while I’m still working on the headdress, which I affectionately call the ‚Jewel of Zenda Pouch‘:

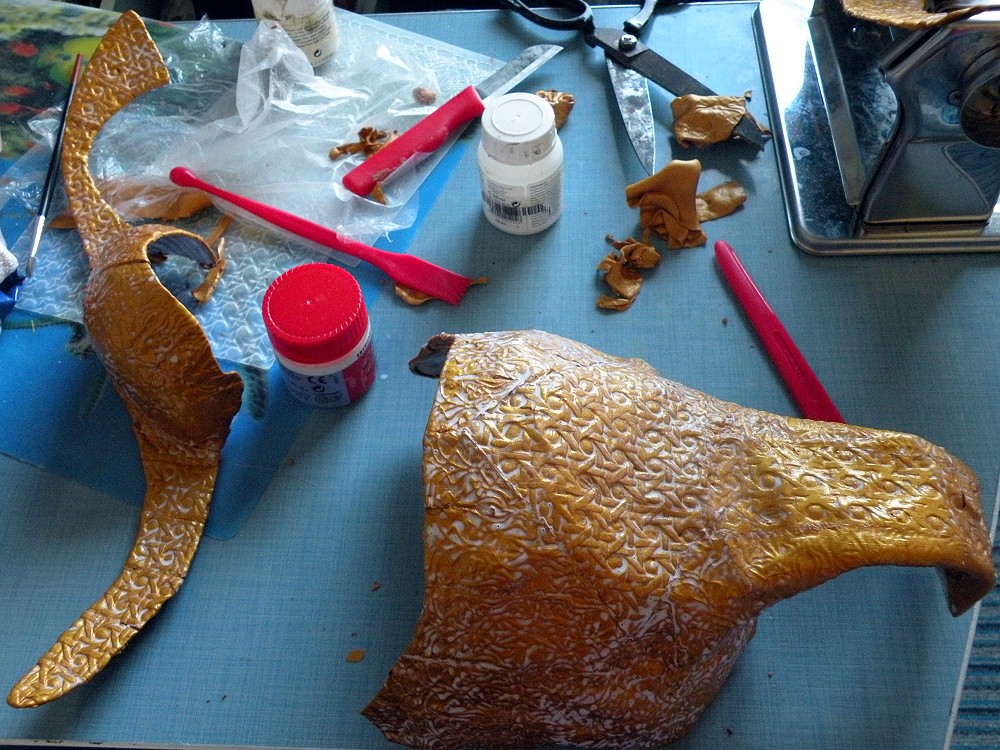
Creation of the „peak“ and the center jewel, using Fimo (polymer clay), Swarovski jewels, glass beads and leaf gilding:
Here’s what they look like when finished:
Headdress progress:
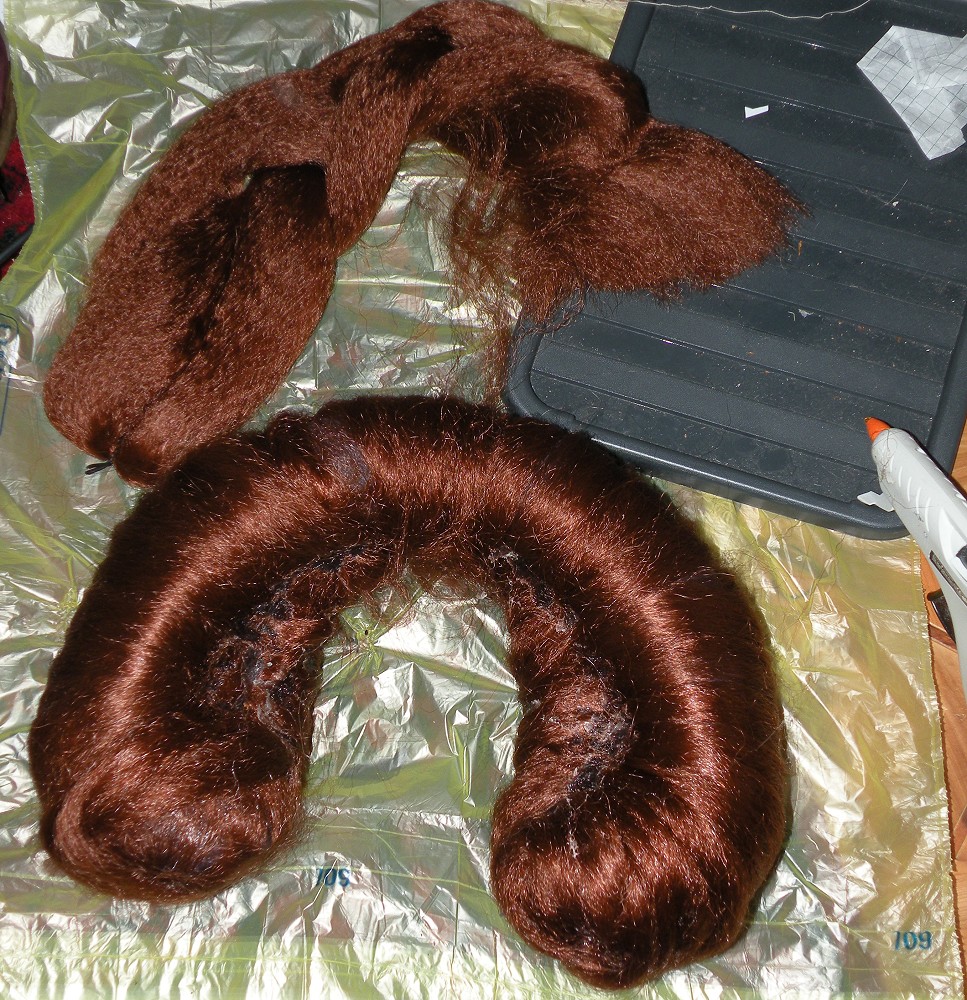 Creating the hair roll; which, as my own hair length is somewhere between my waist and my hips, I created using hair close to my own hair color (since my own natural hair will form the ponytail in the back; so of course the hair roll has to match that color).
 Hair roll combined with the raw cap and „swords“
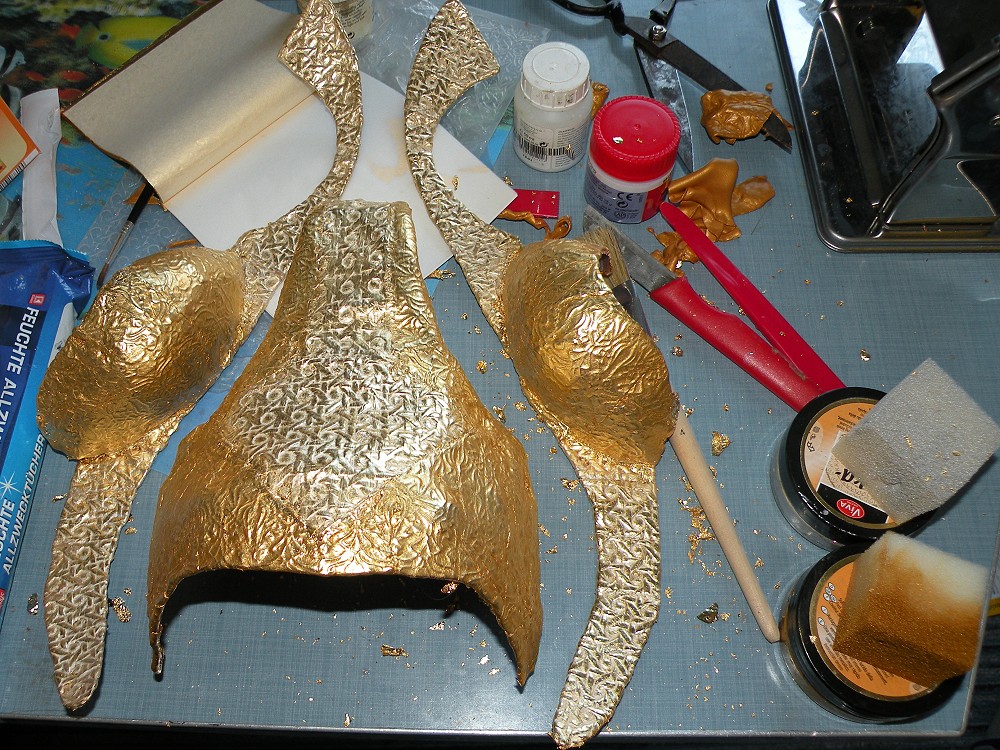
 Cap and swords overlaid with textured polymer clay, ready for leaf gilding.
To create the textured clay, I used a pasta machine (can be seen at the top right of the photo), rolled the clay out VERY thin, then again passed it through the machine over texturing sheets.
After that, I arranged the soft, textured clay on the cap and the swords and baked everything on a layer of epoxy resin, which basically welded the raw cap and the polymer clay together.
 Leaf gilding the swords.
 Now, many people remember the original cap as well as the swords to be partially silver and partially gold, but that is just an optical illusion.
In fact, the ENTIRE cap and swords were gold, then partially matted (=rubbed) with silver paint. This is what I did in this picture – matting the „silver“ parts with silver paint, and also matting the golden parts with gold paint.
I did that because as you can see in the last picture with the leaf gilding, pure gilding looks like a mirror, but that is not what the original headdress looks like. You can see the fine patterns BECAUSE the cap and swords are partially matted.
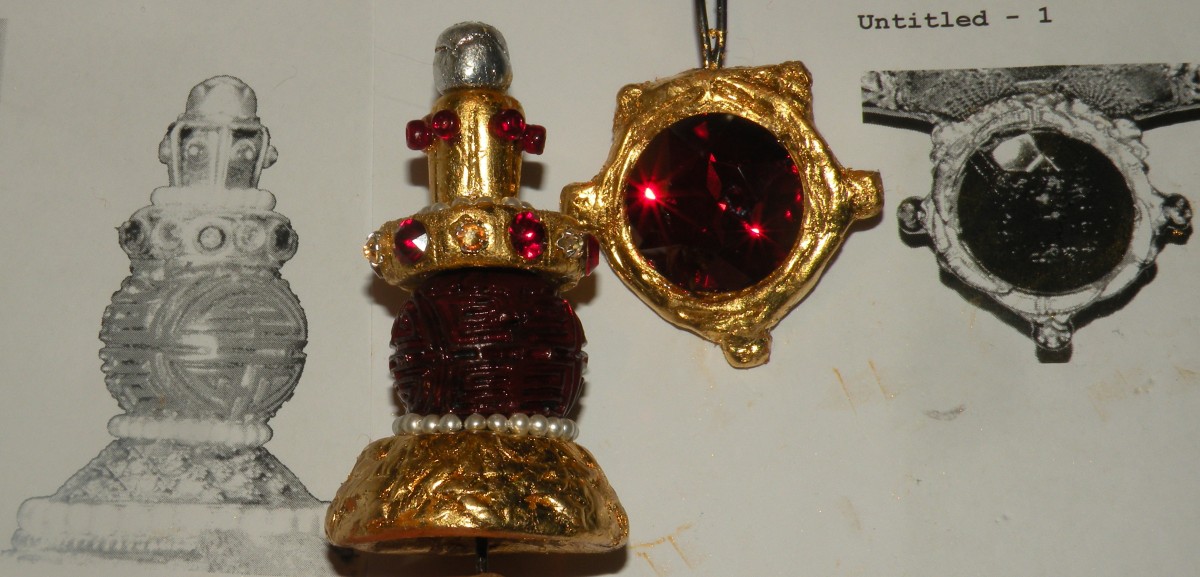
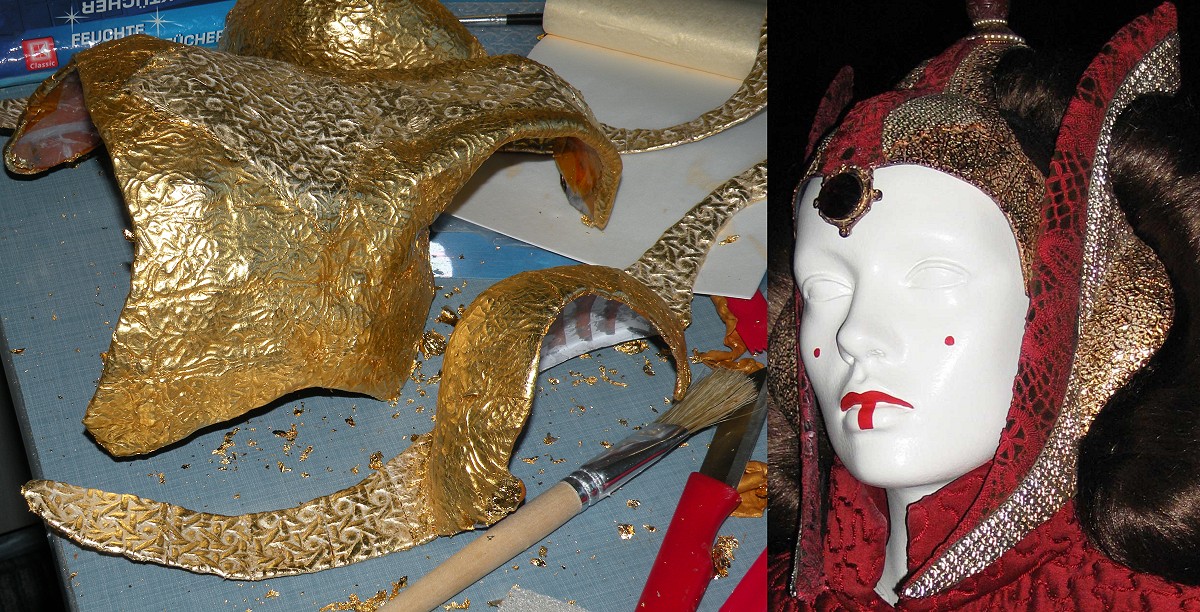 A photo comparing the original headdress (right) to what I created (left). As you can see, the golden and silver matting over the pure leaf gilded golden headdress creates the illusion of the headdress being silver and gold.
.
Navigation menu for this costume:
Analysis of the costume – Making the headdress – Making the gown
~Please also have a look at my other Star Wars costume reproductions! ~
hey hey 😀 your work is amazing ;D and i may be late but i wanted to ask you if you have the 3d model file of the headdress? ;D i mean i even would pay for it ;D maybe you could upload it than on an cosplay forum like etsy so you help so many with doing their amidala cosplay ;D thanks and have an nice day ;D