Navigation for this part of the page:
[catlist categorypage=yes]
I made the skirt with the pattern that I pictured on the ‚Planning‘ page from golden brocade and plush rayon velvet which I dyed to a beautiful garnet red color.
The actual skirt was sewn pretty fast; just to add the linen lining took a bit longer as the skirt just didn’t want to cooperate *lol*…
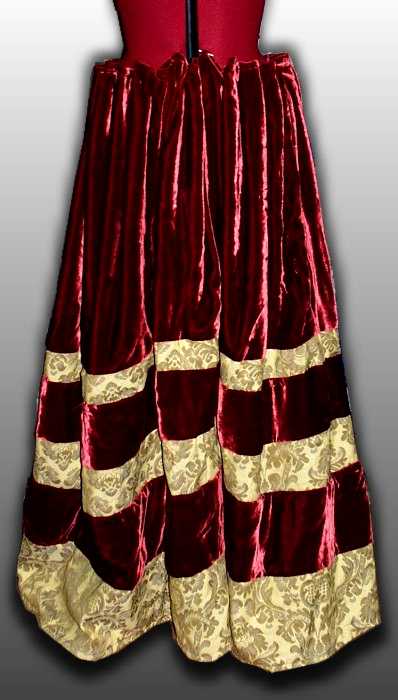
Here’s a first picture of the pleated skirt, which, just like the ones in the paintings, is not at the waistline, but slightly below it.
I still need to push the 5-inch-pleats into the correct position, but overall, I like the look so far.
Just that I’m wondering if I should add some lead banding (as in ‚curtain lead banding‘!) to the bottom of the skirt so that it will drape more nicely…
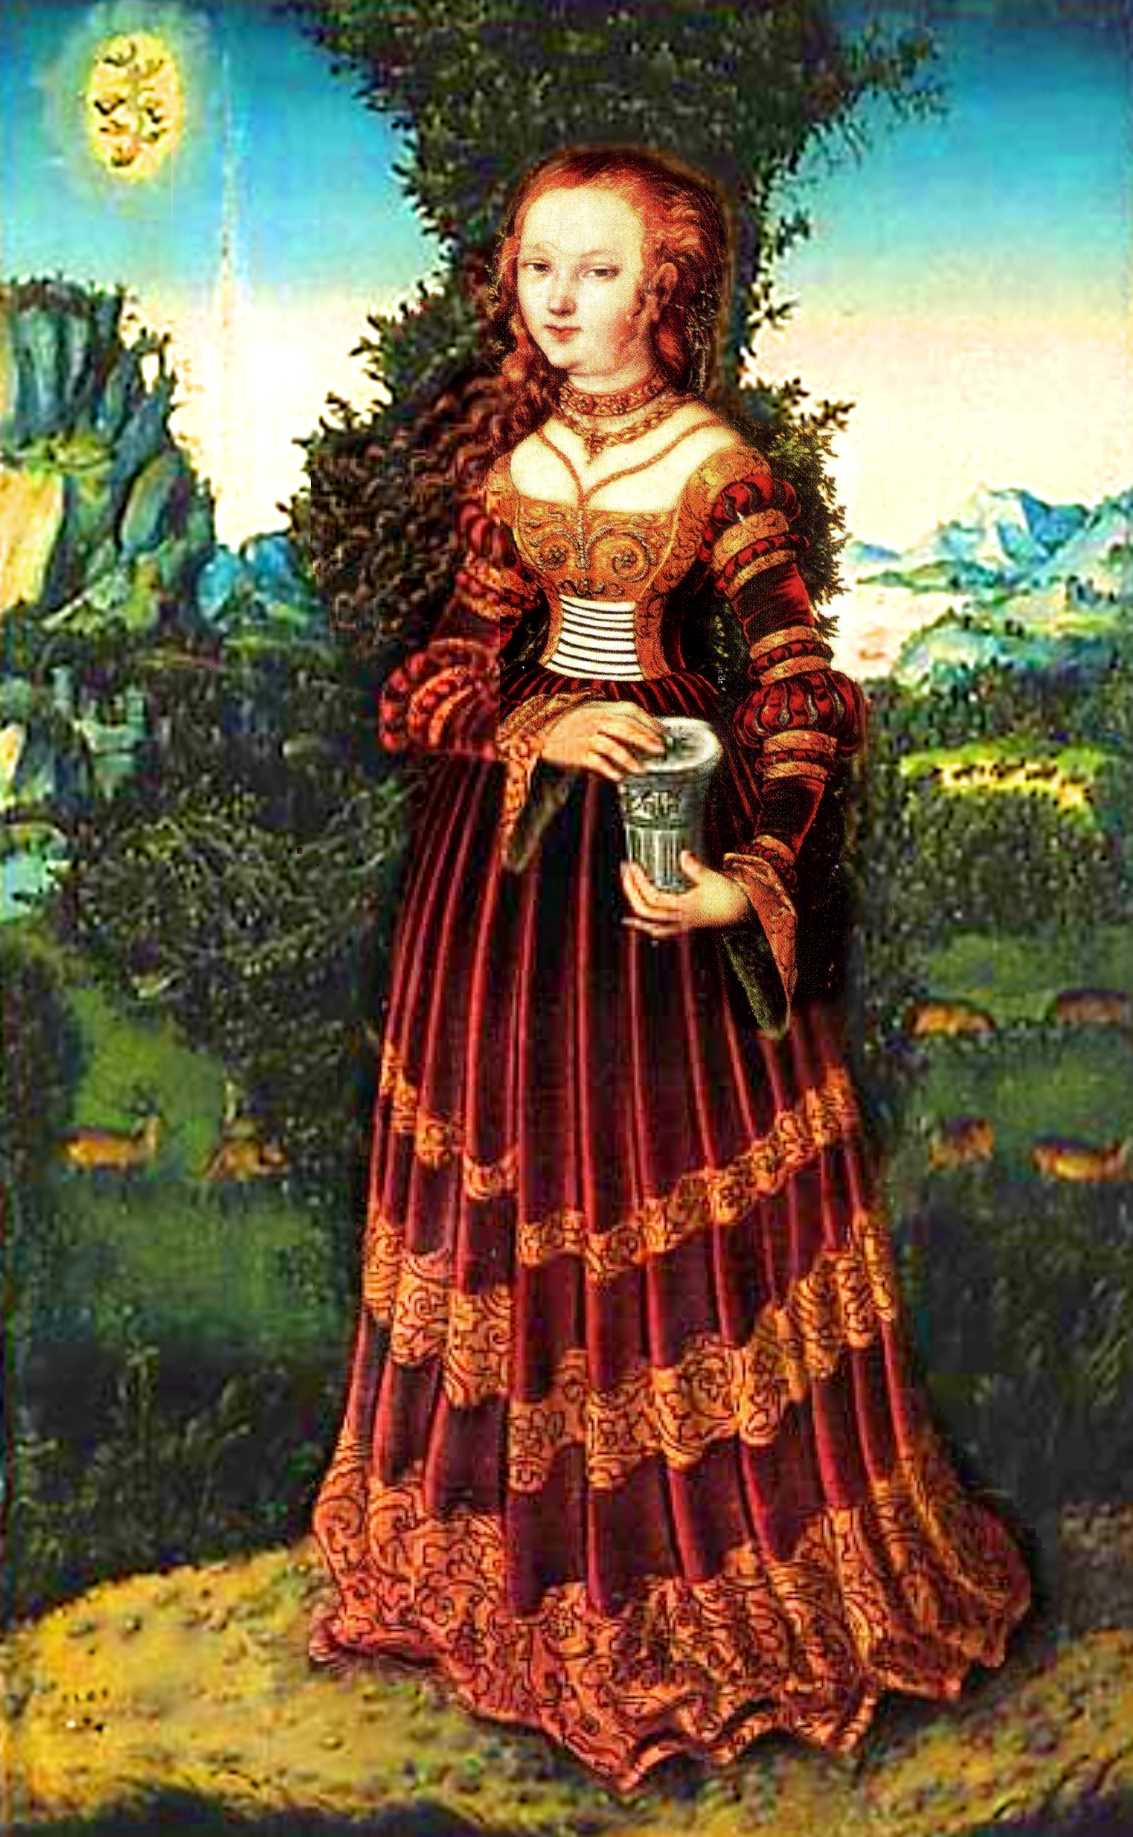
Picture of the original Magdalena for comparison.
The golden brocade, by the way, is the rest I had of the brocade I used for the Elizabeth Coronation gown – it doesn’t exactly have a nice renaissance vine pattern, but I guess it looks nice anyway 😉
And I can’t even begin to express in words how much I love the color of the velvet!
Looking at the painting in comparison to my skirt I wonder if I should give a light red dye to the finished gown, so that the golden parts will get a slightly more reddish appearance. I guess I’ll decide that when I’m finished 😉
Here’s how I made the pleats:
Note first:
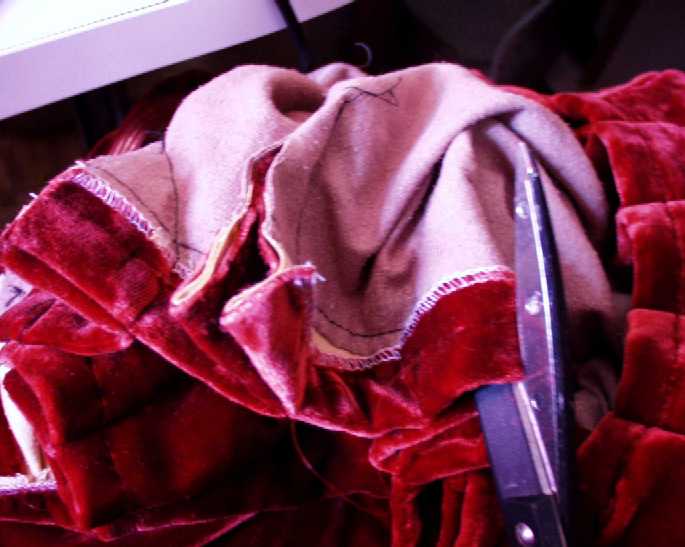
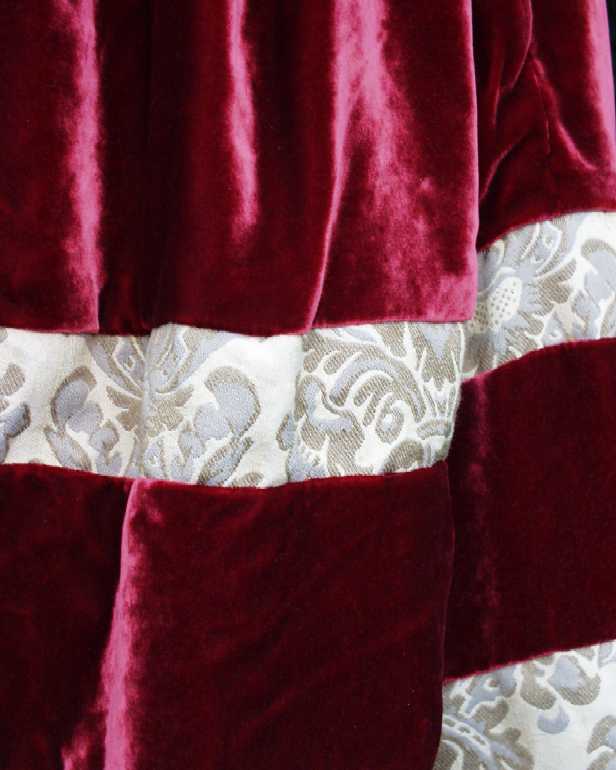
You’ll notice that the top of the lining has a yellow color, while the bottom is brown. This is because I accidentally cut the lining (brown) too short and noticed that just when I tried to attach it to the top of the outer fabric (the bottom was sewn first).
As I had none of the brown linen left, I had to use yellow; that’s how easy it is 😉
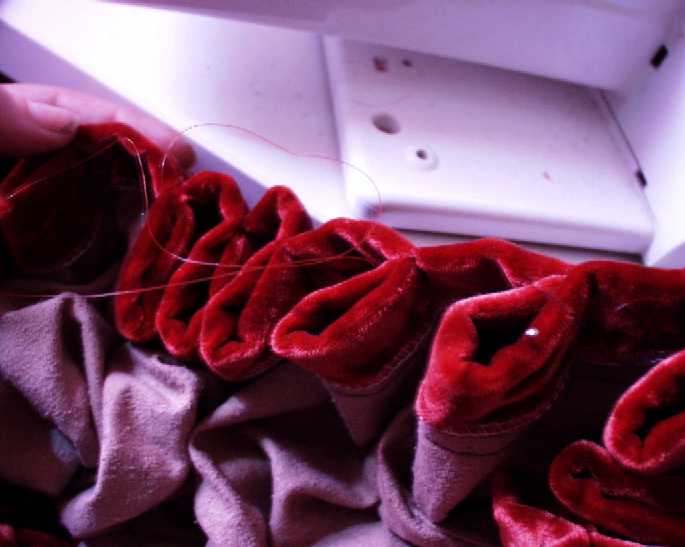
First I pleated the skirt into five inch pleats with two nylon strings. I use nylon strings so they won’t break when I pull them up.
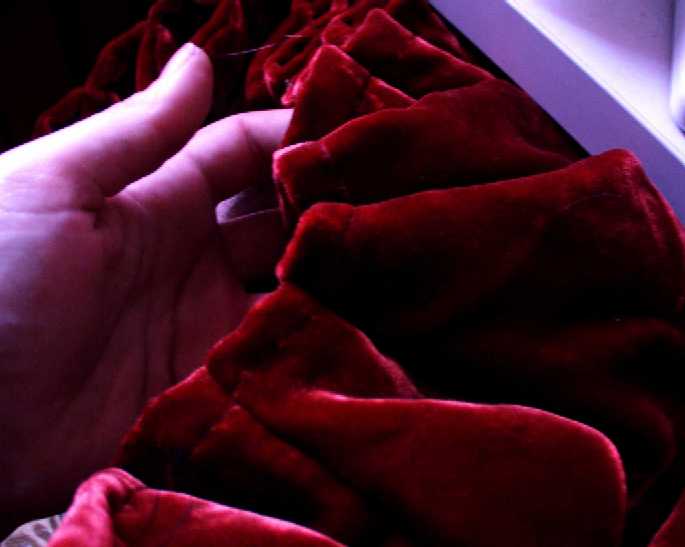
Afterwards, I’ve sewn the organized pleats into some kind of triangle shape. It’s much better if I show it rather than describing it:

I then cut the inside parts of these triangles open and turned the edges back.
All this is done to make the pleats look (from the outside) as if there was something ’stuck‘ in them, which creates those nice ‚rolls‘ of the original picture without having them stick out at the very top, where they have to be flat at the waist banding..
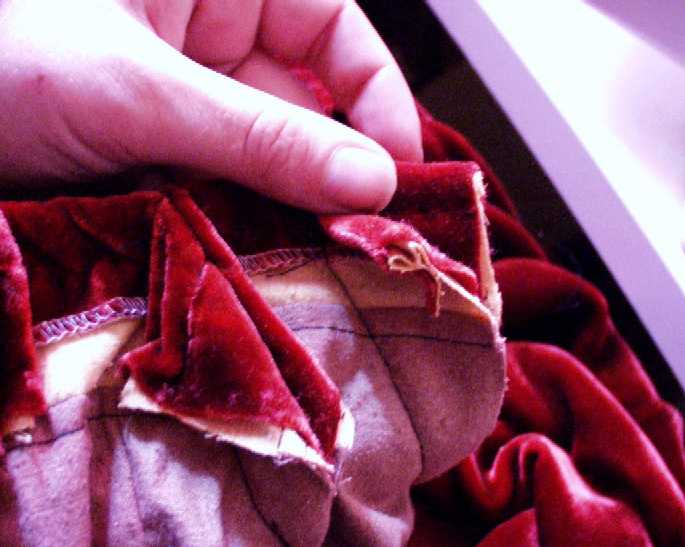
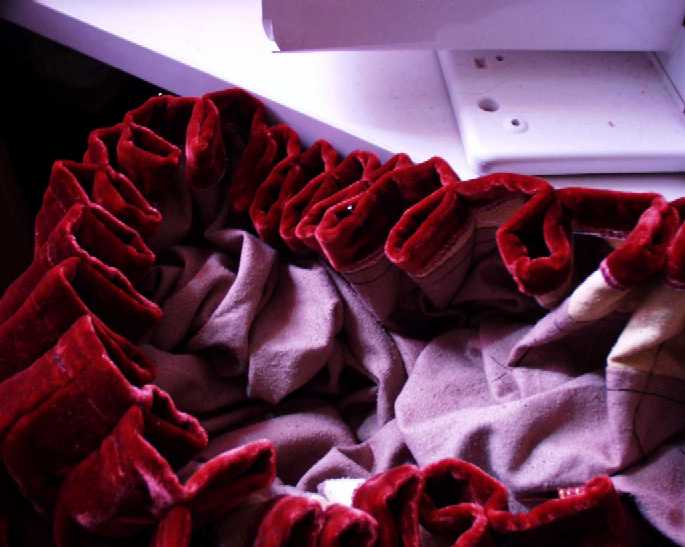
Then I’ve sewn those ‚back rolled edges‘ down,…
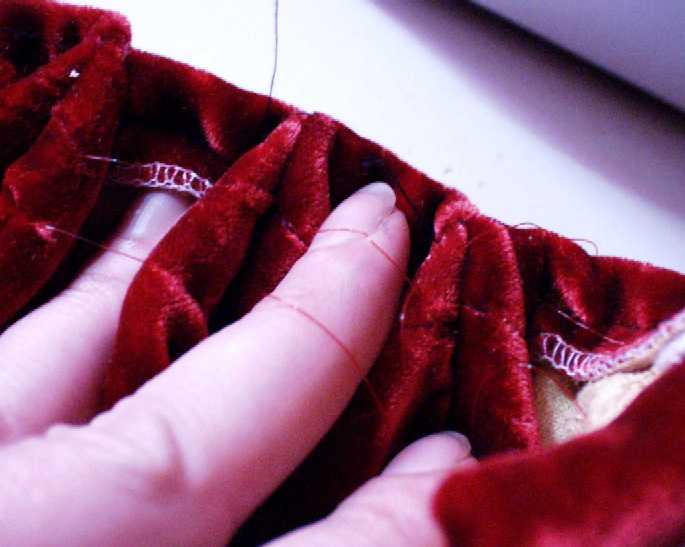
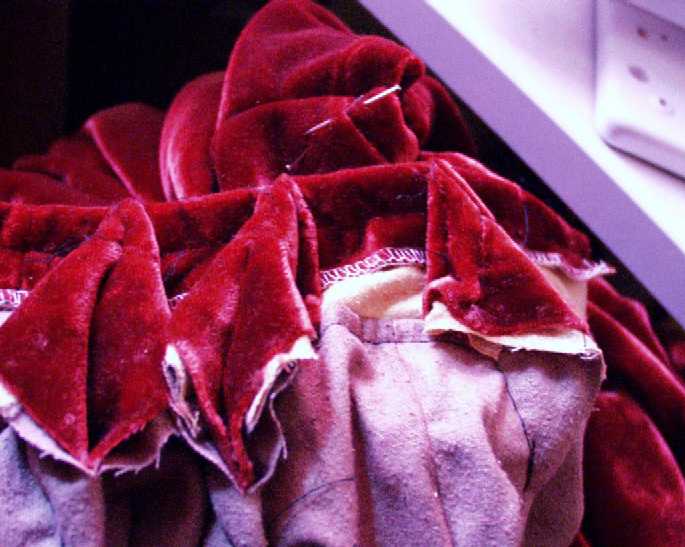
and added the waist-/hip banding in some sort of ‚yoke‘ form. I’ve sewn each of the pleats ‚inward‘ pointing seams to the banding, and voilà – the skirt:
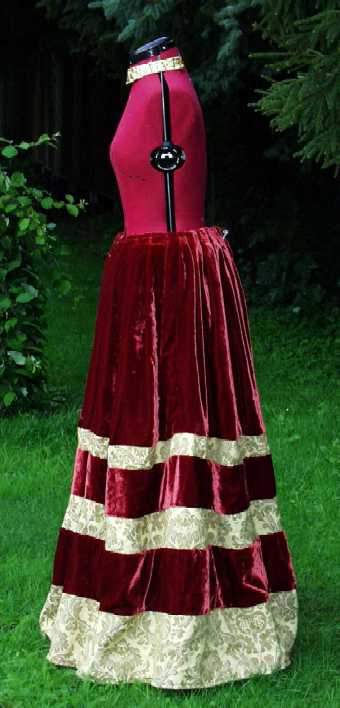
Here are some more pictures, taken in daylight outside. The pleats are half way sewn to the waist / hips banding (in the pictures, on the right side); the other side is not sewn to the banding yet.
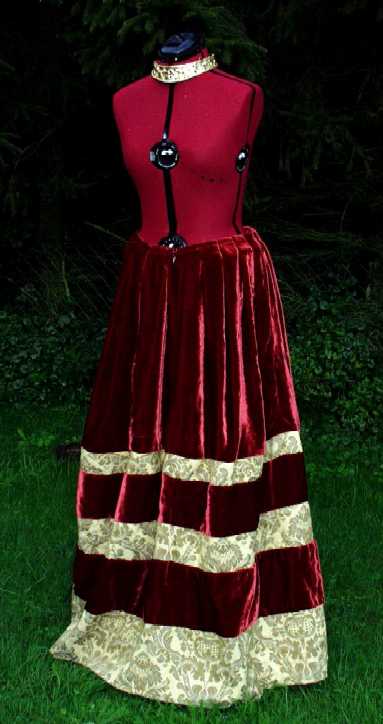
The bottom of the skirt, unfortunately, doesn’t pleat quite as much as the original. This is because the skirt is not wide enough – 280cm (110 inch) is not enough. I intended to make the skirt wider when I planned it, but unfortunately I didn’t have enough of the golden brocade left, so I had to reduce the planned circumference.
Nevertheless, I think even the reduced pleating now is quite nice 🙂
Now follow me to the Brusfleck, or, as I have explained in the ‚Study‚, the Renaissance Babydoll 😉
Navigation for this part of the page:
[catlist categorypage=yes]