The „Arnolfini Marriage“ gown
Subjects on this page (click or just scroll down to see them all):
Differences between my reproduction and the portrait gown
Links to other reproductions of this gown that I’ve found on the net
Overview of the portrait gown
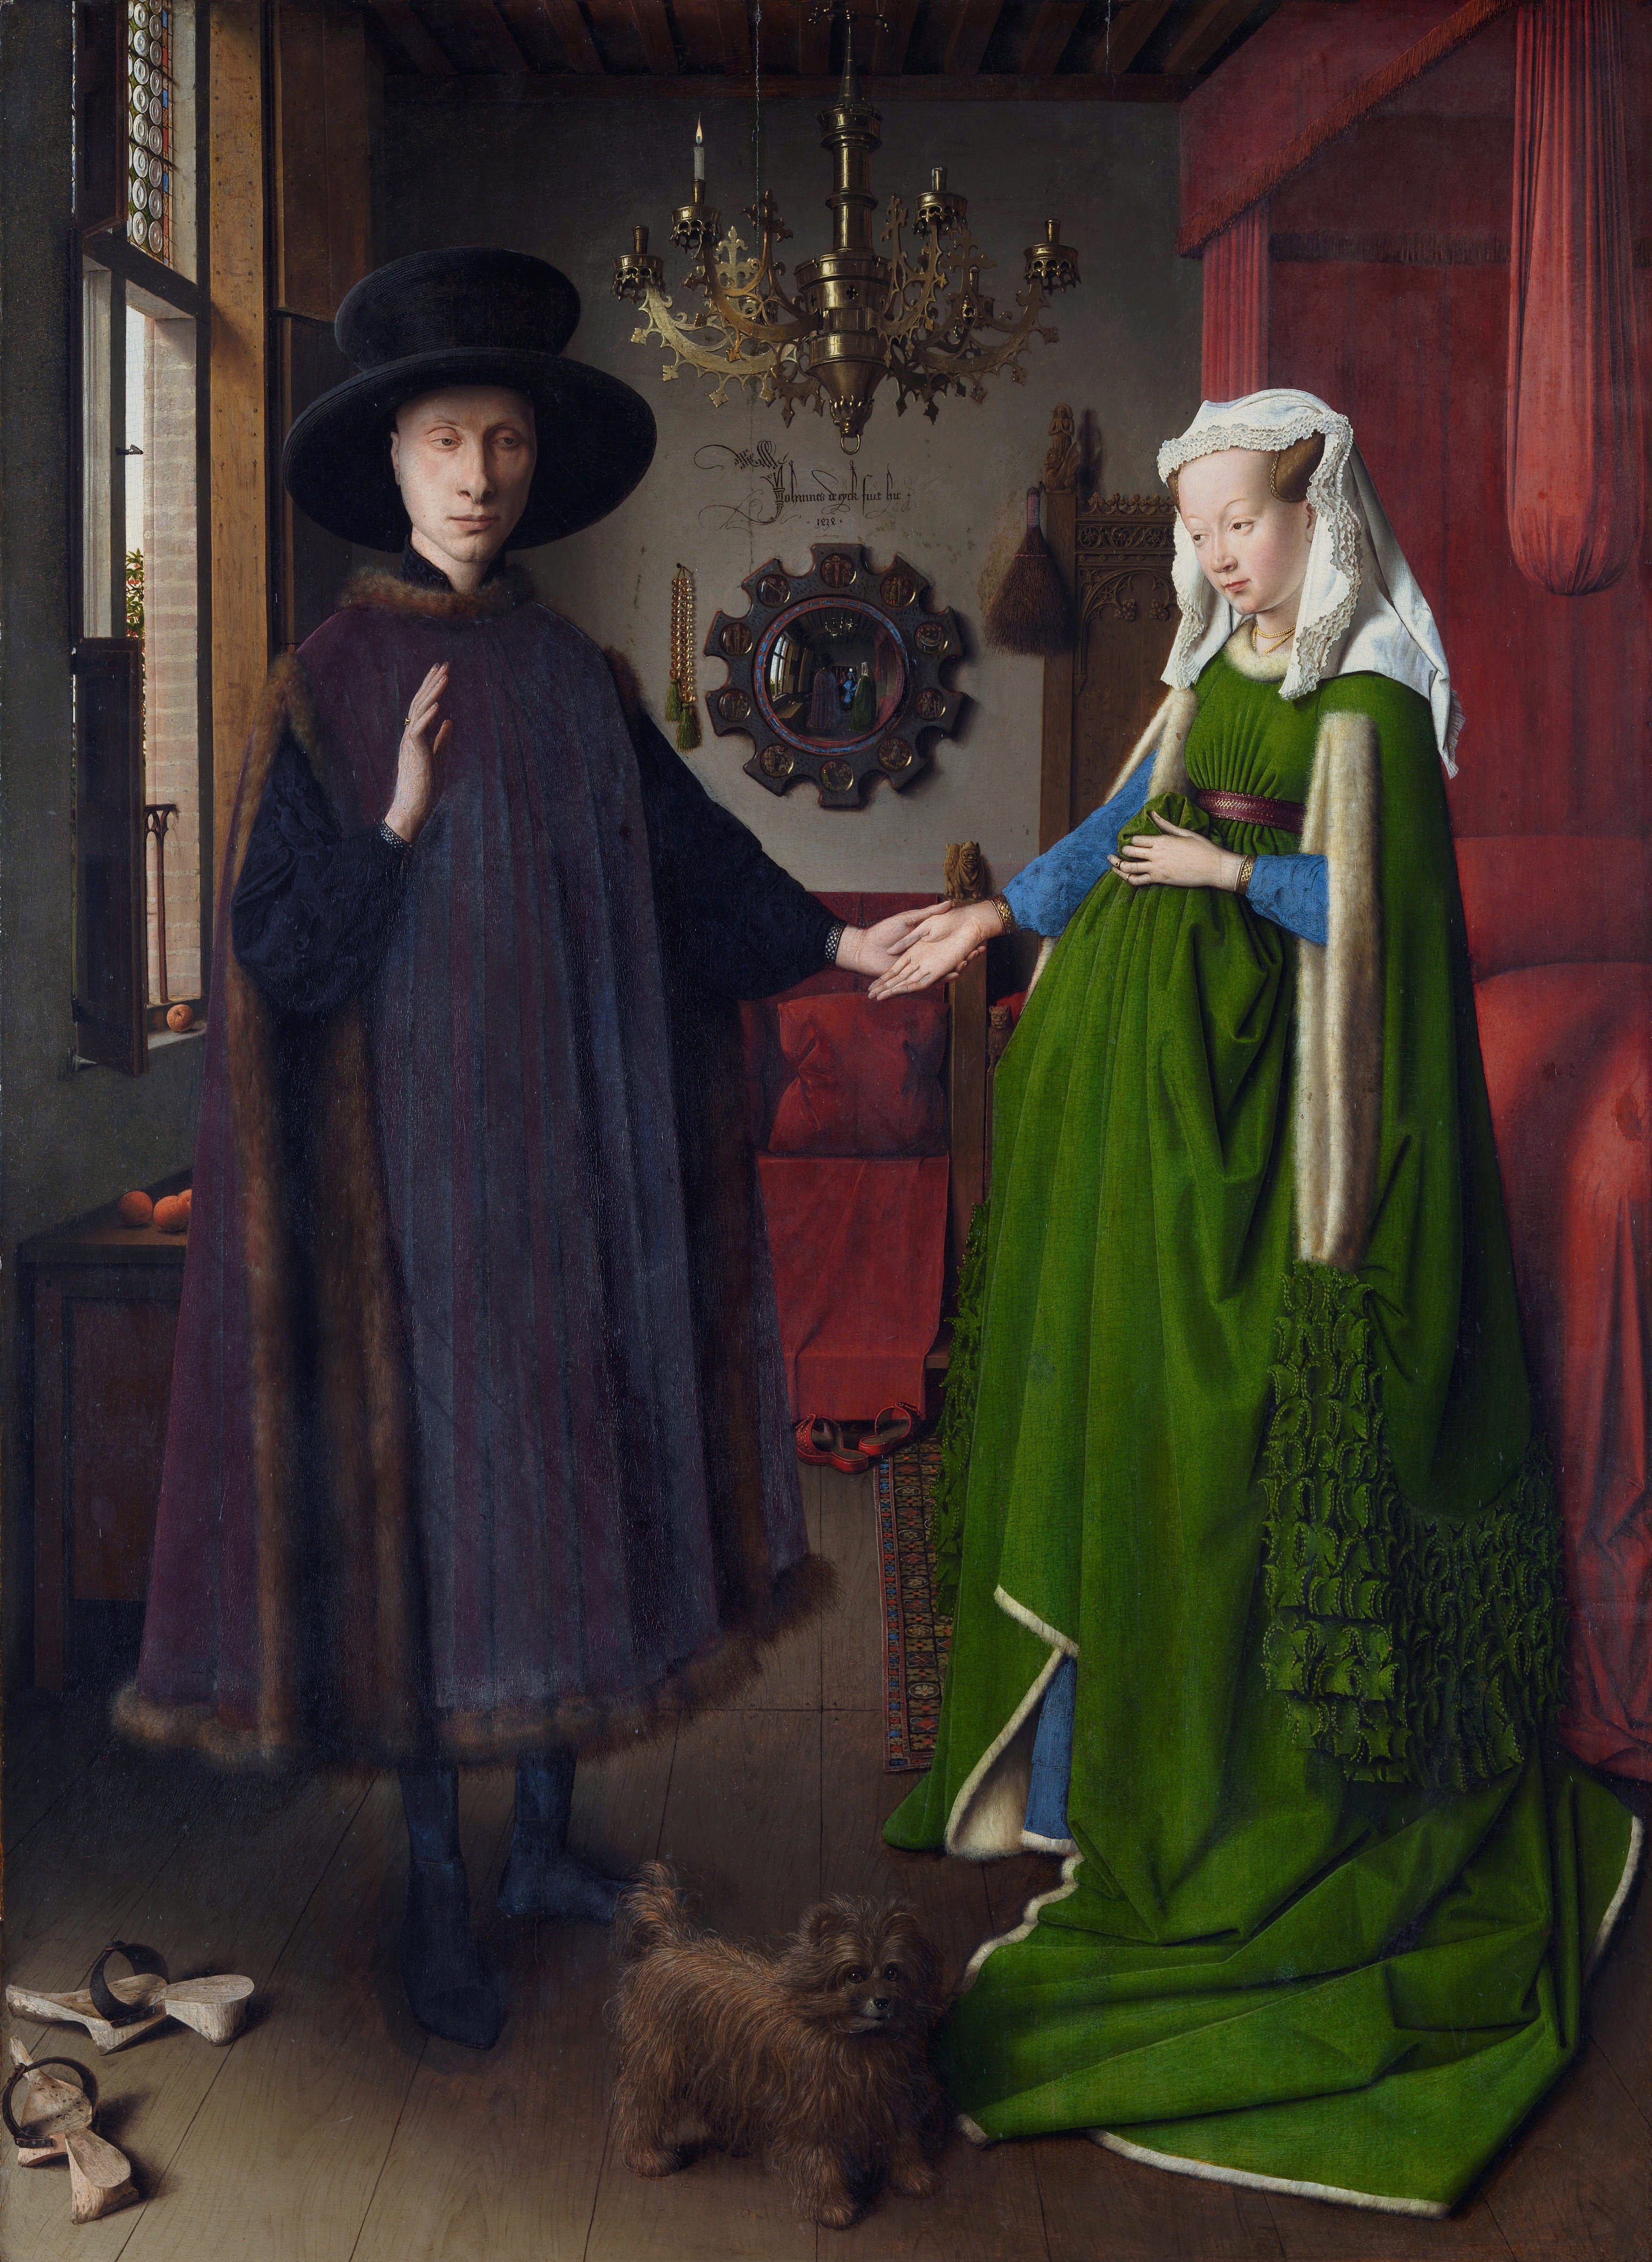
This portrait by Jan van Eyck is dated to 1434 (see signature and date on the back wall). It is believed to show the merchant Giovanni Arnolfini and his wife Giovanna Cenami, though that is not entirely safe to say – please read the corresponding Wikipedia entry for more information.
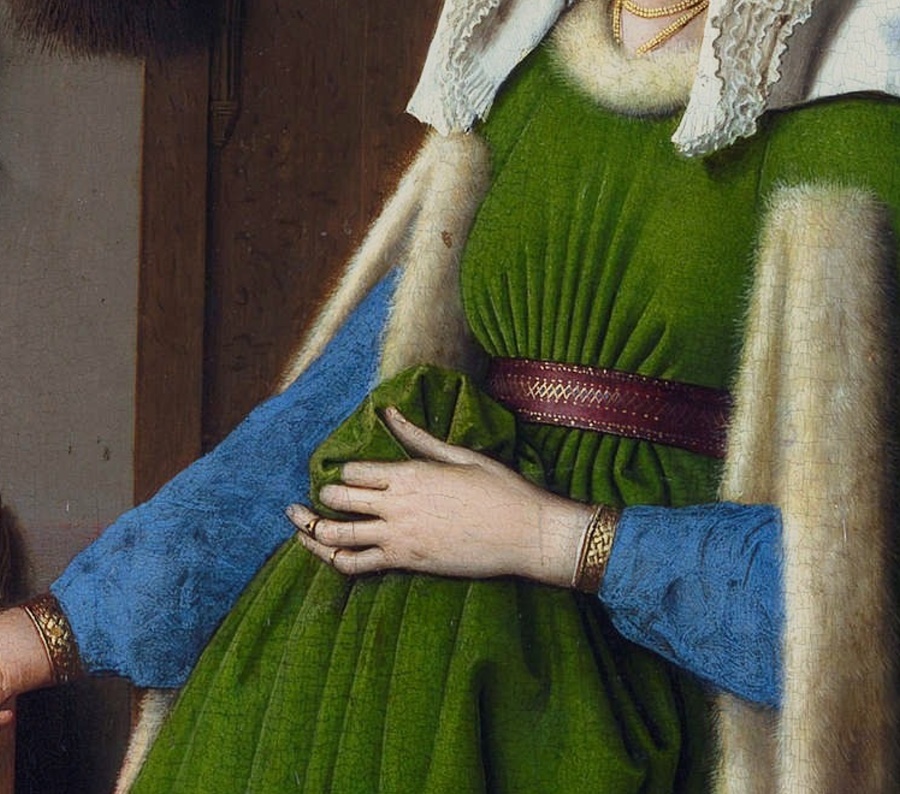
The interesting thing about this portrait is that it has almost photorealistic quality. You can really see everything very well, from the dagged (slashed or pinked) sleeve decorations, to the fur on her dress, to the tiny pleats in her veil (Kruseler), to even her fine braids of hair. Also, there’s a mirror on the back wall which (more or less) shows the garments from the backside as well.
The bride wears a striking green wool dress, which is trimmed with fur. Beneath this, she’s wearing a blue (damask) gown, of which at least the skirt hem is trimmed with fur as well.
Making the dress
Here’s my dress diary of this dresses‘ reproduction.
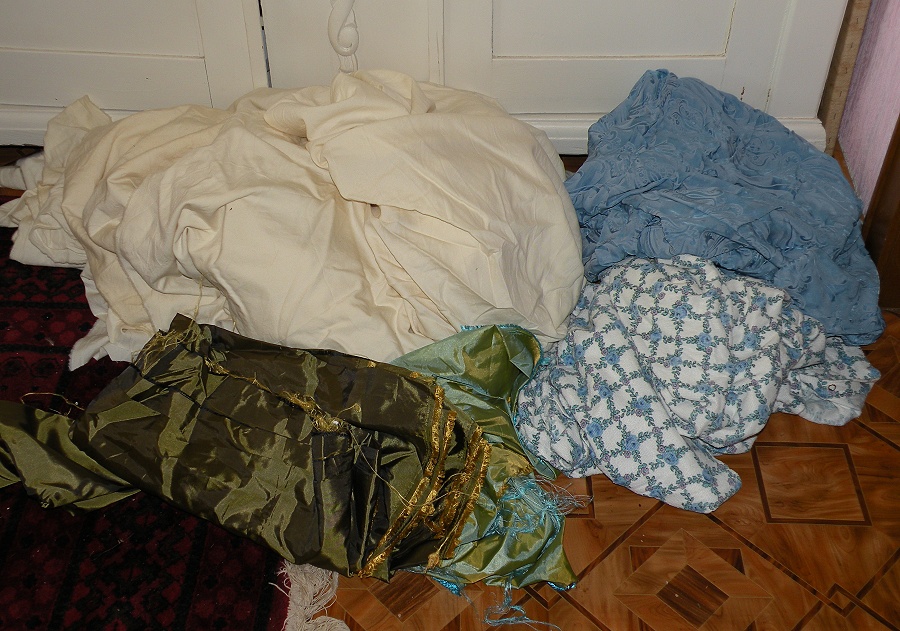
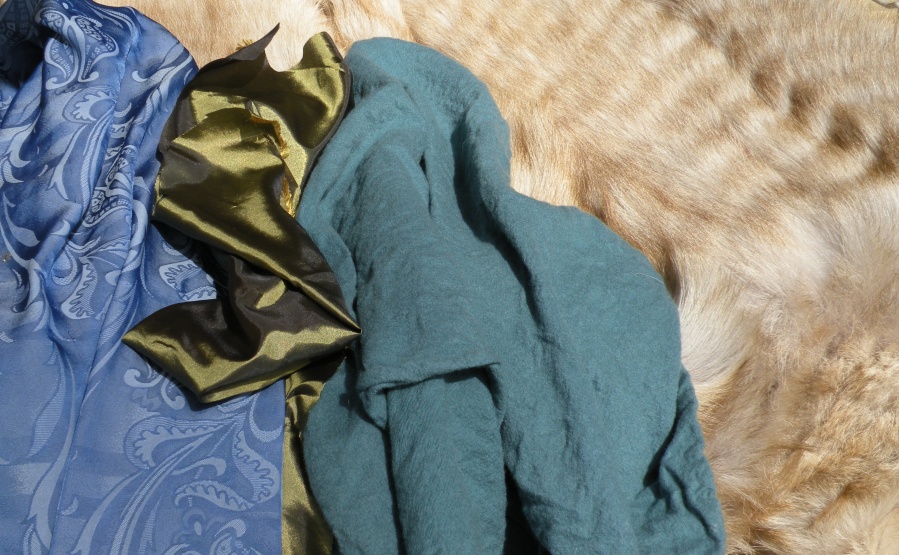
This picture shows the piles of fabric which I initially chose to make the dress. I later discovered that I wouldn’t need all of them, but more on that subject later.
The cream fabric is 14 meters / ~16 yards of a nice, fulled yet not too thick wool, which I will first dye blue, then yellow, to achieve the green color of the gown.
The green fabric in front of that will become a partial lining of the gown.
The blue damask (top right) will become the underdress.
The flower fabric under it (which actually is old bedding) was supposed to become the lining of the underdress.
For the fur trimming, I have an old fur coat at hand (real fur) which I can take apart.
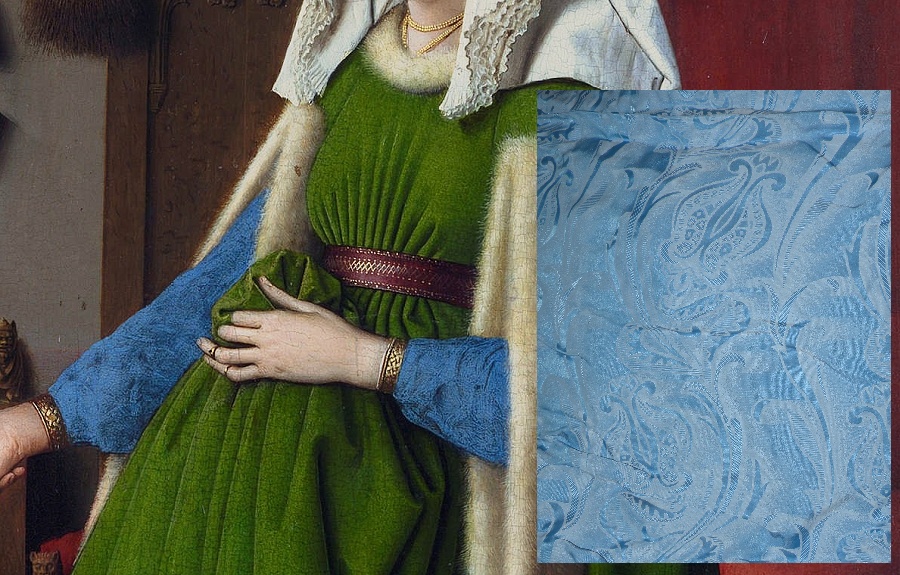
Here’s a comparison between the painting and my blue damask. I’ll dye that together with the blue batch of the wool to intensify the color a bit. The size is ‚lifesize‘, comparing her underarm / my underarm / the size of the damask pattern, btw.
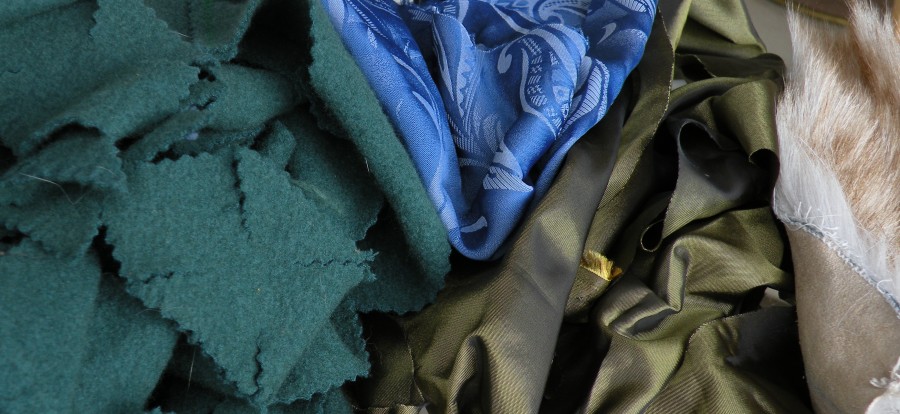
You’ve probably noticed that the supposed lining for the overdress is two colors – light and dark green. I don’t have enough of either to line the entire gown, but both together will work. I’ll probably use the dark green for the insides of the sleeves, and the lighter green for the rest of the gown, possibly pieced with some dark green (since the gown without sleeves takes up LOTS of fabric).
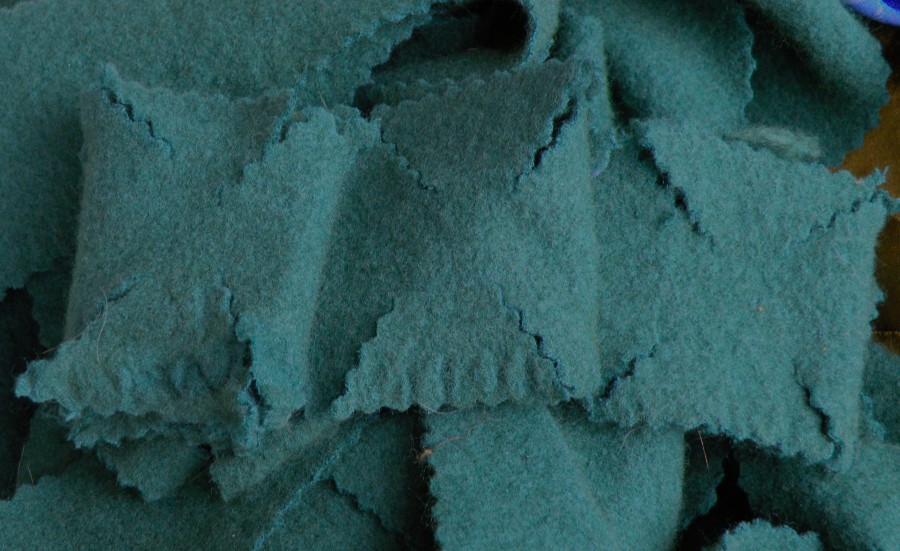
After the wool and damask had their appointment with my washing machine and some dye, they looked like this:
This was NOT satisfying, since the green wool turned out to be not green but light teal. Another dye batch was in order:
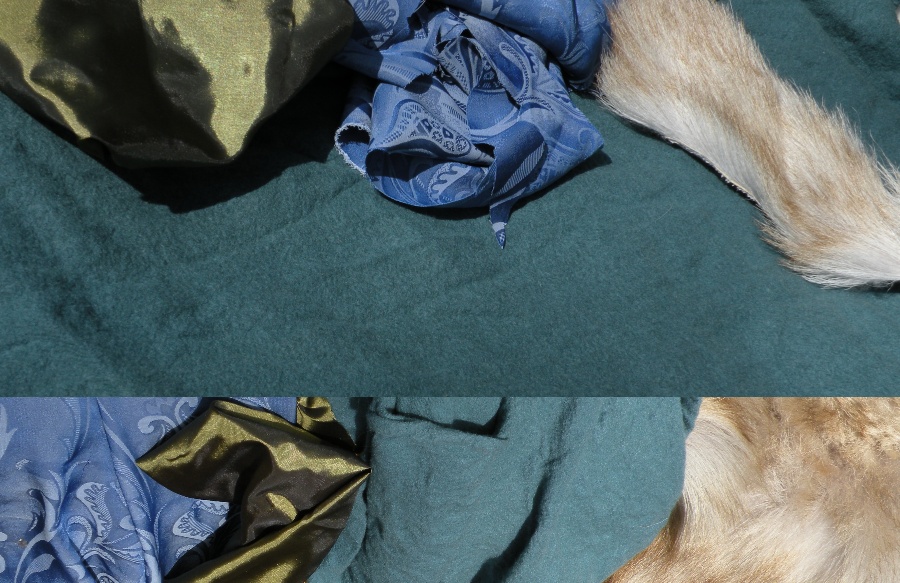
(the ’strip‘ at the bottom shows the colors after the first dye). STILL not satisfying. So I dyed a THIRD batch.
And YES, that was it for me. The green isn’t as yellow as in the portrait, but since my complexion doesn’t like yellow too much, I’m quite happy with the dark green-blueish wool that you can see in this picture. Also, since I basically dyed the wool fabric FIVE times in HOT water, I was left with just ELEVEN yards of ~44 inches / 110cm wide fabric instead of the SIXTEEN yards of 56 in / 150cm wide fabric. I doubt that the wool would have shrinked even more if I would have risked ANOTHER dye, but I didn’t want to risk it.
While the wool was dyeing (which was a process that took several days – dyeing, washing, drying, not being satisfied, re-dyeing… etc…), I used the blue damask to make a simple underdress from the three meters / ~3.5 yards of damask that I had.
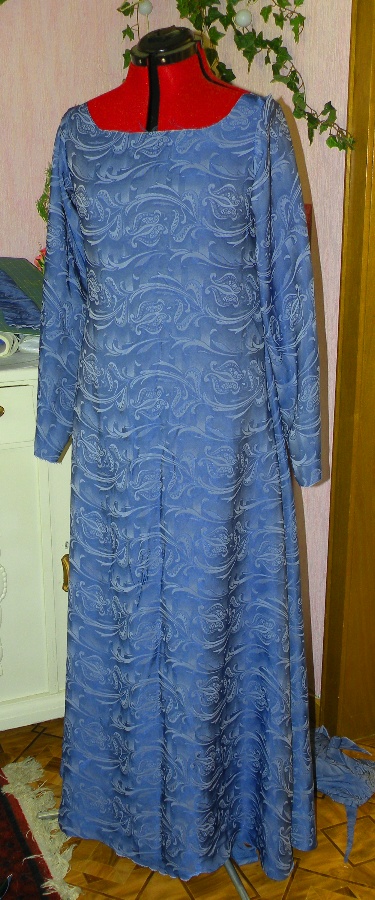
You’ll notice that the sleeves seem too long.
That’s because they’re not exactly form-fitting in the portrait, but more like Bishop sleeves:
so I needed the sleeves to be a bit longer than usual. I then left the dress alone to hang out on the mannequin because the skirt needs to be able to stretch (as the sides of it run on the bias), since I will later add fur trim to the hem and can’t risk that it stretches more when I do that. So back to the subject of the underdress later.
After the fabrics were dyed and the underdress was finished as far as described above, the first thing I did was to make a mock-up (some of you may call it a muslin) for the overdress. For that, I used a slightly modified version of the pattern that can be found in Jean Hunnisett’s „Theatrical Costumes – Medieval to 1500“ book – and the green taffeta that I chose for the lining. In the end I found that I didn’t need to use the lighter green taffeta, but, with a bit of piecing at the back of the sleeve, I could get away with using just the dark green taffeta:
Let me do a sidestep to explain the ‚pregnancy‘ theory on the painting. Many people think that Giovanna must be (very!) pregnant in the painting. This, however, is just wrong.
Look at this picture of my thin lining taffeta pinned up on the mannequin in a way similar to how Giovanna is holding the skirt portion of her gown…:
…and THEN imagine that this wouldn’t be thin lining taffeta, but lining taffeta plus wool PLUS a fur lining (you can clearly see the inside of the green gown’s skirt – it’s also lined with fur!).
No, the Lady is NOT pregnant. It’s just a case of an extremely bulky skirt! *lol*
After making the lining, I started on the dress – on the sleeve decoration, to be precise.
First, of course, I had to cut the strips which form the decoration. Those are about 2 inch / 5cm wide strips, cut with something that resembles an ‚Iron cross‘. I started by cutting 10 meters of those strips with a ‚wavy‘ rotary cutter:
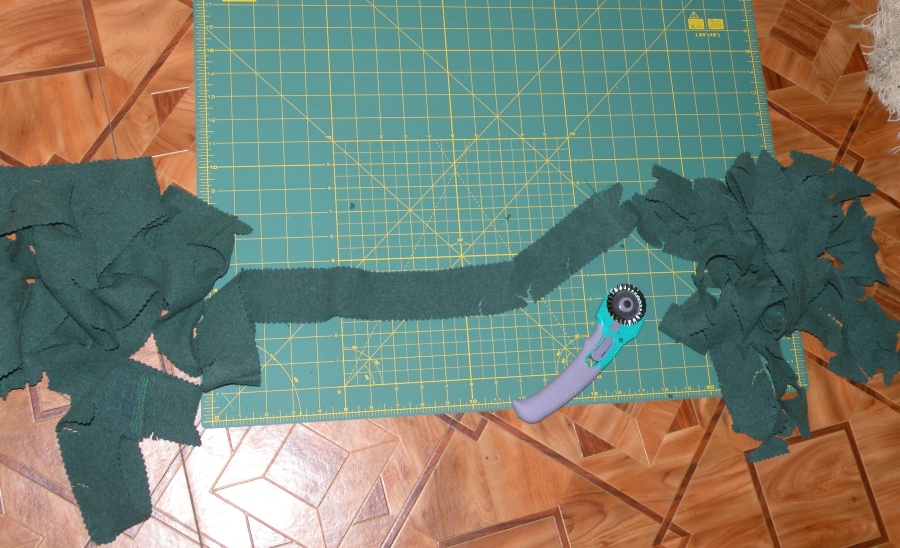
Here’s a pic comparing the ‚cross‘ cutting to what you can see in the portrait:

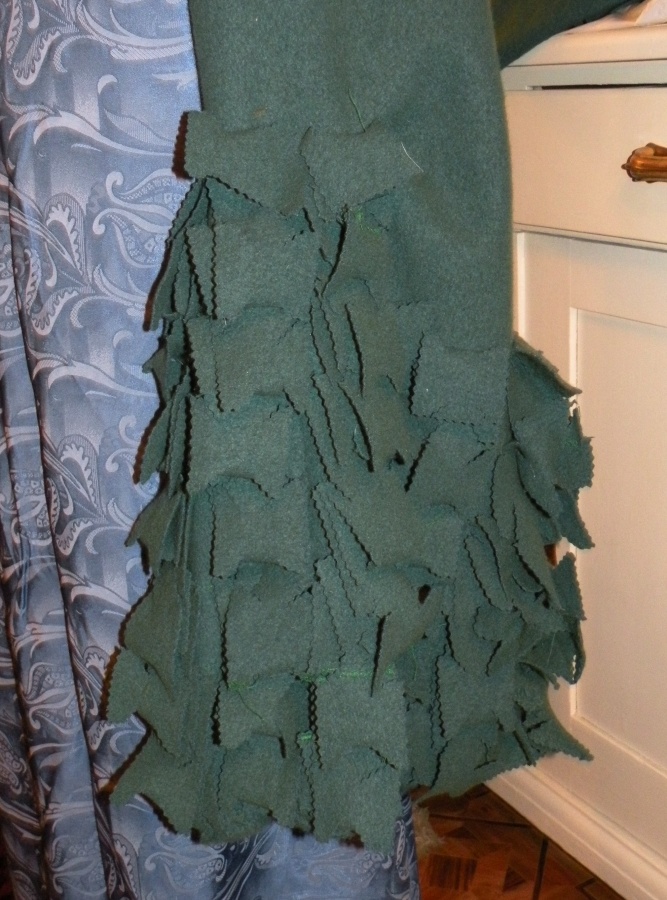
I then added those strips to one sleeve. Turned out I didn’t have enough strips, so I cut some more. In the end, with the second sleeve, I cut no less than 32.5 meters (35.5 yds) of cross strips, meaning 16.25m / 17.75 yds per sleeve (!!!). And no, that was neither fun, nor fast, nor interesting after the first few meters / yards – but it had to be done.
Here are some pics of the sleeves in progress:
After the sleeves, I finally started assembling the gown in the wool fabric. The first pic looked like this:
and I HATED it. It looked like a giant green TENT. Plus, ‚flattering‘ wasn’t exactly how I would describe the shape.
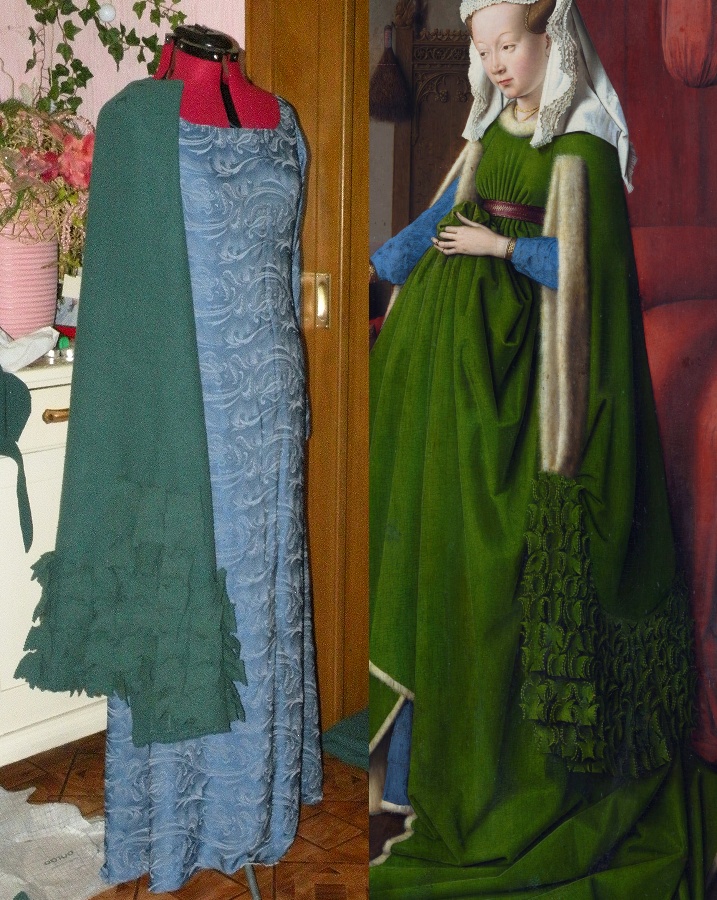
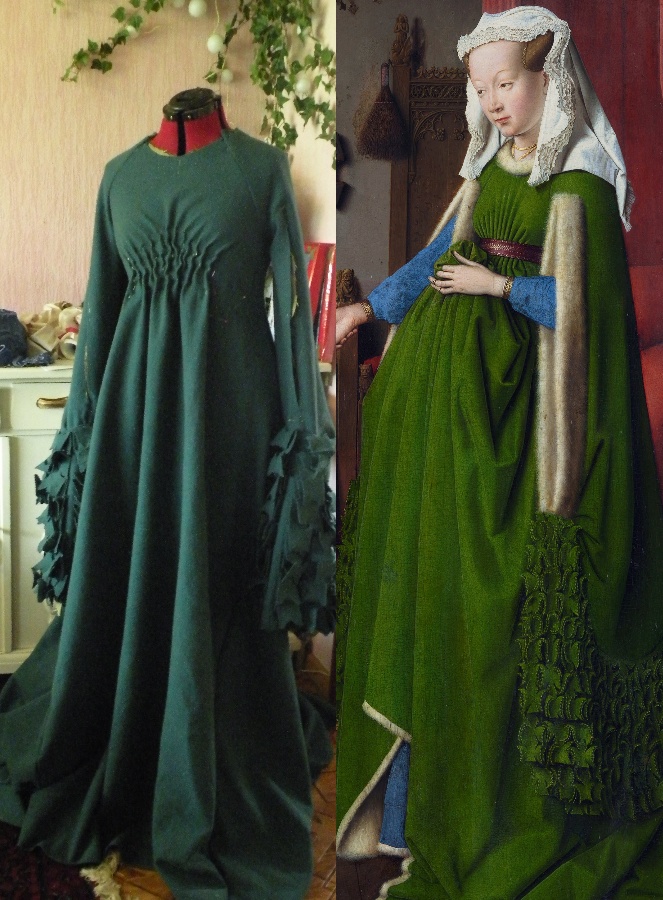
Let’s compare it to the original portrait:
Ah, there are the problems (occasionally, a side-by-side-picture comparison does more than looking a thousand times at the real thing and a picture of the painting!):
First, the belt has to come up higher. As in, approximately four inches higher.
Secondly, the ’starburst‘ pleating at the front is wrong. Of course, since it’s not pinned yet.
Thirdly, the entire dress looks like a tent, because the sides flare out so much from the belt, while in the painting, the pleating (over the belt) goes towards the front and seems to be nonexistant at the sides – from which I conclude that the dress must be very smooth and figure-hugging at those sides (hidden by the sleeves).
So what I basically did was to reshape the lining of the overdress, by pinning, then sewing away the excess fabric from armholes down to the waist, so that it’s VERY snug to the body.
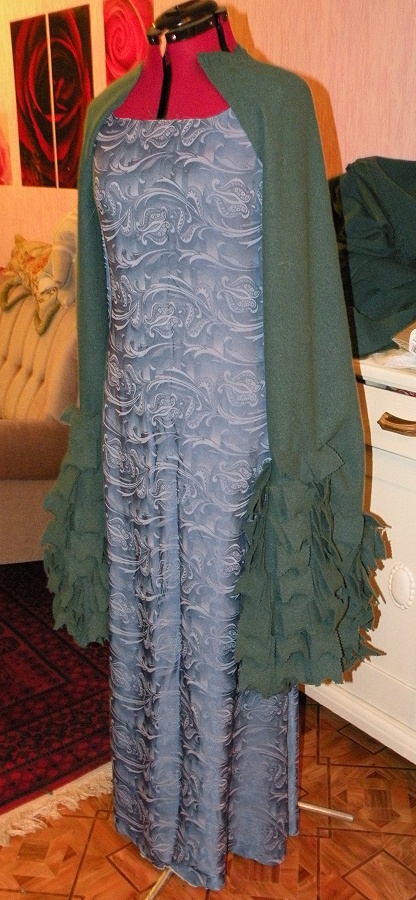
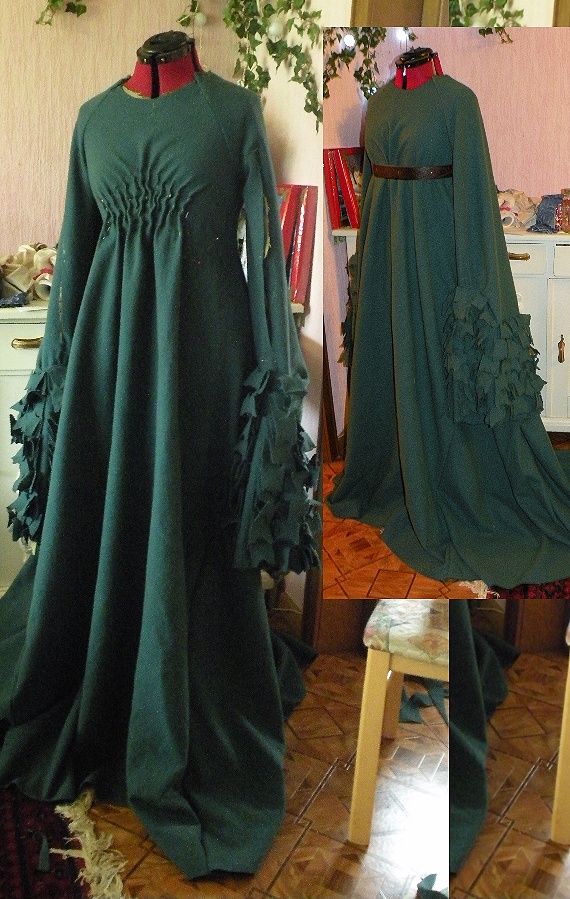
After that, I started to basically pin the sides of the ‚wool‘ dress to the ‚lining‘ dress, and arrange the starburst pleating (by also using pins) in the very same way (=pinning it to the tight lining, that is). When that was finished, the entire shape looked MUCH better:
The ‚Starburst‘ looks a tiny bit different than Giovanna’s. That’s probably because, uhmmmm – my ‚girls‘ are not just a tiny bit larger than Giovanna’s *lol*
Also, if you look closely, you’ll notice that my starburst’s ‚rays‘ (=the pleats) look ‚wavy‘. That’s because they’re held in position with pins. The waves will disappear as soon as I have hand-basted the pleats to the lining.
In case you can’t see the difference, look at this pic which compares the ‚before‘ and ‚after‘ shaping. You’ll agree that the ‚before‘ dress looks approximately three sizes larger 😉
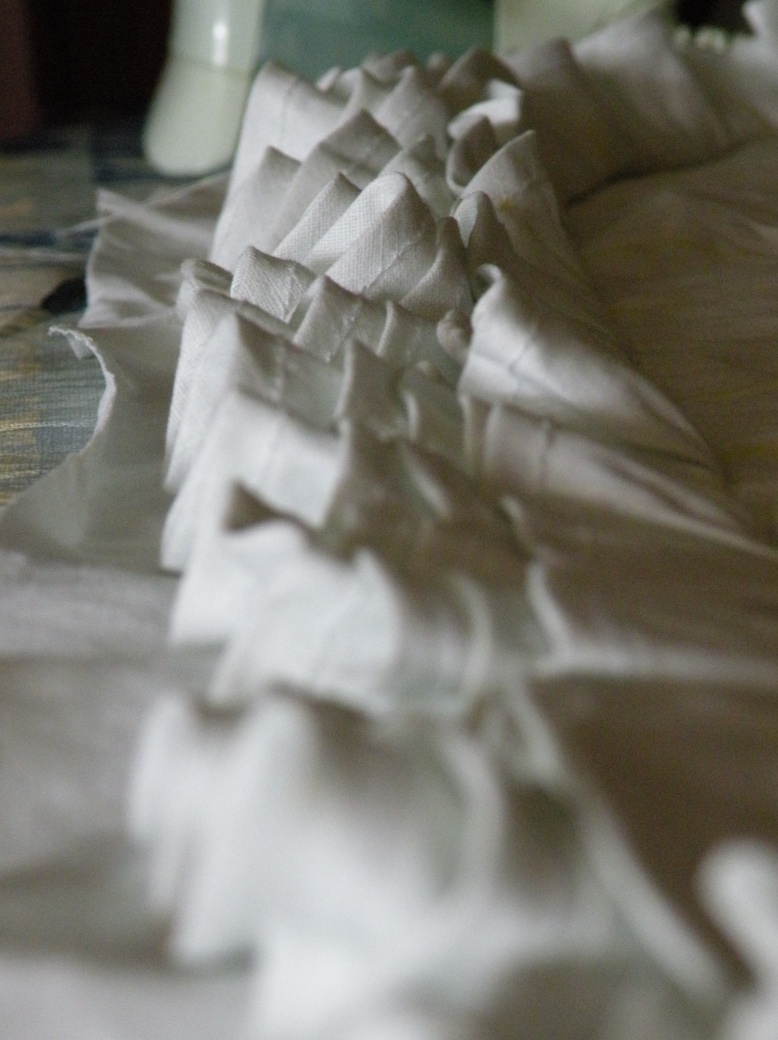
Also, I started making the veil (which is called a ‚Kruseler‘ in Germany).
For that, I used handkerchief linien. I then cut 25 yards of 2“ wide bias strips from it, to make the ruffles. One side of the bias strips was rolled and acted as a hem, the other side was gathered and sewn down on two wide pieces of fabric (which become the ‚base fabric‘ of the veil).
Here’s a closeup of the ruffles in the making. Four rows sewn on, one more to go:
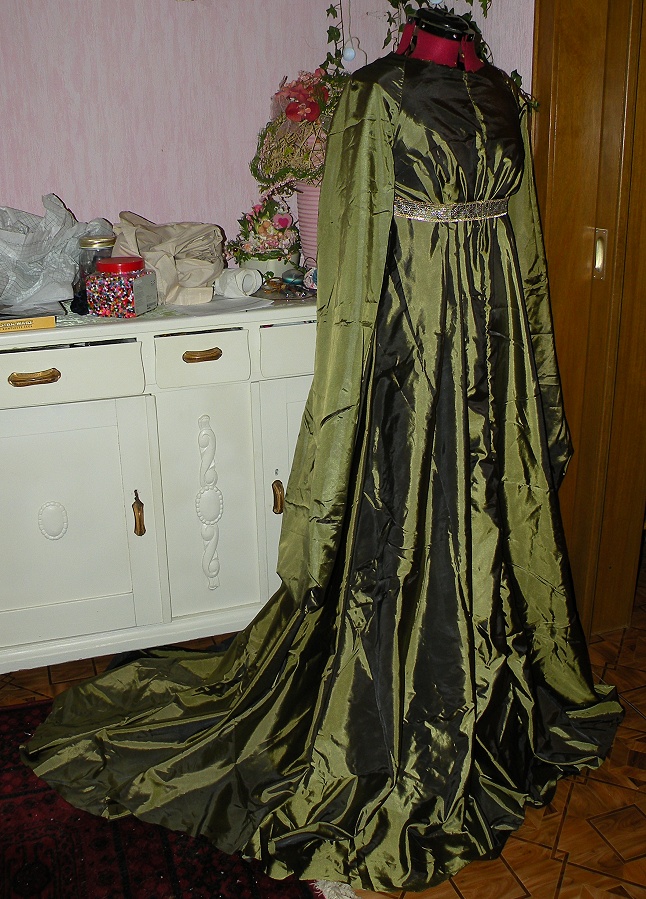
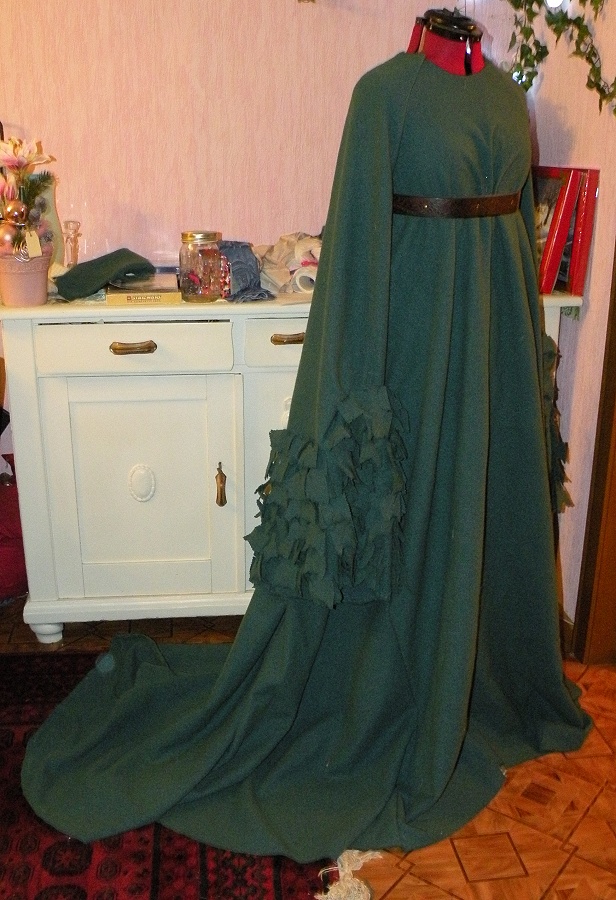
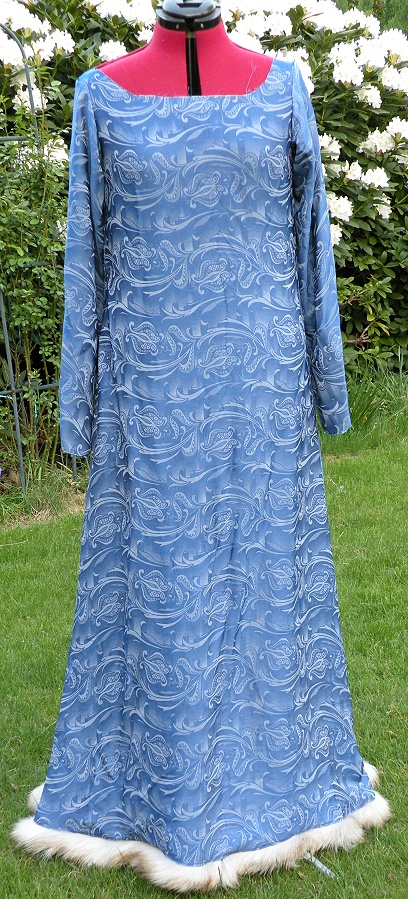
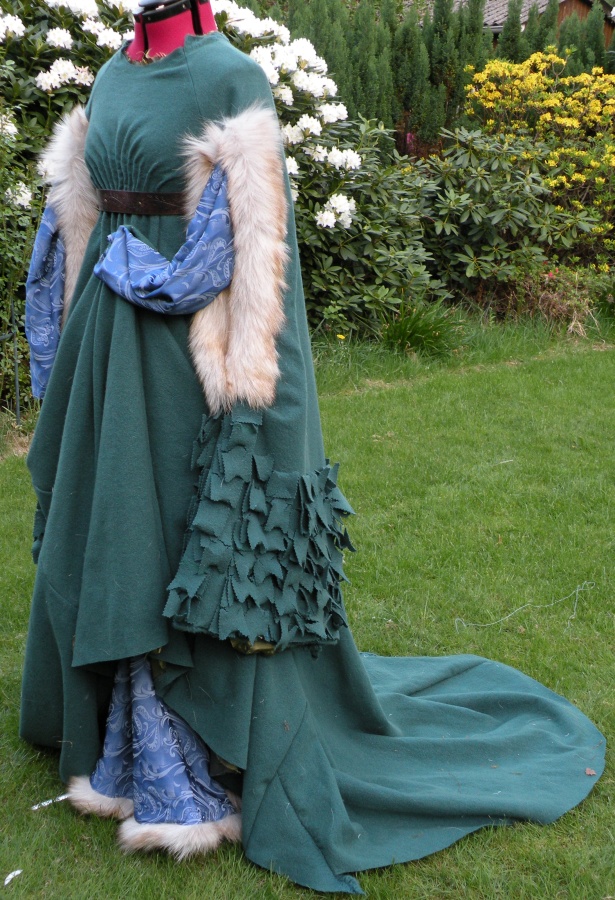
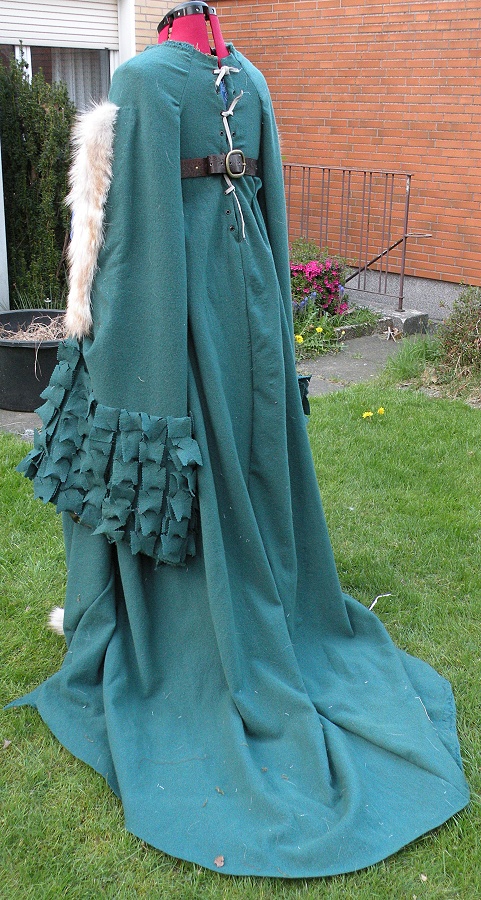
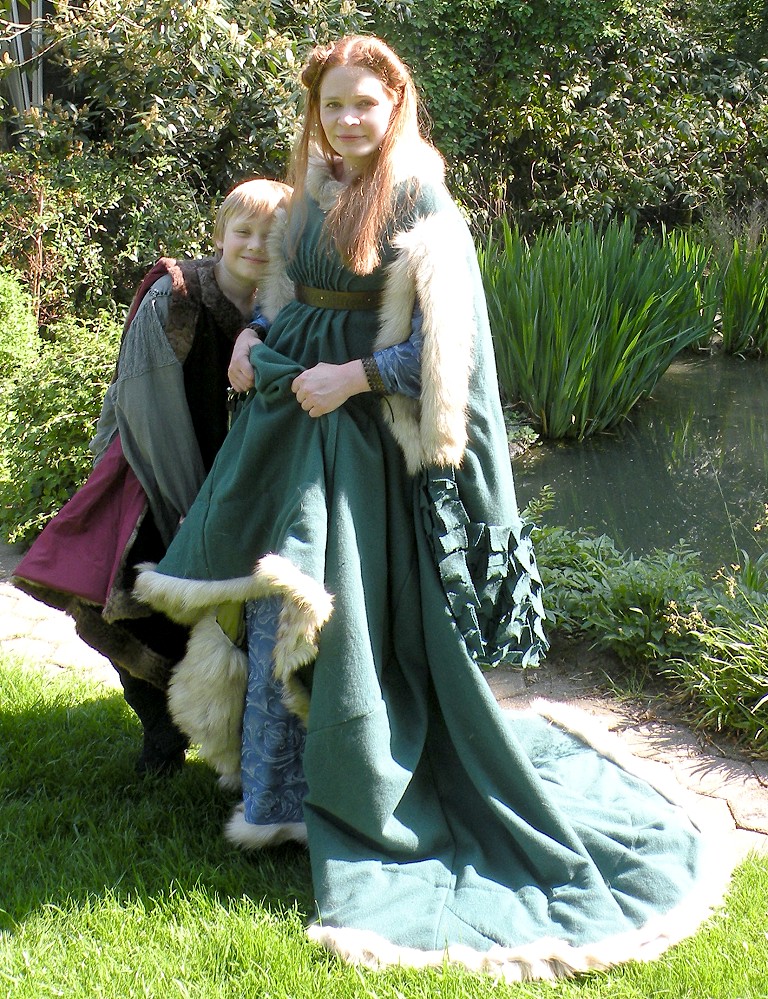
Some pics taken in the garden. Underdress has the fur on the hem; overdress has lacings on the back (not yet with the correct laces, though). Still need to add fur to the neckline and hem of the overdress and the braided pieces to the underdresses‘ sleeves. Also, still wondering what to do with the underdresses‘ neckline.
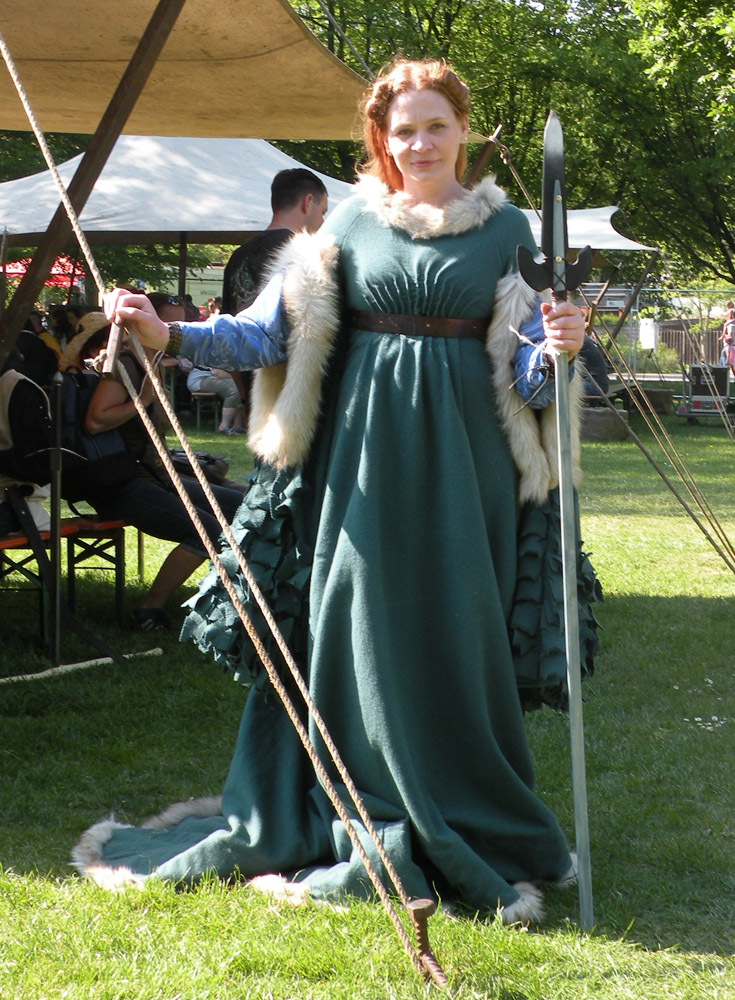
The finished gown

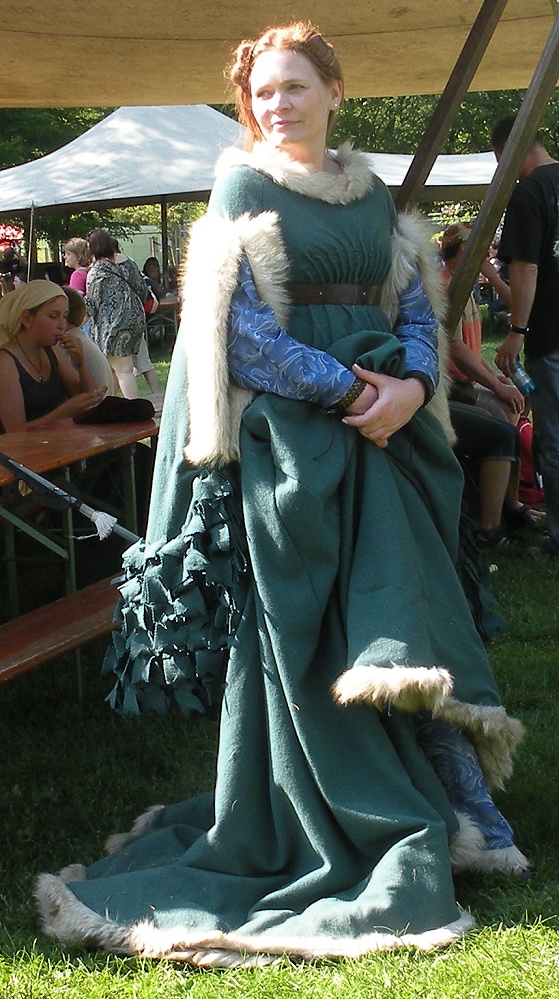
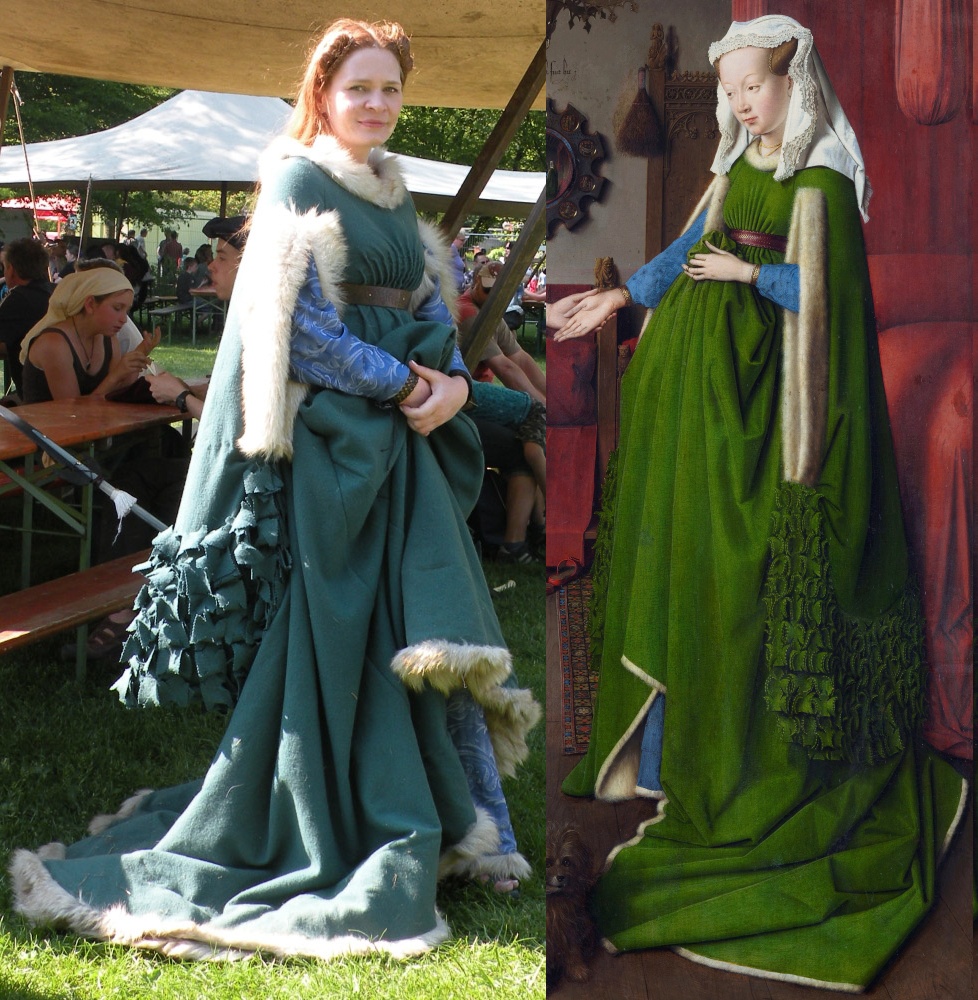
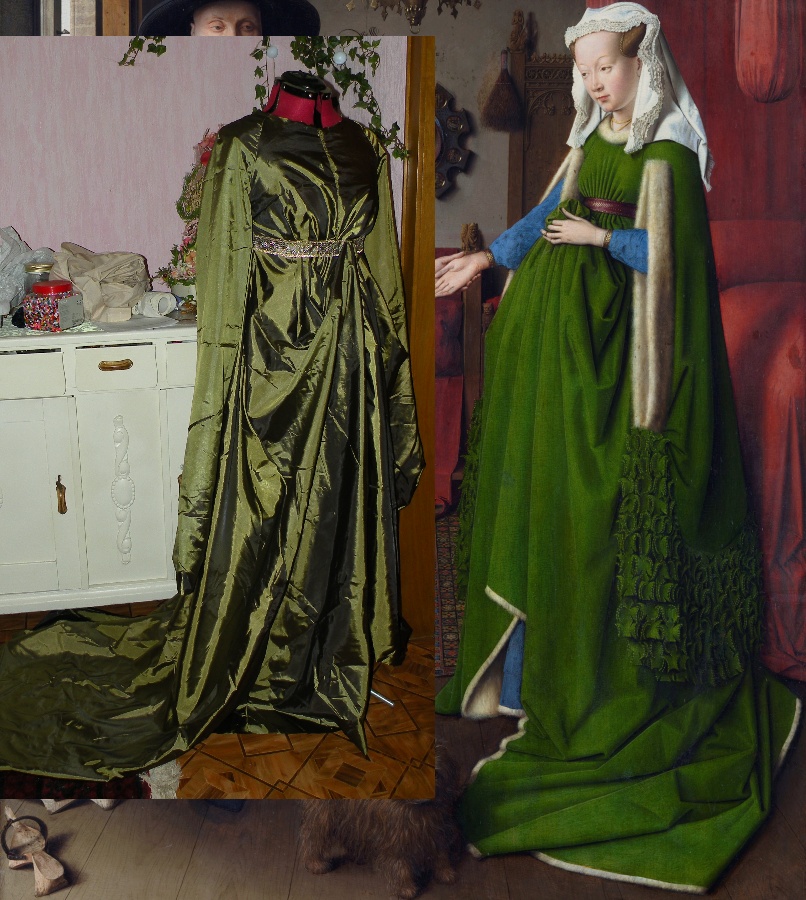
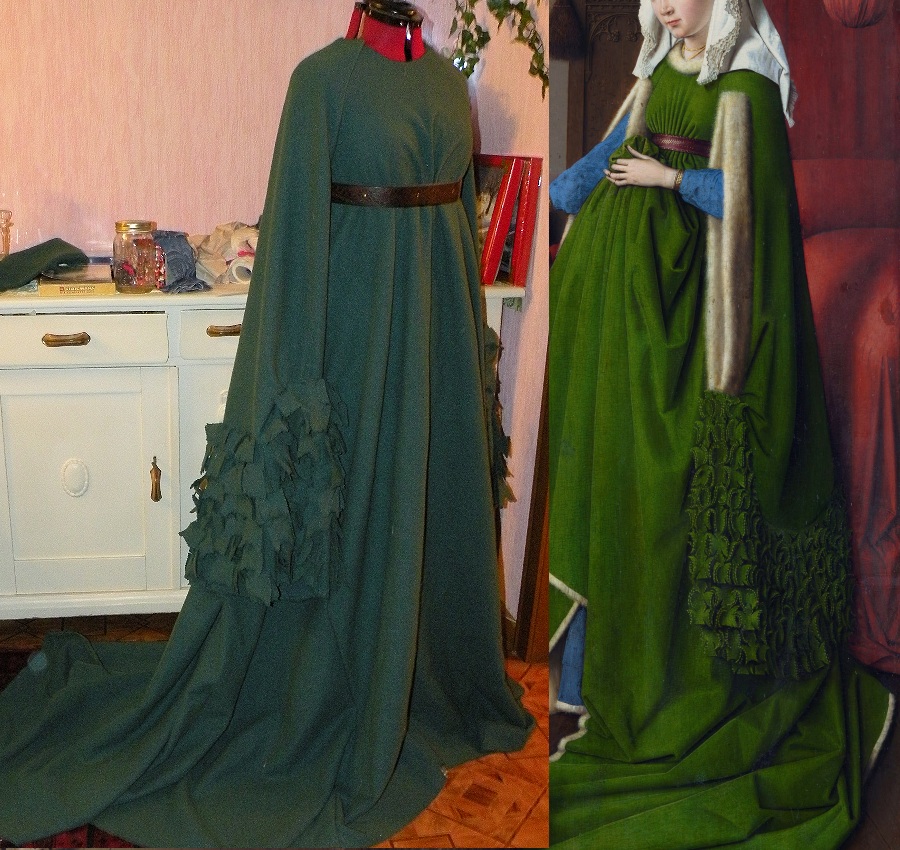
The picture that compares my reproduction dress to the gown in the portrait:
Differences between my reproduction and the portrait gown:
|
|
All those differences aside, I think it’s a well recognizable reproduction of the Arnolfini portrait gown.
Statistics for the dress:
- Materials used:
16 yards of 1.40m wide wool – when bought; after dyeing several times: 11 yards of 1.10m wide wool 😉
3 meters of white silk damask
6 meters of 1.40m wide taffeta (for lining the woolen gown)
1 floor length fox coat, German size 40 (US size 14), which I took apart and completely used up on the gown; particularly on the 4 inches wide lining of the inside of the overdresses‘ hem
3 meters of 1.40m wide handkerchief linen for the veil (which I didn’t wear with the finished dress because it was hot that day, and while the gown didn’t bother me, the veil did!)
2 braided belts, taken apart for the cuffs and the neckline of the blue underdress
1 stamped leather belt with golden rivets for, well, the belt of course 😉
Metal grommets for the lacing holes of over- and underdress - Dye used:
6 packages of cobalt blue ‚Simplicol‘ dye;
6 packages of yellow ‚Simplicon‘ dye,
10 packages of dark green ‚Simplicol‘ dye,and
a mix of approximately 10 more packages in all possible shades between yellow and blue. - Time required to make the gown
About two weeks of sewing (14 days) with approximately 7-10 hours per day (every day!); resulting in approximately 100 hours of work before the dress was finished.
Links to other reproductions of this gown that I’ve found on the net
http://www.associatedcontent.com/article/5747178/sew_your_own_womens_medieval_renaissance.html?cat=24
http://wickedfrau.livejournal.com/tag/arnolfini
Instead of Knitting…; here’s another posting with that dress: Halloween (Post-Op)
http://www.virtue.to/articles/arnolfini.html
In case you have made a reproduction of the Arnolfini gown as well and would like me to include a link to your site as well, please do not hesitate to email me! My address is given at the bottom of each page 🙂
What pattern would you suggest for whole outfit?
Wow!!! What a beautiful job. It looks like it was definitely a labour of love. I appreciate you sharing what was involved in creating this gown and all the photos. 🙂
Hi
My husband has just found a book about Beatrice D’Este and I found your website by looking her up. Congratulations on the wonderful things you do.
Regards.
Eleanor Roberts (UK)