Research
This here:
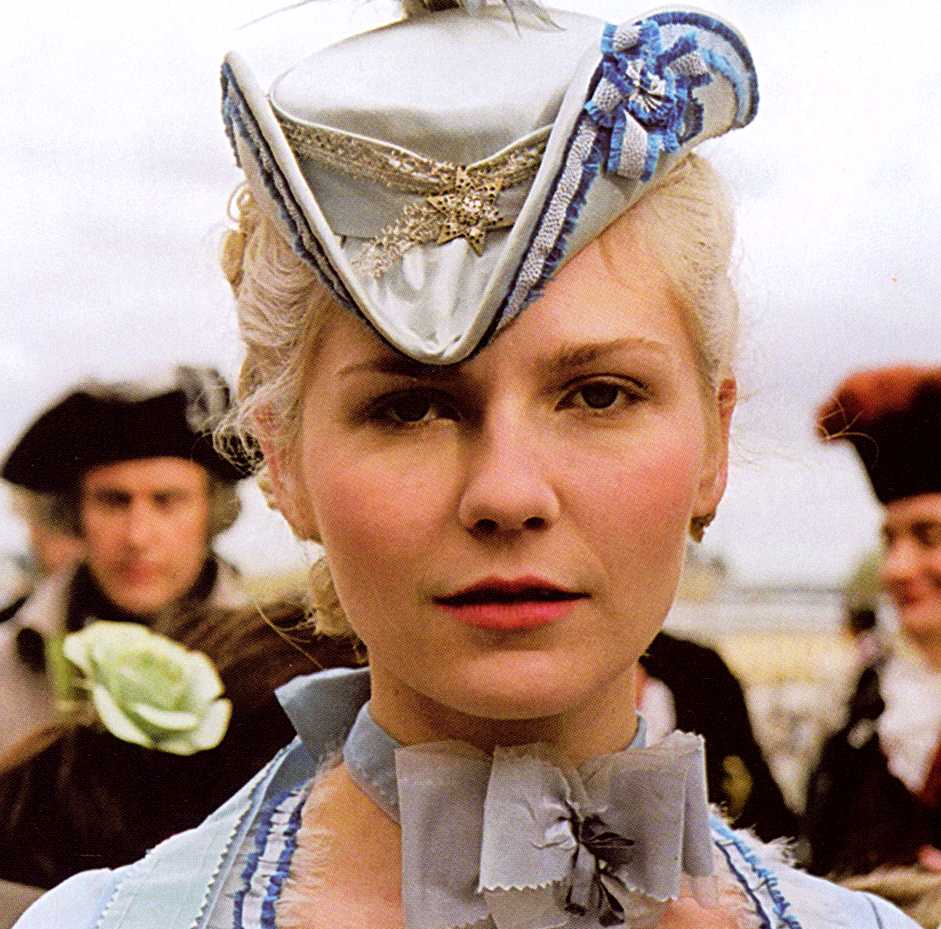
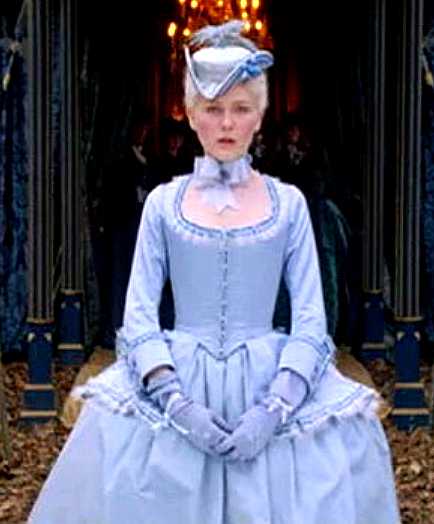
is the gown I would like to reproduce. More pictures can be found at Costumersguide.
Historically, this is a slightly wrong-shaped Caraco worn with a non-quilted petticoat over ruchings-decorated short paniers.
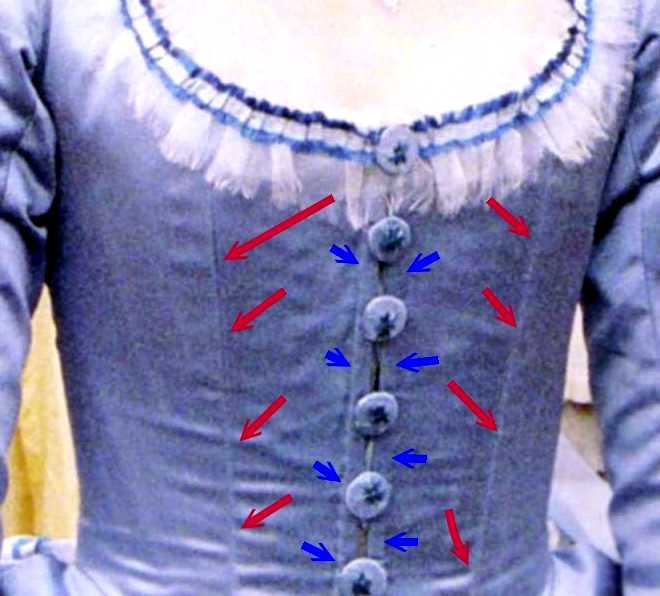
The seams at the front, which probably result from changing a pattern that originally had a stomacher to one that doesn’t, marked in the following picture with red darts, are not historical; which is why I’ve eliminated them from my reproduction. The bones at the front middle, marked with blue darts, I will keep.
That having said – here we go with my reproduction…
I started by buying some yards of poly duchesse from www.fabric.com – this one here in ‚Lake Blue‘, to be exact.
The choice of fabric was for various reasons:
First, that particular weave (duchess) was already known at that time. The sheen of the fabric is a bit more than on taffeta and much less than on satin, so it seemed a perfect choice.
Second, this particular poly duchess doesn’t feel like poly – it feels a bit like a rayon-cotton mix and drapes very nicely.
Third, it’s completely washable; and that’s a big advantage to silk duchesse (which I used for the reproduction of Elisabeth of Bavaria’s Hungary coronation gown).
And fourth, it’s much less expensive than silk duchess 😉
When I received my fabric, the first thing I did was to pre-wash it. Poly usually doesn’t shrink much when being washed, but as one never knows… I did it.
Skirt
Then I started by draping the petticoat on my dress mannequin (which, of course, wears my stays and pocket hoops – as I already had them I didn’t think it necessary to create another pair of short hoops):
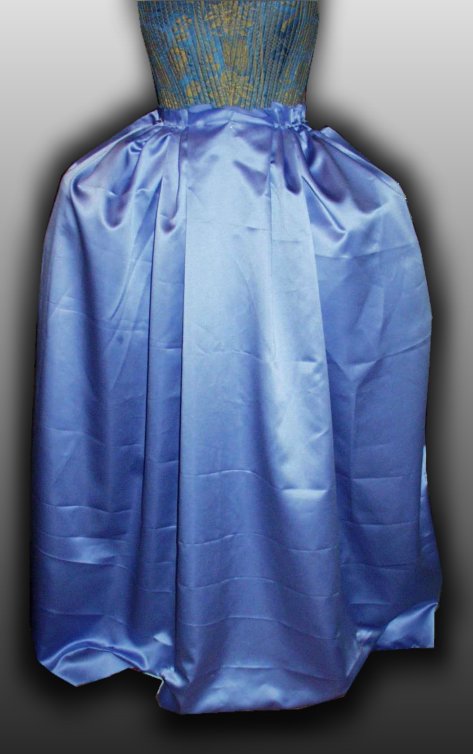
The grain line of the hem, which is just loosely pinned in this image, is always on the straight grain with Elizabethan, Baroque and Rococo gowns. So all the shaping over the hoops is done at the waist, leaving you with a W-shaped waistline.
I don’t use any pattern for those skirts, as the patterns are usually made for specific hoops. Draping is much faster and easier. The only thing that one has to keep in mind is that the hem must be straight and the pleating must always face towards the sides of the gown. The sides are split at the top so that one can reach into the pocket hoops, which serve as bags.
Bodice
I first slightly changed and enlarged the pattern of this jacket from Janet Arnold’s ‚Patterns of fashion‘:

For the changes, I had to add a front piece to eliminate the stomacher (which isn’t included in the pattern anyway). Then I moved the short ’skirt‘ parts a bit to the sides. Furthermore I changed the neckline, and last not least, I changed the sleeves.
As announced, I’ve completely eliminated the front seams which are to be seen in the movie costume, just to make my reproduction a little more historical in shape. So my reproduction’s bodice body consists of three pattern pieces: The two fronts, extending to the back, and the center back piece. This makes it a little more historical.
I’ve also eliminated this:

strange looking, bias-cut panel under the arm, which is also not historical.
Comparing the sleeve decoration of the movie costume to the one in Janet Arnold’s jacket pattern…
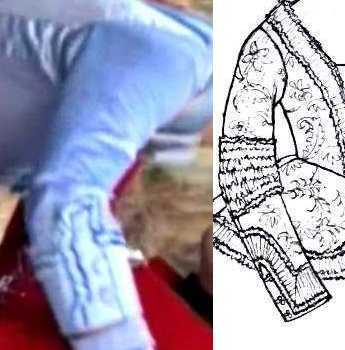
…which are much likely, I strongly assume that this jacket pattern was also used and changed for the movie costume.
At least it must have served as some kind of inspiration, as the trimmings on the original ‚Arnold‘ jacket are described as being ‚white gauze trims‘, which come quite close to the organza trimming we see beneath the blue-white trim around neckline and skirtings on the movie costume jacket.
I then cut the bodice first from two layers of thin linen, which will serve as a lining in the bodice. Also, they’re perfect to encase boning between them which this bodice will require to prevent wrinkling – no matter if there are stays worn below it or not.
After test fitting the linen parts, I covered each double layer of linen with the duchess and treated all three layers as one layer.
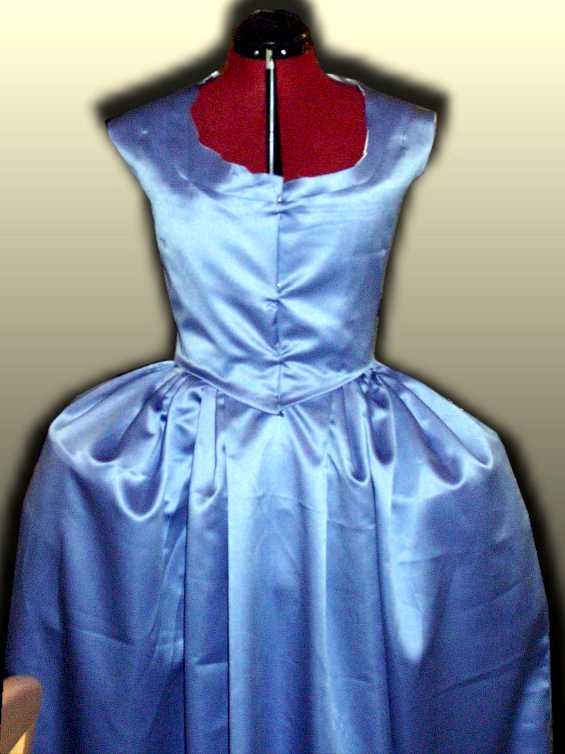
This is a first test draping of the pinned-together bodice on my dress mannequin (which still wears stays, of course!). No sleeves or short skirts are attached to the bodice so far.
I hope you can see that the neckline is still supposed to become deeper (there’s a small seam indicating this).
The sides towards the so far non existent sleeves seem so wide as there’s still a *wide* seam allowance towards them.
Oh, and of course there’s still no single bone in the bodice front, which is why it wrinkles so much. At least one, better two bones still have to go in there.
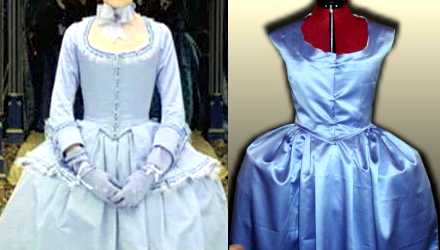
This is a comparison of shape between the original and my bodice. I’m quite satisfied so far, except that the lower front point of the bodice could go a little deeper and the sides of the waist could be a bit higher. I’ll change that when I attach the short skirtings.
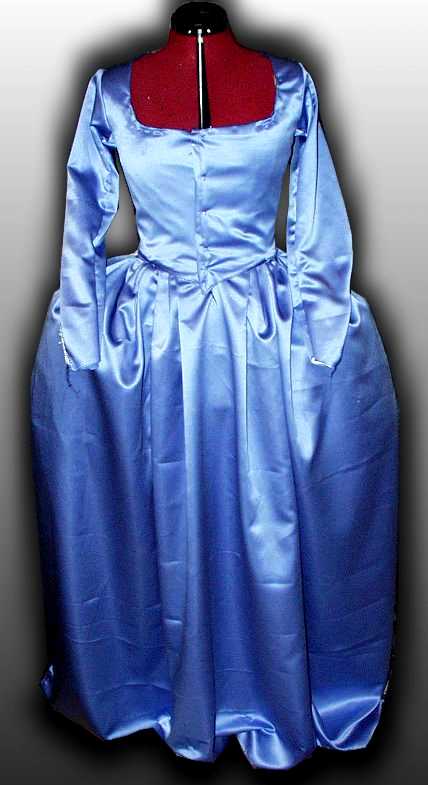
For this picture I’ve already attached the sleeves. Still no boning in the bodice, but the neckline is almost right now (needs to be a little more rounded towards the front, but as it’s all still just pinned, this shouldn’t be a problem).
Then I’ve spent a night unraveling the edges of blue taffeta to imitate the base of the trim, which is a work I’d rather have skipped if I had the choice because it’s utterly boring…
This trim is ruched on the bodice, but straight on the hat, this is why I’ve copied a mirrored cropped image of the hat trim into the following picture to look if the test-pinned trim looks right.
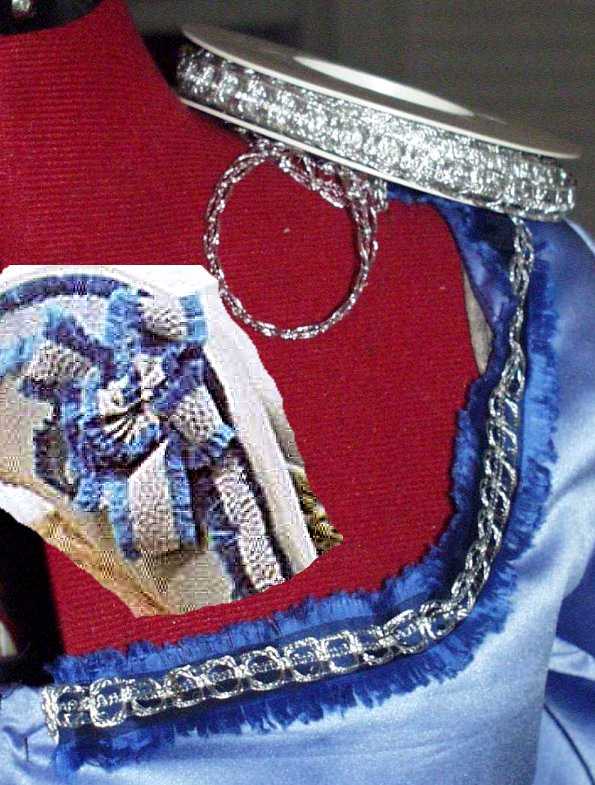
The covering of the trim is originally some sort of white netting. As I don’t particularly like that white trim, I’ve decided to substitute it with an aluminum silver (that means, non shiny silver) trim which you can see in the picture. Don’t be fooled, that picture was taken with a flash and therefore the matte silver trim seems shiny – but in reality, it isn’t.
Why silver instead of white, you ask?
A very simple reason for that: I like silver better. Plus, I think it fits. That’s really all there is to say about this 😉
Here are the first pictures of the bodice with the skirtings attached: Still no boning in the bodice…
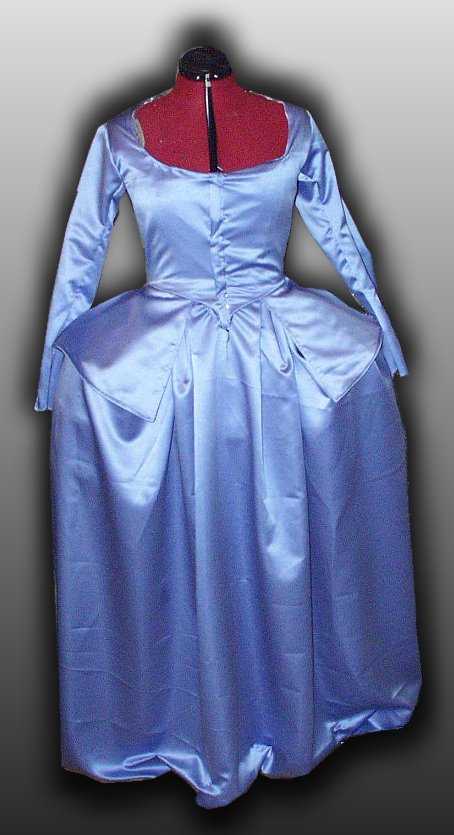
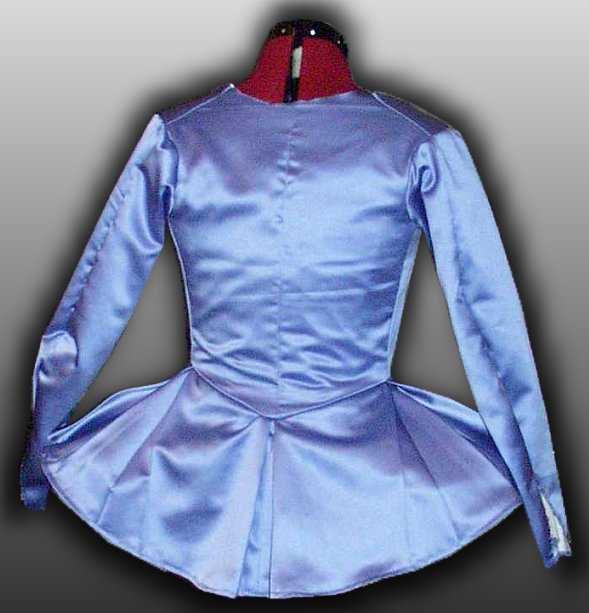
As you can probably see, the skirtings are not too well visible over the skirt if they’re not decorated with the trims.
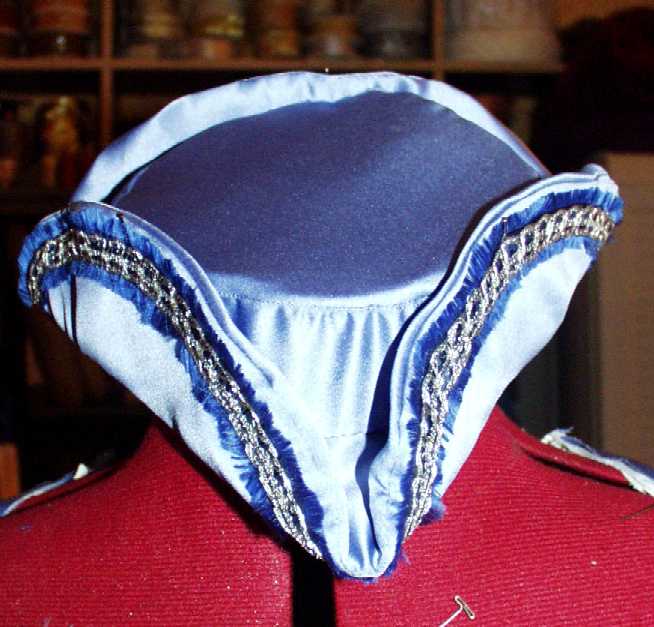
The Tricorn
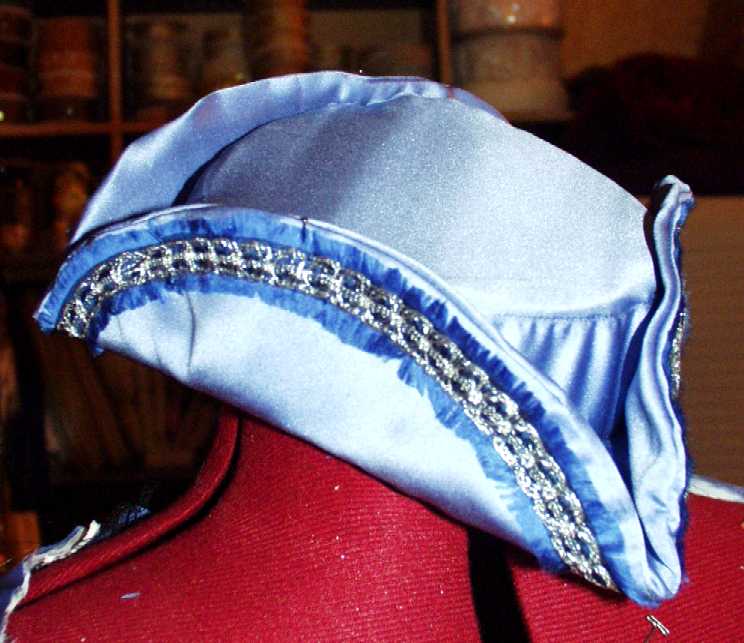
I’ve spent one day making my tricorn – the first hat I’ve made in my life, by the way.
Here it is; still without the star at the front and without the ribbon bow at its side, but I’m already utterly in love with it, which is why I’m wearing it in the third picture.
You can find a tutorial about how to make the hat here.

Stay tuned for updates… ![]()