~Please also have a look at my other Star Wars costume reproductions! ~
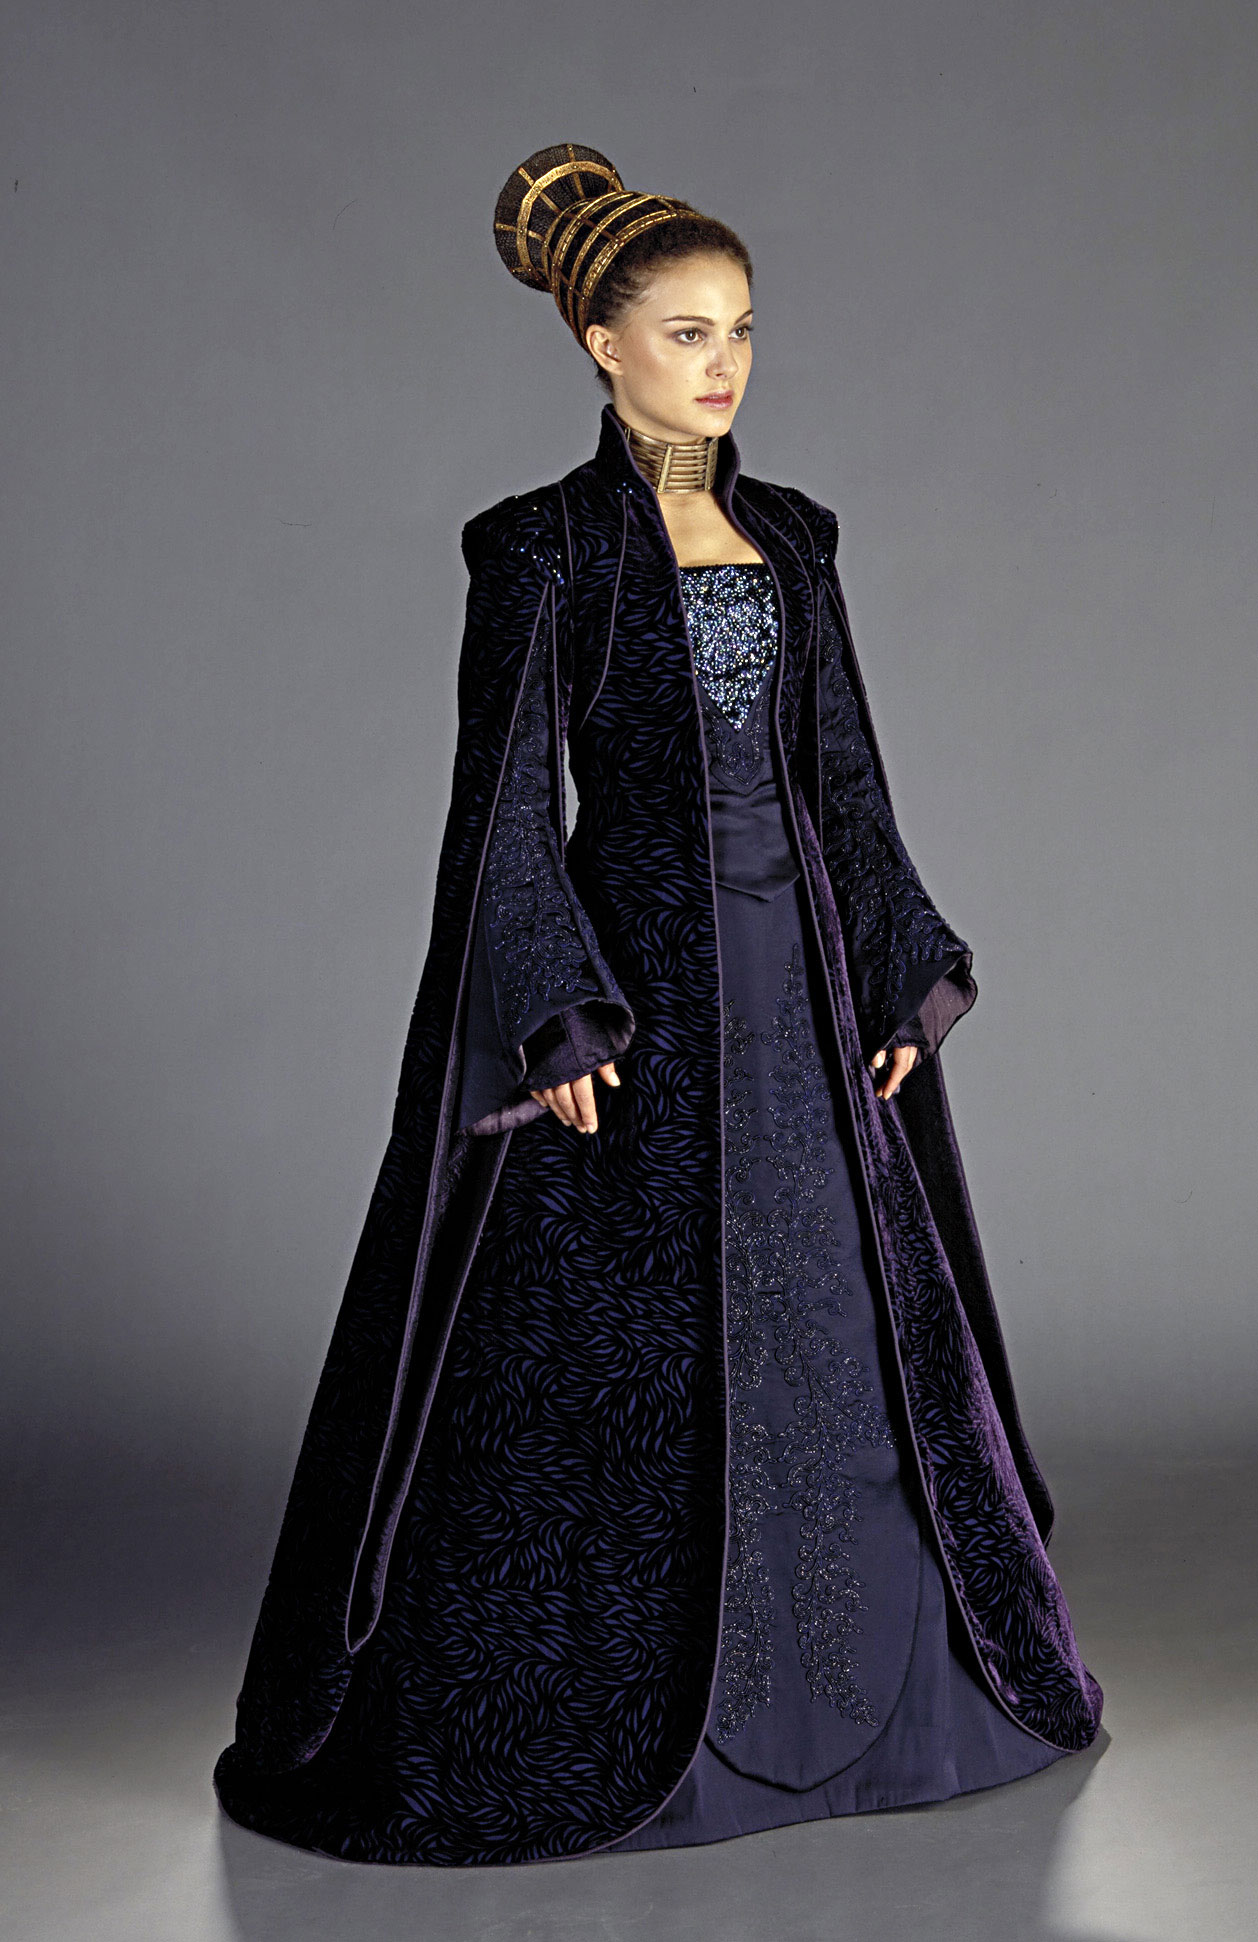
Senator Amidala, Episode 2:
Purple Senate / Loyalist Committee gown
I do still have some of the two bolts I originally bought in 2003 but already agreed to make one more Senate gown for someone. However, there’s a printed version of the flames design available here on Spoonflower. The fabric offered there is NOT burnout velvet. It’s not even printed velvet. Spoonflower prints the design on the fabric you chose from their selection. That is the same technique I used to create my Senator Amidala Travel dress. So if you can live with NOT having silk velvet BUT still want the original pattern, the Spoonflower print would probably be a good idea 🙂 |
I have reproduced this costume twice – once in 2003 for someone else; pictures of that reproduction can be found down the page. The progress on my second reproduction in 2013 (10 years later) is posted on top of this page. The second reproduction will be closer to the original than the first one as since 2003, better pictures – particularly exhibit pictures! – surfaced.
Second reproduction, 2013:
I was working on a (different!) „surprise“ costume for CEII, when I remembered that I still have a full bolt of the silk/rayon ‚flame‘ velvet of the purple Senate gown from Episode 2 (I bought 2 bolts ten years ago, as described below for the first costume which I made ten years ago…); so I could have made that one as well (instead of the surprise costume which I actually made, that is).
The idea nagged me. For weeks.
And finally I gave in (thanks to my son who also nagged me to make it).
I’m not quite sure if I can pull that gown off until CEII, but I just HAVE to try. So here’s my progress.
I started with the most time consuming things because I know that I tend to lose interest if I am stuck doing things that, well, need much time.
So I figured that instead of doing the actual sewing on the dress first, I’d start with the beading and cording embroideries – that way I won’t waste time doing the „simple stuff“ (=sewing) first, but can do it last, so I know that my speed will pick up towards the end.
Beading
During the past five days I’ve done nothing but beading. Here’s the result after five days (of which I took one day off from beading).
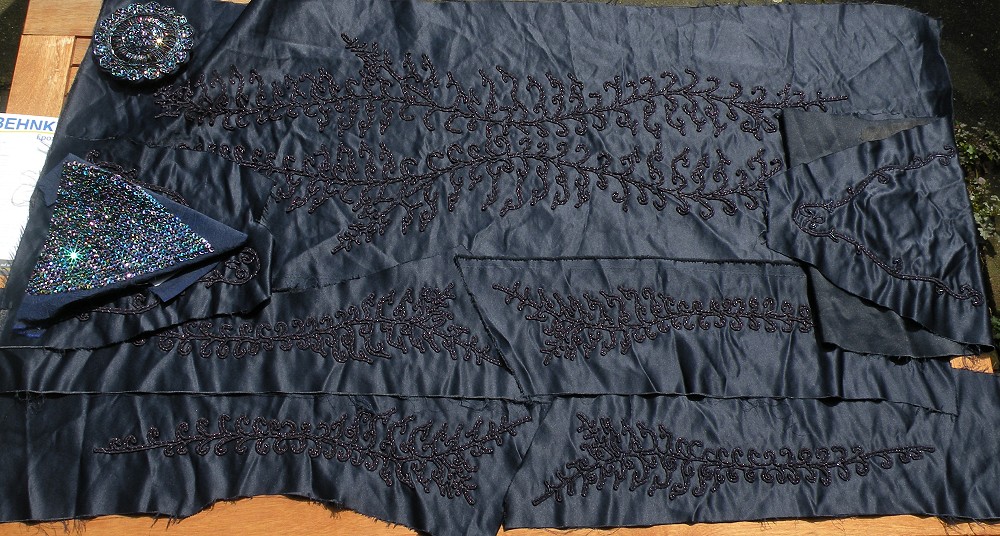
The photos of the brooch were taken indoors with a flash, the one of the triangle was taken outside in the sun. I used no filters on the photos; that IS the way the beading sparkles naturally 😉
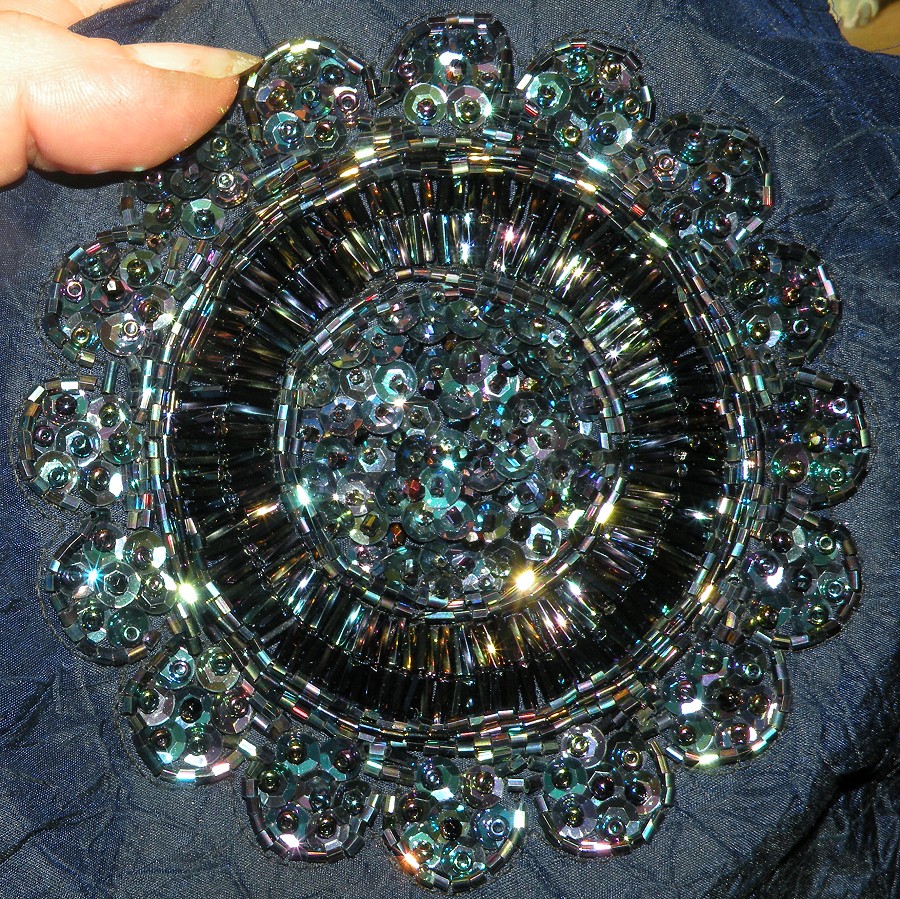
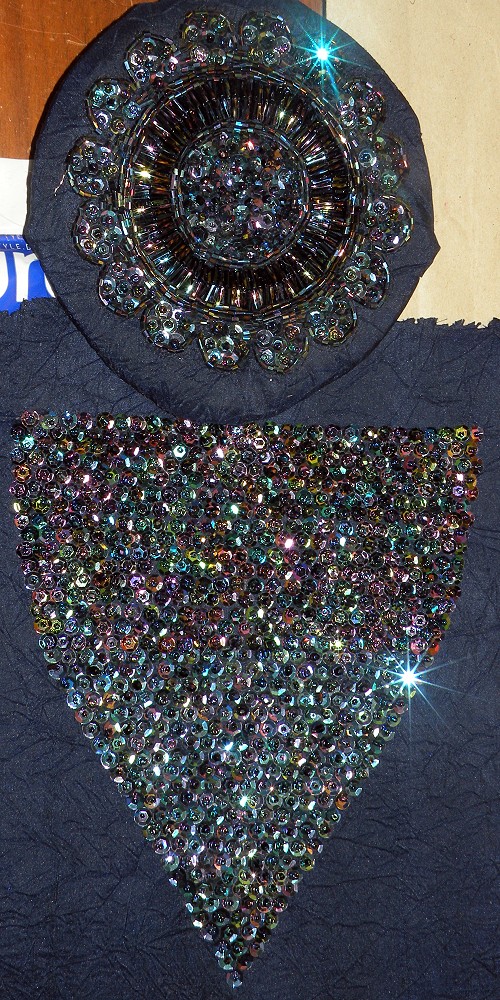
Brooch, after one day:
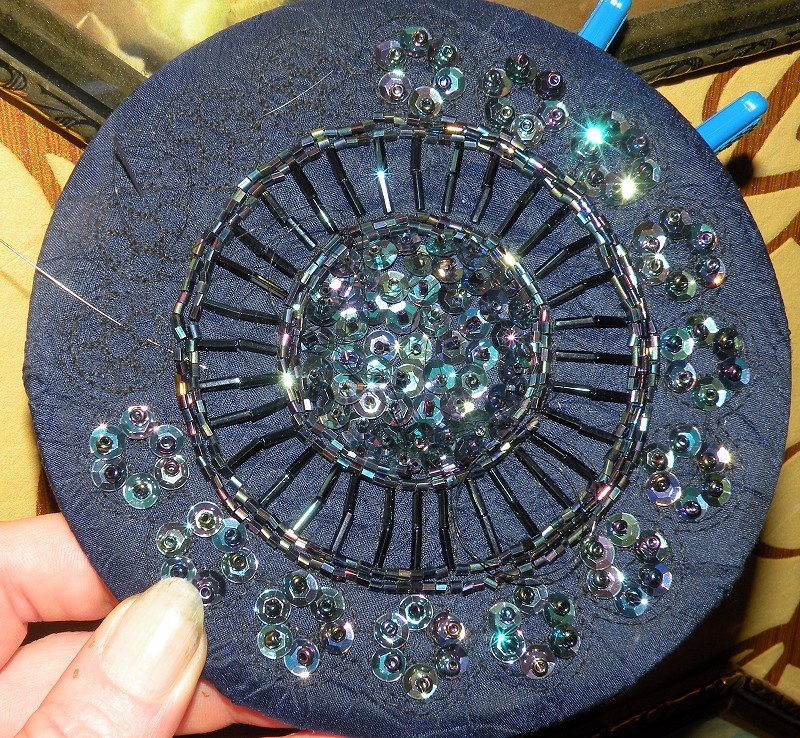
Brooch, after two days – this was finished surprisingly fast:
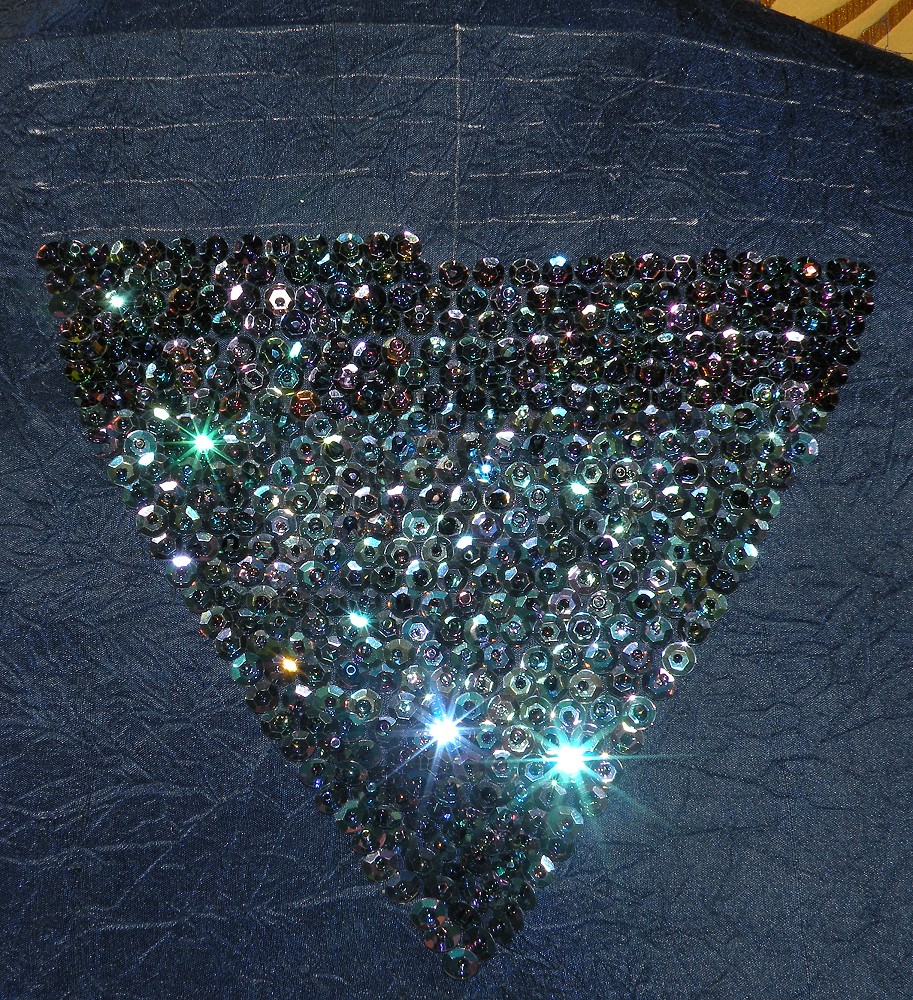
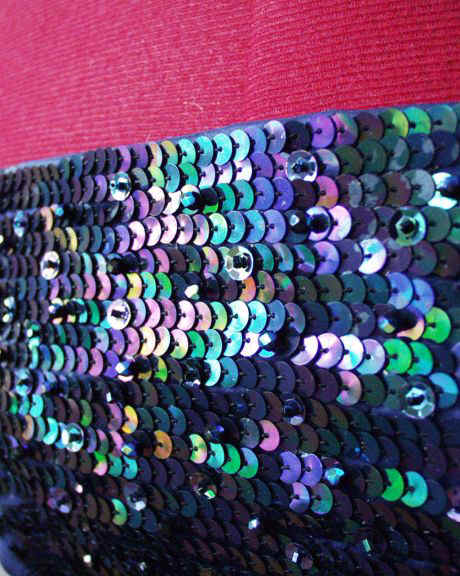
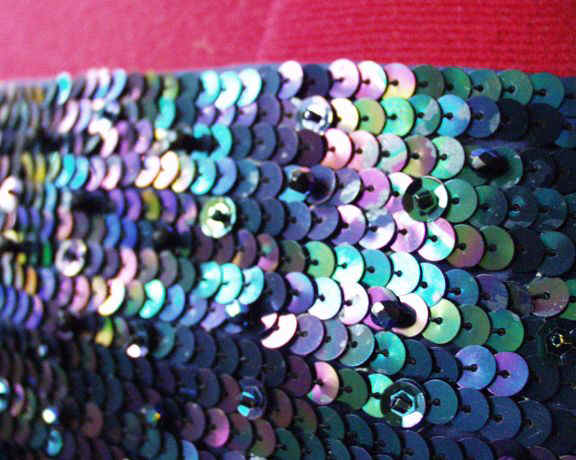
By now I’ve spent two days on the „bodice triangle“, on which the progress is WAY slower than on the brooch:
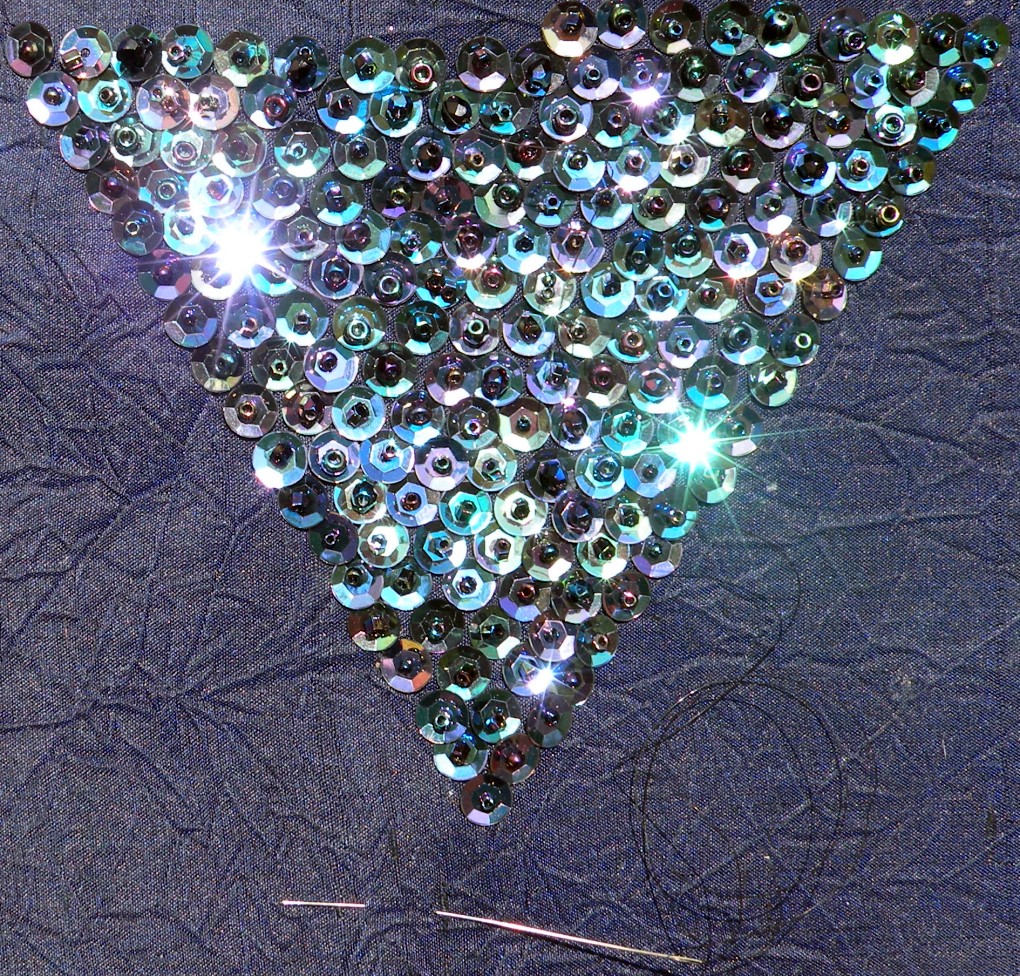
If you click on the ‚triangle‘ photo to see it larger, you will notice that the beads at the center of the sequins have many different sizes and shapes.
This is because I’m not just using cupped iridescent black sequins and seed beads. In fact I’m using a variety of round and cut seed beads, hex cut beads and cut glass beads, all in various shades of „iridescent“ (black-, blue- and purple iridescent, that is) on top of the sequins.
I’m not doing this because I would have „no idea that the original gown only uses round seed beads“ (actually I know that 😉 ), but to add some extra sparkle by using the cut variations of beads on top of the cupped sequins. I don’t think that the usage of those cut beads takes away much from the appearance (in terms of „likeliness to the original“), and I love me some extra sparkle, so there 😉
Also, for the brooch I didn’t just use „straight“ bugle beads but also twisted ones in black AB – again, to add to the sparkle (because a twisted bugle will sparkle more than a non-twisted one).
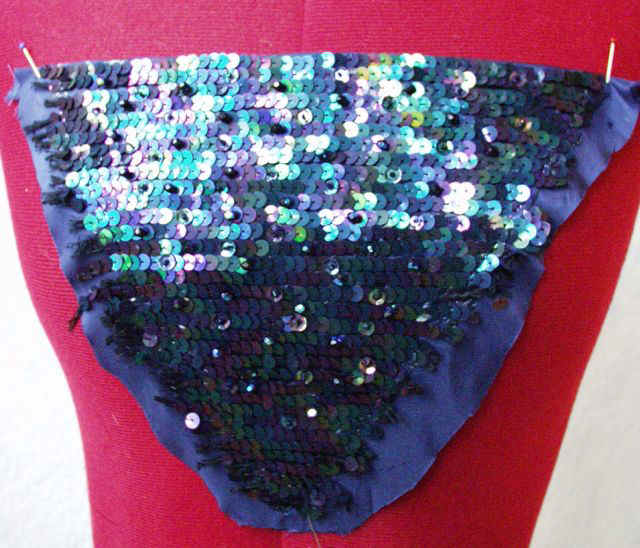
A bit further in progress; just nine and a half more rows to bead 😀
Beading of brooch and triangle:Finished 😀
Soutache embroideries
Let’s talk about soutache.
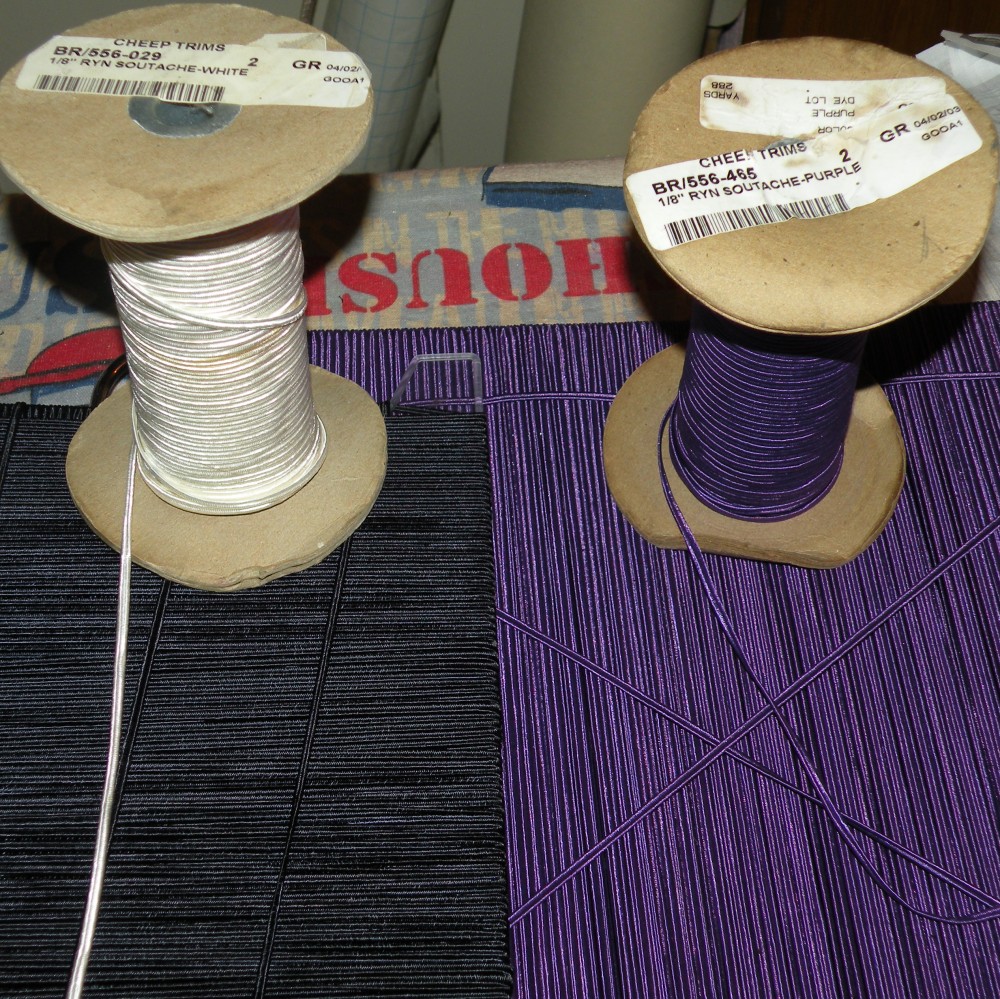
Ten years ago I bought two 288-yards-spools of Soutache from Cheeptrims; one white, one purple.
Those two poor spools have survived three house moves and one flooded basement after a tornado, so they’re not exactly in best shape – but the soutache on them is still good.
Here’s a picture so you can compare the labels:

As you can see, the spools and labels are basically the same (except for the labels having different color codes). And actually, both labels have a „RYN“ on them, specifying that the content of the soutache is rayon, which is dyeable.
Over the years I’ve used quite a bit of the white soutache and dyed it successfully (of course – it’s rayon, right?).
Now, when it came to soutache for this Senate gown reproduction, I thought „why not use the purple soutache and dye it navy?“ – not unreasonable, right?
So I put approximately 100 yards of the purple soutache on a loosely spooled plastic card (to be able to dye it properly), and tried to dye it.
Twice.
Guess what? It didn’t take the dye at all.
So I put ANOTHER 100 yards of the WHITE soutache on such a plastic spool, and dyed that.
Guess what? It took the dye PERFECTLY.
Here’s a picture of both the original spools standing on the plastic cards with the dyed soutache. You will notice almost no color difference on the purple dye batch (compared to the original spool color, that is) while the white clearly turned navy without problems.
Reason?
Cheeptrims obviously MISLABELED the purple spool. That purple soutache, as similar as it may look to the white soutache, is made from polyester; while the white soutache is indeed rayon.
I confirmed that with a burn test of the fibers – the white soutache burns like a candle, smells like burned paper and crumbles into fine ash; while the purple soutache burns with a bright flame, smells like burned plastic and turns into hard blobs of molten plastic.
So much for „soutache doesn’t equal soutache.
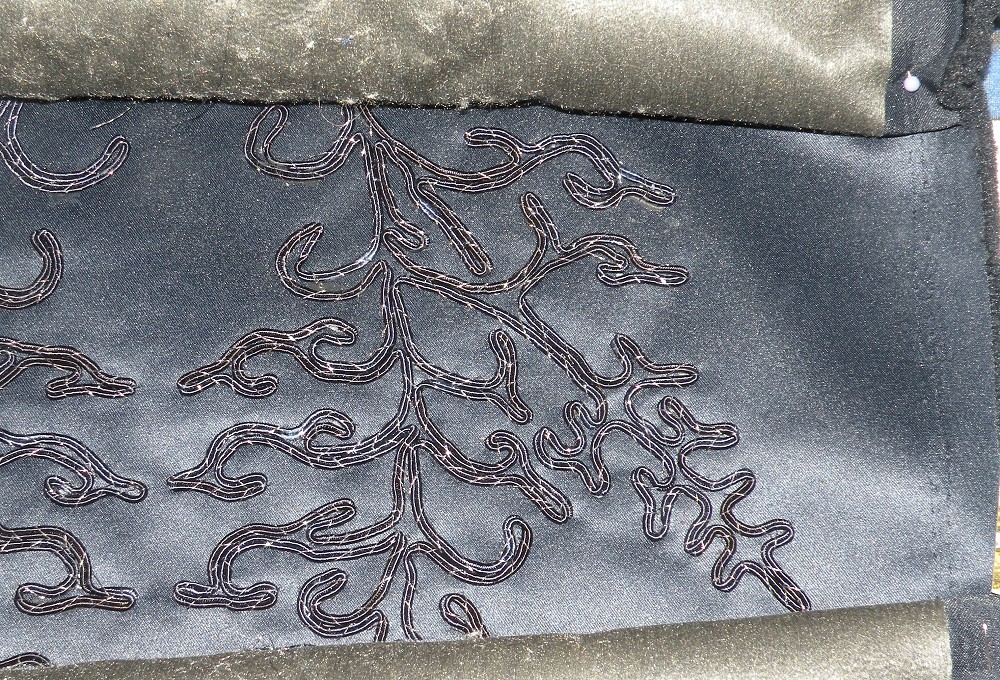
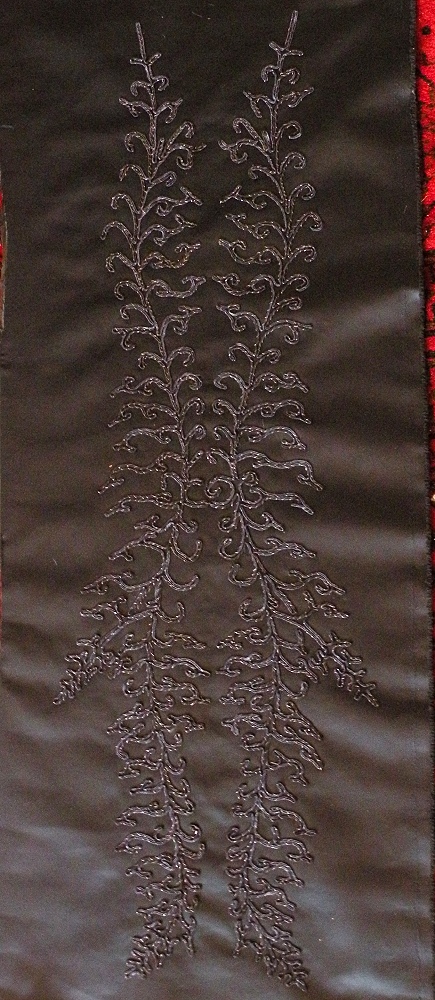
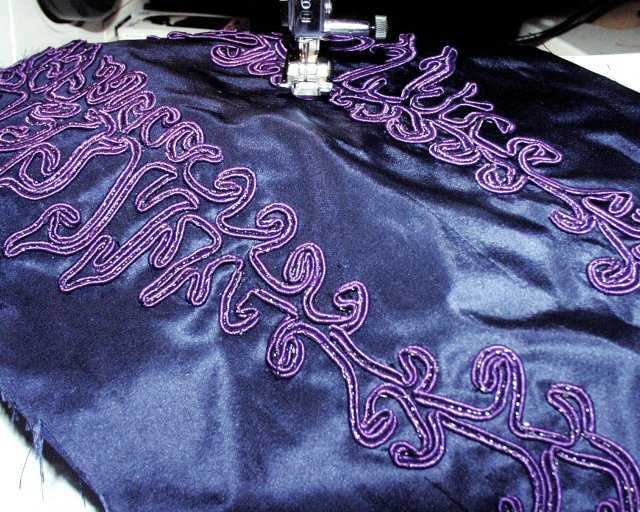
Front panel embroideries finished – that panel is over a yard high; so don’t underestimate the size of what you’re seeing here! *lol*
Sleeve- and collar soutache embroideries in progress:
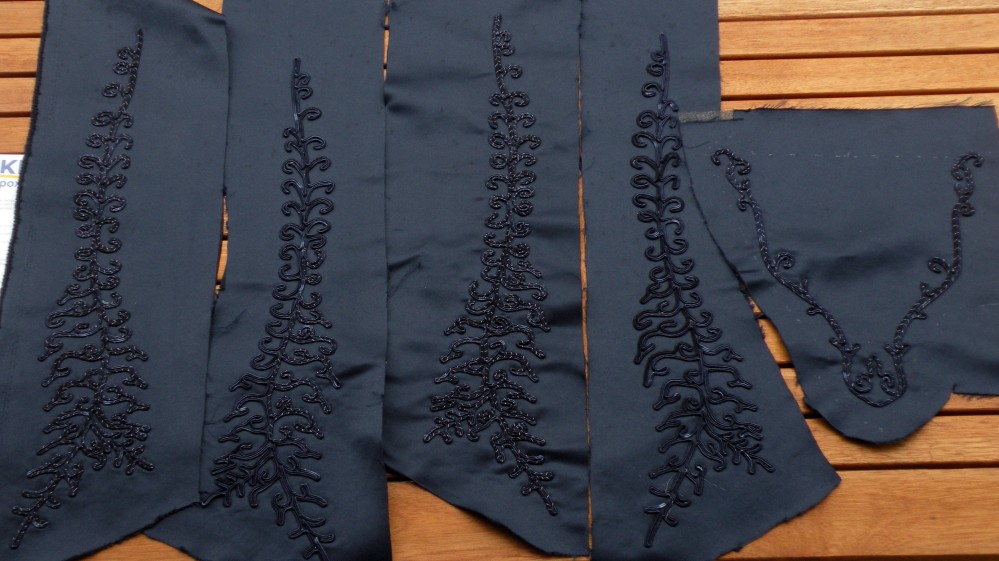
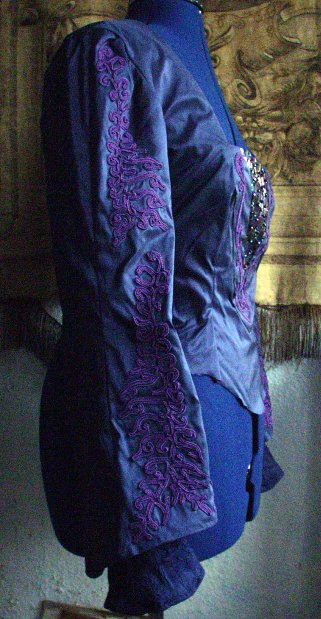
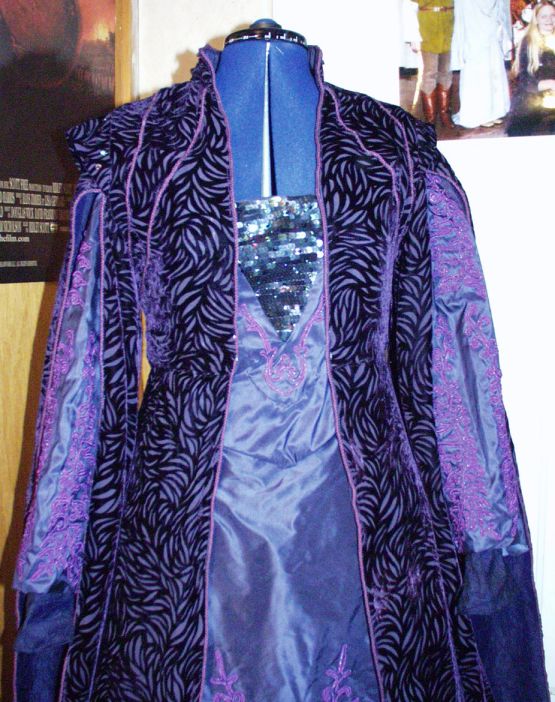
ALL the soutache embroideries and beading finished (still need to iron the pieces):
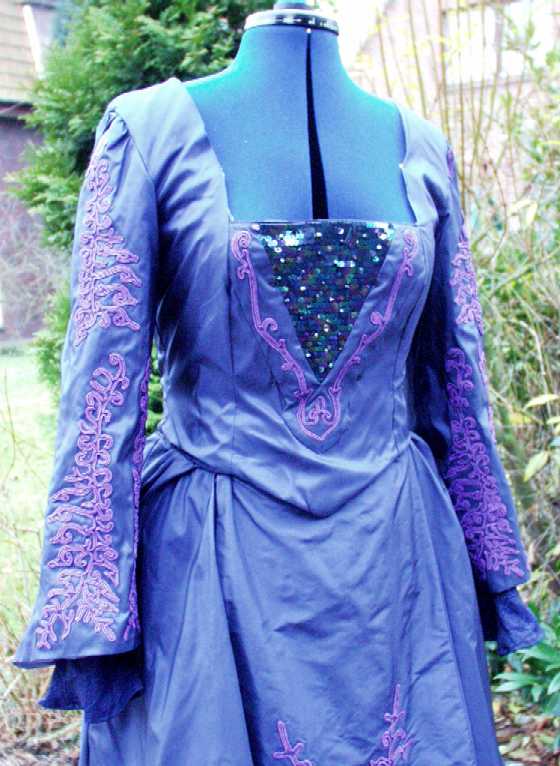
Closeup of the embroideries:

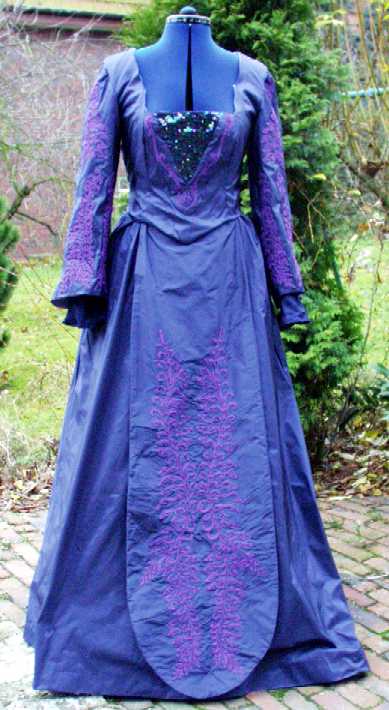
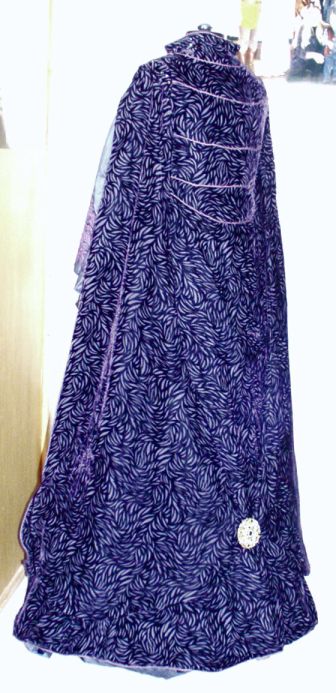
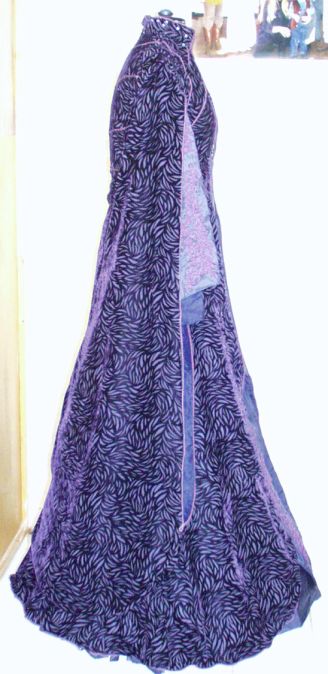
Skirt finished:
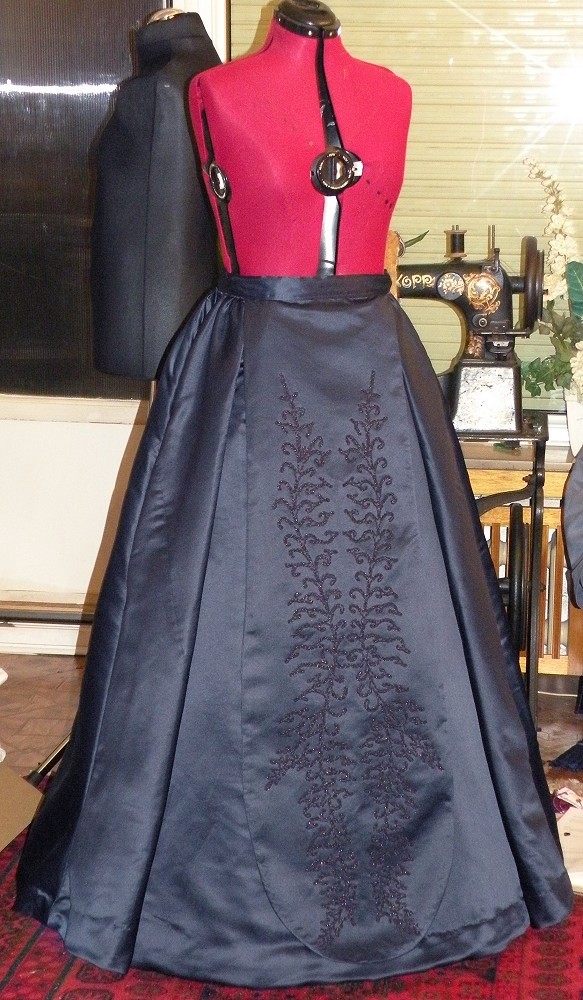
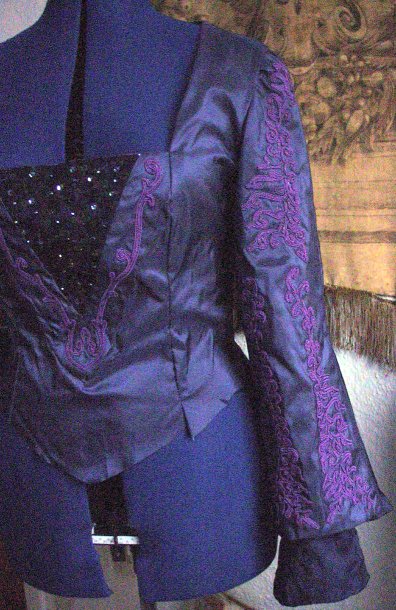
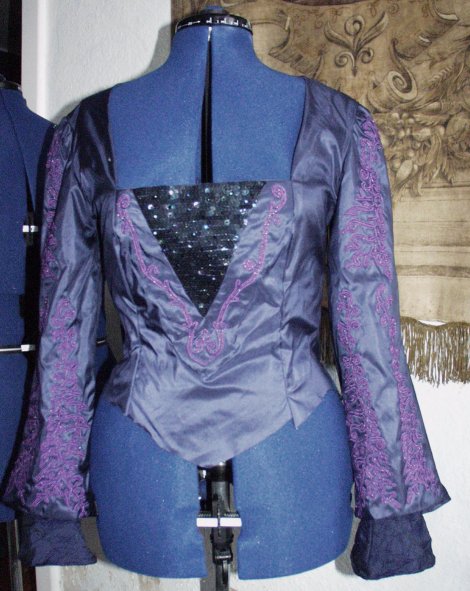
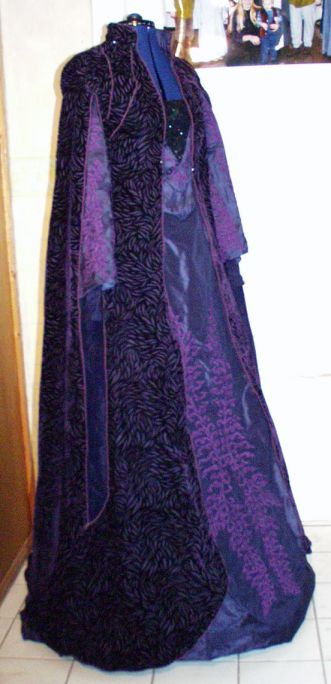
Skirt and bodice finished:
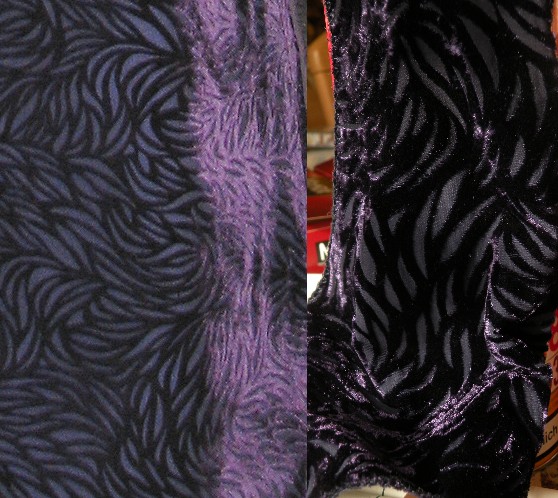
Velvet dyed – left, original gown; right, my dyed silk velvet:
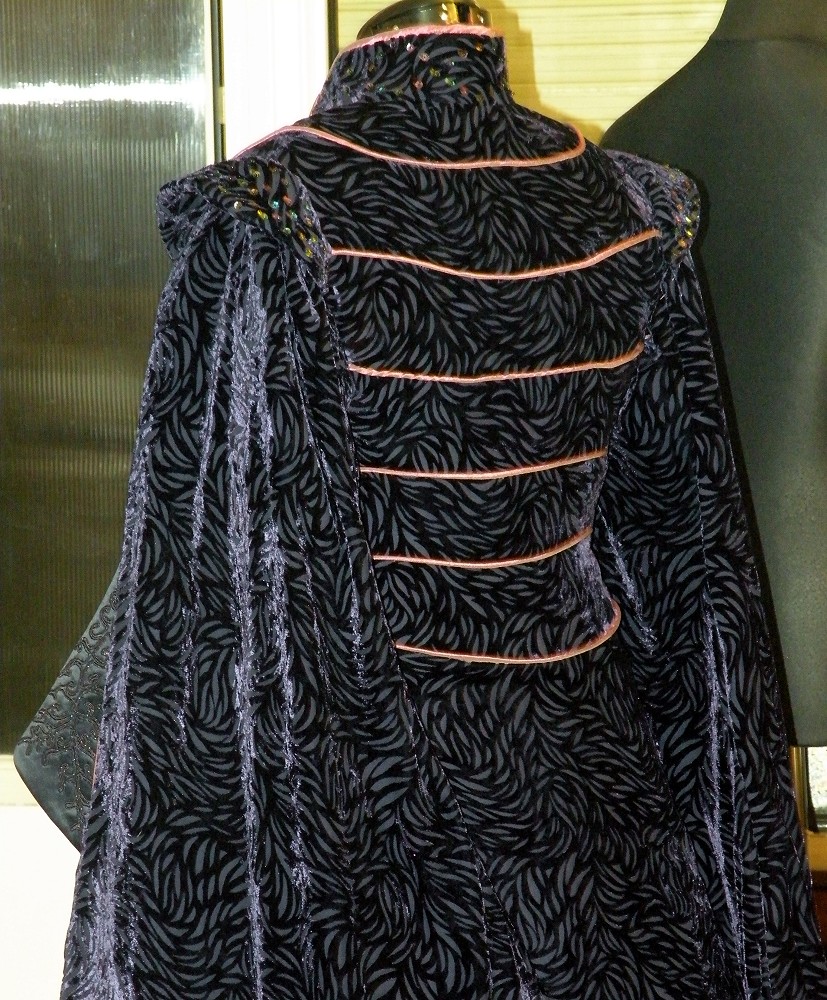
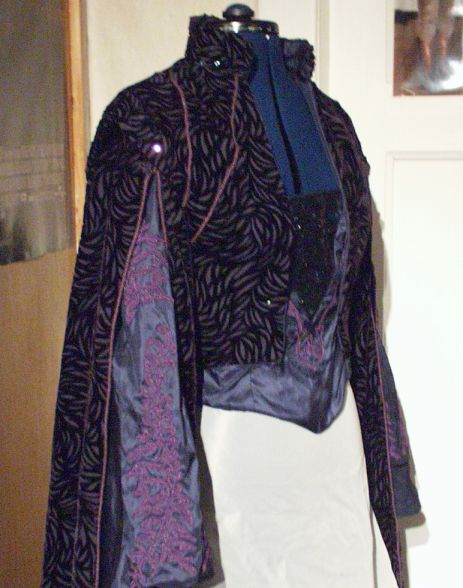
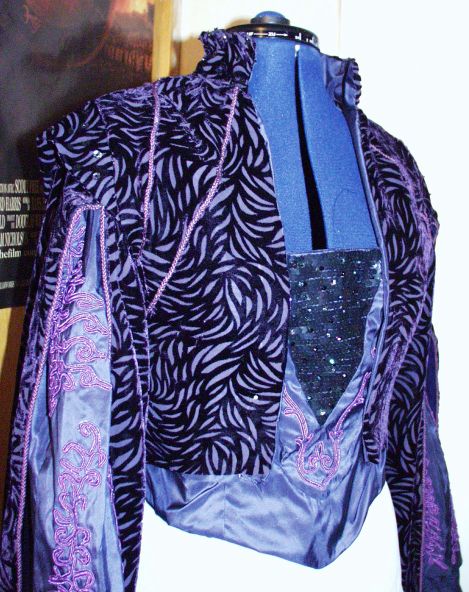
Coat beading and sewing:
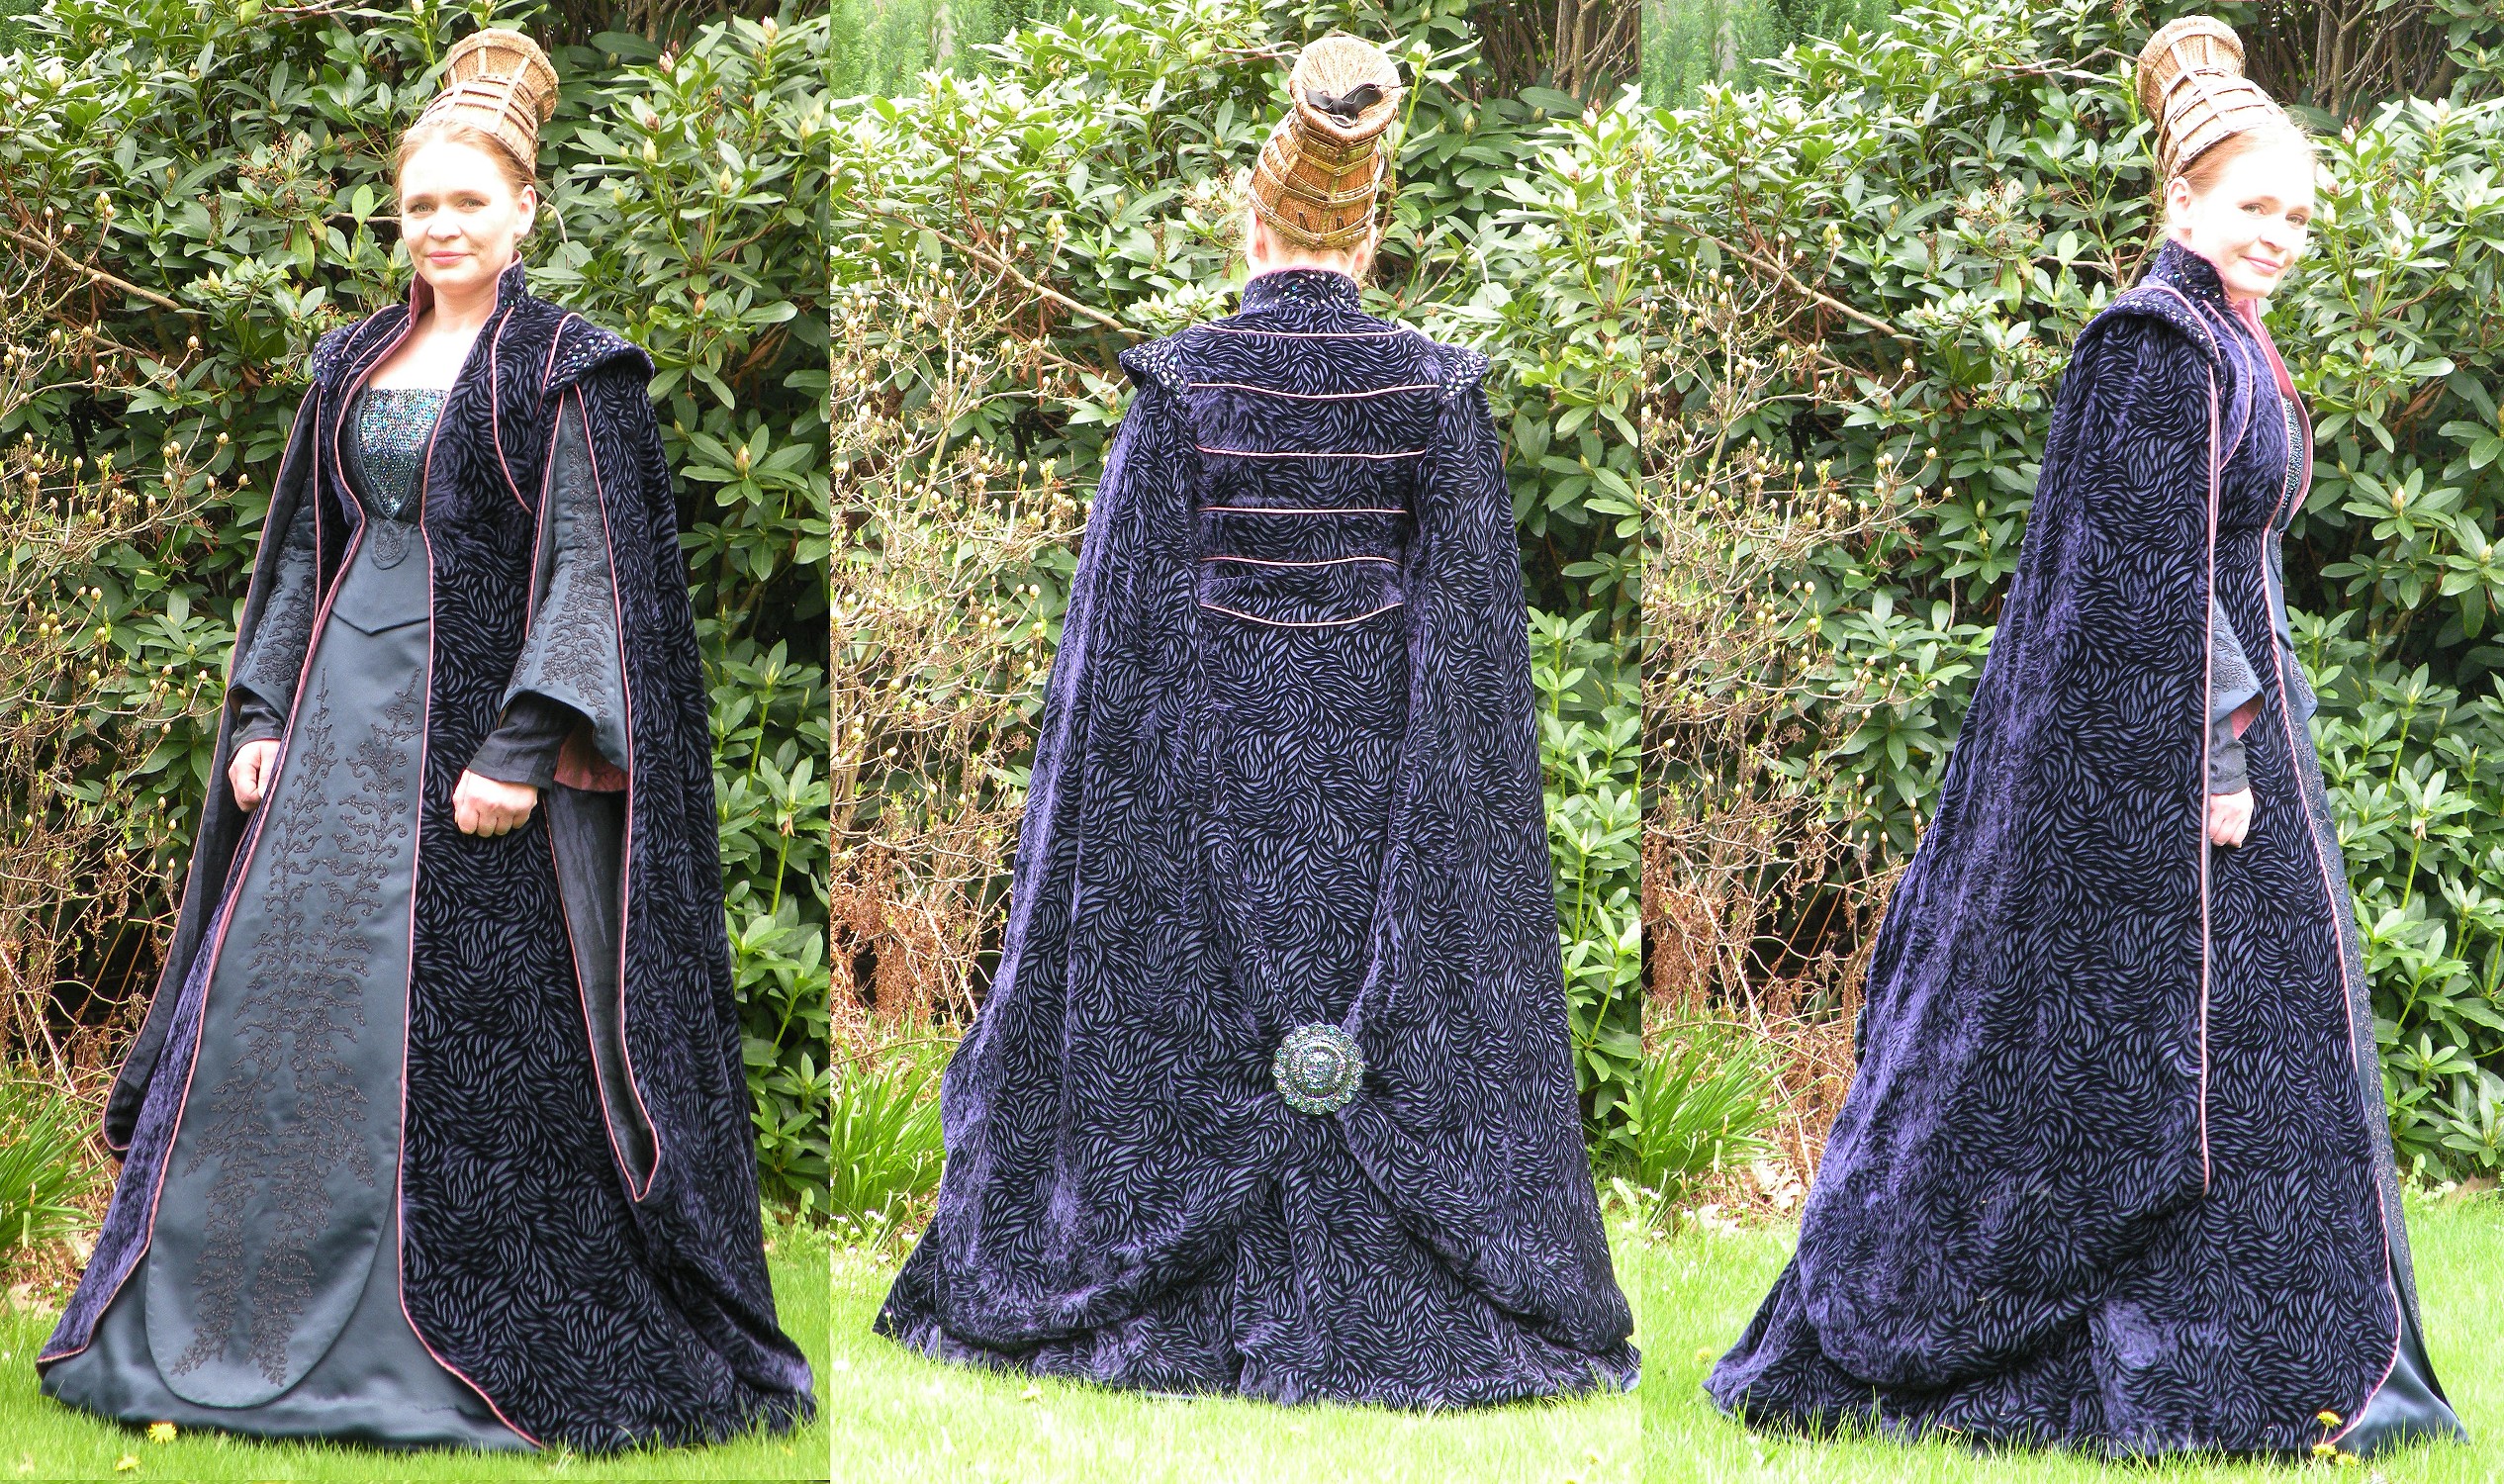
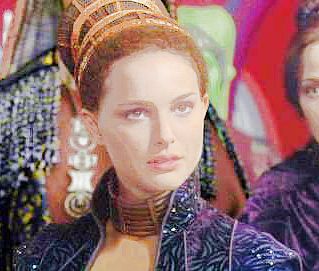
And here’s me wearing the not-yet-finished gown for a first test (just to see if it fits):
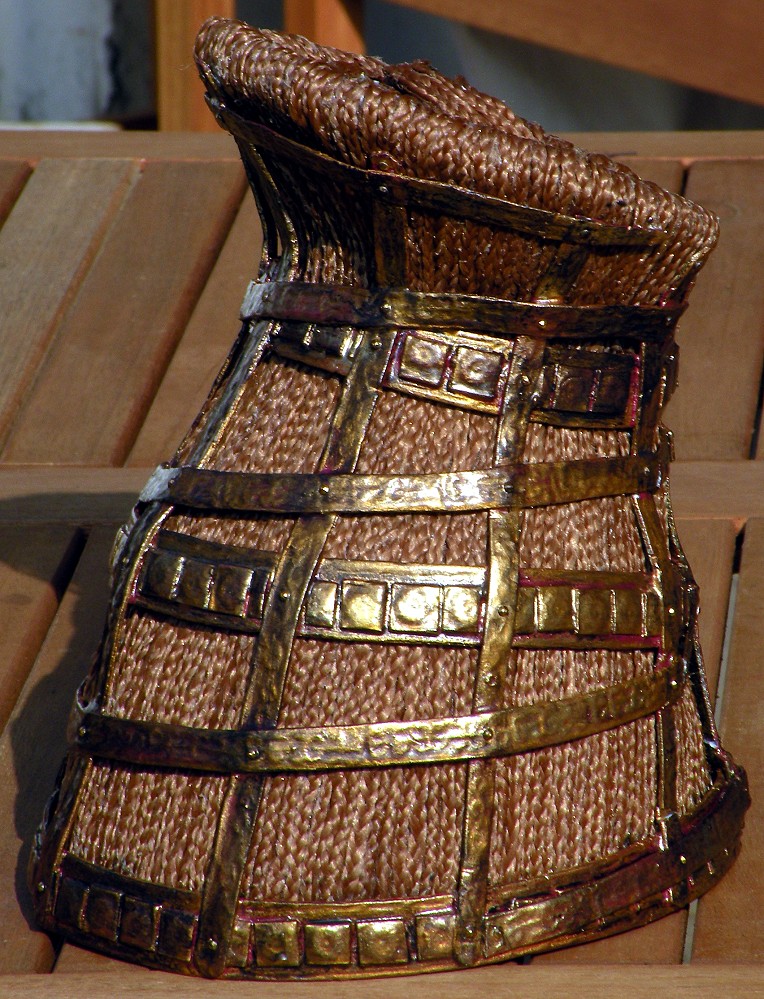
Making the headdress
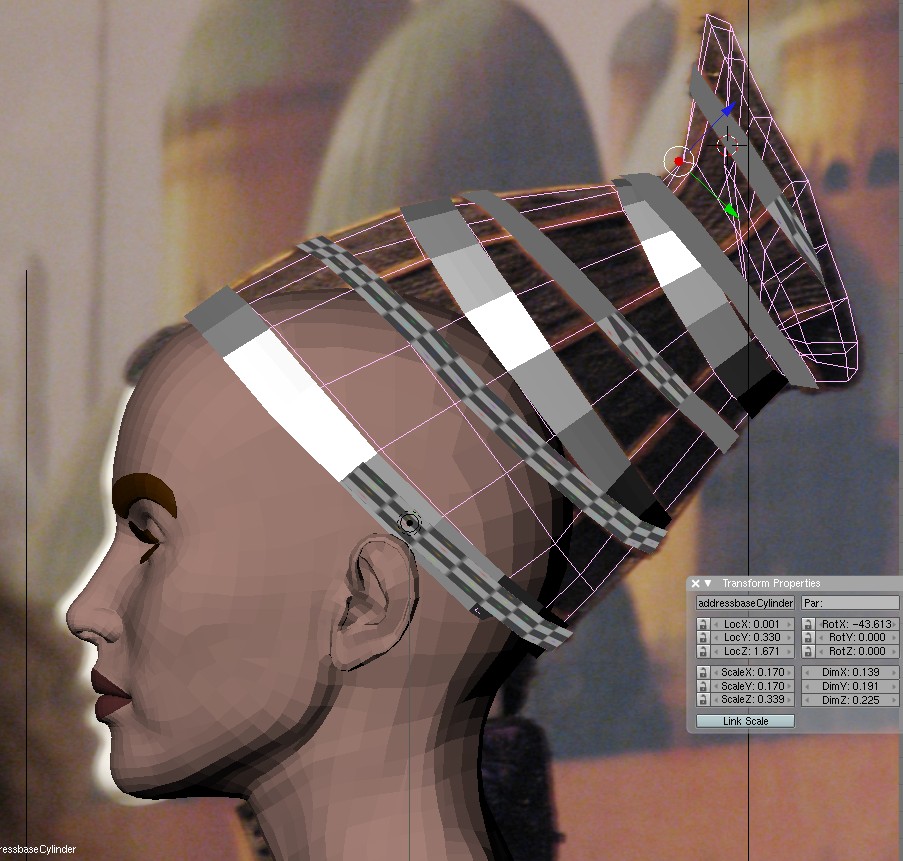
I’m building my headdress with the help of Pepakura and Blender.
What I did was to first build the headdress in Blender, with reference photos of the original headdress in the background to get the shape right…
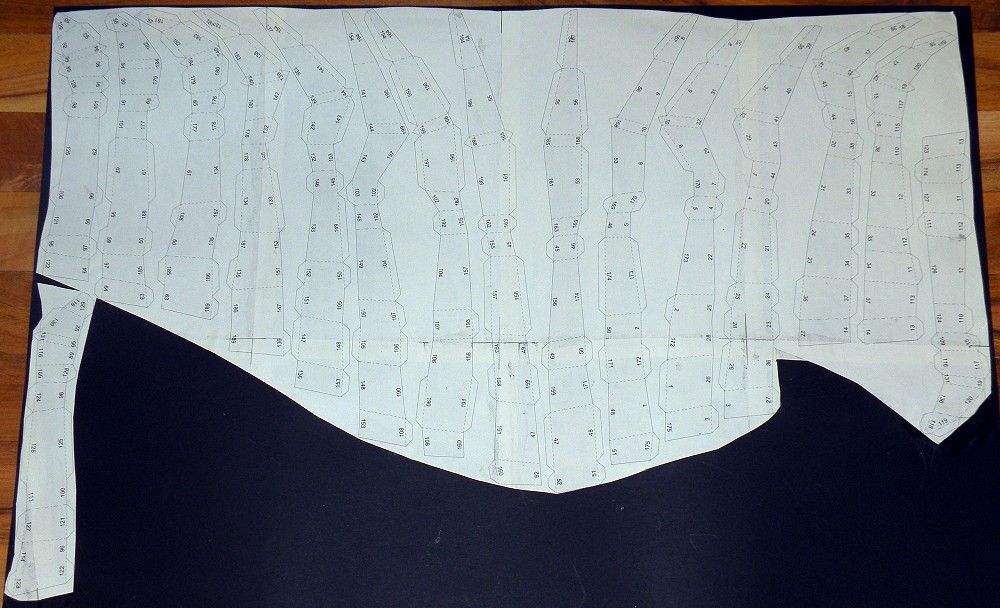
…and then I disassembled the object in Pepakura, printed it out on paper and then glued the paper to cardboard.
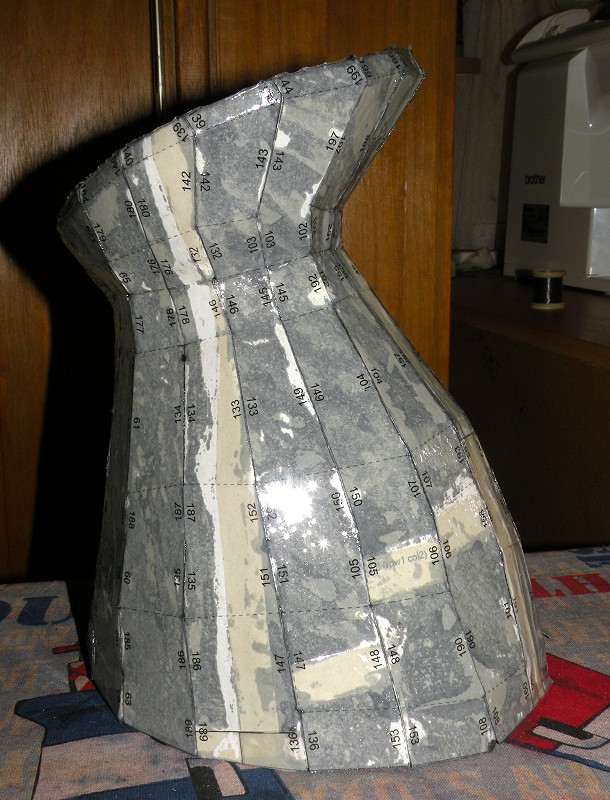
Here’s what the headdress looks like when assembled and stabilized with epoxy resin:
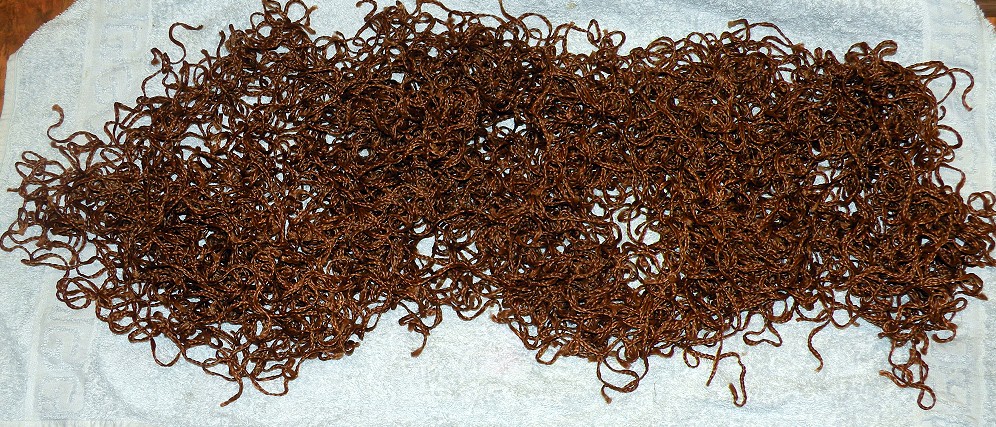
Here’s the microbraided hair which I’m using to cover the base of the headdress after a first washing. I chose a hair color close to my own (light reddish brown) rather than the original darker brown, because my own hair will still be visible at the front of the head.
Here’s the headdress covered with felt, then painted with brown acrylic paint and a few initial braids glued to it. The markings are the placement for the cage above the hair.

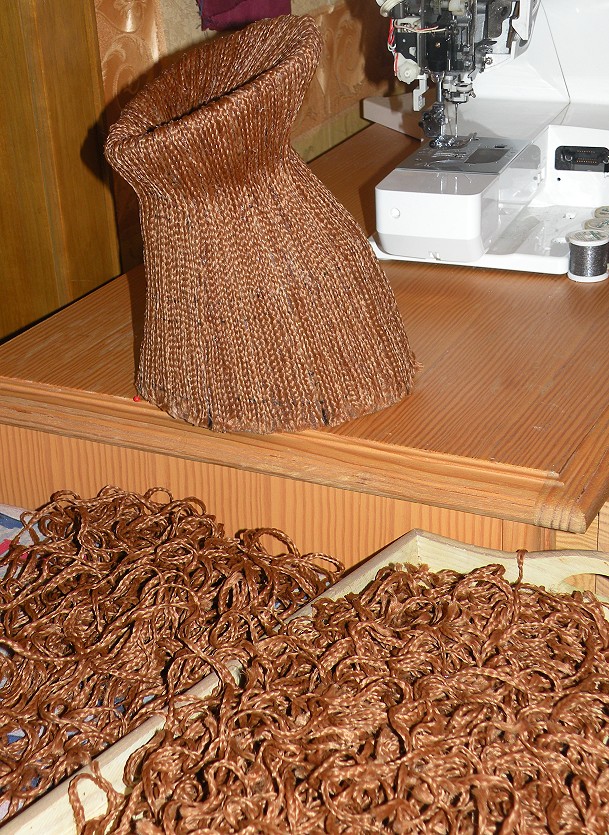
And here’s the headdress base, completely covered with microbraided hair. As you can see in the front… I probably have enough microbraided hair left to cover another headdress 😉
Of course, depending on the size of your head and your headdress, you may be needing more or less (or longer / shorter) microbraids, but just to give you a ballpark figure:
It took about 144 microbraids (not sure if I counted them correctly; so that’s just the approximate number) with lengths varying between ~16.5 inches (42cm) and ~10 inches (25cm). The difference in length is because you need shorter microbraids at the back and longer ones to cover the front.
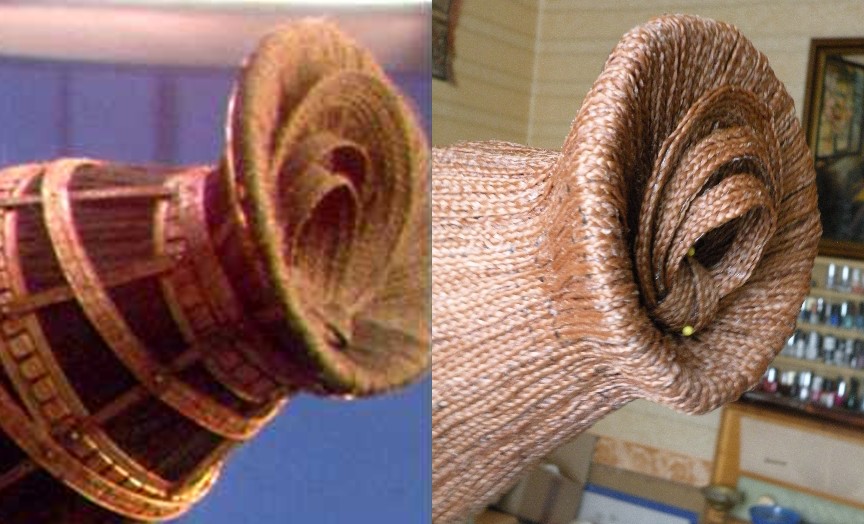
Hairigami (=hair Origami!) at the back of the headdress; left: original headdress; right: mine:
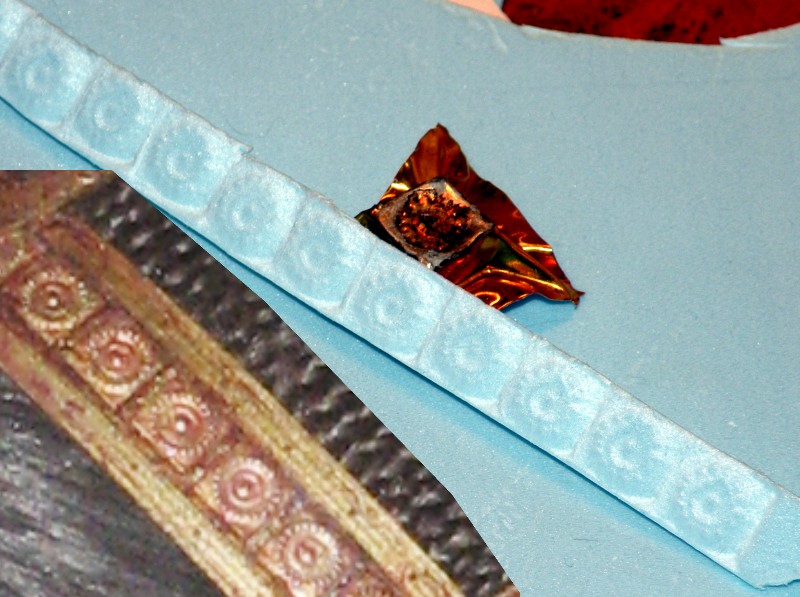
Stamping the pattern for the little squares on the headband into styrofoam (and yes, I made the little stamp – consisting of pressed metal filled with epoxy resin to stabilize it – myself); left bottom corner shows the original headdress to compare:
The finished headdress:
First reproduction made in 2003 for someone else:
Fabric for this gown
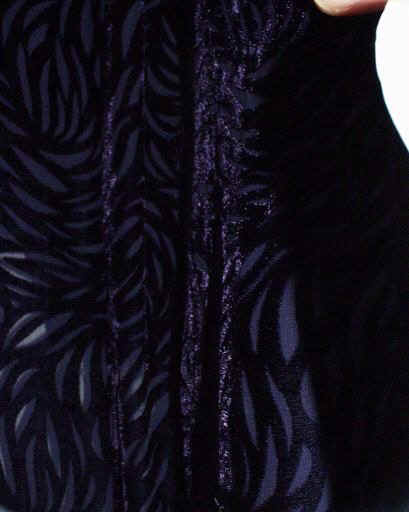
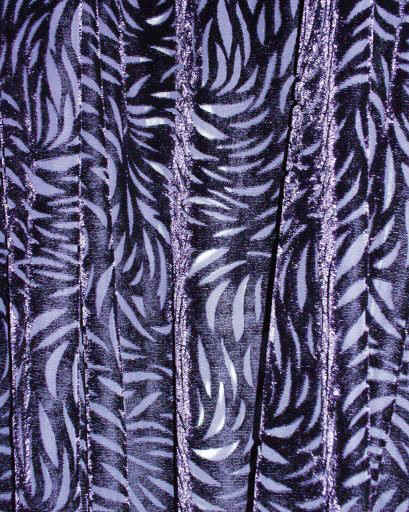
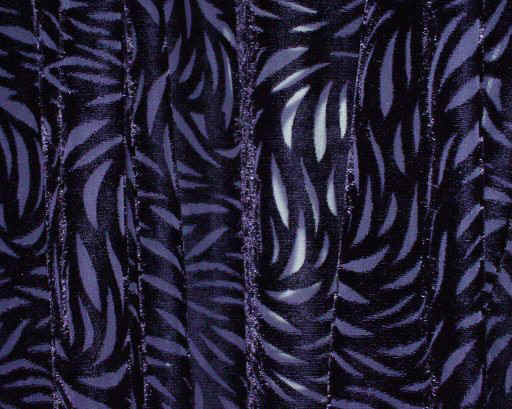
The top layer of the original gown is made of an etched silk velvet, and I was lucky enough to buy two bolts of the *original* fabric!
As I purchased it in white, it was still a risk to dye it.
Would the colors (a dark, deep violet, having an unearthly, lighter purple sheen) be right?
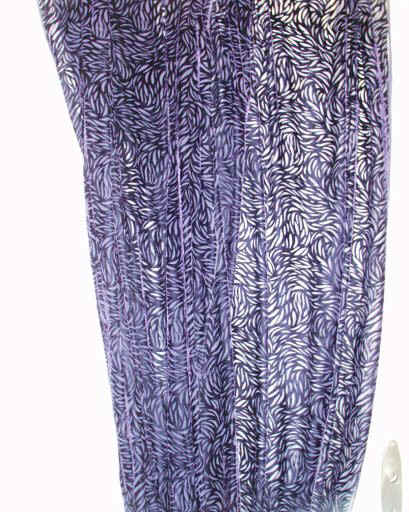
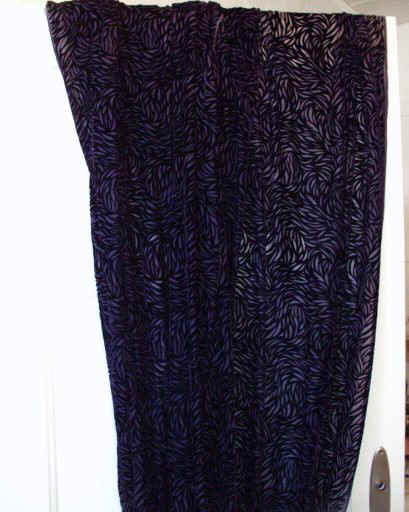
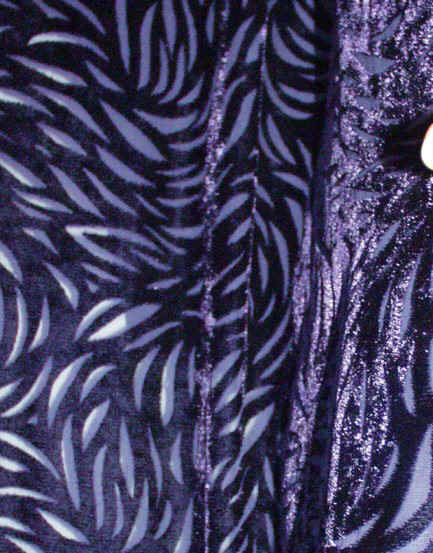
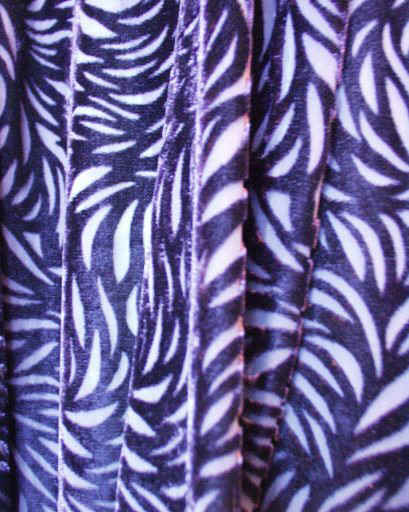
Well.. here are the first pictures after dyeing. Isn’t that absolutely incredibly wonderful? I have taken several pictures, and on each picture the velvet has a different sheen (Pictures were taken with daylight, flashlight and inside light). The pictures were taking while the fabric hang over a white door, so the etched designs mostly show up lighter than they will when the gown will be finished, as this part will be backed with darker fabric:
To compare, look at this picture of the original gown:
By now I have finished the front insert of the gown. I used AB coated sequins; AB coated cut jet pearls and AB coated cut glass beads on AB coated cupped sequins on the insert:
After finishing the insert, we can put this into the bodice that we have already prepared with the necessary soutache embroidery (no less than 100 yards of Soutache went into the complete embroidery, by the way!):

Now we can prepare the embroidery for the sleeves:
When we have finished that, we can sew the sleeves to the bodice; but not without forgetting to insert the belled undersleeves which will cup the hand when wearing:
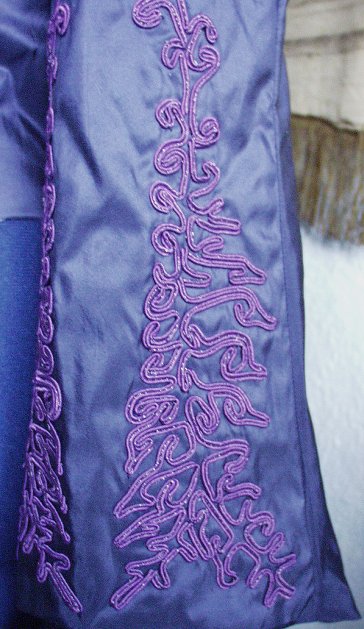
After endless hours of embroidery, we have finally finished the soutache embroidery of the front panel:

(this seems small, but is actually one yard high!)
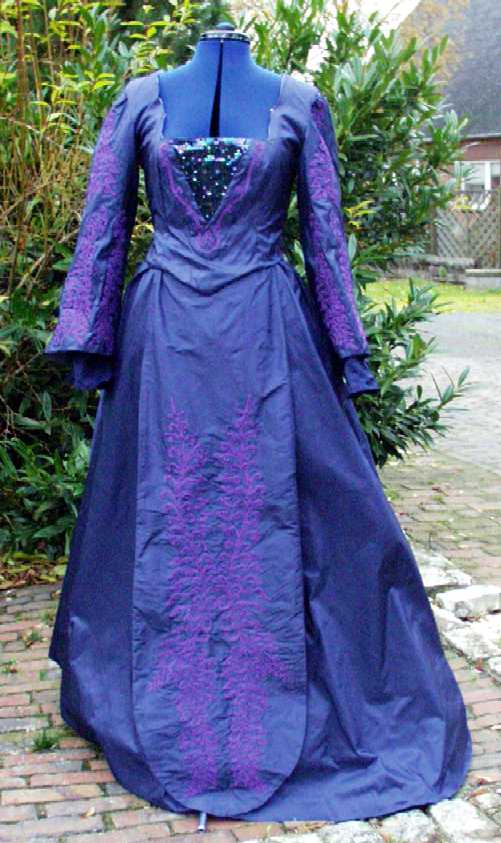
Now, after taking our time to cry shamelessly for some minutes, we can take the task to complete the skirt. Here it is:

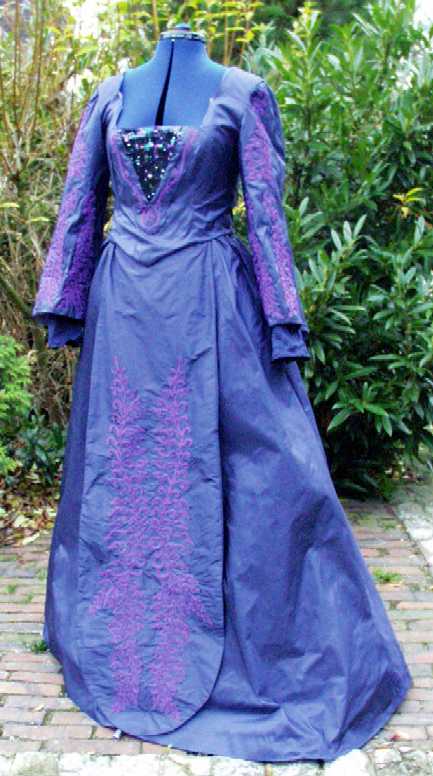
Some more pictures taken outside, just to get the color correctly…:
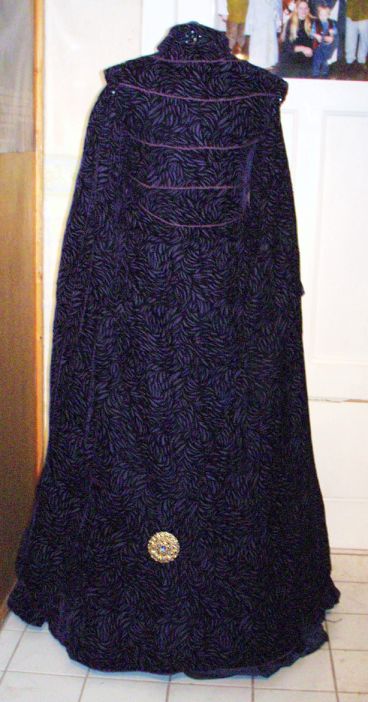
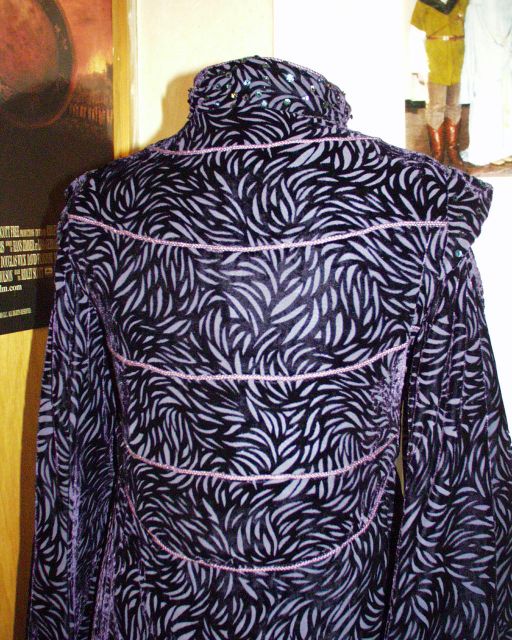
Next, and last, thing will be the overdress.
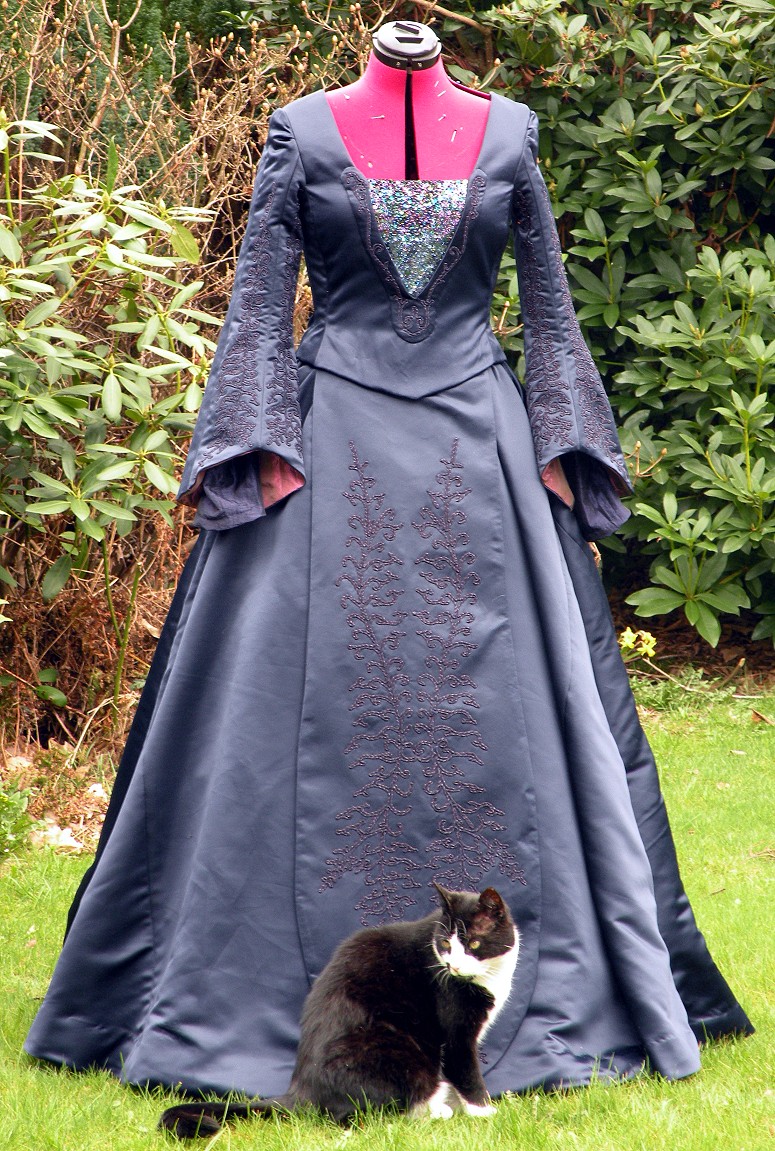
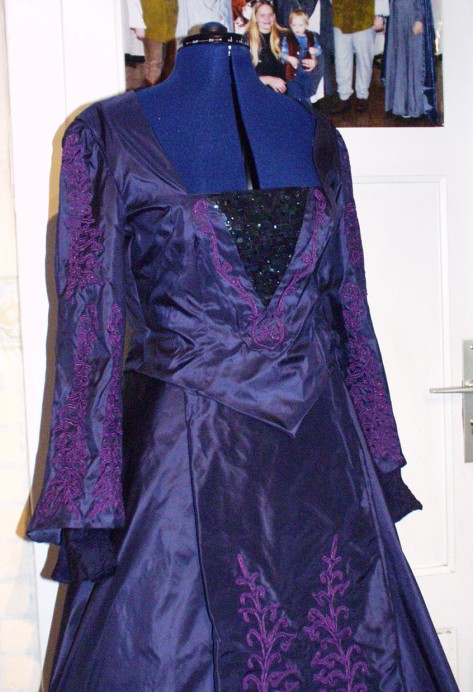
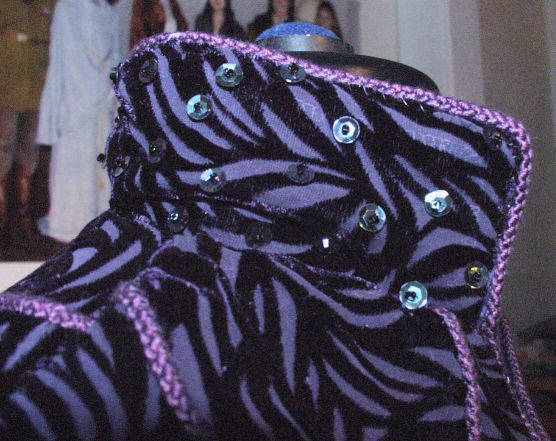
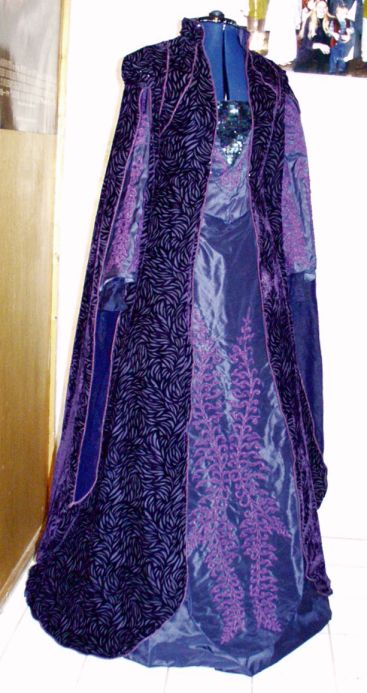
Here is the upper part of the overdress. The first picture shows about the right colors; but the second shows the better details.
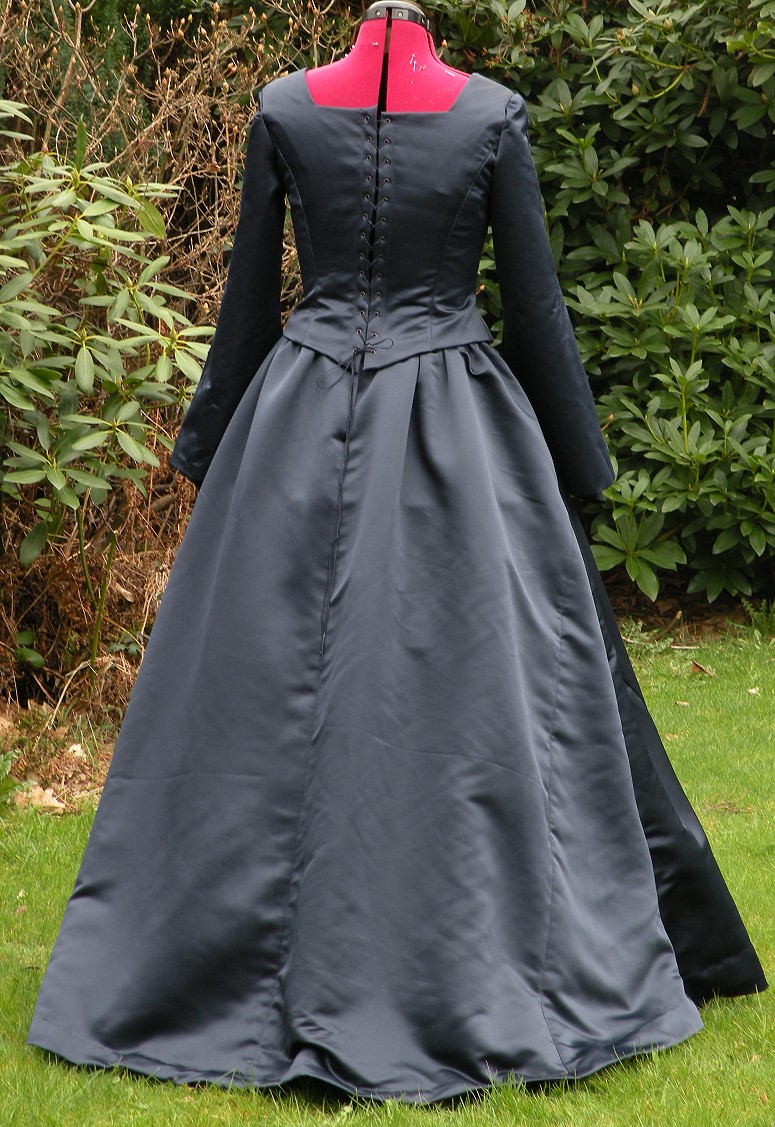
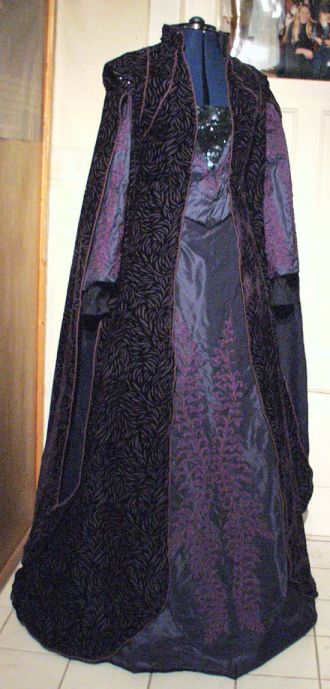
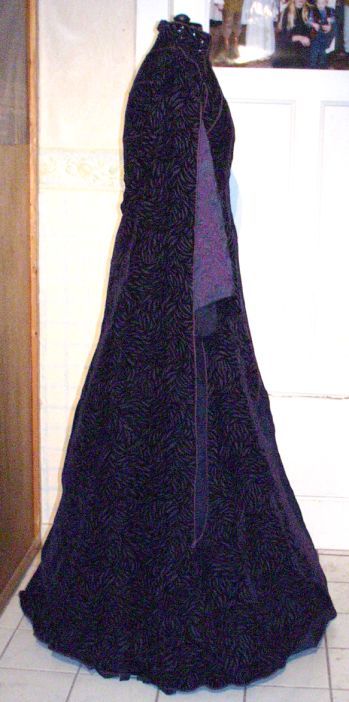
And here are the pictures of the finished gown. Unfortunately I have no pictures of the complete gown that were taken outside. The colors are a little weird due to artificial light and flashlight; the real colors are more like the pictures that seem a little ‚dull‘ – compare them to the pictures above of the underdress which were taken in daylight.
Also, the hoopskirt that is under this gown is too small for this skirt; but the person I made this gown for has her own which is larger than mine.
~Please also have a look at my other Star Wars costume reproductions! ~
How do i get a hold of all the patterns to make this dress Rebel Legion official?
Sorry, but I have no idea. I made my own patterns to create this dress 🙂
Are you willing to sell your pattern? I want this dress for my wedding.
Thank you!
My fiance is a part of 501st and Rebel Legion and he has finally gotten me excited about a costume and it is this gorgeous dress! I want to make this to be able to troop with him but i don’t know where to find all the details to get it approved. How can i get a hold of all the patterns for the soutache braids and all the intricate details to get this done?