~Please also have a look at my other Star Wars costume reproductions! ~
Padmé’s blue Tattooine Poncho
Padmé Amidala – Star Wars Episode 2 – Blue Tattooine Poncho
The blue Star Wars Tattooine Poncho of Padmé / Amidala is something I’ve been wanting to do for a LONG time for myself. I’ve made it in 2003 for a customer; and ever since, I’ve been wanting it for myself; but never really got to actually making it.
Then I basically ‚inherited‘ a huge amount of well-dyeable linen (some of which I’ve also used for my ‚Waterhouse Ophelia‘ gown); and when I had leftovers from cutting the Ophelia dress – even if the linen I dyed for that gown is a tad lighter than what I’d need for this one – it dawned me that I should finally at least make this damn poncho (not the dress that’s worn beneath it yet) since it works very well as everyday clothing when being worn with jeans and a shirt beneath it, IMHO.
I also didn’t re-dye it; the medium blue of the Ophelia gown works pretty well, IMHO, for my very own version of Padmé’s Poncho.
Let’s analyze the original poncho first.
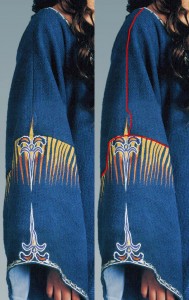
This is the most crucial part: the sleeve seam. As you can see from the picture (marked red in the right one), there’s a seam that runs from the shoulder to approximately the crook of the arm (elbow height), and then, *just* then, there’s the horizontal seam that connects an actual sleeve (namely, the piece of fabric that has the flames painted to it) to that.
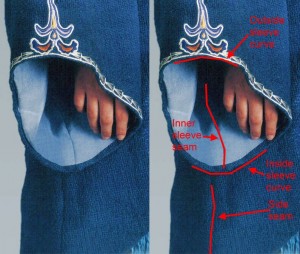
Also, the ‚outer‘ part of that lower sleeve (which sits right over the top of the hand) is much shorter than the ‚inner‘ part of it; and there’s a slight curve at the inside seam. You can see that pretty well here:
Here is the sewing pattern which I’ve drafted from looking at pictures of the original poncho.
It should be pretty conclusive; also, of course, you can very easily draft it down using your own measurements (and if you do so and have your own website… it would be somehow fair to link to this page, don’t you think? 😉 ):
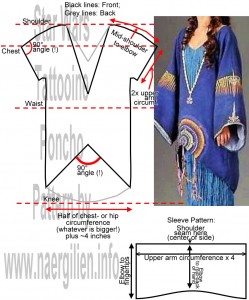 Click the image to enlarge. Of course you have to cut the sleeve TWICE. I haven’t written that down on the pattern, but it should be obvious!
Also, the pattern is NOT to scale; so you can’t exactly just blow it up to get a working pattern. If you want to draft it out for yourself, use grid paper and your own measurements.
The flames on the upper arm are, actually painted. Here’s how I did mine:
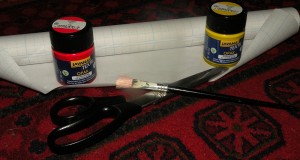
I used clear contact paper (that stuff with the grid paper backing – that helps a LOT to cut the flames to scale!), opaque textile paint and a brush.
First, I cut a strip of that contact paper; as wide as the roll was and as long as (flames + 2 inches). Then I cut the contact paper to achieve the ‚flames‘ basic shape; each of my flames is one grid square ‚wide‘ (which is 1cm, since my grid is 1x1cm. In case you’re working with inch-grid-paper, you’ll probably want to go for 1 flame every HALF inch; that’s still a tad larger than what I did (1/2 inch = 1.25cm), but I think that would work as well.
Then, peel off the backing and stick the adhesive clear plastic to your sleeve fabric, right at the top. Be careful to follow the weaving pattern while doing so.
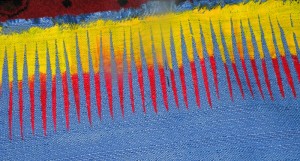
After that, start to paint; always going from the ‚red‘ part to the ‚yellow‘ part. I usually paint red first, then yellow. When you’ve finished both colors, there’ll be a hard edge between the two colors. Blend that by basically ‚dotting‘ that hard edge with a mix of red and yellow.
You can tear the clear adhesive plastic off as soon as the paint has dried. Now you should have red / yellow flames. I do recommend to PRACTICE this before you work on an ‚actual‘ sleeve, though (you can still use the ‚practice‘ piece of fabric to make a matching handbag for your poncho!).
The other decorations on the original costume are also painted in some places (like the ‚flames‘ at the center front circle, for example!), but I’ve decided to embroider them entirely (just because I like embroideries better – believe me, even WITH an embroidery machine they’re NOT ‚easier‘ or ‚faster‘ to make!).
How many stitches do those embroideries have?
Just because I love statistics, here’s a table that should be conclusive. Note that ‚left‘ and ‚right‘ half of the circle differ since the ‚center‘ parts of the circle embroideries are just in the ‚right‘ half, not in the ‚left‘ one. Also, keep in mind that the sleeve embroideries have to be done twice (left and right) – the table takes that into consideration (by ‚x2‘ the number of one embroidery):
So all together, there are over 71,000 (seventy-one thousand!) stitches in the embroideries of my poncho.
It took me about a week to digitize, then embroider all of them (that’s about 40 hours, if you like hours better than weeks ;-)). And that’s just because I’m practiced with my embroidery software and the machine, of course.
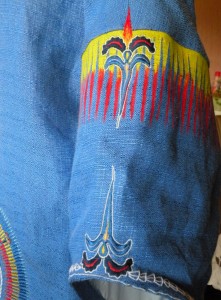
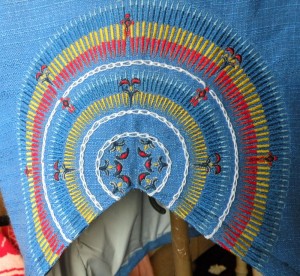
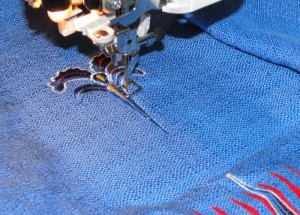
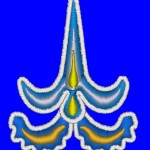
Here’s what my finished embroideries look like on the fabric.
Please take into consideration that the ‚hen’s feet‘ embroidery around the neckline, the sleeves, and on certain parts of the front ‚circle‘ have to be done by hand; so they’re not in these pictures yet:
| Upper sleeve | Neckline and front circle | Upper- and lower sleeve |
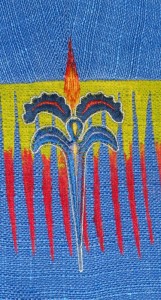 |
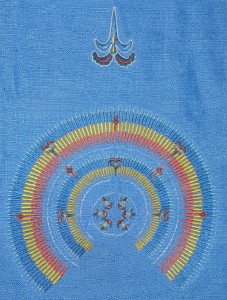 |
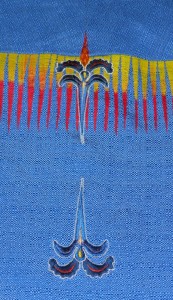 |
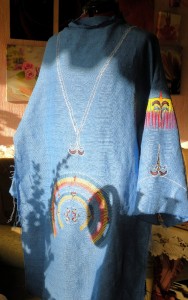
And here’s a first picture of the finished embroideries on my dress mannequin.
Note that I haven’t closed the side seams yet; just the shoulder- and top sleeve seams. Also, I haven’t cut out the neckline, the bottom front and the sleeve curve (towards the hand) yet; I like to keep those things uncut until I have finished the ‚chicken feet‘ embroideries, which, as I have already mentioned, have to be done by hand.
The color is slightly off in this picture – the poncho is showing as some kind of bright aqua, but it’s really more a blue – see pictures of the embroideries above; those show the correct color:
Here’s another one, taken by the window in sunlight. This one shows the color better; but has some shadow cast on the poncho:
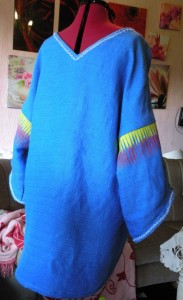
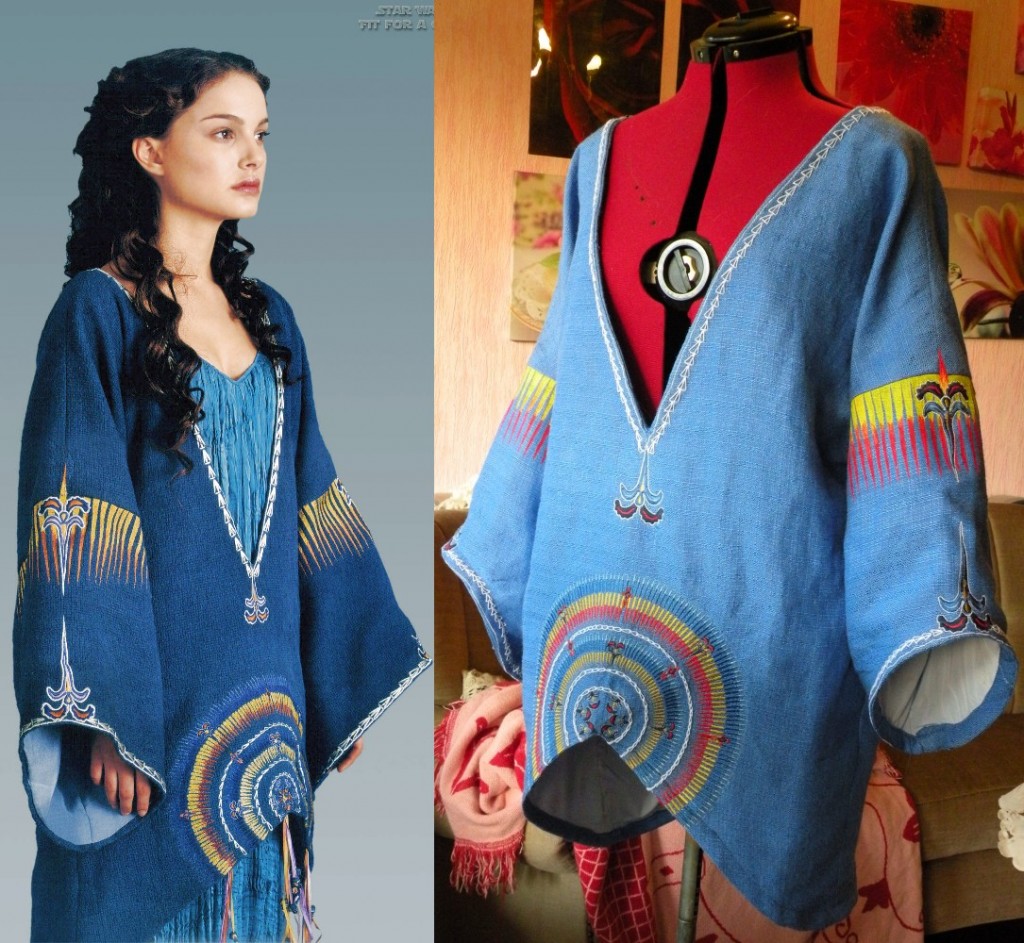
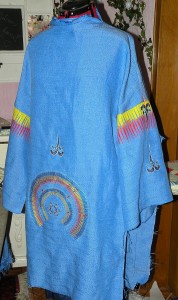
Here are pictures of the finished poncho:
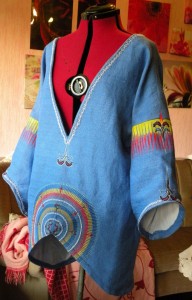 |
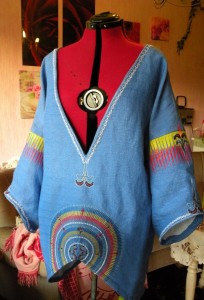 |
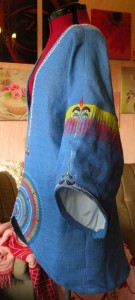 |
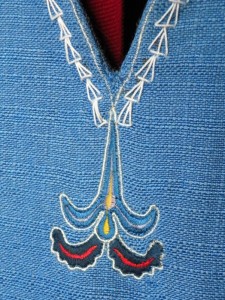 |
 |
 |
 |
||
Here are some links to other reproductions of this costume:
- Reproduction by Two-Gingers (links to pictures at the bottom)
- Maggie’s Reproduction
- Kristy’s Reproduction
- Various reproductions listed on Padawansguide
If you, too, have made a reproduction of this costume and want to be included in this list, don’t hesitate to comment on this entry with a link to your website and I will surely add you!
~Please also have a look at my other Star Wars costume reproductions! ~




I am working on this costume for RL and was wondering if you still had the embroidery files? I’m new to using embroidery software. 🤦♀️ I would appreciate it greatly!
please get ahold of me ok about the poncho this is bobbi longtin
hi there I was wondering about the dress if you can buy it off line or do you need to sew it your self please get back to me my number is […] thank and have a nice day
I mean the poncho not a dress sorry
I have no idea if you can buy the poncho offline (or online, for that matter).
It’s not a regular clothing item; and the embroideries / paintings are rather specific – the chance that someone who already made it would actually sell her used poncho is rather unlikely.
The way to go to obtain one would either be to make it yourself or to hire a seamstress – again, on- or offline – and have it specifically made for you.
With the hand- and large machine embroideries as well as the painted areas, which all are rather time consuming, you should be prepared for a price tag somewhere between 600-800 US-$, depending on your size and the base material used.
Hope that helps!
P.S.: I have edited your phone number out of your comment. Seriously, you do NOT want to post your phone number on the internet.