| Navigation for this part of the page: |
|
[catlist categorypage=yes] |
How to make molds and cold cast metal
This tutorial basically covers two different techniques:
How to make a silicone mold from something you sculpted (or wish to recast), and how to cold cast metal using polyurethane resin and metal powder.
I will explain both on the example of Aveline de Grandpré’s belt buckle from Assassin’s Creed III but did use the very same technique for Connor’s buckle as well as the buttons for Connor and Washington (and quite a few other things).
Let’s start with the…
Silicone mold making
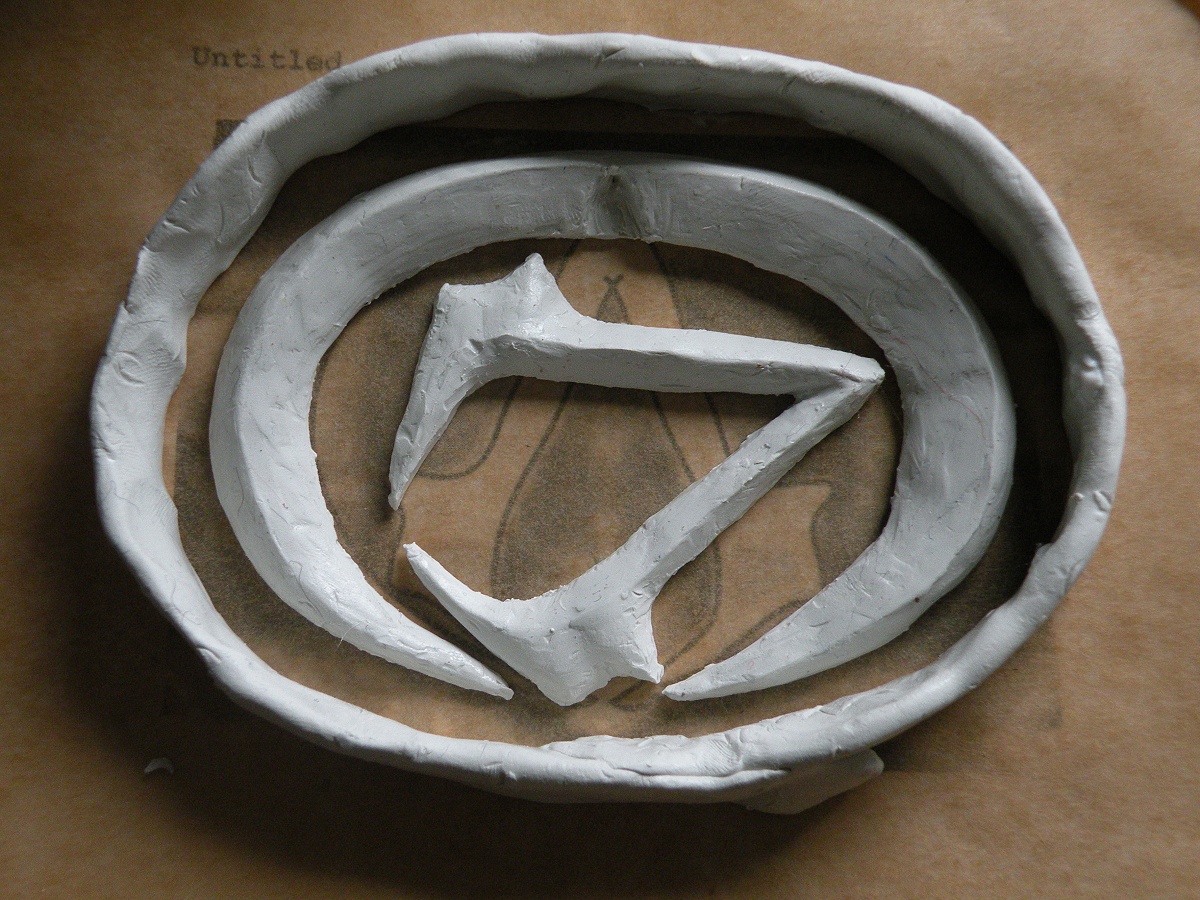 |
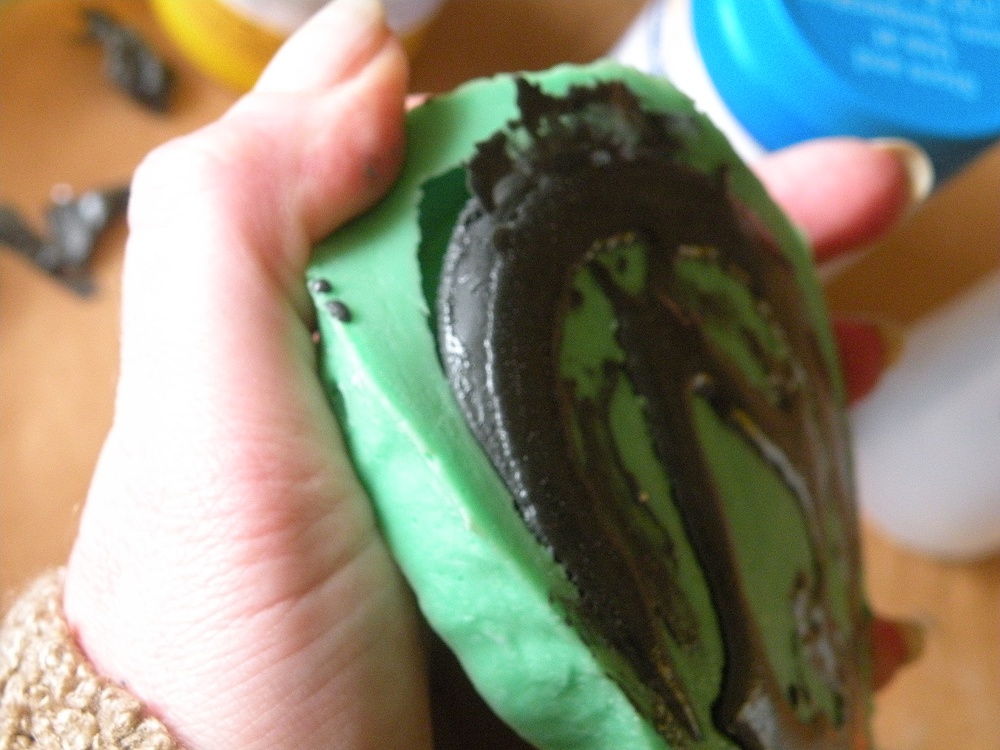
Start by laying your sculpted or to be recast thing out on a piece of baking paper.Note that this tutorial is about items that are flat on one side, therefore can be laid out. It’s not really useful for creating a mold for a statue.In this case, I’ve created a sculpt of Aveline’s belt buckle (which is two parts – the „A“ and the surrounding oval shape, which will later be glued together) using modelling clay. After laying those two parts out on the baking paper, I surrounded them with a „border“ of modelling clay that is about 1/2 inch „higher“ than the two pieces. The only really important thing is that said border must be pressed really firm to the baking paper, leaving no space between itself and the paper. |
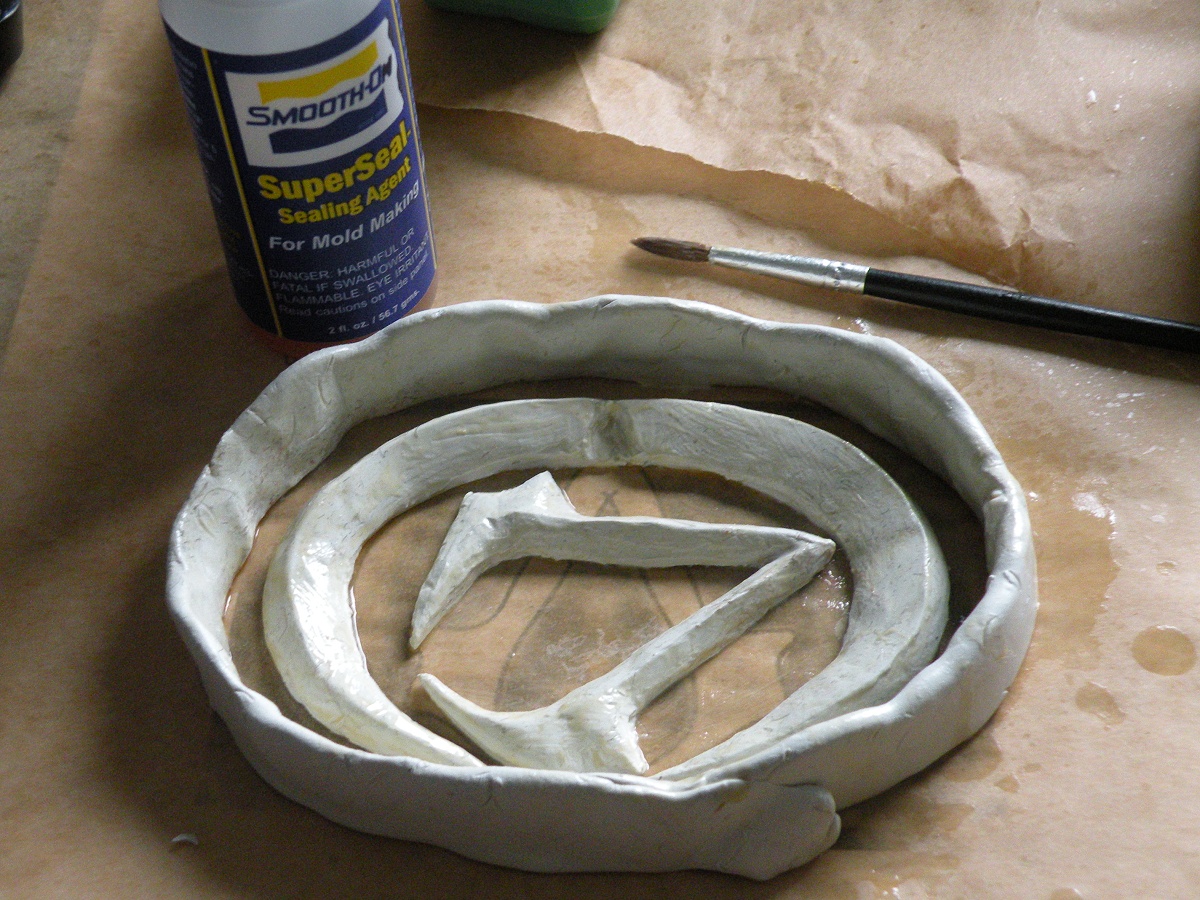
| Now, since I’m working with clay (which can and usually does contain traces of sulphur, which would spoil the casting silicone!), I then added several layers of a sealing agent to keep the clay from getting into actual contact with the silicone.I am using Smooth-On’s „SuperSeal“ to do this.This is a really important step. IF the clay keeps the silicone from reacting (or inhibiting), the silicone won’t cure and remain sticky; which is something you really don’t want.The sealing agent can be washed away with water. So it’s safe to use on any kind of material that can be washed.
It is also very useful when working with plaster models to seal that rather porous surface. |
 |
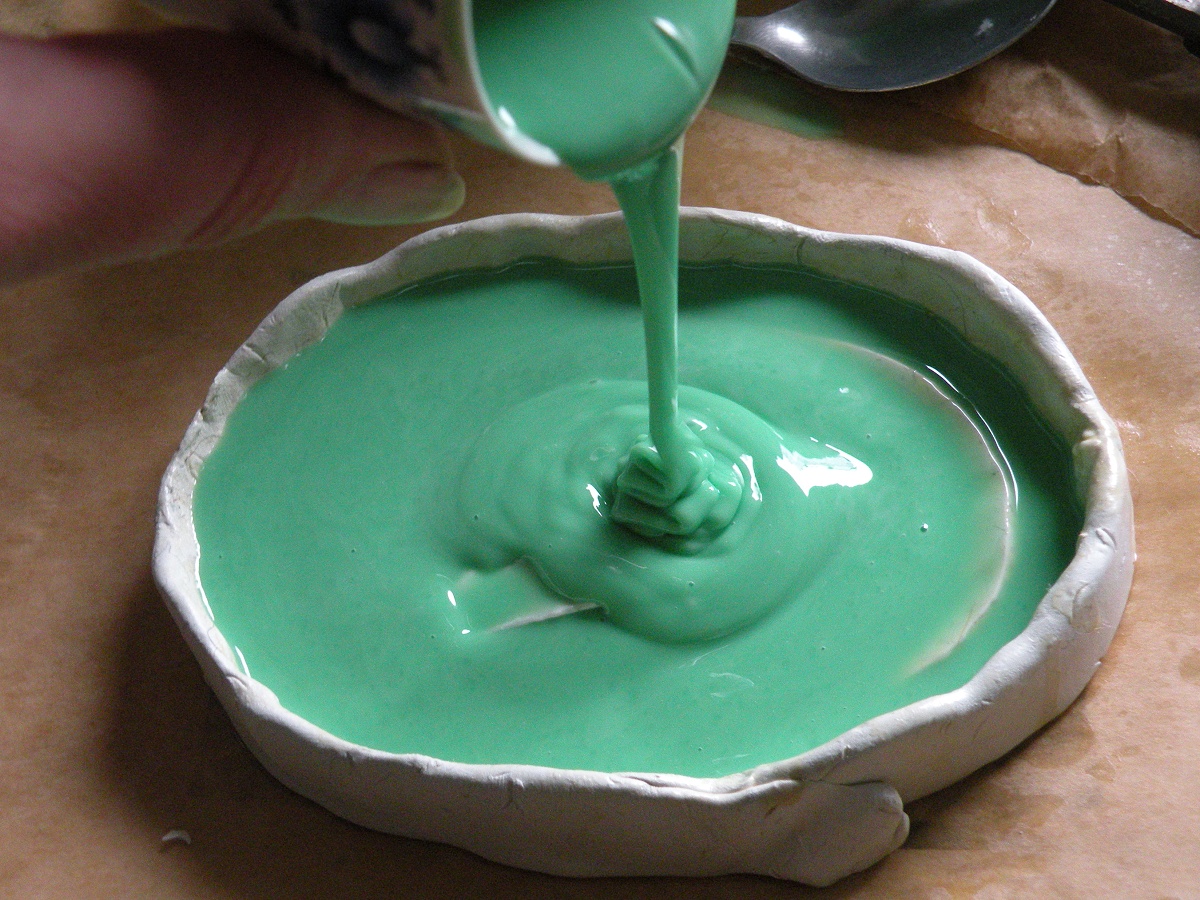 |
I then mixed the two parts of my molding silicone and poured it into the oval shape.For creating a casting mold you definitely DON’T want to use „bathroom“ or „household“ silicone but PROPER molding silicone – for example, one of the mold-making silicones by Smooth-On.Personally I am using a German brand called „Mobasil“. |
| The silicone I am using has a pot life (that’s how long you can work with it!) of about eight minutes, and cures (hardens) within 30 minutes.After that, you can peel if off the clay (or other) model.Note that if you used clay (or any other soft, shapeable model making material), it is quite possible that this original model can and will be destroyed in that process. | 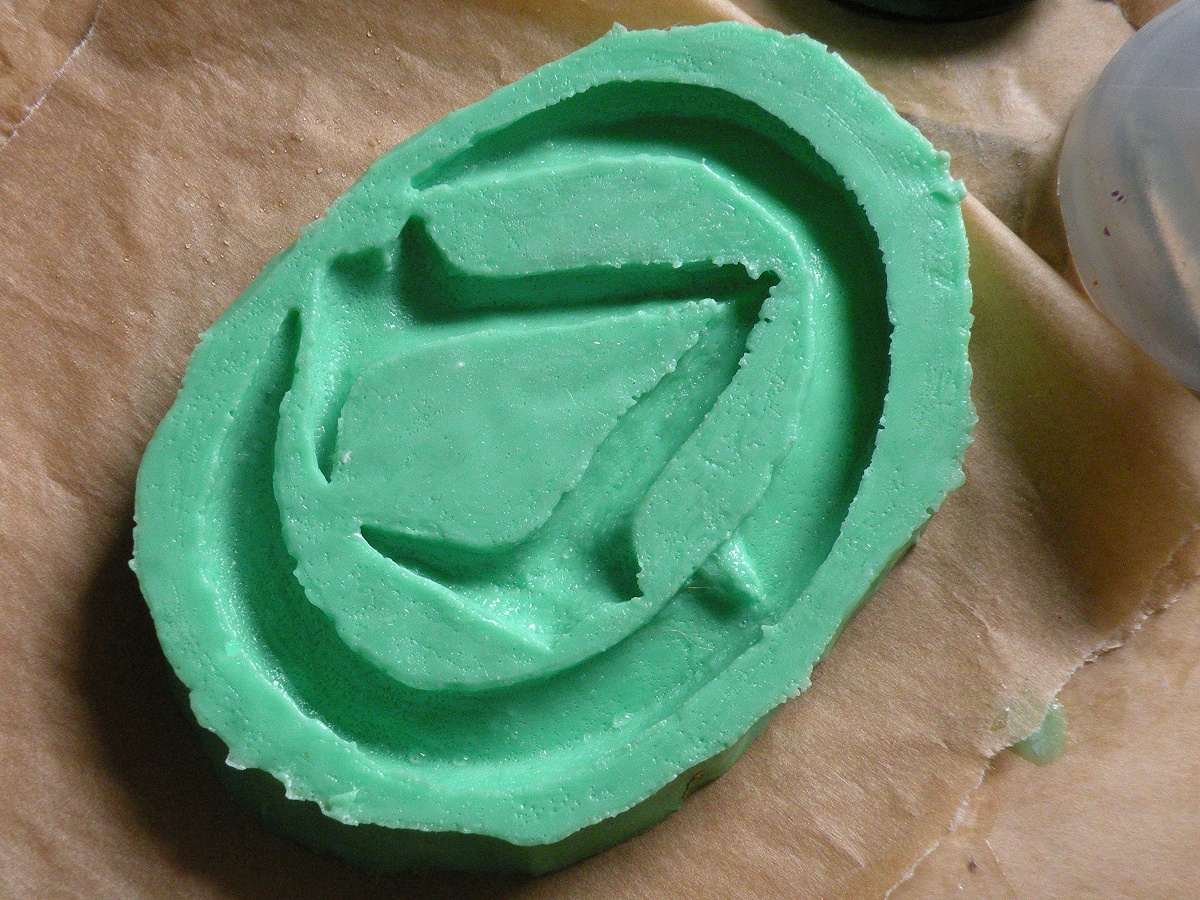 |
After that, I put my finished silicone mold into the baking oven at 100°C for approximately 30 minutes, to re-harden it.
This also helps curing some maybe still sticky silicone which MAYBE, despite the sealing agent, still got into contact with the clay.
After that, you should have a hardened, flexible silicone mold which you can use for casting resins.
Cold casting metal
For this you will need:
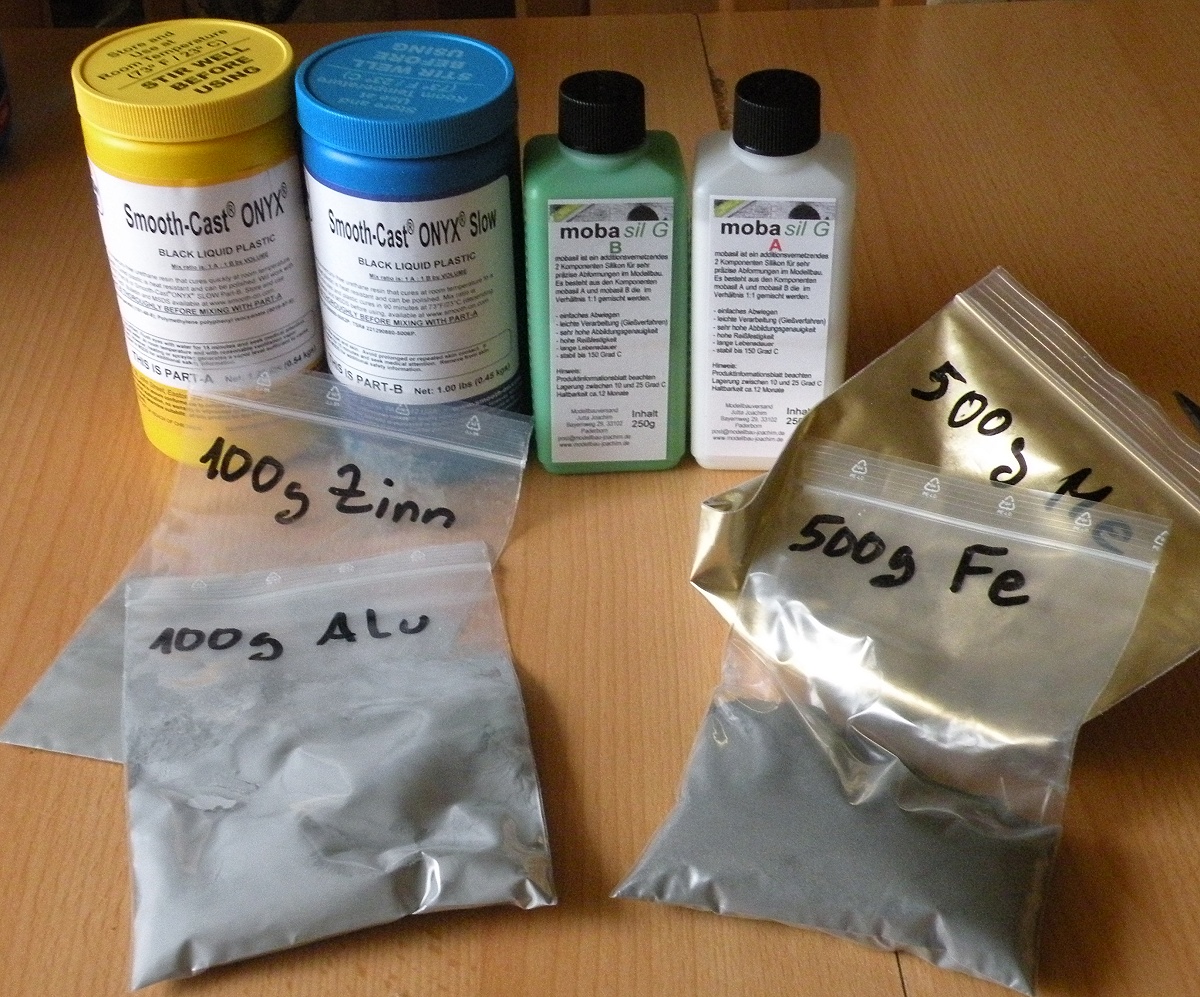
- Various atomized metal powders
I use aluminum, pewter / tin, iron and brass powder (which are shown in this picture) but also have bronze and copper powders.
Which powder you want to use really depends on the metal color you want to achieve; aluminum and tin will result in silver colors; if you need the item to rust a bit (or have more weight) add iron, for a gold tone add brass, same for bronze and copper.
You can also mix those powders to achieve an „in between“ effect for the colors.
They all should just have one thing in common and that is to have a mesh size of 200 to 325 or a size of 74 to 44 microns (µm).
This indicates how fine the powder is. Too coarse powder won’t give a nice metal result, too fine powder will basically just „swim“ on the polyurethane resin.
If the seller of your metal powders can’t tell the mesh or micron size… look for a different powder (and seller!).
Note that „makeup powders or pigments“ will NOT work at all.
Grounding your own metal powder isn’t exactly a good idea either, because seriously… a normal person is NOT able to atomize metal to that extend. - Polyurethane resin (and maybe polyurethane resin dye / tint)
I am using Smooth-On’s „SmoothCast Onyx“, which is already dyed black.
But of course you can use any kind of polyurethane resin and (appropriate!) black or brown dye / tint for that resin.
Note that common inks and / or paints do NOT work to colorize the resin; it has to be special polyurethane dye / tint – find a selection here for example. - Your silicone mold (represented in the picture above as the two bottles which contain the two parts of my Mobasil molding silicone 😉 ).
 |
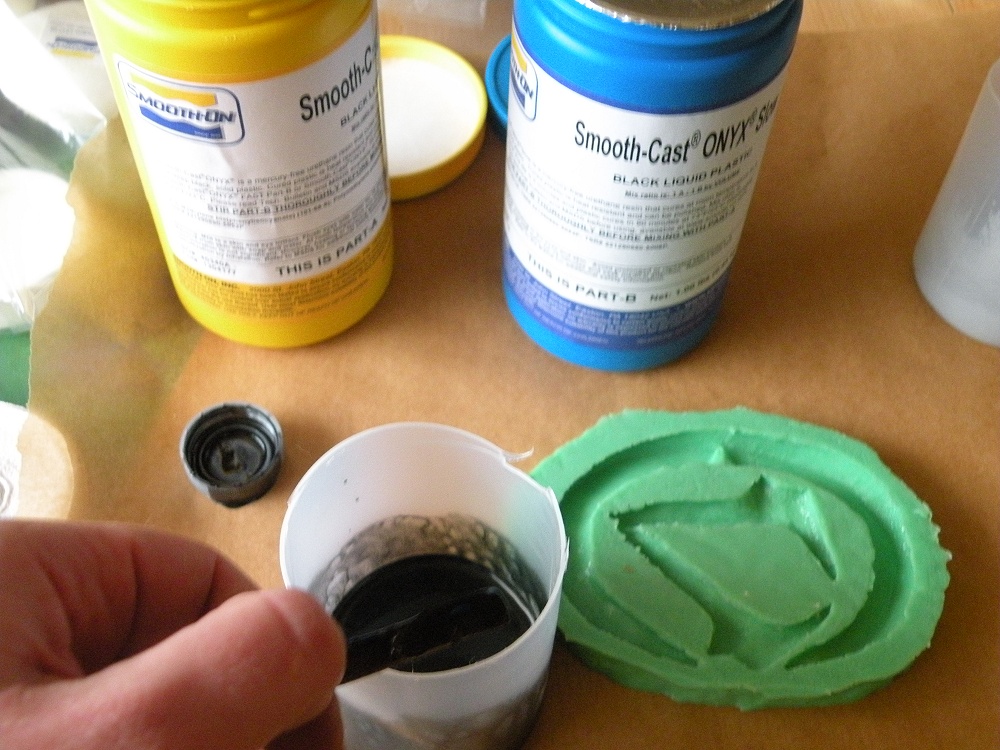
Blend your metal powders.You will need an amount that equals half of the resin amount. Since most PU resin components mix at a 1:1 ratio, that basically means that you will need as much resin as you need hardener as you need metal powder, volume- (not weight!) wise.Please do be careful when working with the metal powders. They dust (and are airbourne!) quickly. Do not inhale them. It’s safer to wear a mask while blending them together because seriously, you do NOT want metal powder of any kind in your lungs.In this picture I have blended 1 part pewter with 1 part aluminum and 1 part iron powders. That mixture results in a very old iron look. |
| In a different cup, now blend the two components of the polyurethane resin together.Blend them for at LEAST 20 seconds. The more thoroughly you blend them, the better your result.Keep in mind though that the resin only has a pot life of a few minutes. So you still have to work quickly. |
 |
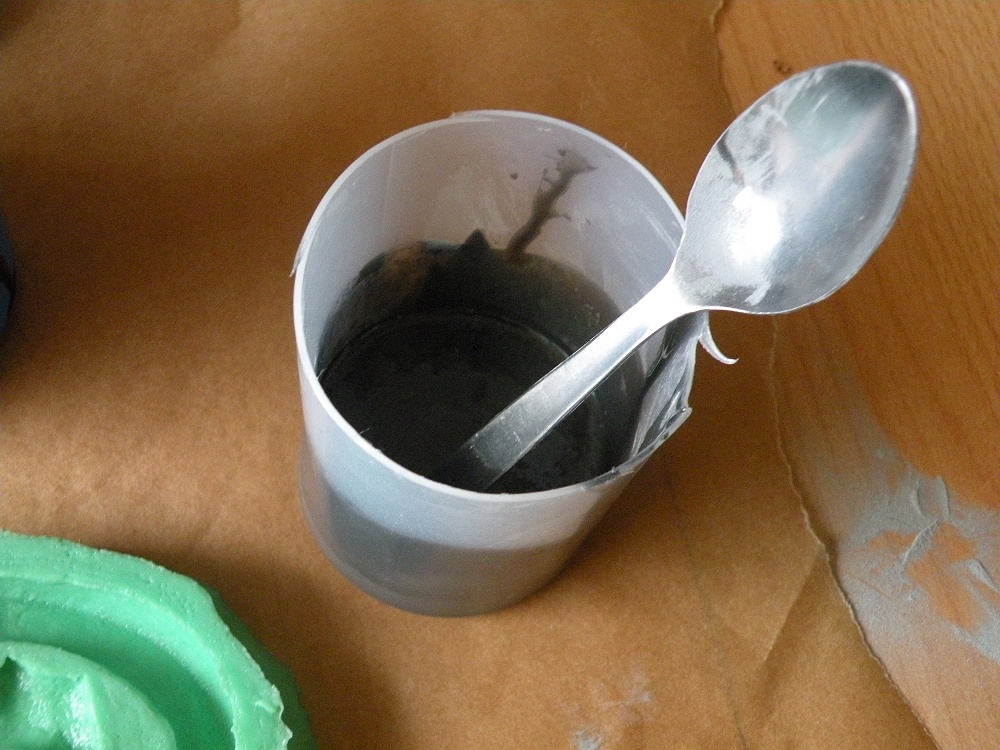 |
Add the metal powder to the resin. Stir it in slowly, but constantly keep stirring.This should be done for another 30 seconds or so.Scrape along the bottom of your cup while doing it to catch clumps of powder that got stuck there. |
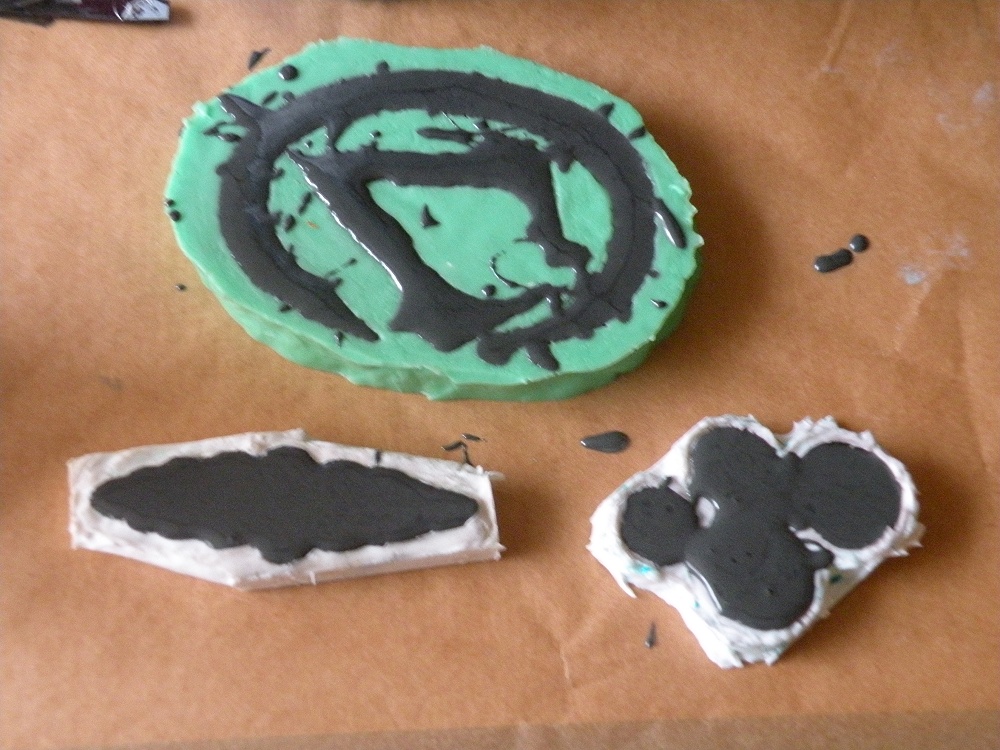
| Pour the resin into the mold.Keep stirring while doing so – one hand holds / tilts the cup, the other is stirring.Even with practice, a bit of a mess is unavoidable when doing this, which is why my workspace is laid out with either baking paper or plastic.
Since I miscalculated the amount of resin required (I only calculated for the RESIN part but not for the added METAL powder!), I also filled two of my other molds (of Amidala’s final Senate gown brooches as well as Connor’s buttons!) with the resin just to not waste it. |
 |
 |
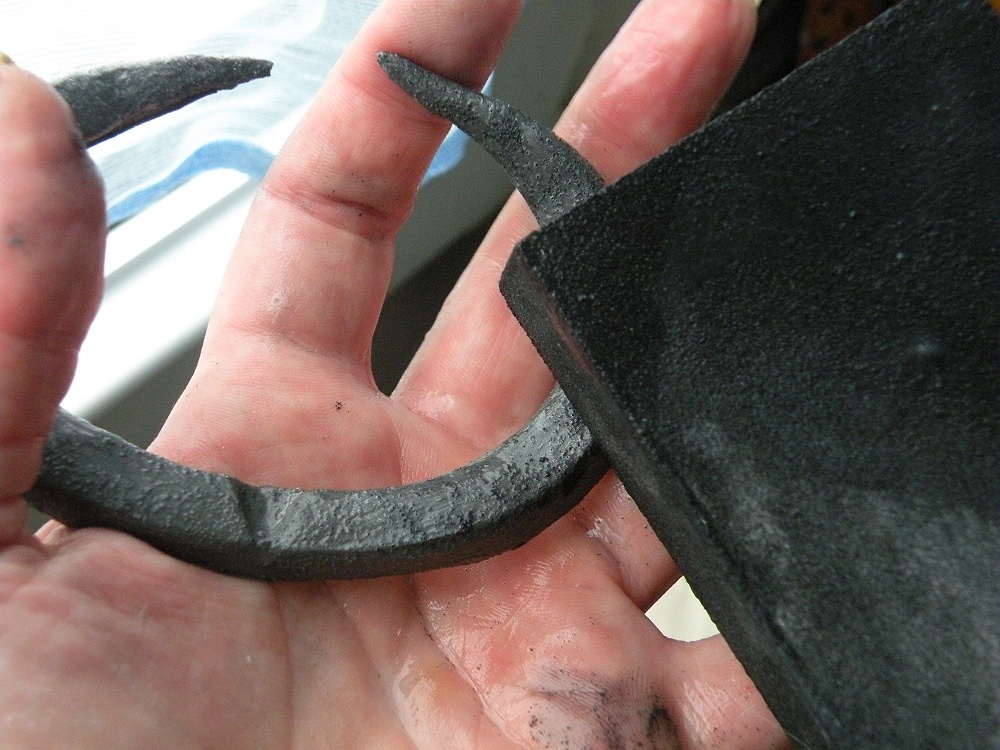
Approximately 90 minutes later, you can pry the cast buckle parts from the silicone mold. |
| This is what you get – the cast buckle parts, with the messy stuff still attached to it. | 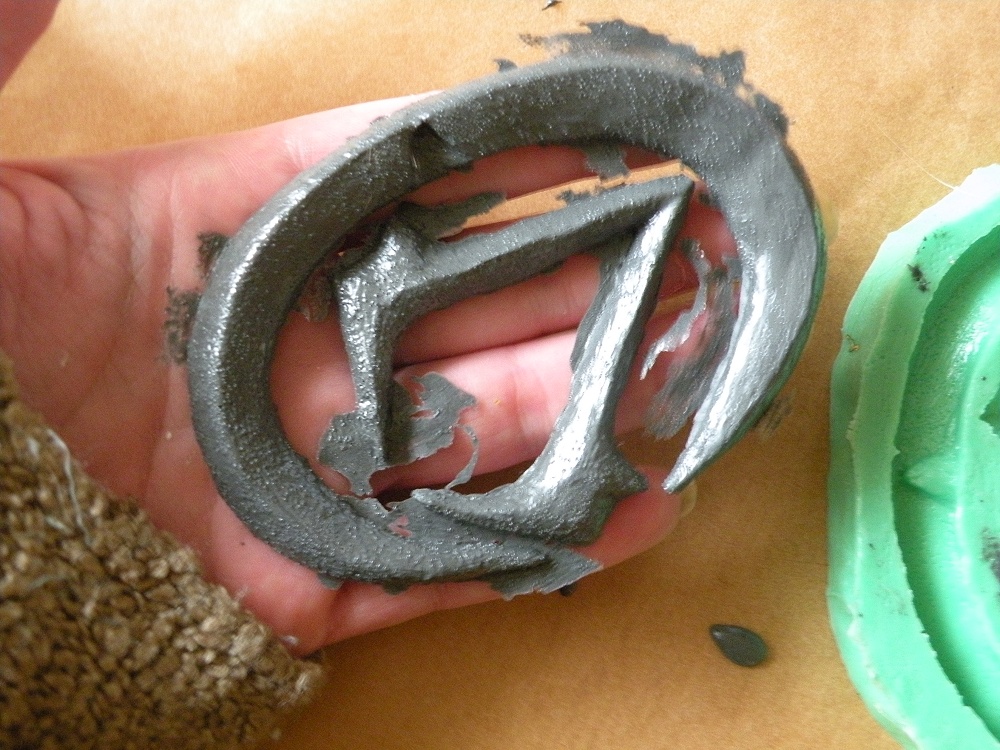 |
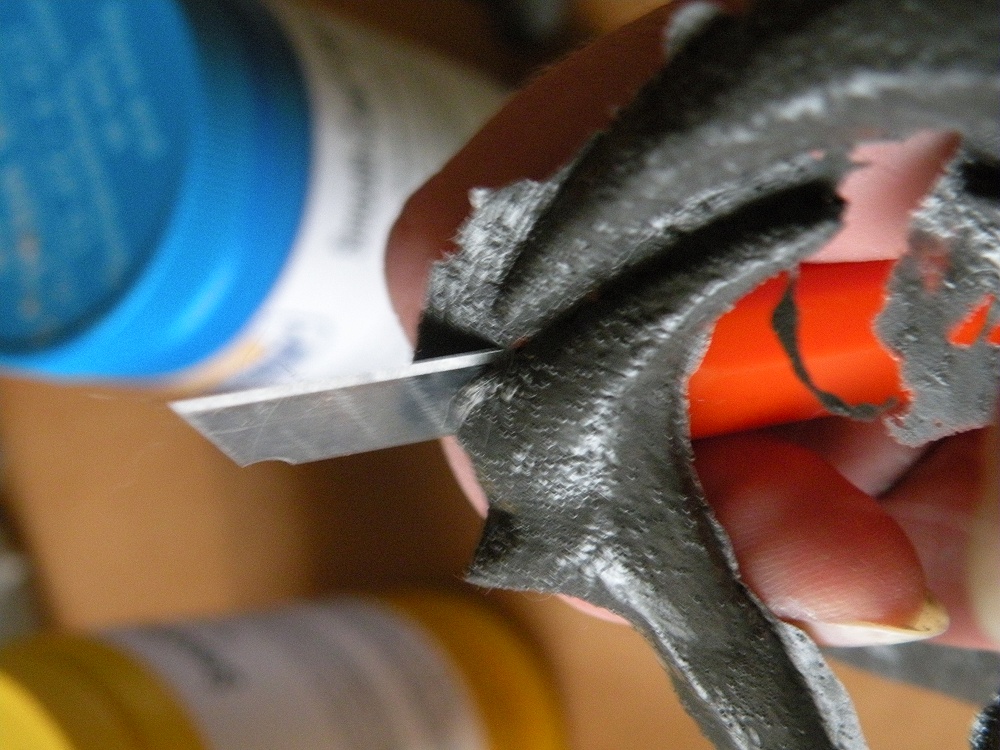 |
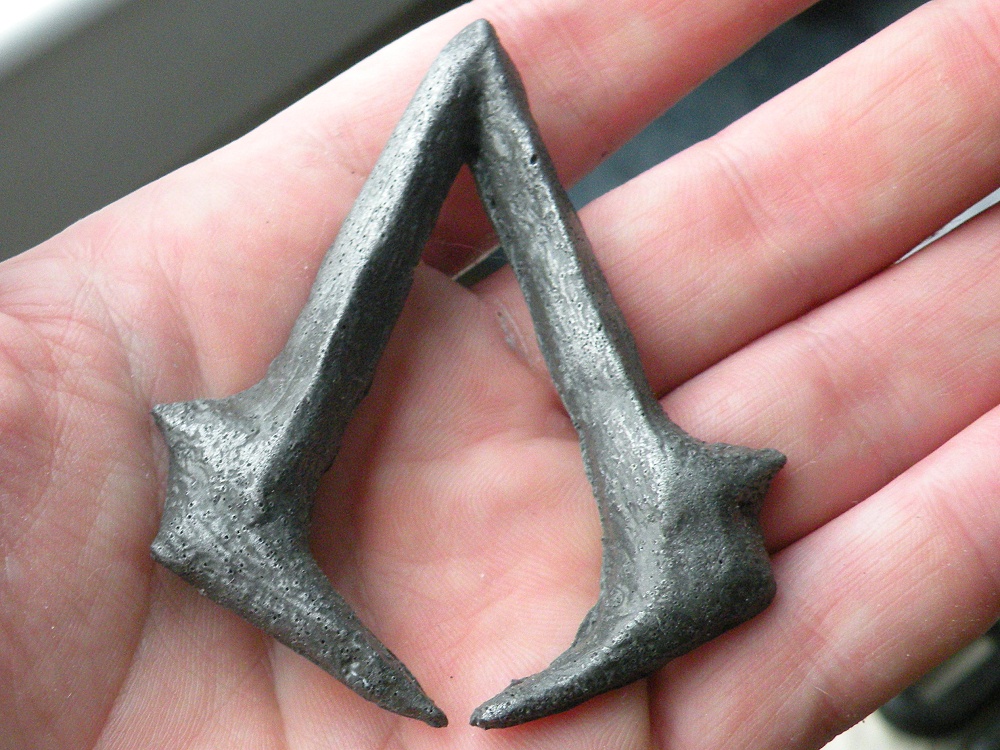
Use a sharp knife to cut the messy parts away. |
| This is what the cleaned up buckle looks like.As you can see it looks more like grey plastic; nothing like metal at this point. | 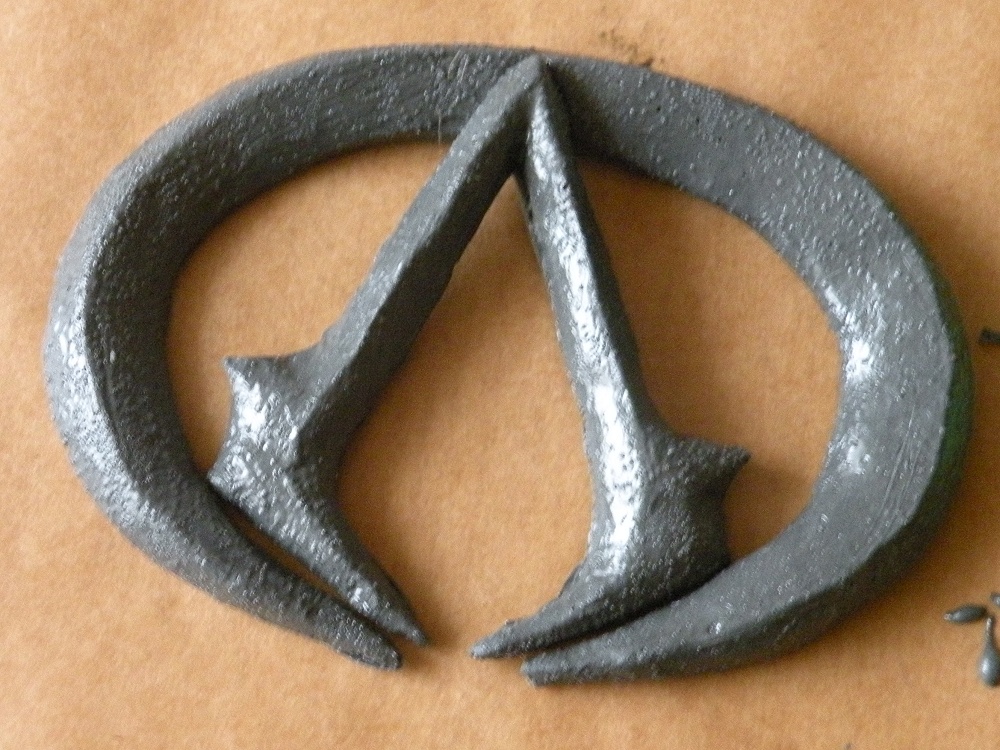 |
 |
You then use anything that is abrasive – from sanding pads… |
| …to steel wool, to any other kind of polishing surface – to polish and smooth what you’ve cast.This process removes the outer layer of the black resin and reveals the metal powder pieces, which, in return, will appear as a shiny metal surface. | 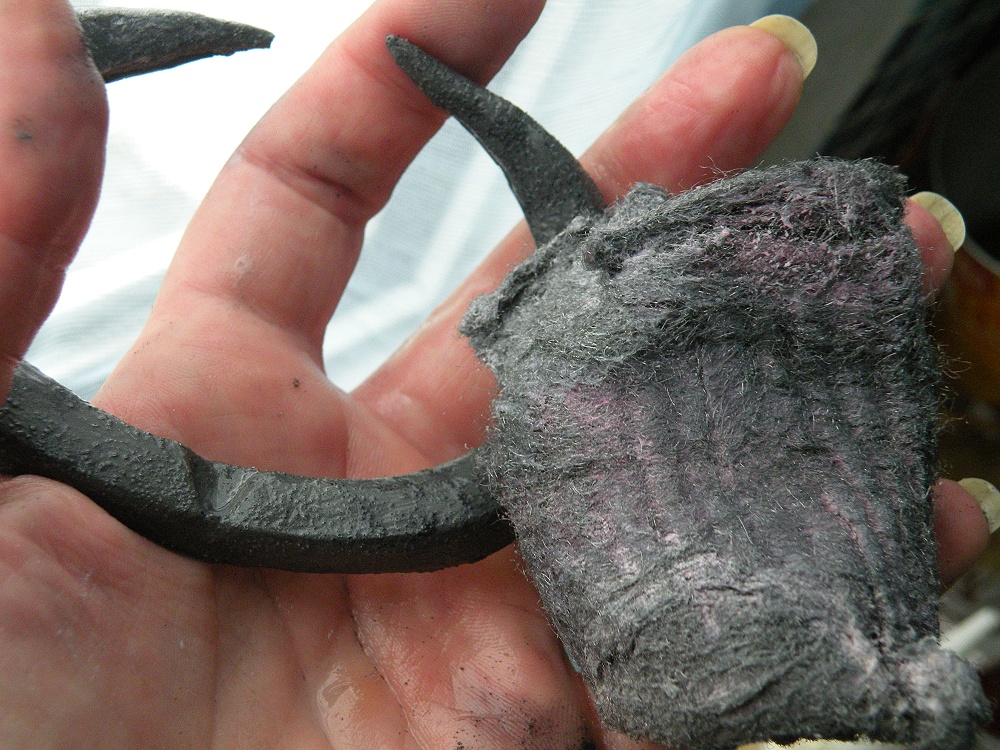 |
 |
Afterwards, clean the cast piece with water, then acetone.Just THEN you will have a „metal“ looking surface. In this case I was going for a „very old iron“ look, which I achieved rather well, if I may say that.
By adding less iron to the mix, I would have achieved a way more silvery, „new“ surface. |
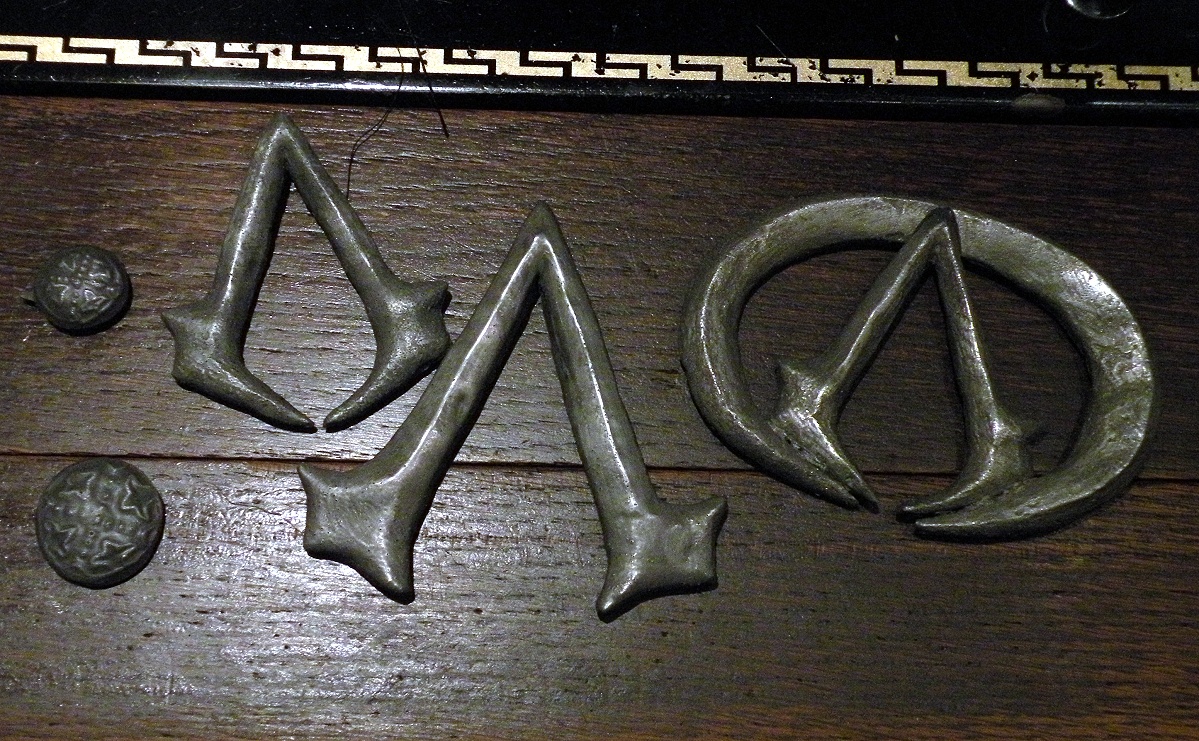 |
Here are some items which I cast with various blends of tin / aluminum / iron powders just to give you an idea. |
Possible problems:
|
|
If you have any questions, please do not hesitate to ask 🙂
| Navigation for this part of the page: |
|
[catlist categorypage=yes] |
Hello
Here in Turkiye Istanbul we do castings but we are new to cold metal casting
We tried to find metal powders here for casting but sellers always ask for the micron size and I really do not know what iy should be
Would you mind please helping us for this
What should we buy and is it possible to mix 2 different metal powders in polyester resin ? Or should we exactly use polyurethane ?
Best regards
Hello,
Can you tell me where you ordered your iron powder from? I’m having trouble finding a supplier
Thanks!
I am buying mine in Germany where I live, so that probably won’t help you.
Smooth-On, from which you should also get your Polyurethane resin, as described in this tutorial, has that kind of metal powder. Granted, they do not have iron, but still.
If you google „iron powder cold cast“, you will find suppliers for iron powder.
Hope that helps!