– Edited to add:
During to a flood that hit my house, the fabrics and partially completed costume parts were destroyed.
So until I decide to actually redo everything with new fabrics, the pages for this gown only serve as a documentation and memory of what I made; not as a dress diary.
The slashed skirt in the portrait is special in a certain kind of way:
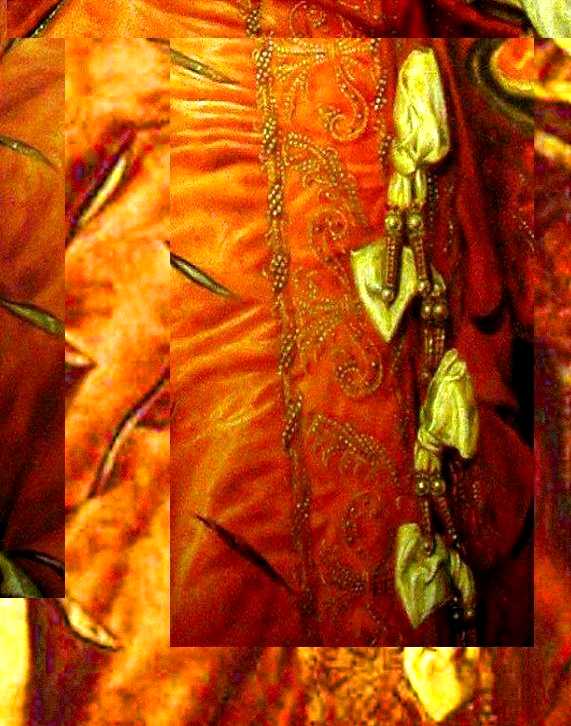

Non-pleated waistline of the portrait gown
…it shows absolutely *no* pleats on the waistline at the front.
This *is* definitely most unusual – an Elizabethan skirt was either cartridge pleated or had some kind of box- or knife pleating.
However, the back of the skirt is fanning out towards the back, which means that there has to be some kind of gathering or pleating at the back.
I have decided to make up the front skirt with side gores. This will make sure that this skirt will still fit over my farthingale, but will not make any pleating necessary.
As all variations of skirt in Margo’s patterns base on a pleated front, again, I had to come up with my own. Here it is:
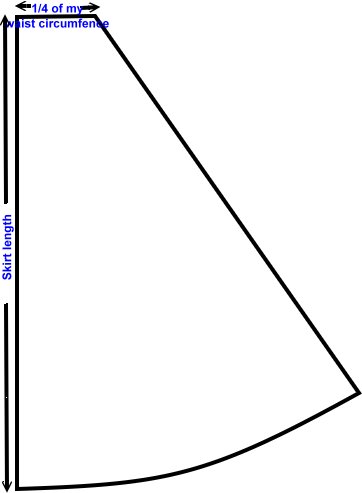
Pattern for one half of the front skirt
…directly derived from Alcega’s pattern book.
I know that historically I would have had to sew the skirt front indeed with a sewn gore – but the breadth of my fabric allows me to cut each half of the front as one piece; and so I’ll do just that. (The painter didn’t bother painting a seam to the skirt in the original portrait, too – right…?)
For the back pattern piece, I think I’ll use one single breadth of fabric and cartridge pleat it. This will also make sure that the side gore, which is practically cut on the bias, will not stretch downwards – as it is sewn to the selvage edge of the back pattern piece, it is prevented from stretching.
I could use something from Alcega’s pattern book for the back, though; but I don’t want any train on my skirt – trains make me nervous, people like to step on them, which can result in a disaster if it happens in a moment when I’m just about to move forward.
For the slashes in the skirt, I have made a template of cardboard. Looks like this (*LARGE*! That’s the original size!)…:

… and I first printed that template (size: about 30x30cm / 12×12 inches) on tiled papers, then I transferred it to the cardboard, cut the slashes out from that cardboard – and, Voilà, I had a perfect template to first trace the slashes with self-disappearing marker (vanishes after some hours) on the skirt pattern pieces absolutely evenly.
Afterwards, I again traced the shapes of the slashes – this time on the fabric – with a line of rhinestone glue, to prevent the edges from fraying.
As I have said when studying the gown, the original slashes are presumably also sealed – but with wax. Well, Rhinestone glue is more reliable, I guess; it’s most certainly more durable *and* it also prevents the fabric from fraying, *plus* it’s much easier to apply.
After the rhinestone glue had dried, I first attached all pattern pieces to each other by sewing them.
I also made a lining for the skirt from black wool, which I still have in a considerable amount, and *carefully* practically glued the satin fabric in the places where the slashes will once be to the wool lining. This was done to prevent the wool lining from detaching itself from the satin; something likely must have been done on the original skirt, where you can not only see the darker edge of the wax sealed satin, but also something beneath it which is also cut – and darker.

And after *that* glue had finally dried, I cut the slashes open by the means of an X-acto knife. Voilà – slashed skirt pieces 🙂
The rather heavy wool lining also has another advantage: the skirt will drape very nicely with it – the acetate taffeta is rather light and I wouldn’t have achieved a nice look with it for the large pattern pieces of the skirt.