Cersei’s coronation gown
– finished –
The fabrics
Tywin Lannister’s jacket uses exactly the same lasered dot/teardrop leather as Cersei’s coronation gown.
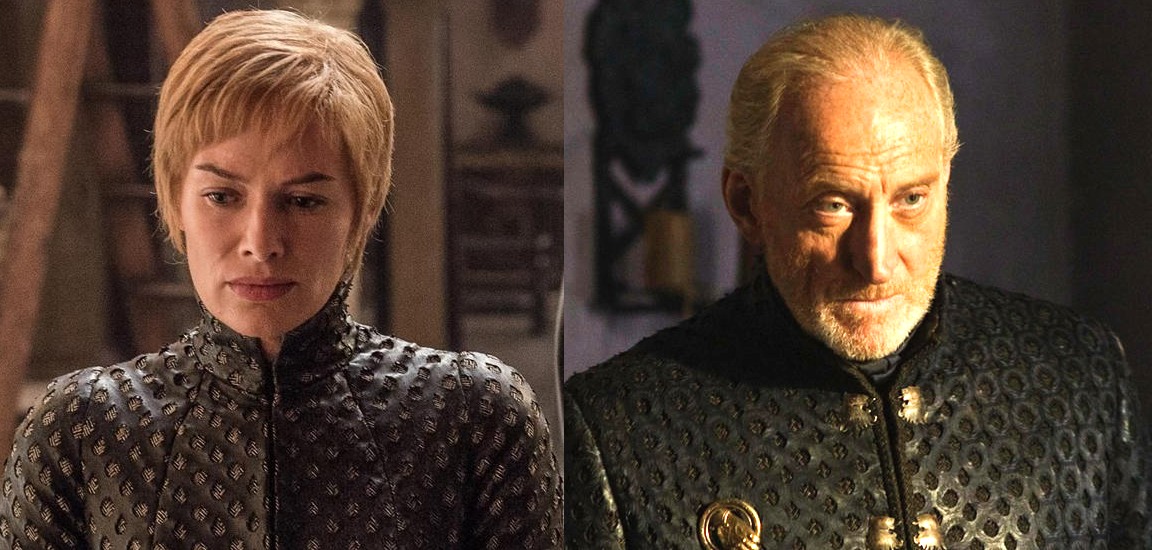
…like father, like daughter.
Now – it would be simple but tedious to either cut or punch those dots and holes into artificial or real leather. However, I found a similar PU leather with the lasered dot and teardrop pattern on Etsy. Note that this lasered pattern isn’t exactly accurate, it’s just similar.
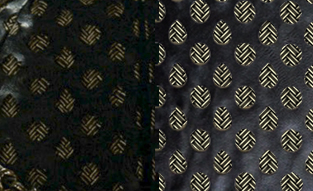
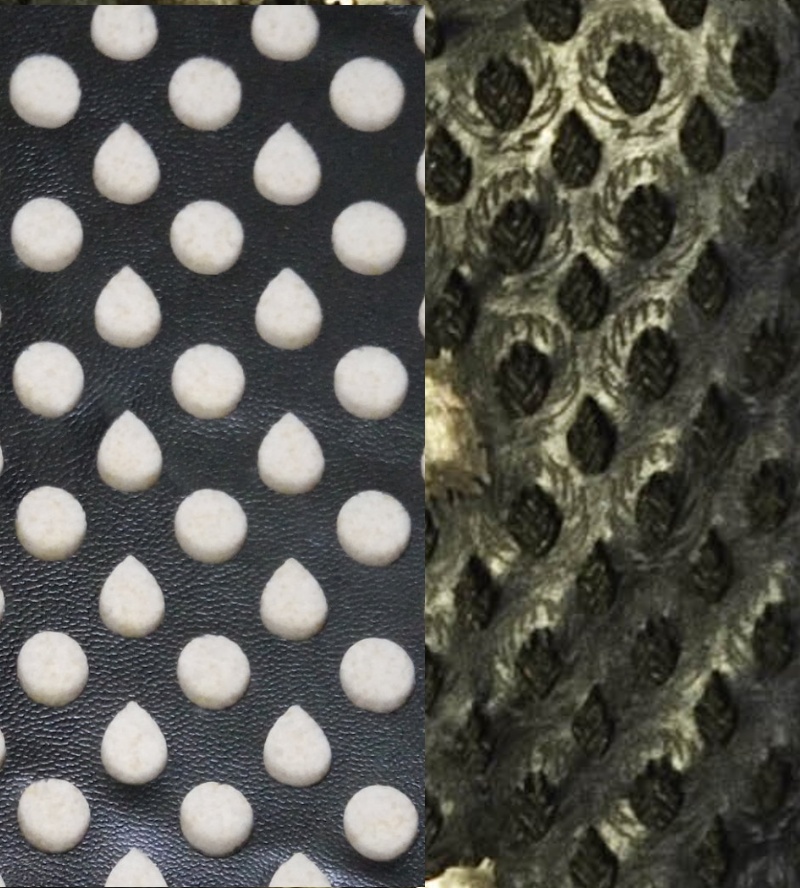 The original lasered pattern (right) has jagged edges around the dots/teardrops, opposed to the Etsy pattern, which has smooth dots and teardrops.
There’s also some kind of ‚laurel crown‘ etching around all dots on the original laser pattern, which isn’t on the Etsy fabric.
Still, it’s a nice starting point.
When creating the dress pattern (read below) and using the proportional method of enlarging it as described on my page how I made Emperor Palpatine’s robe for my father, I ran into the problem that the lasered pattern on the pleather which is offered on Etsy is too small for my own height.
The pattern on Etsy has a repeat (=1 dot, 1 teardrop) of approximately 2x2cm.
However, for my own dress, I needed that pattern to be at 150% of its original size – 3x3cm, to be precise.
So I just asked the seller if it would be possible to laser the pattern larger – and it was. There, problem solved 🙂
I also developed a print pattern for what’s beneath the lasered leather.
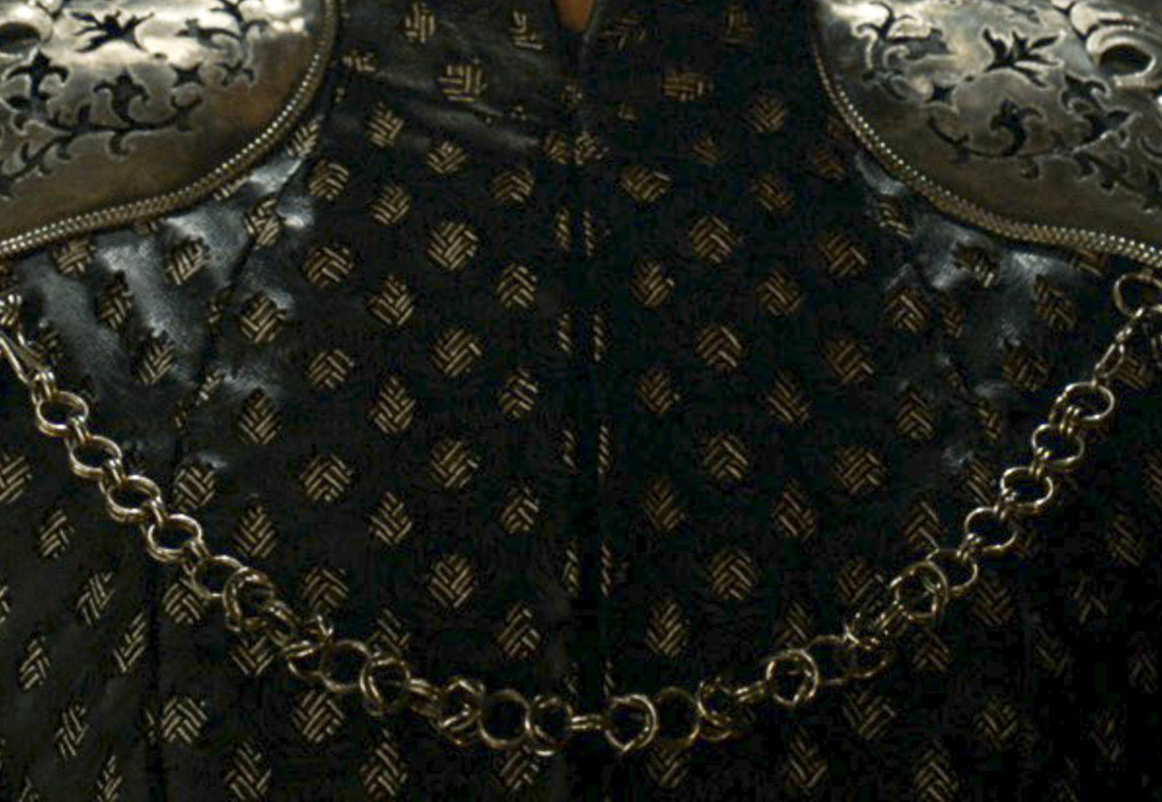
This image shows the fabric underneath the lasered leather rather well.
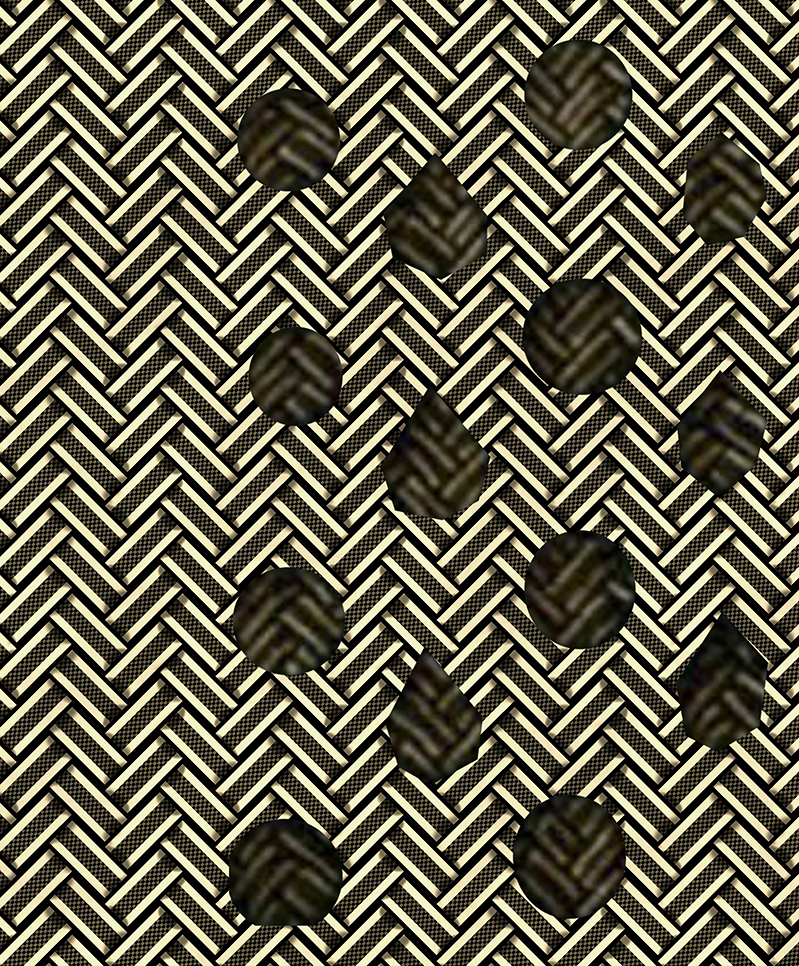
I isolated the cut-out dots and teardrops and developed the pattern of the fabric underneath from there.
Here’s what that pattern would look like if placed beneath the laser-cut leather (right); compared to the original gown (left). This is photoshopped.
Not bad, I think!
I will have that pattern printed on fabric at Spoonflower. Yeah, I know that it’s probably woven and all and must be available somewhere; but even at Spoonflower’s prices I bet the printed version will be cheaper than the original stuff; and it will still look like the original material because so little can be seen of it.
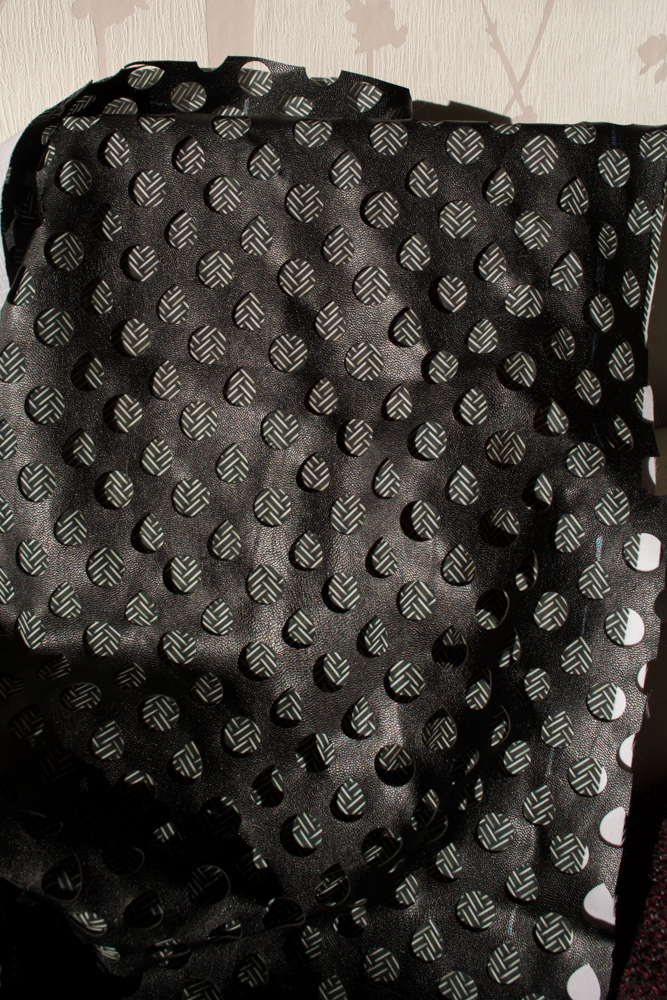
Here’s the laser-cut fabric from Etsy over my Spoonflower-printed fabric – not photoshopped, but an actual photo of both fabrics:
And here’s a direct comparison of that combination (left) to the original layers (right):
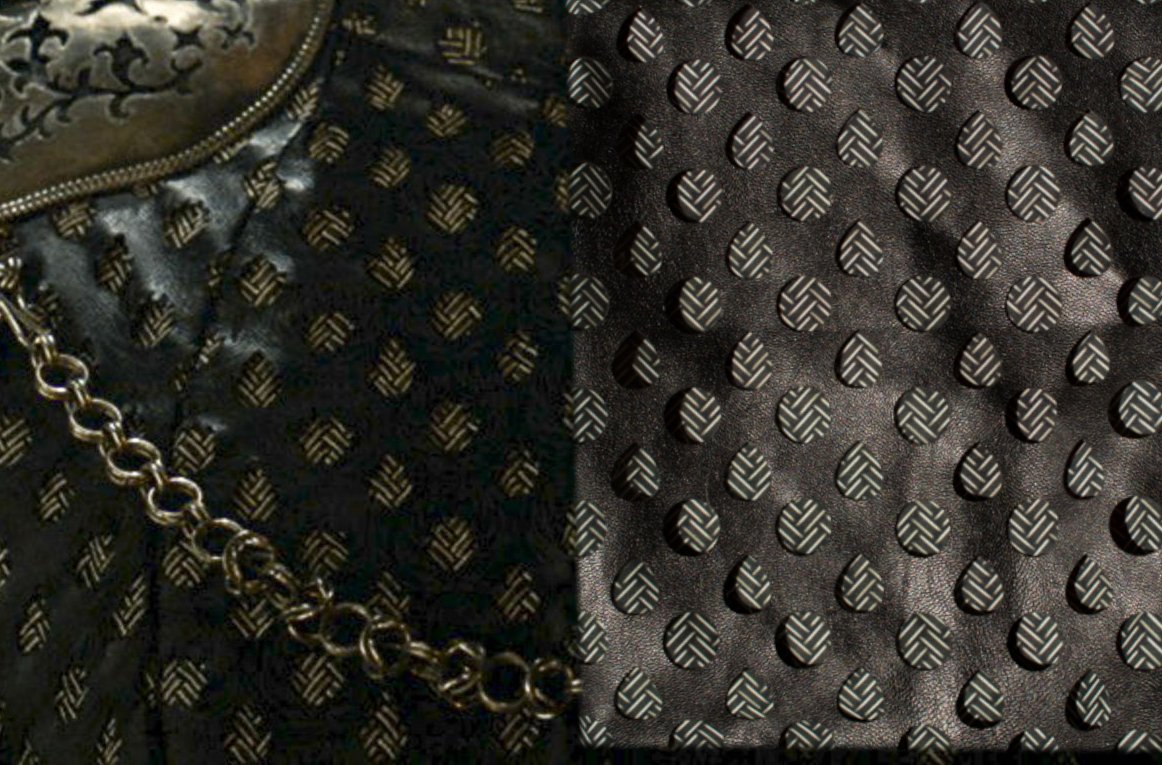
…YES! That should work. I just need another stabilizing layer of stiffer cotton beneath the lasered leather / printed background fabric layers, to make it look more rigid – which is important particularly on the skirt, but also on the bodice, where the fabric has to appear wrinkle-free.
The gown
The gown is front-split down from just below the hip; and there’s a brownish-black skirt made from rather rigid material with an undefinable pattern beneath it (which shows whenever she walks or lifts the split sides of the gown to walk up to the throne during the coronation).
Also, when Cersei is in the map room OR sits on the Iron Throne, there’s no hoop skirt worn under it; but when she’s in the dungeons or walks towards the Iron Throne, there is a hoopskirt beneath the gown.
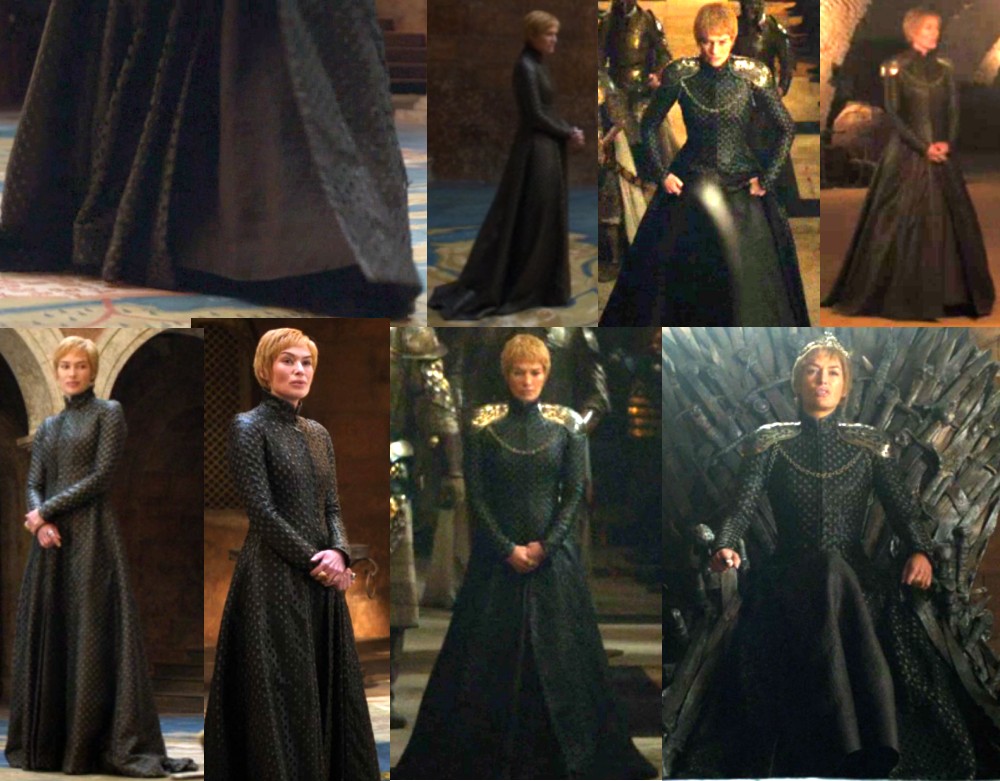
The dress has some interesting seams. For example, there’s this curved seam on the backside…

Left shows the dress as we see it in the series; right side highlights the seams.
So to create a perfect sewing pattern for the dress, I counted the dots and teardrops; carefully comparing them to dozens of promotional images and screenshots, and while doing so, I drafted the dress sewing pattern in Inkscape.
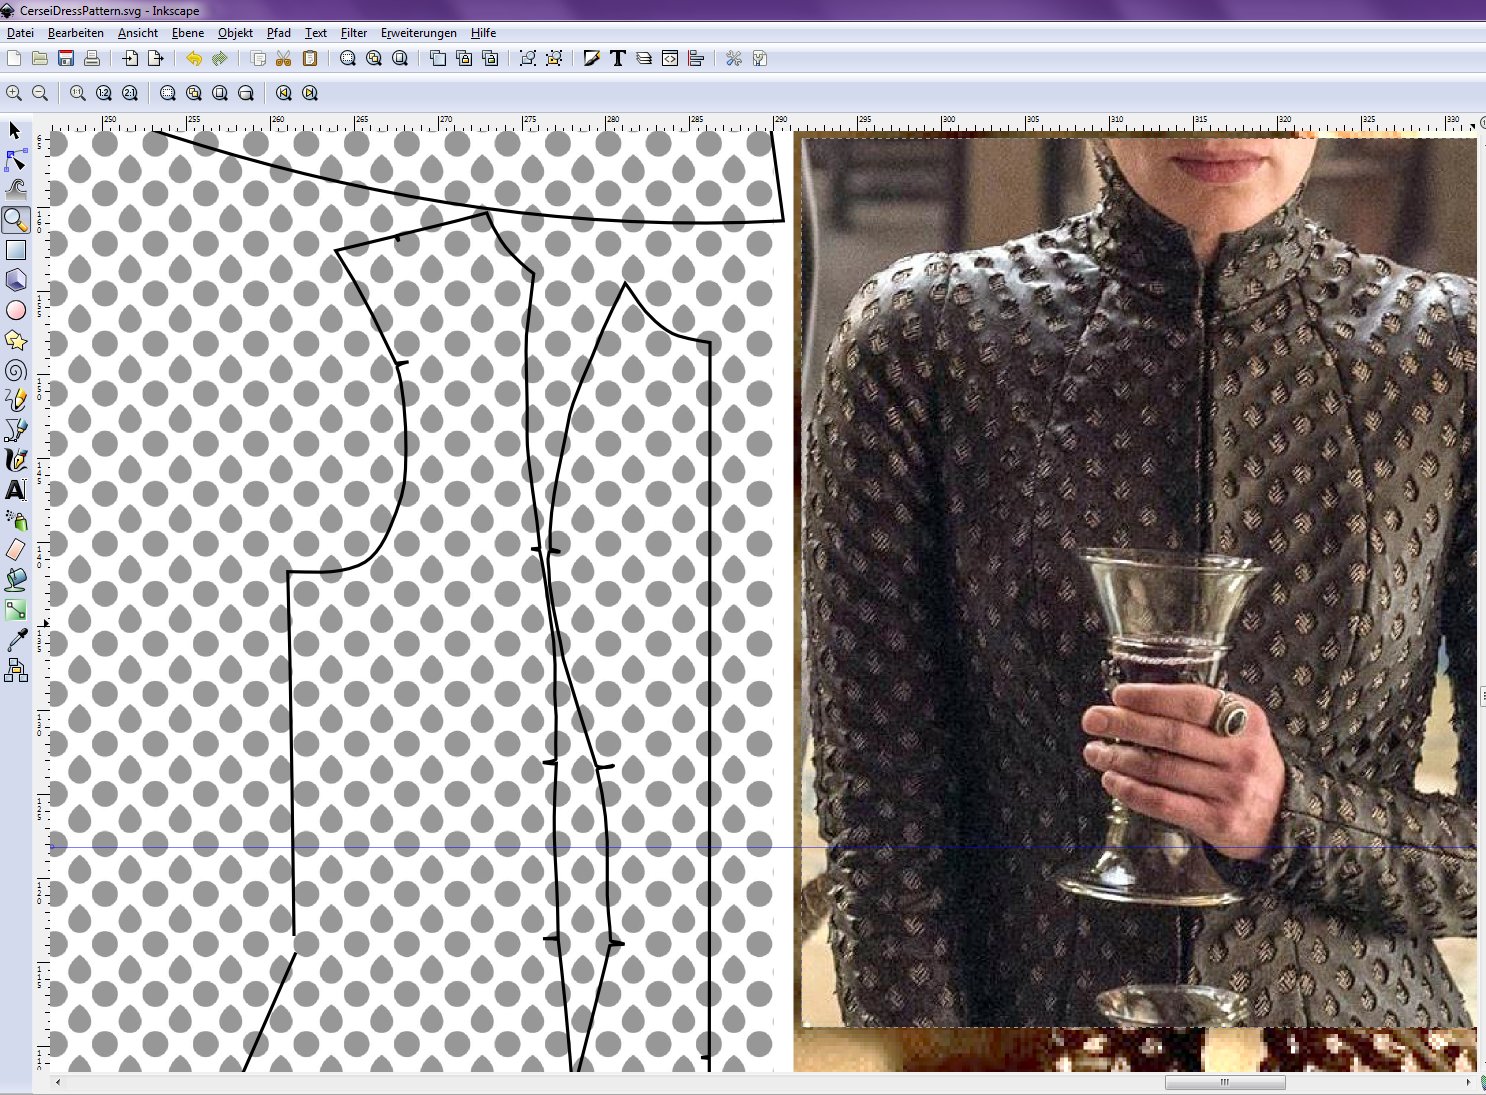
…like this.
The underarm- and side of the dress was just „guessing“. I’ll probably have to correct the pattern when I make the mockup from cheap cotton fabric (which will then serve as lining).
Here’s the complete pattern I came up with by counting as many dots/teardrops as I possibly could:

…those were a LOT of dots and teardrops to count, believe me.
Center back is on the left side, center front on the right side. Collar is between center front and side front.
Note that this is not a final sewing pattern; particularly the parts that are beneath the arms (on body and sleeves) are still subject to change until I have finished the mockup.
To make that pattern of the original dress fit my own size, I first JUST adjusted the entire pattern to fit my own height at the center front. Which means I adjusted the center front panel. which, on the original gown goes from the base of the neck to the floor, to my own height; and adjusted all other pattern pieces accordingly.
This, by the way, is where I ran into the problem of the lasered Etsy pattern not being to scale for my own height.
Of course my own body size is (very!) different from that of Lena Headley who plays Cersei; but that’s something I will have to adjust on the mockup of the gown, not on the printout of the pattern.
Cutting the laser-cut leather FIRST, then – later – using these pieces to cut the printed background fabric and the stabilizing rigid cotton layer. Particularly the laser-cut leather is difficult when cutting because it constantly shifts. And yes, I DO cut fabric on the carpet in my living room.

The crown
I decided that the best way to create a replica of the crown would be to have it 3D printed on Shapeways in „strong and flexible“ plastic, then to use leaf silver and gold to hide the fact that it’s actually just plastic. Yes, Shapeways prints metal too – but I didn’t want to shell out a four-figure amount for that crown (which would be what it would cost in metal), so I went for plastic instead.
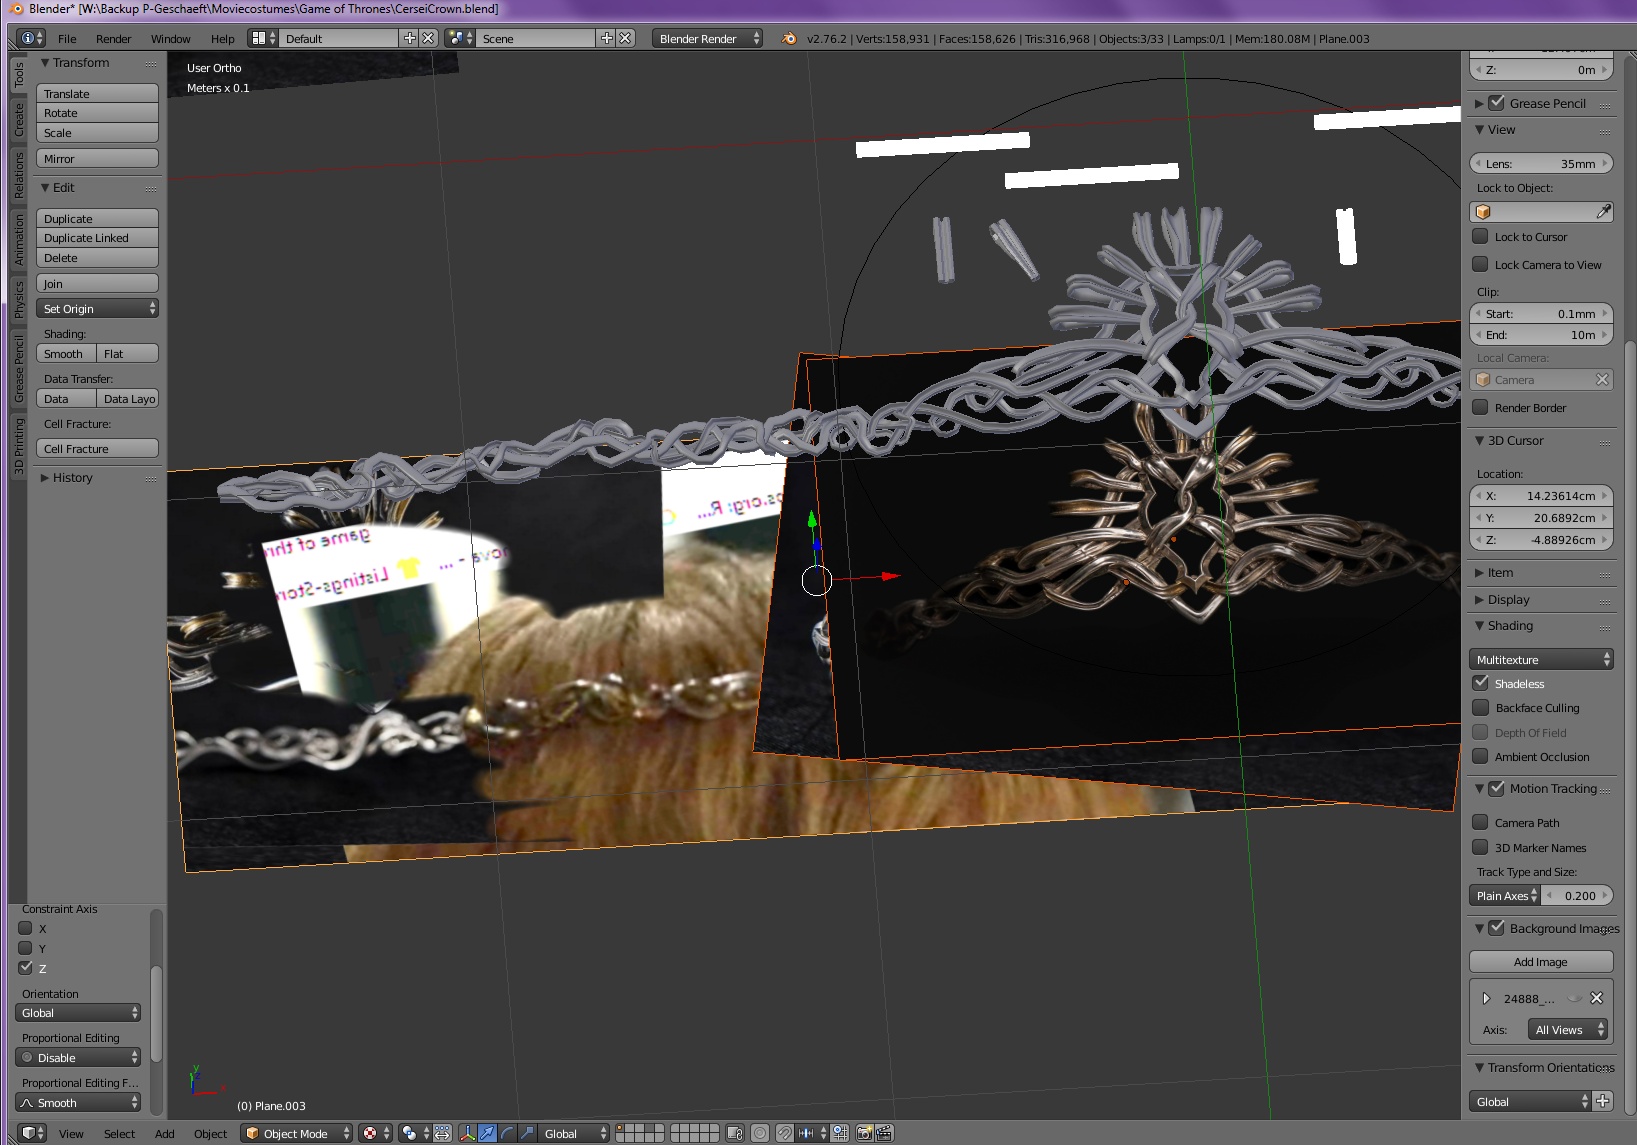
I started by developing a replica of the crown in Blender.
To do so, I first created a photoshopped image which shows the actual wraparound of the crown…
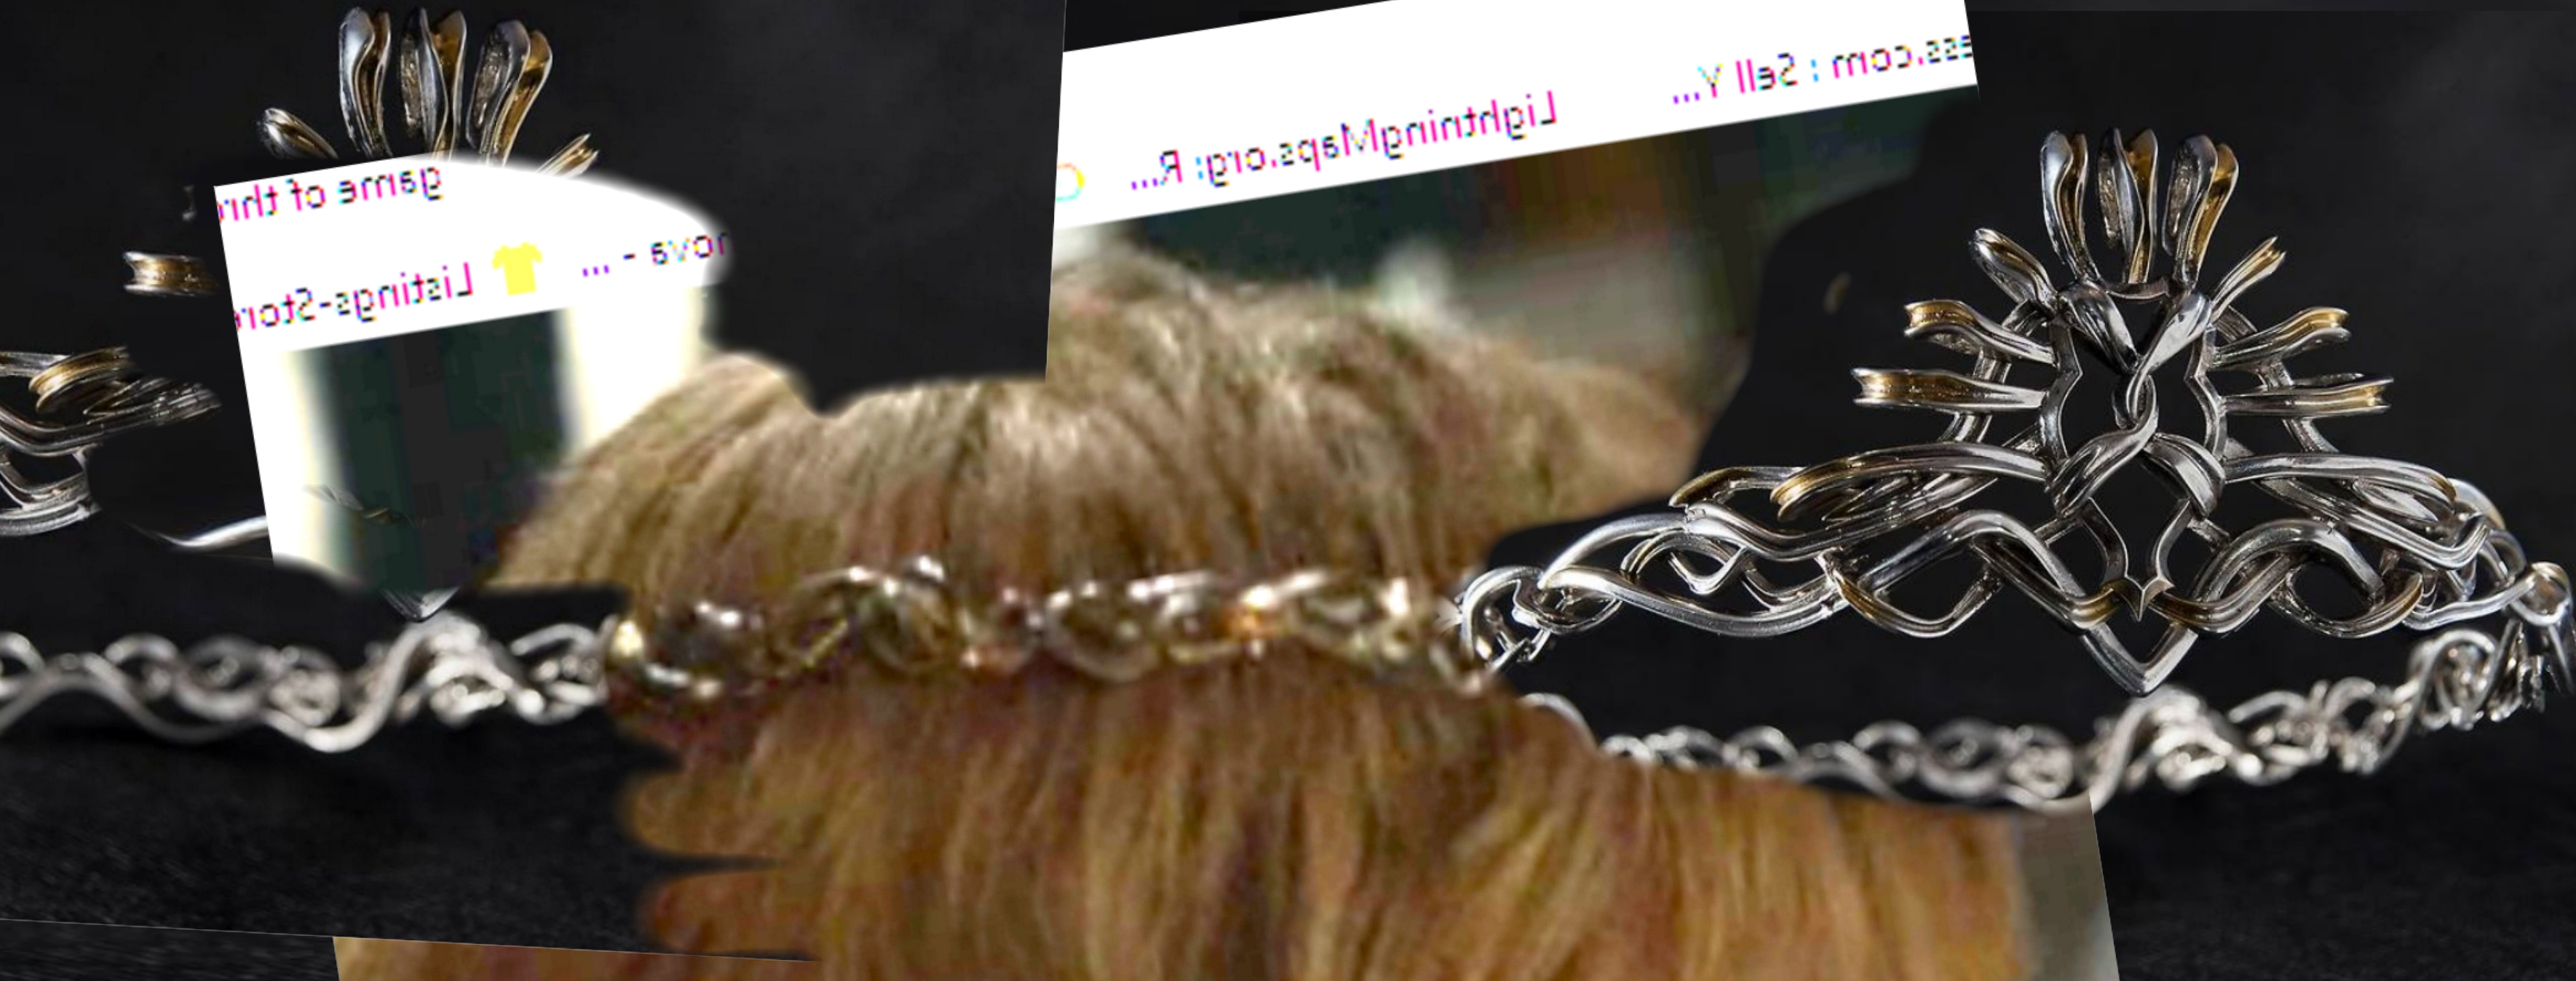
…then used this image to create the crown in Blender. The sides, of which I only have a blurred image, may not be completely accurate; and I also added some „eyelets“ at the back of the head to be able to adjust the size on my head once it’s 3D printed; but the front should be accurate.
I then used a „curve“ modifier on the finished crown object, and resized it to fit my own head plus wig. You see, I have a rather uncommon problem with Cersei’s hairdo – my hair is way, way too long for it (reaches to my hips). My own hair length would work extremely well for all of Cersei’s hairdos BEFORE the „Walk of Shame“ and her hair being cut – but for the short hair, it doesn’t work at all.
Which also means that I will have to hide a (very!) massive amount of hair under a short hair wig. This *will* make my head larger where the crown will be.
That’s why I added eyelets to the back of the crown, to be able to adjust and tie the crown over that wig.
Here’s a rendered (which means – computer-generated…) picture of the crown replica I made in Blender (top), compared to the original crown (bottom). I made several of these rendered comparisons of the object I was creating in Blender, always checking for differences to the original crown – this is the final version.
If it turns out even just HALF as nice when I have it 3D printed and leaf-gilded and silvered, I’ll be a very happy camper 🙂
I have made the model available on Shapeways.
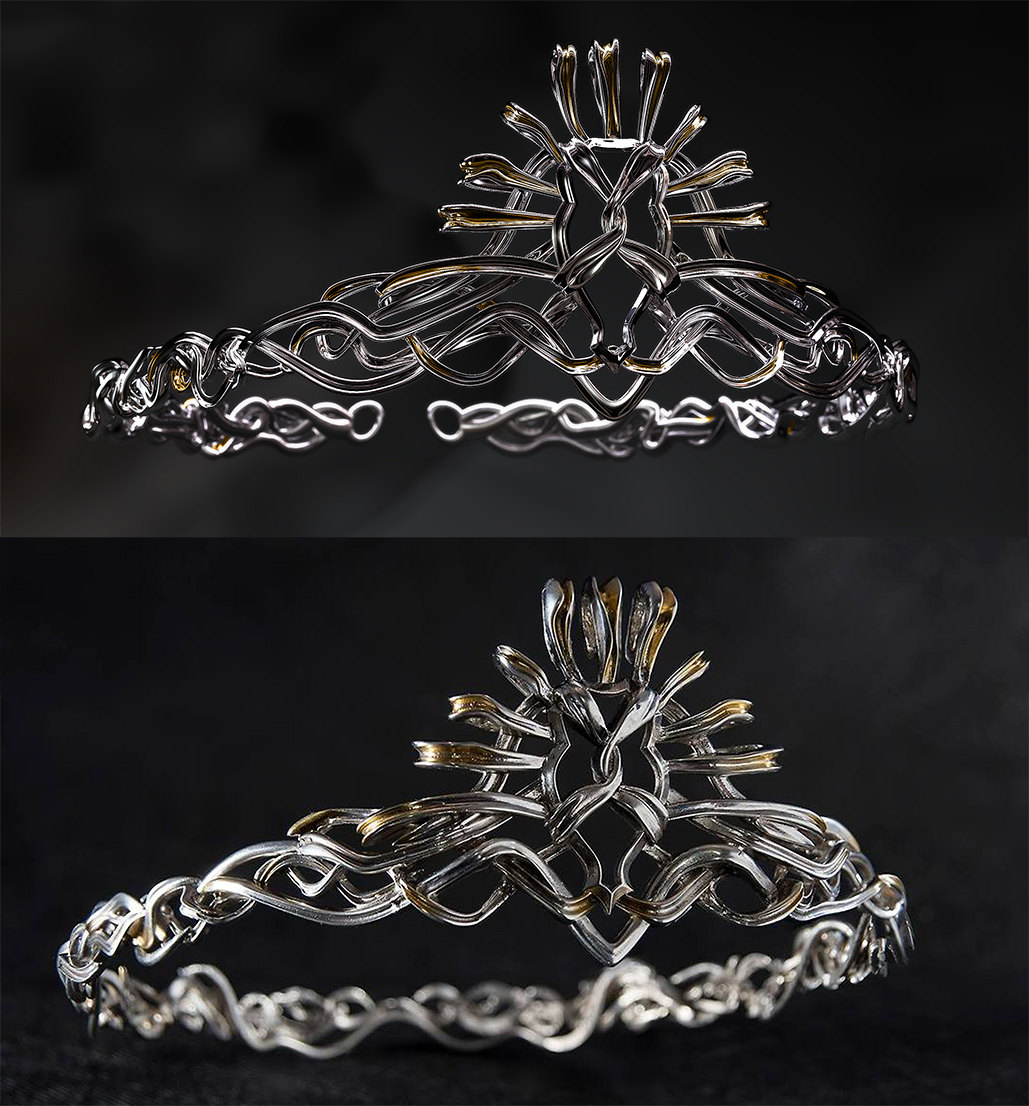
Rendered crown (top) compared to the original crown (bottom).
Here’s my 3D printed model of Cersei’s crown; right out of the box from Shapeways. I’ve had the model printed in a prototype material (HP strong and flexible in grey); so I had to wair considerably long for it.
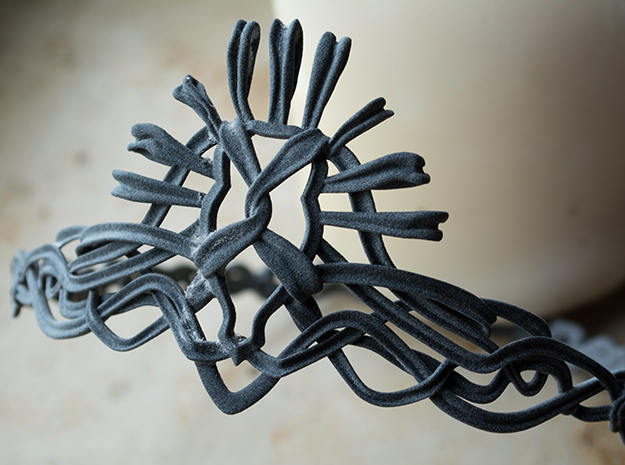
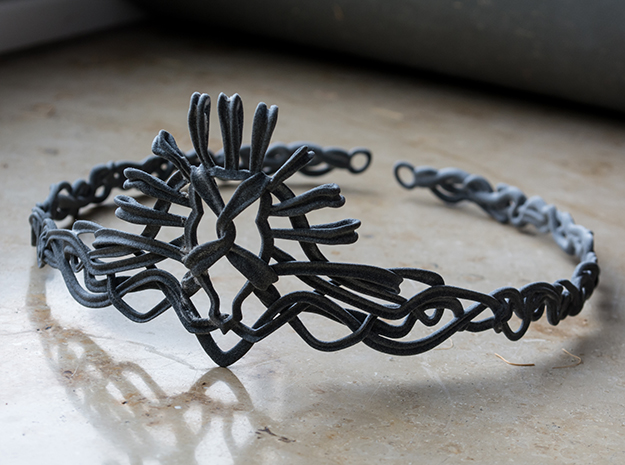
The print is very clean, and also very filigree. Not too fragile to wear though!
I couldn’t resist and also created a little something for everyday wear from my lifesize crown file… „Cersei’s crown ring“ is also available on Shapeways; in many sizes and materials.
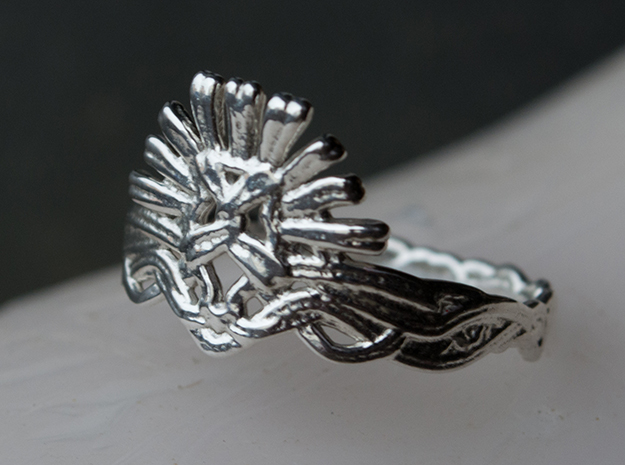
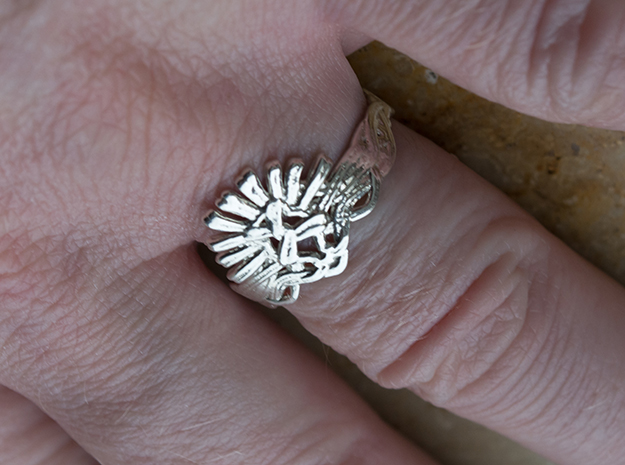
A perfect tiny little Cersei crown as a ring; shown here in „polished silver“
Now on to leaf silvering and gilding the lifesize version!
I first thoroughly scrubbed my crown using a nail brush, dish washing detergent and warm water. I did this to remove all possible remaining powder from the 3D printing process; and also to remove the grease which I deposited on it by just handling it.
Then I painted it with 4 thin layers of undiluted, glossy black acrylic paint, all of which I let dry thoroughly in between. I did that to smooth out the slightly coarse surface of the 3D print, so the leaf silver will have a smooth, glossy surface to adhere to.
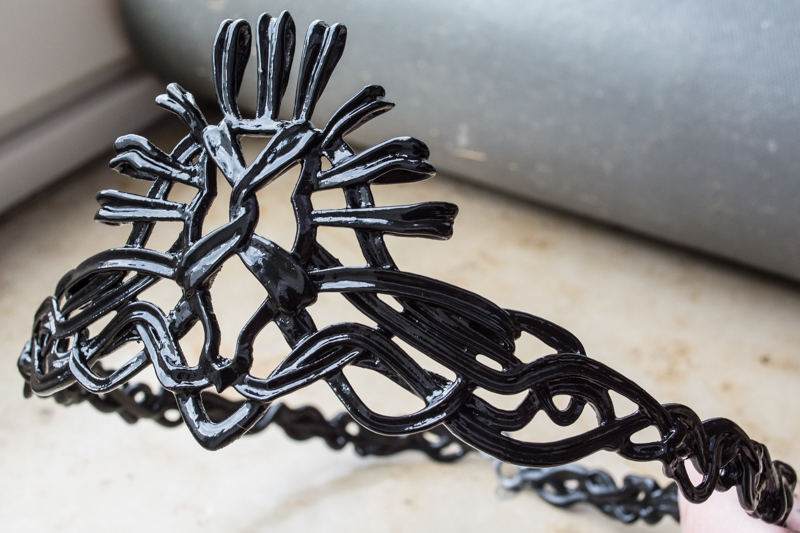
Larger imperfections are perfectly normal on a hand-made silver crown, so I didn’t bother sanding those out.
Note that this step – painting it with several layers of glossy black paint – is also what you should do in case you just want to paint the crown silver (i. e. by using liquid leaf). Seriously; that, too, requires a glossy, smooth surface.
After that, I painted the outside of the crown (plus the inside of the center front top) with adhesive for leaf metal and let that dry for several hours as well. Note that the „job“ of said adhesive is to remain sticky (otherwise the leaf metal wouldn’t stick to it!); so don’t presume that „it’s still sticky, so it needs more time to dry!“ Generally, said adhesive is „white“ when applied and dries to „clear“. So if you can’t see adhesive any more… wait for another hour. Then it’s safe to presume that yes, now the adhesive has dried and is ready for the leaf metal application.
(No photos of that step, sorry – as I said, it dries clear; so there wouldn’t be much of a difference to the „painted black“ photo above.)
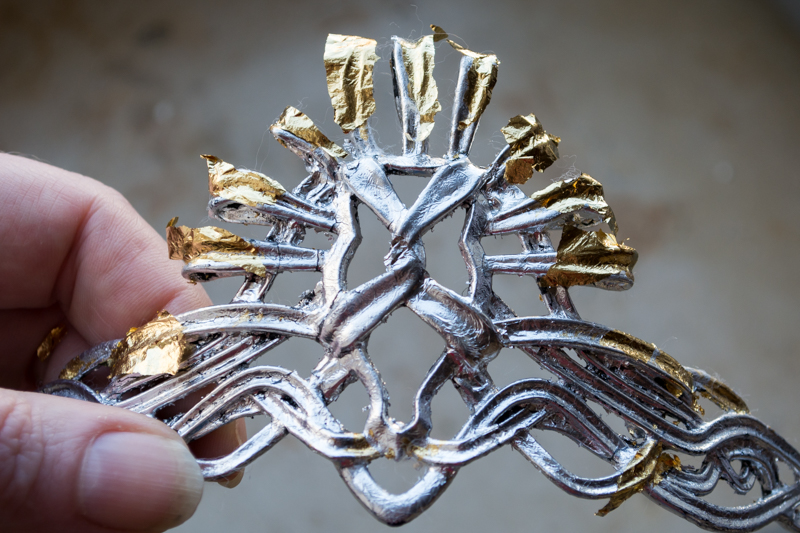
I then first applied leaf silver….
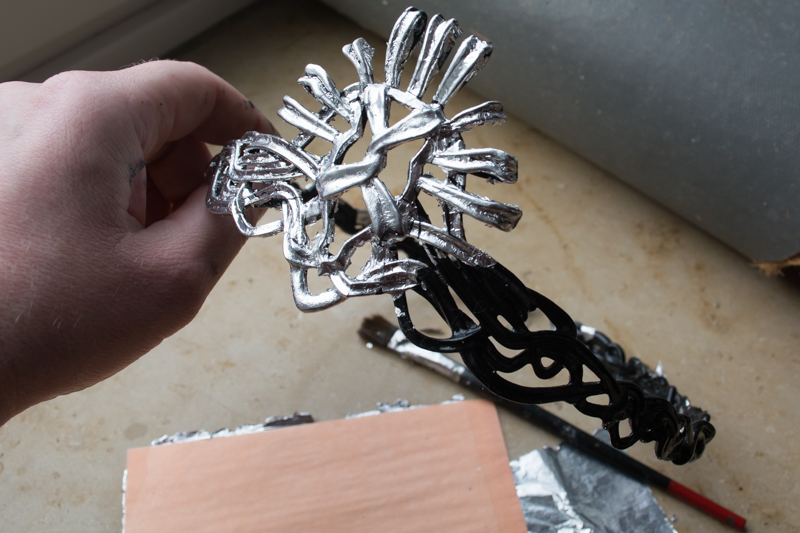
…then leaf gold in selective places.
After burnishing (=polishing) the crown with a linen cloth, I also painted the inside of the crown with liquid leaf in silver. That’s just in case any of the finish rubs off when wearing the crown, I can easily repair those inside surface.
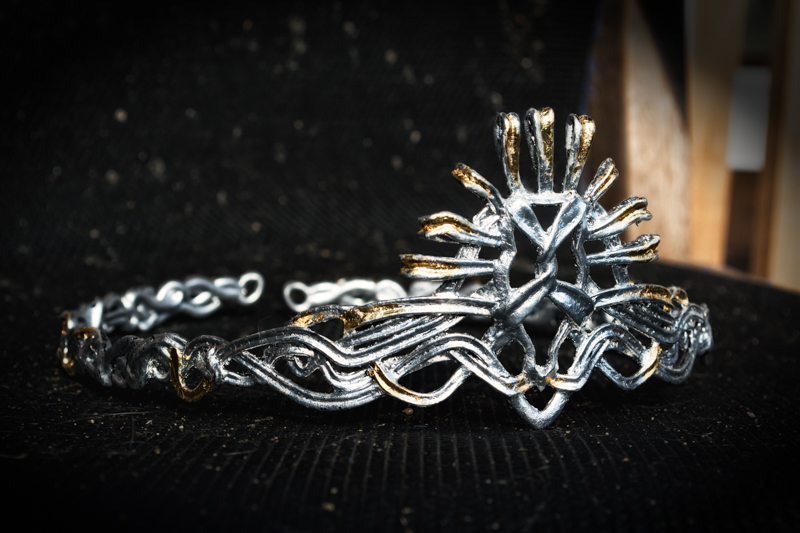
Finished crown – not bad if you ask me 🙂
The embroidery / brooch
Cersei has something at the back of the neck of her coronation gown. It’s basically only visible in the „map room“ scene; and then it’s out of focus, too…:
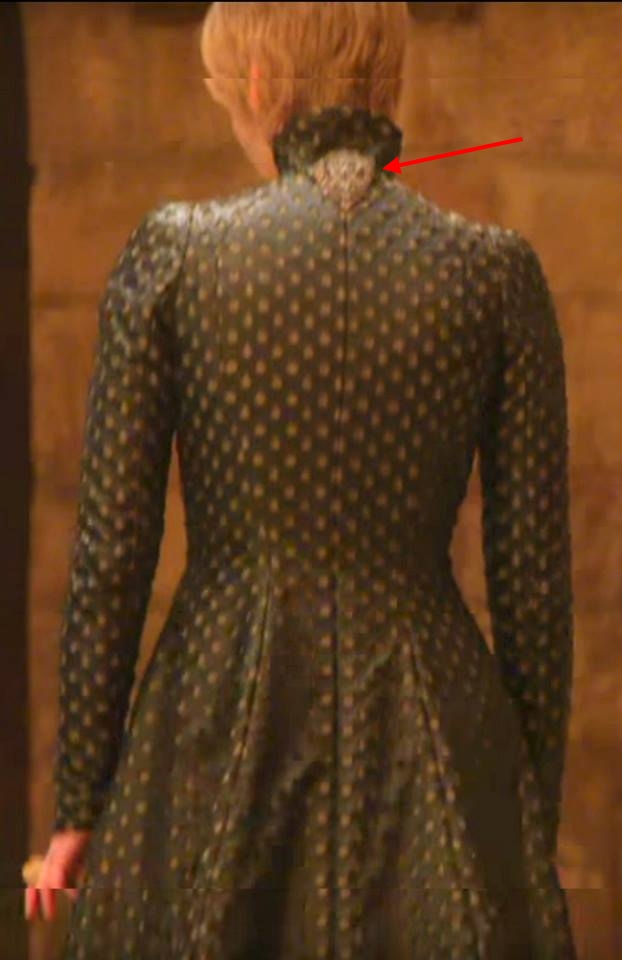
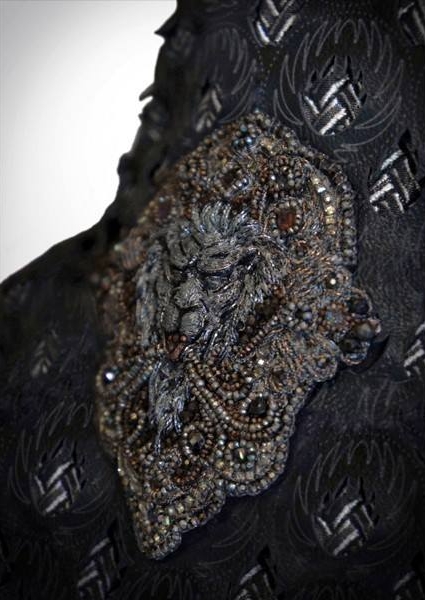
…which is a pity, because that’s a really pretty embroidery, which we know because one single closeup photo of it exists…
…now, I’m not Michele Carragher. I’m also too old to be so patient to embroider something like this, lol.
That is why I created a 3D model in Blender which imitates the stitches and many, but not all, of the pearls; and left space for some tiny rhinestones to be glued on….:
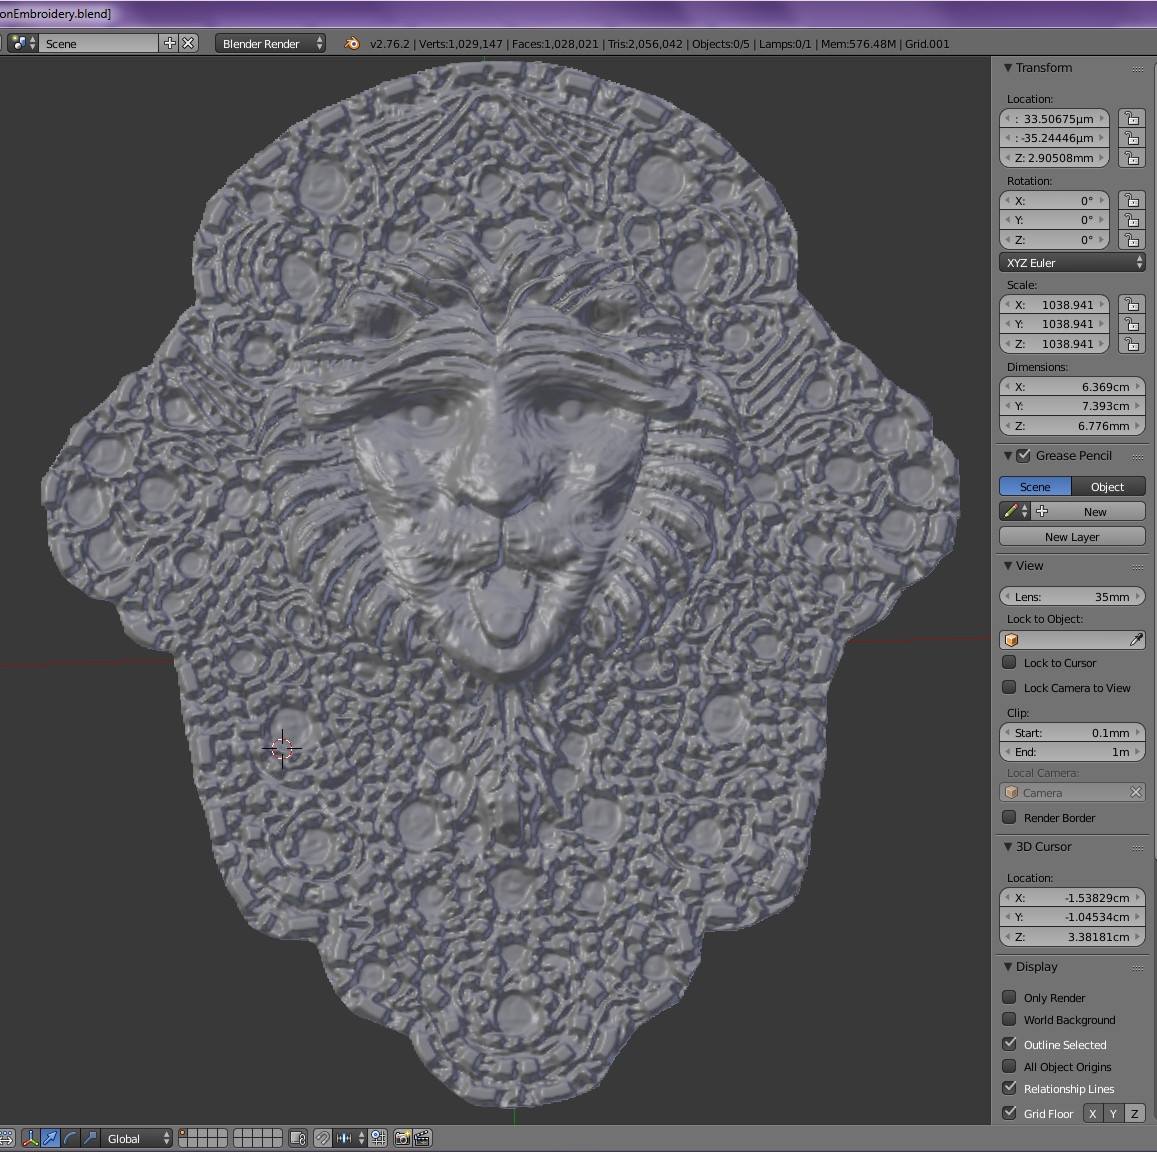
…uploaded that model to Shapeways and had it printed in „Frosted Ultra Detail“…:
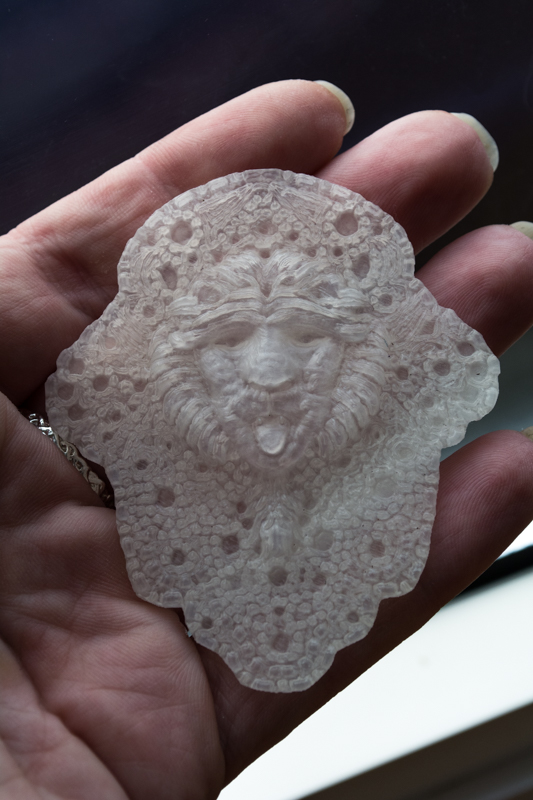
The printed model, straight out of the box. The round thingies are the places where rhinestones will be set in.
I have made that model available on Shapeways, where it can be bought.
I then first painted the model with liquid leaf in copper and silver as well as a bit of gold…:
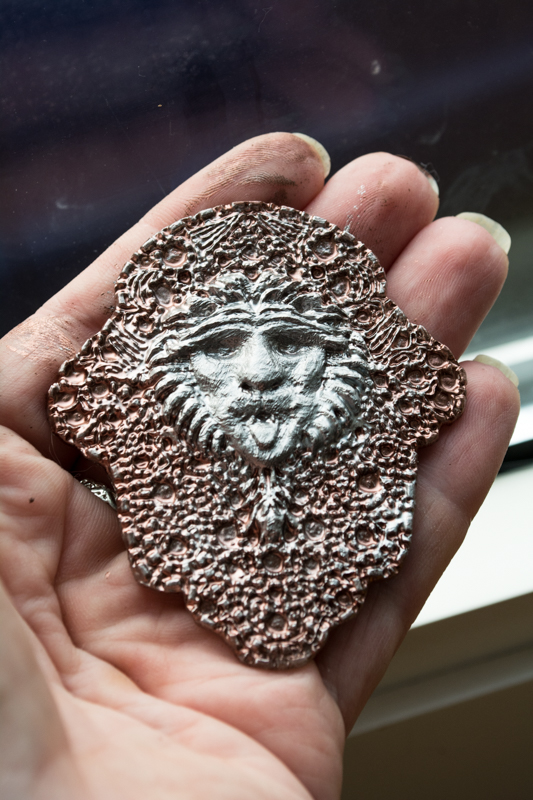
…then gave it a wash with diluted black acrylic paint.
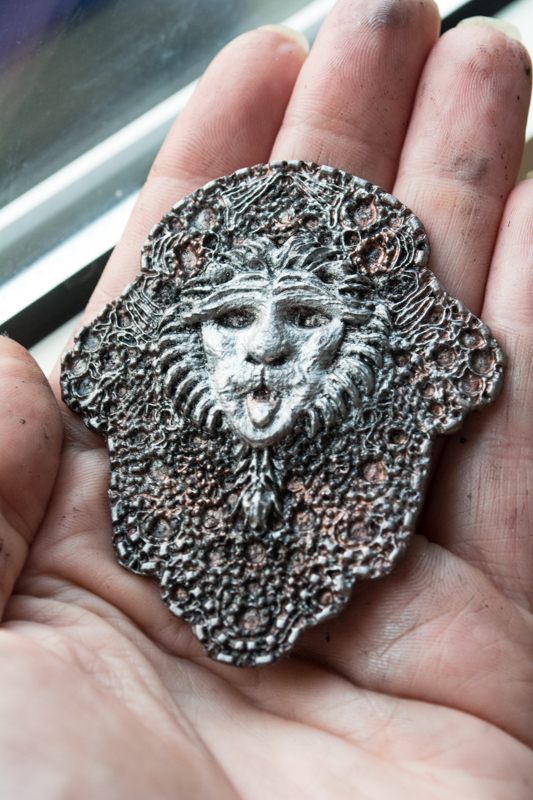
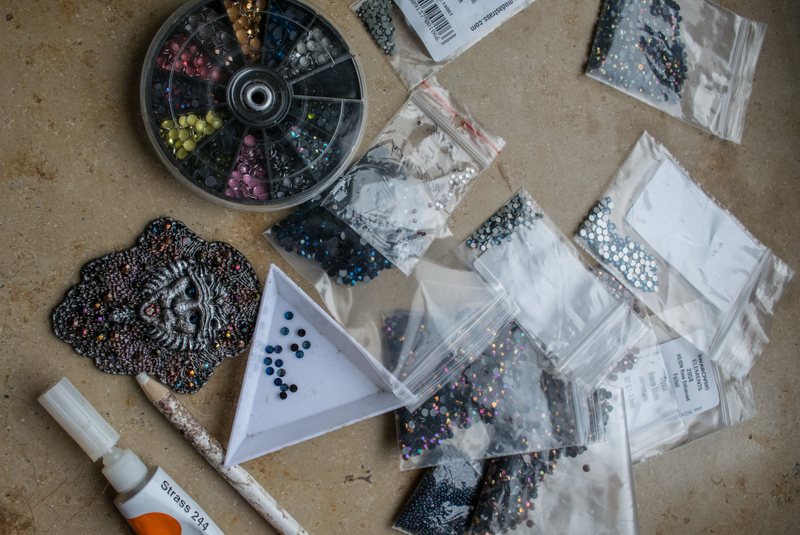
After some more painting of the „printed pearls and stitches“, I decorated the brooch-to-be with rhinestones in various sizes (SS5 to SS10) and various colors (pretty much anything iridescent, golden, copper, blue…):
…and all that was left to do after this was done is to glue a brooch pin to the backside and the brooch is good to go.
Here’s a photo collage comparing my 3D printed, painted, rhinestone decorated brooch to the original one:
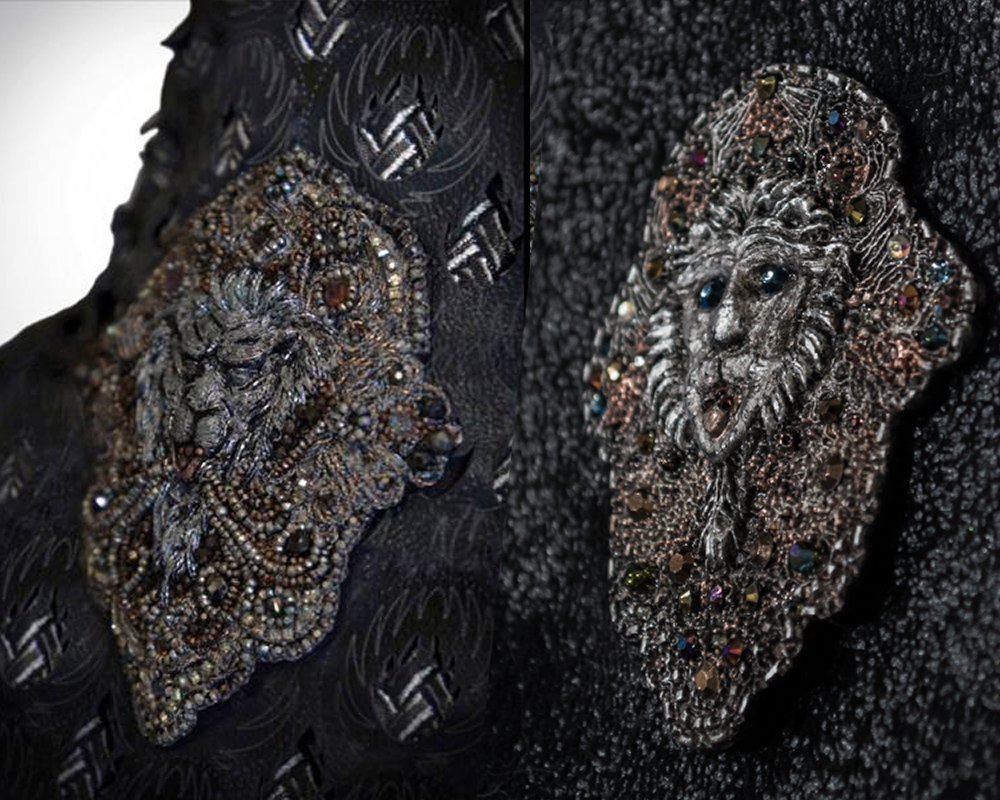
…original embroidery is, obviously, to the left; while my 3D printed, painted, rhinestone decorated brooch is to the right.
Yupp, that will work 😀
Again, that brooch model is available on Shapeways – but you need to paint it and add rhinestones plus the brooch pin (safety pin would work as well…).
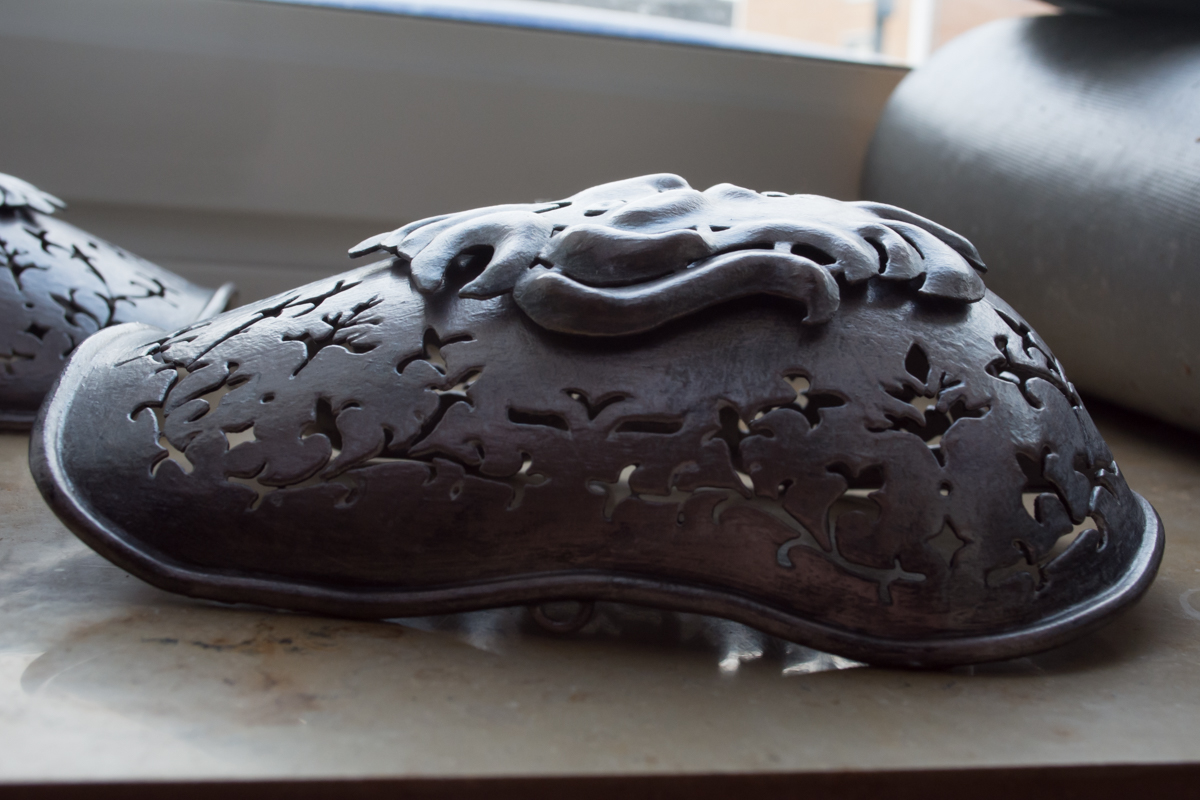
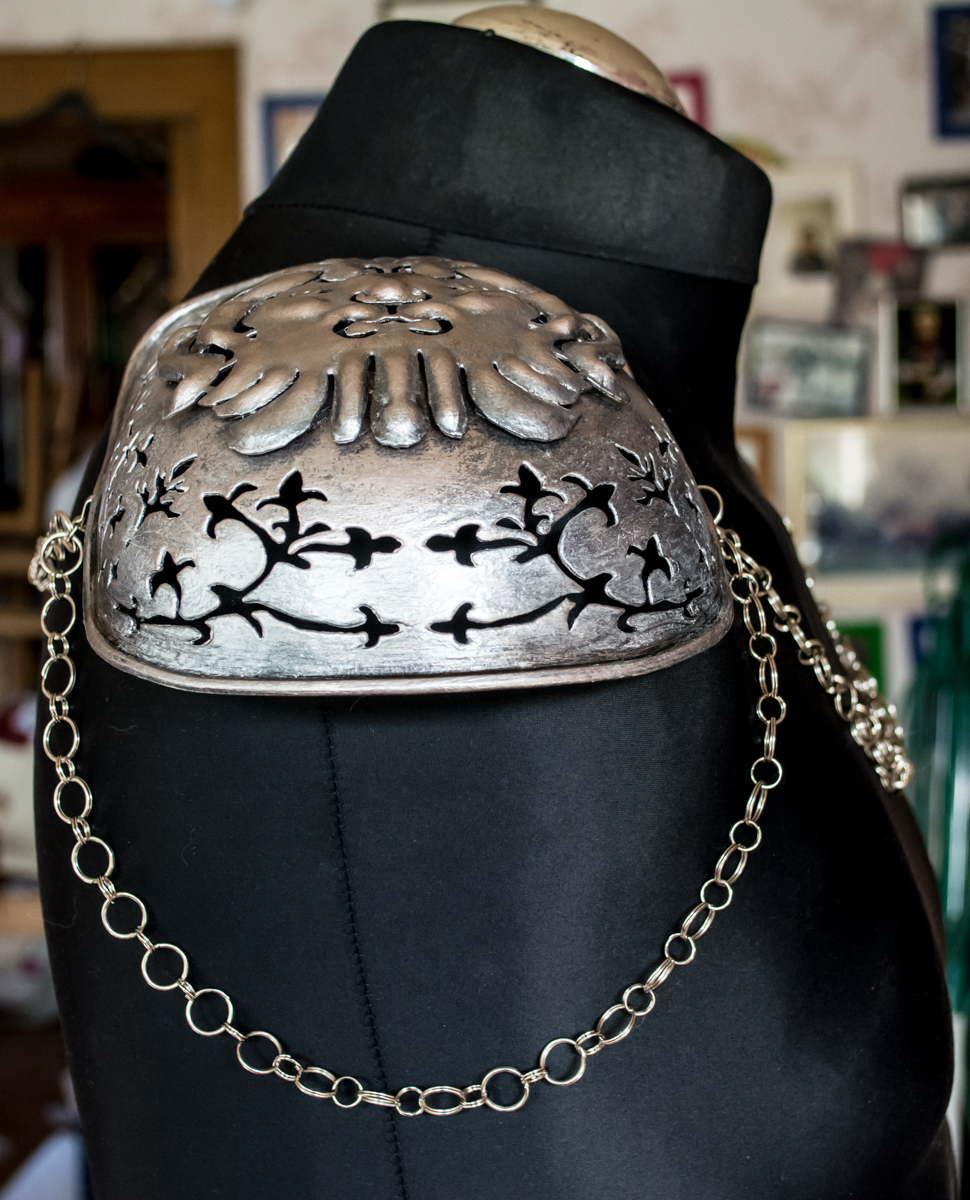
The Pauldrons
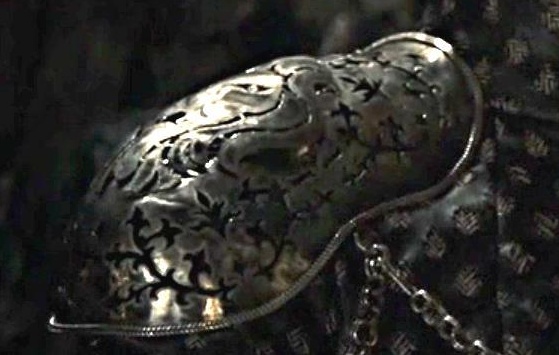
Cersei’s Pauldrons are decorated with an elaborate, fleur-de-lys and vines design. They’re apparently held in place by chains, which are made of three different sizes of double rings.
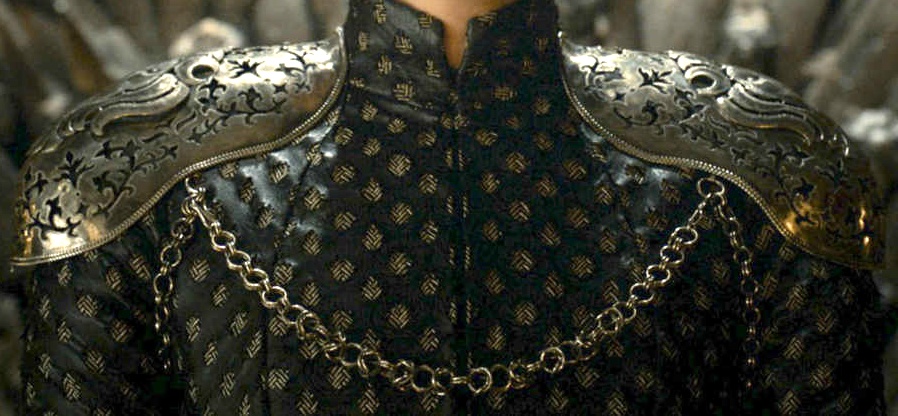
There are also grotesque lion heads on the pauldrons, which are apparently hovering over the base of the pauldrons.
So what I did was to first create the base pauldrons, plus the grotesque lions, in Blender.
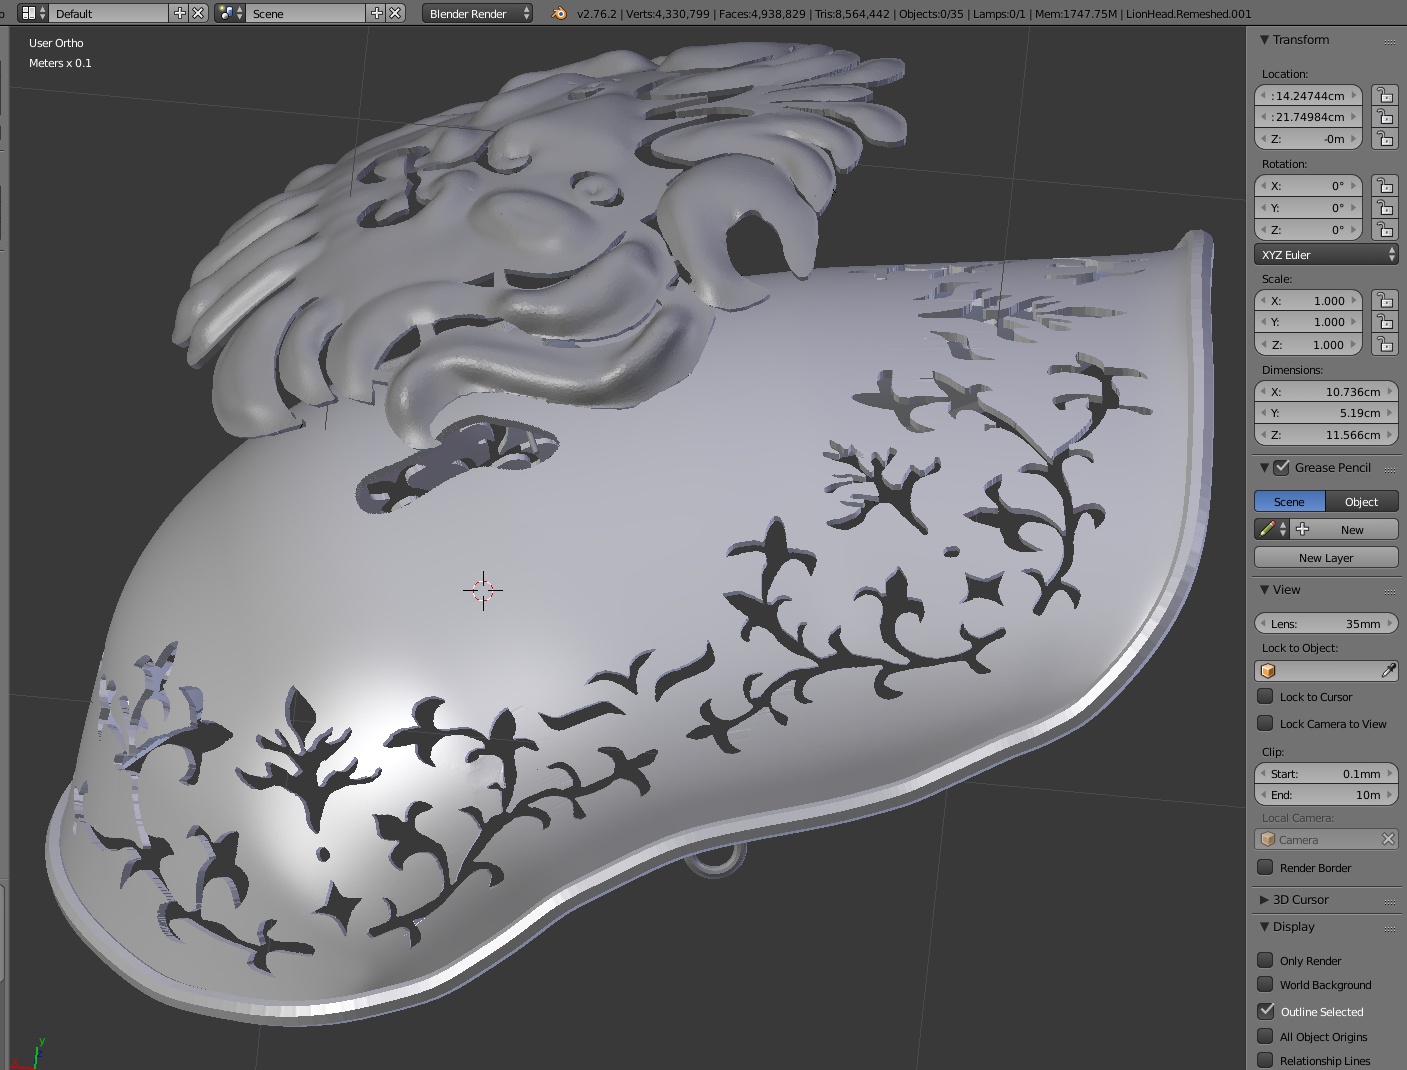
Interesting enough – and yes, I’ve tested that – it was cheaper to have pauldrons and lions printed separately. As in, approximately five dollars cheaper. So I did just that.
The pauldrons, in the raw, 3D printed version, are available on Shapeways here. And yes, 3D printing of such large objects isn’t exactly „cheap“, but it’s the most exact you’ll get without being a blacksmith (who would charge much more).
Here’s the 3D printed pauldrons straight from the printer, on which the lions in this picture just lie loosely on the pauldrons:
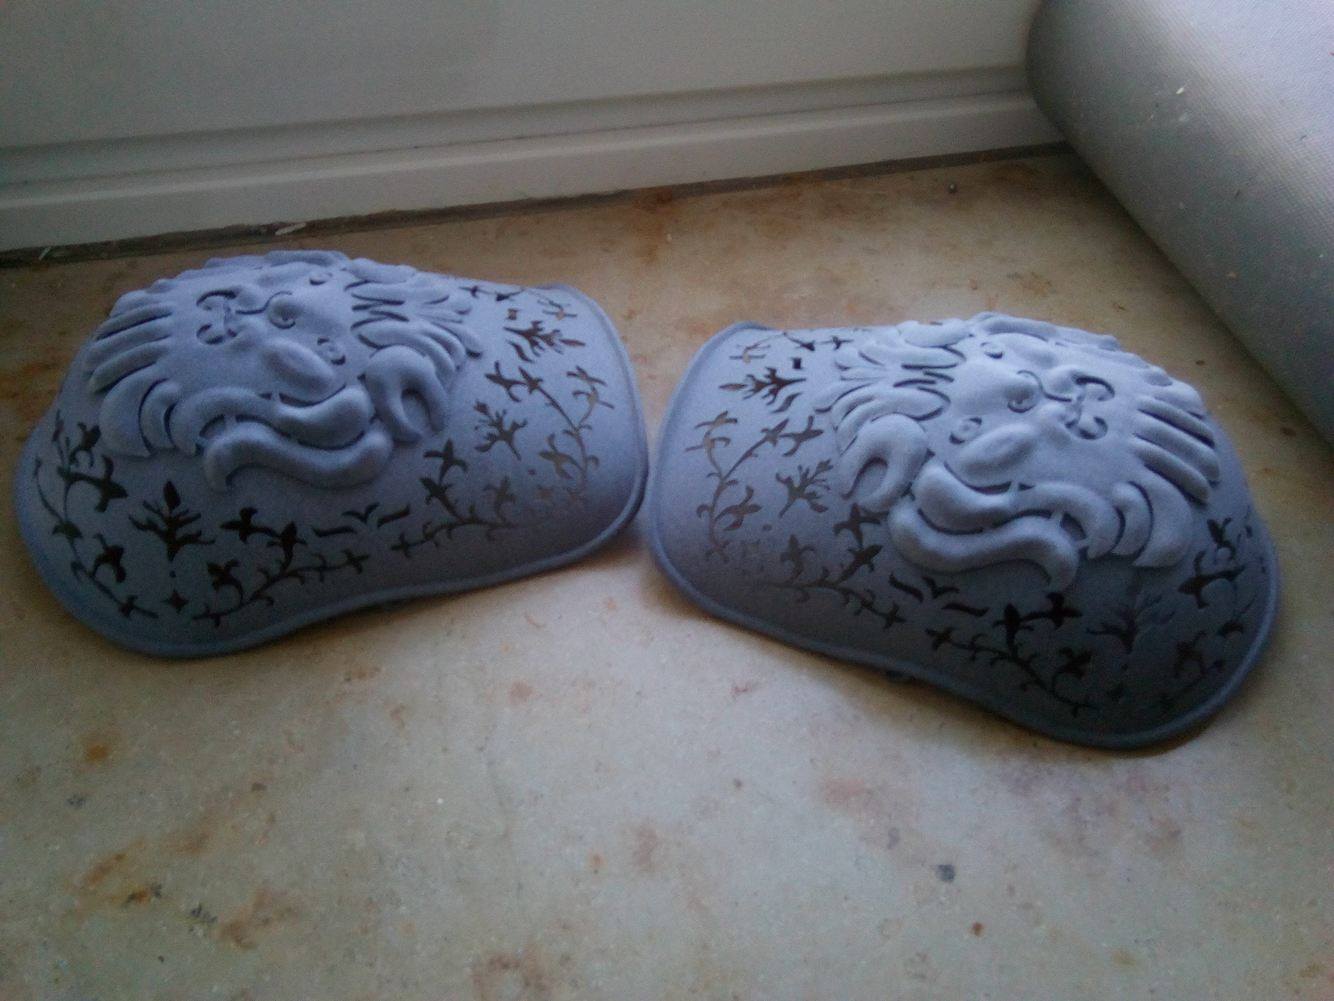
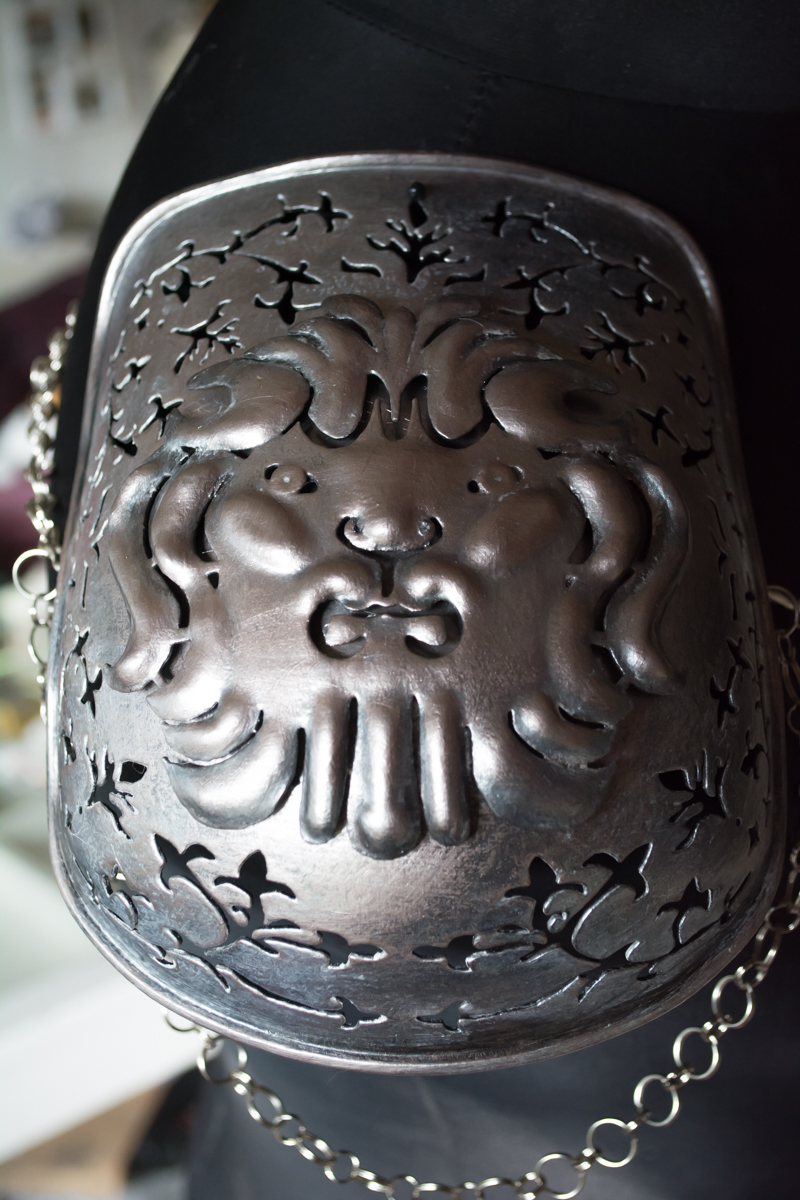
I then painted the pauldrons.
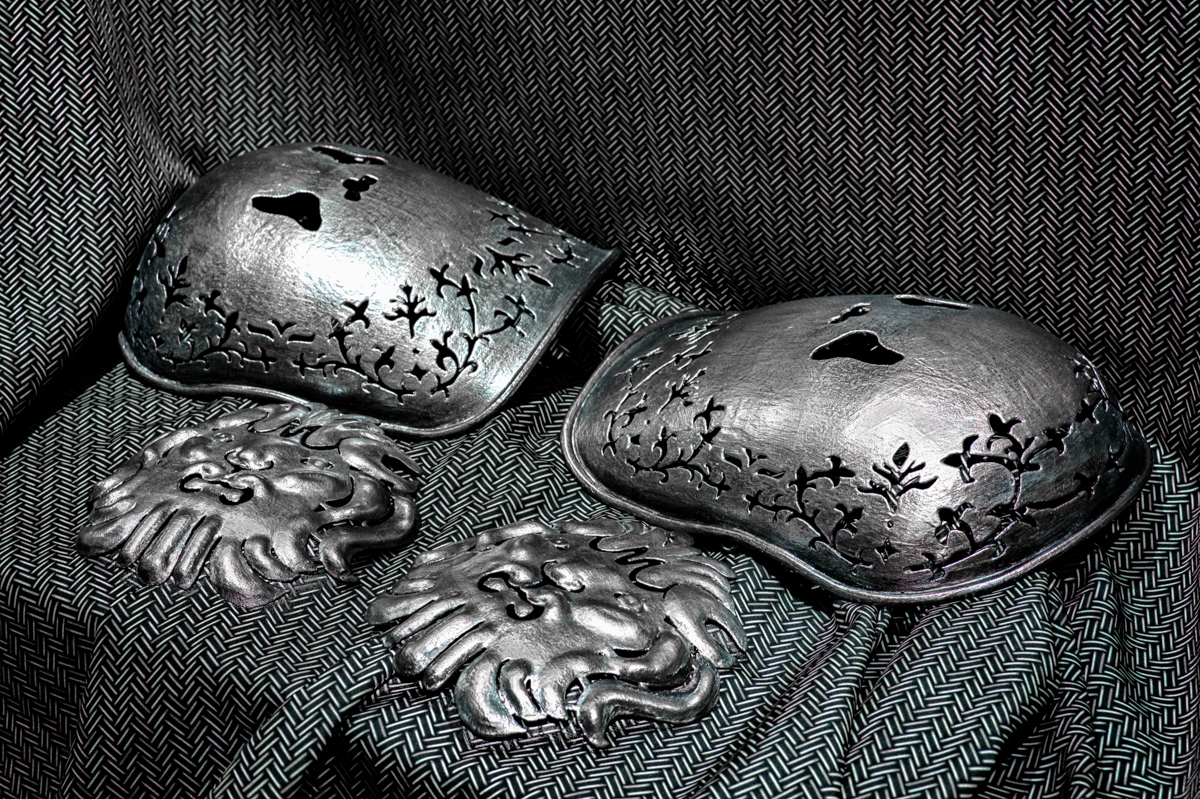
First I applied three thin coats of black glossy paint (to even out the pitted, 3D printed surface), then added two coats of Liquid Leaf in Pewter. Then I polished the pauldrons with a German equivalent of „Rub’n Buff“ in silver. After that, I gave them a wash with diluted black glossy paint, just to immediately wipe off said wash, to create a dark, oxidized look.
Here’s what the parts looked like after painting.
Now… I still had to bring those grotesque lions onto the pauldrons, making them „hover“ over them.
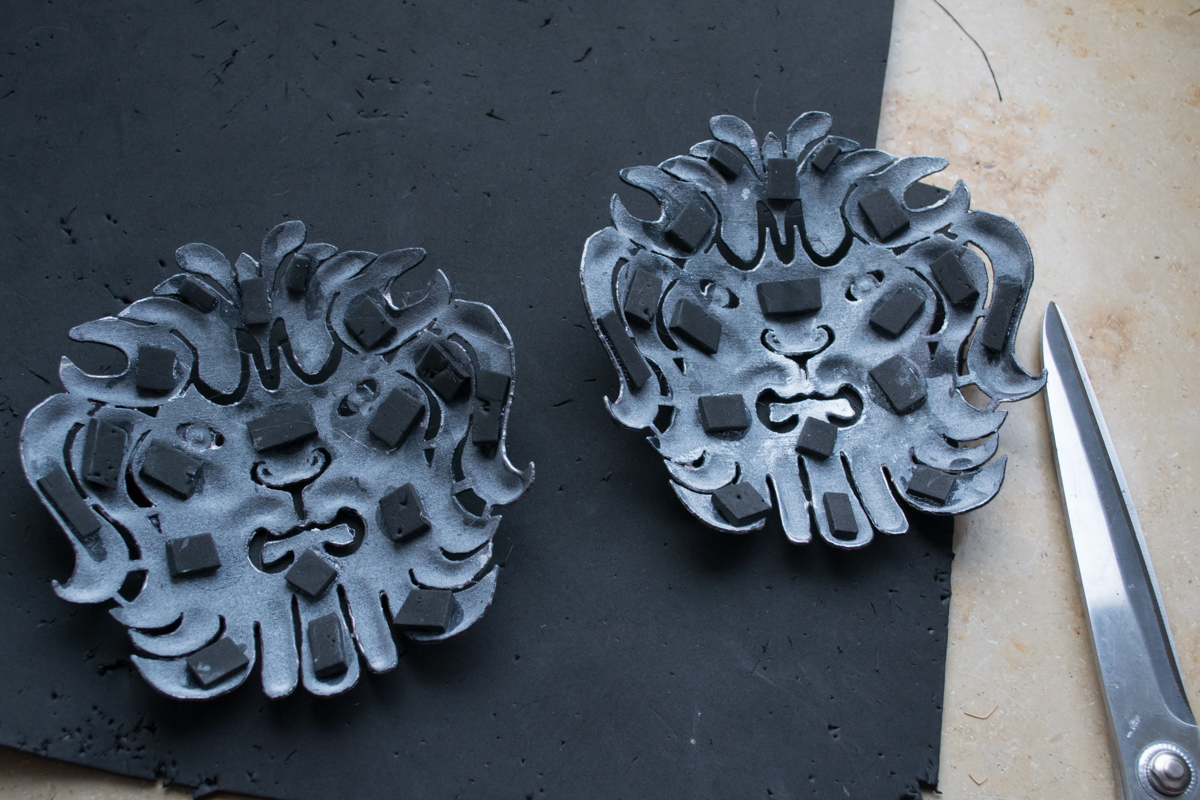
Fortunately, my cats had scratched some craft foam (which I couldn’t use for anything else). So I cut that craft foam – 4mm thickness – into small blocks and glued those small blocks to the back of the lions.
Then I glued the lions to the base pauldrons, making sure that the „moon“ in the lion’s mane points at a certain fleur-de-lys on the base pauldrons (which makes sure the lions are in the place they’re supposed to be), and that they’re centered.
Note:
The pauldrons DO have a „left and right“ side. So have the lions. If you put a „left“ lion on a „right“ pauldron, it won’t exactly fit (but „wobble“ a bit). You can easily test that by placing the lions – without spacers – on the pauldrons first. If they don’t sit flush on the pauldrons, change the sides.
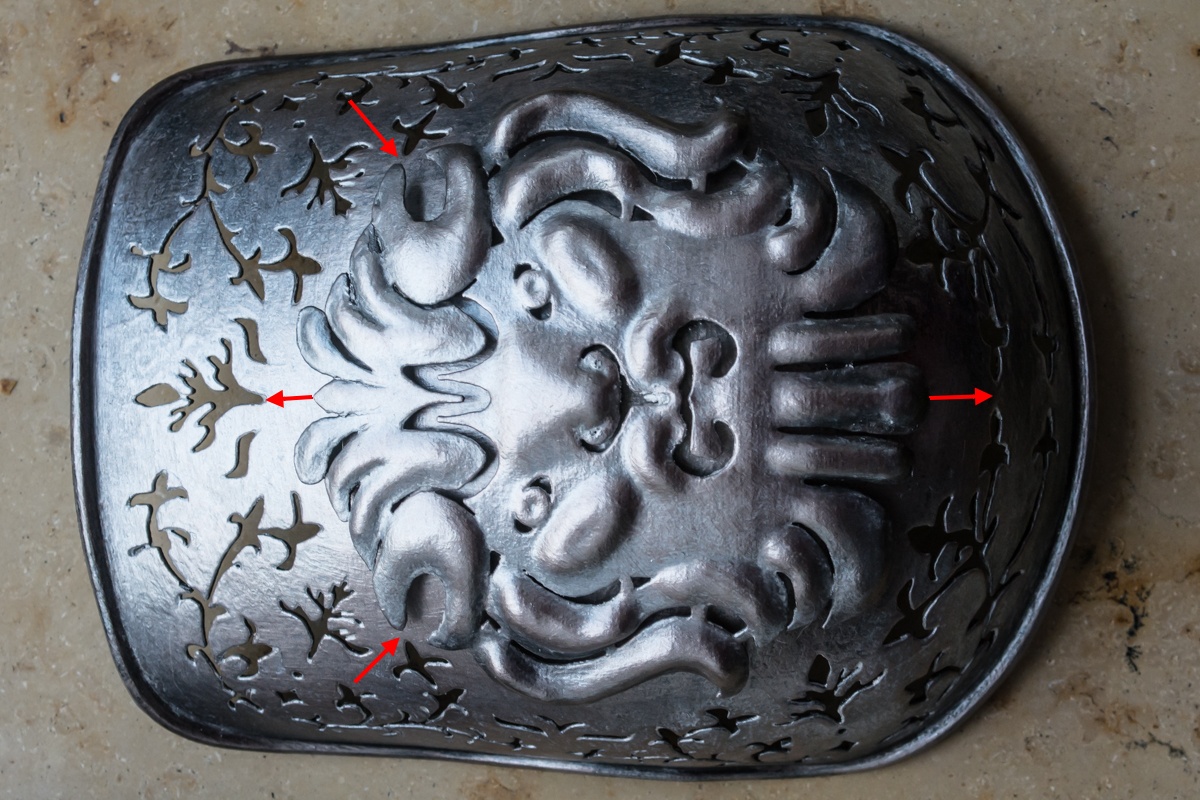
This photo illustrates how the lions should be placed on the pauldrons – with the „moon“ in the mane pointing at the fleur-de-lys, and the centers of lion and pauldrons matching.
Here’s what it looks like when the lions, with the spacers, are glued to the base pauldrons – a nice „hovering“ appearance.
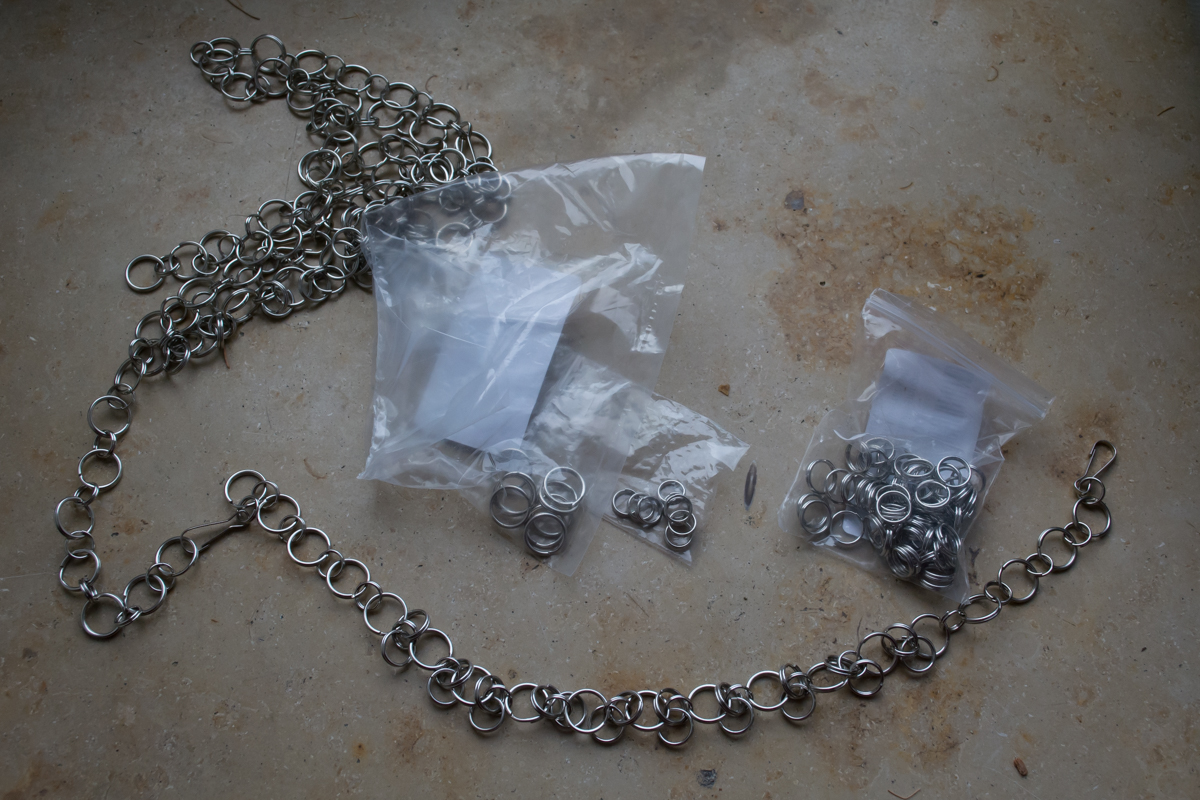
I created the chain using 92 12mm key rings, 92 8mm key rings, and 40 10mm key rings. That’s 224 key rings for the chain. I also used 4 little hooks, to attach the chain to the pauldrons.
Here’s what the finished pauldrons look like:

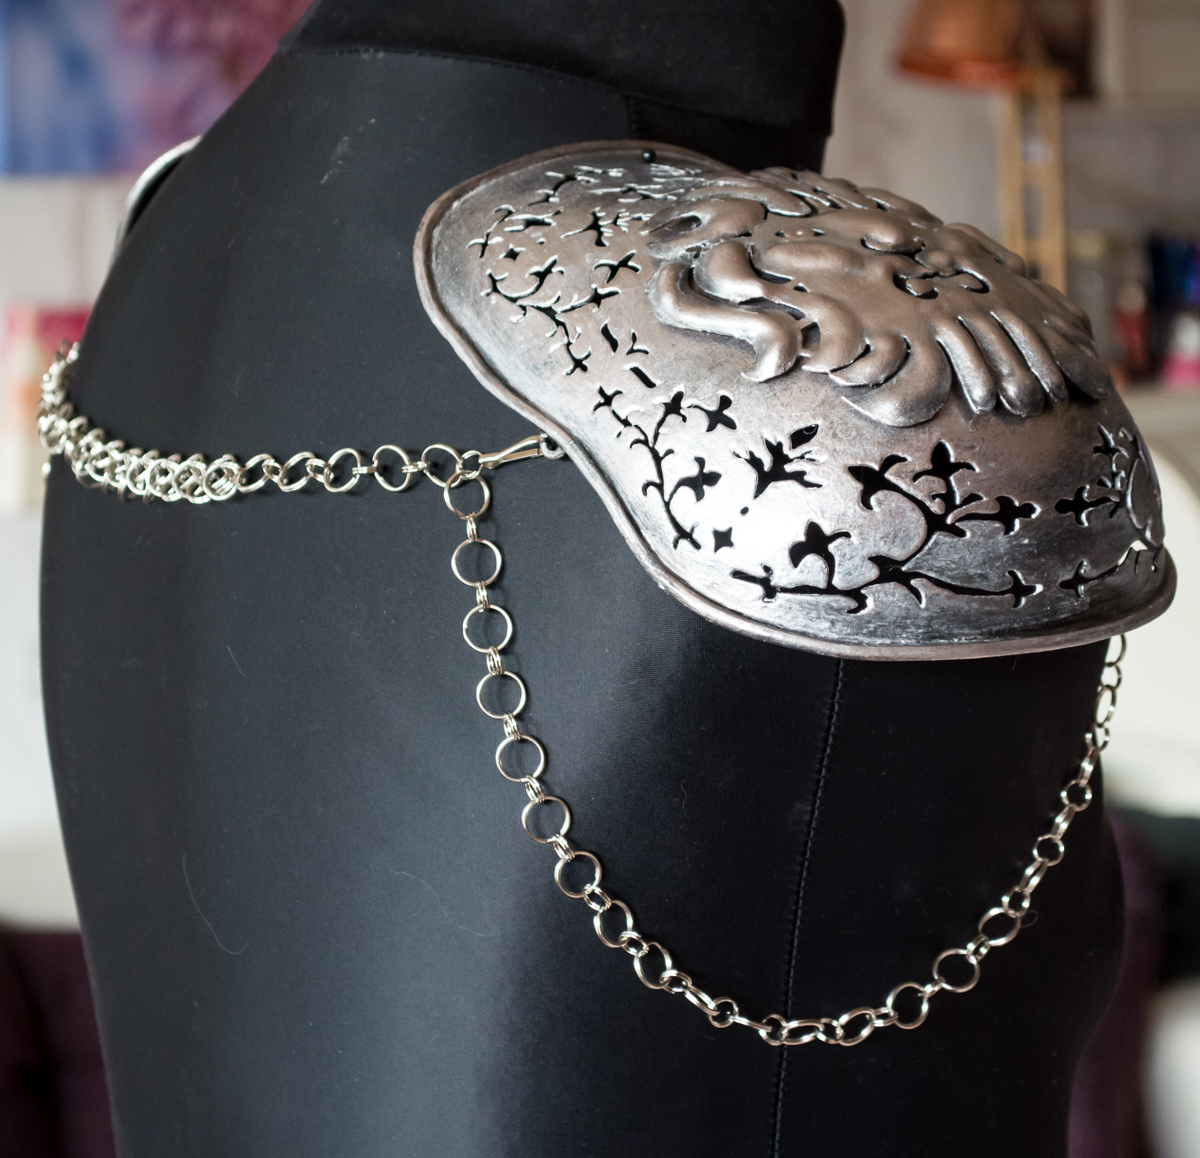
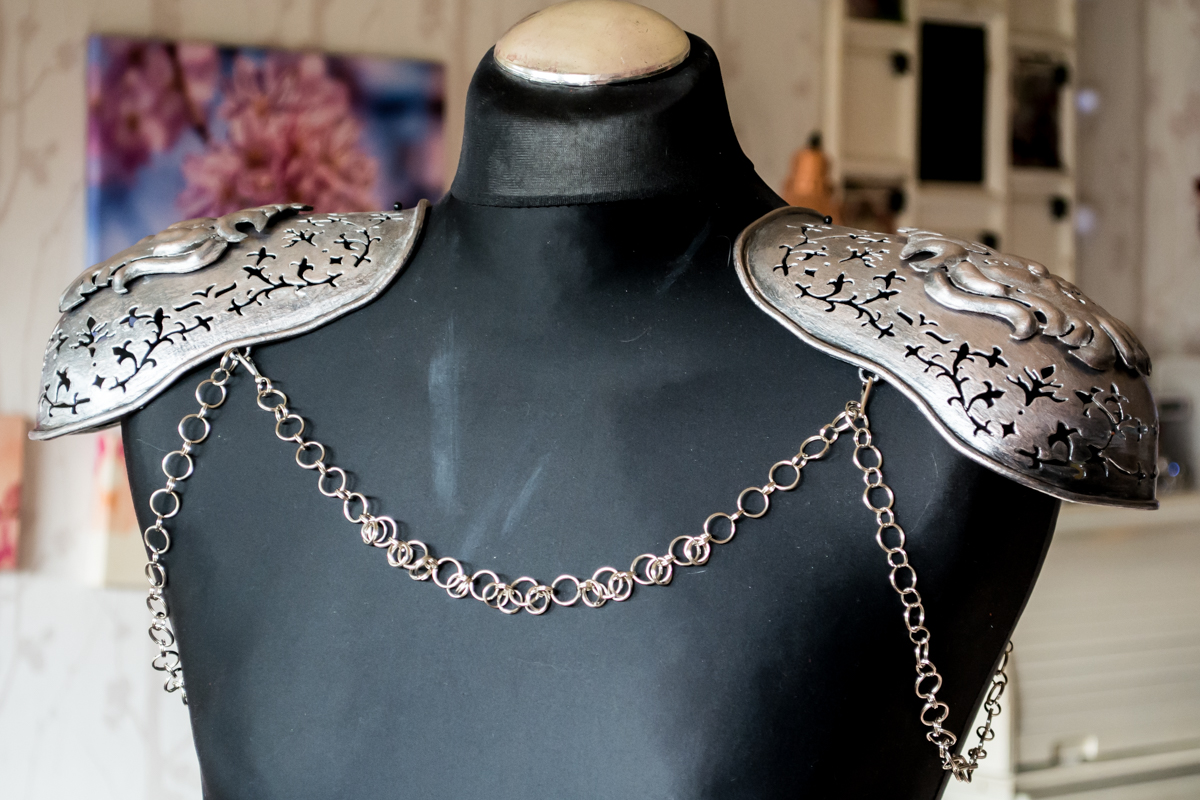
They cannot, however, just be held in place by the chains. You will have to glue velcro, snaps or magnets to the inside of the base pauldrons, which attach to velcro, snaps or magnets on the dress beneath it. Another possibility would be to use a brooch needle.
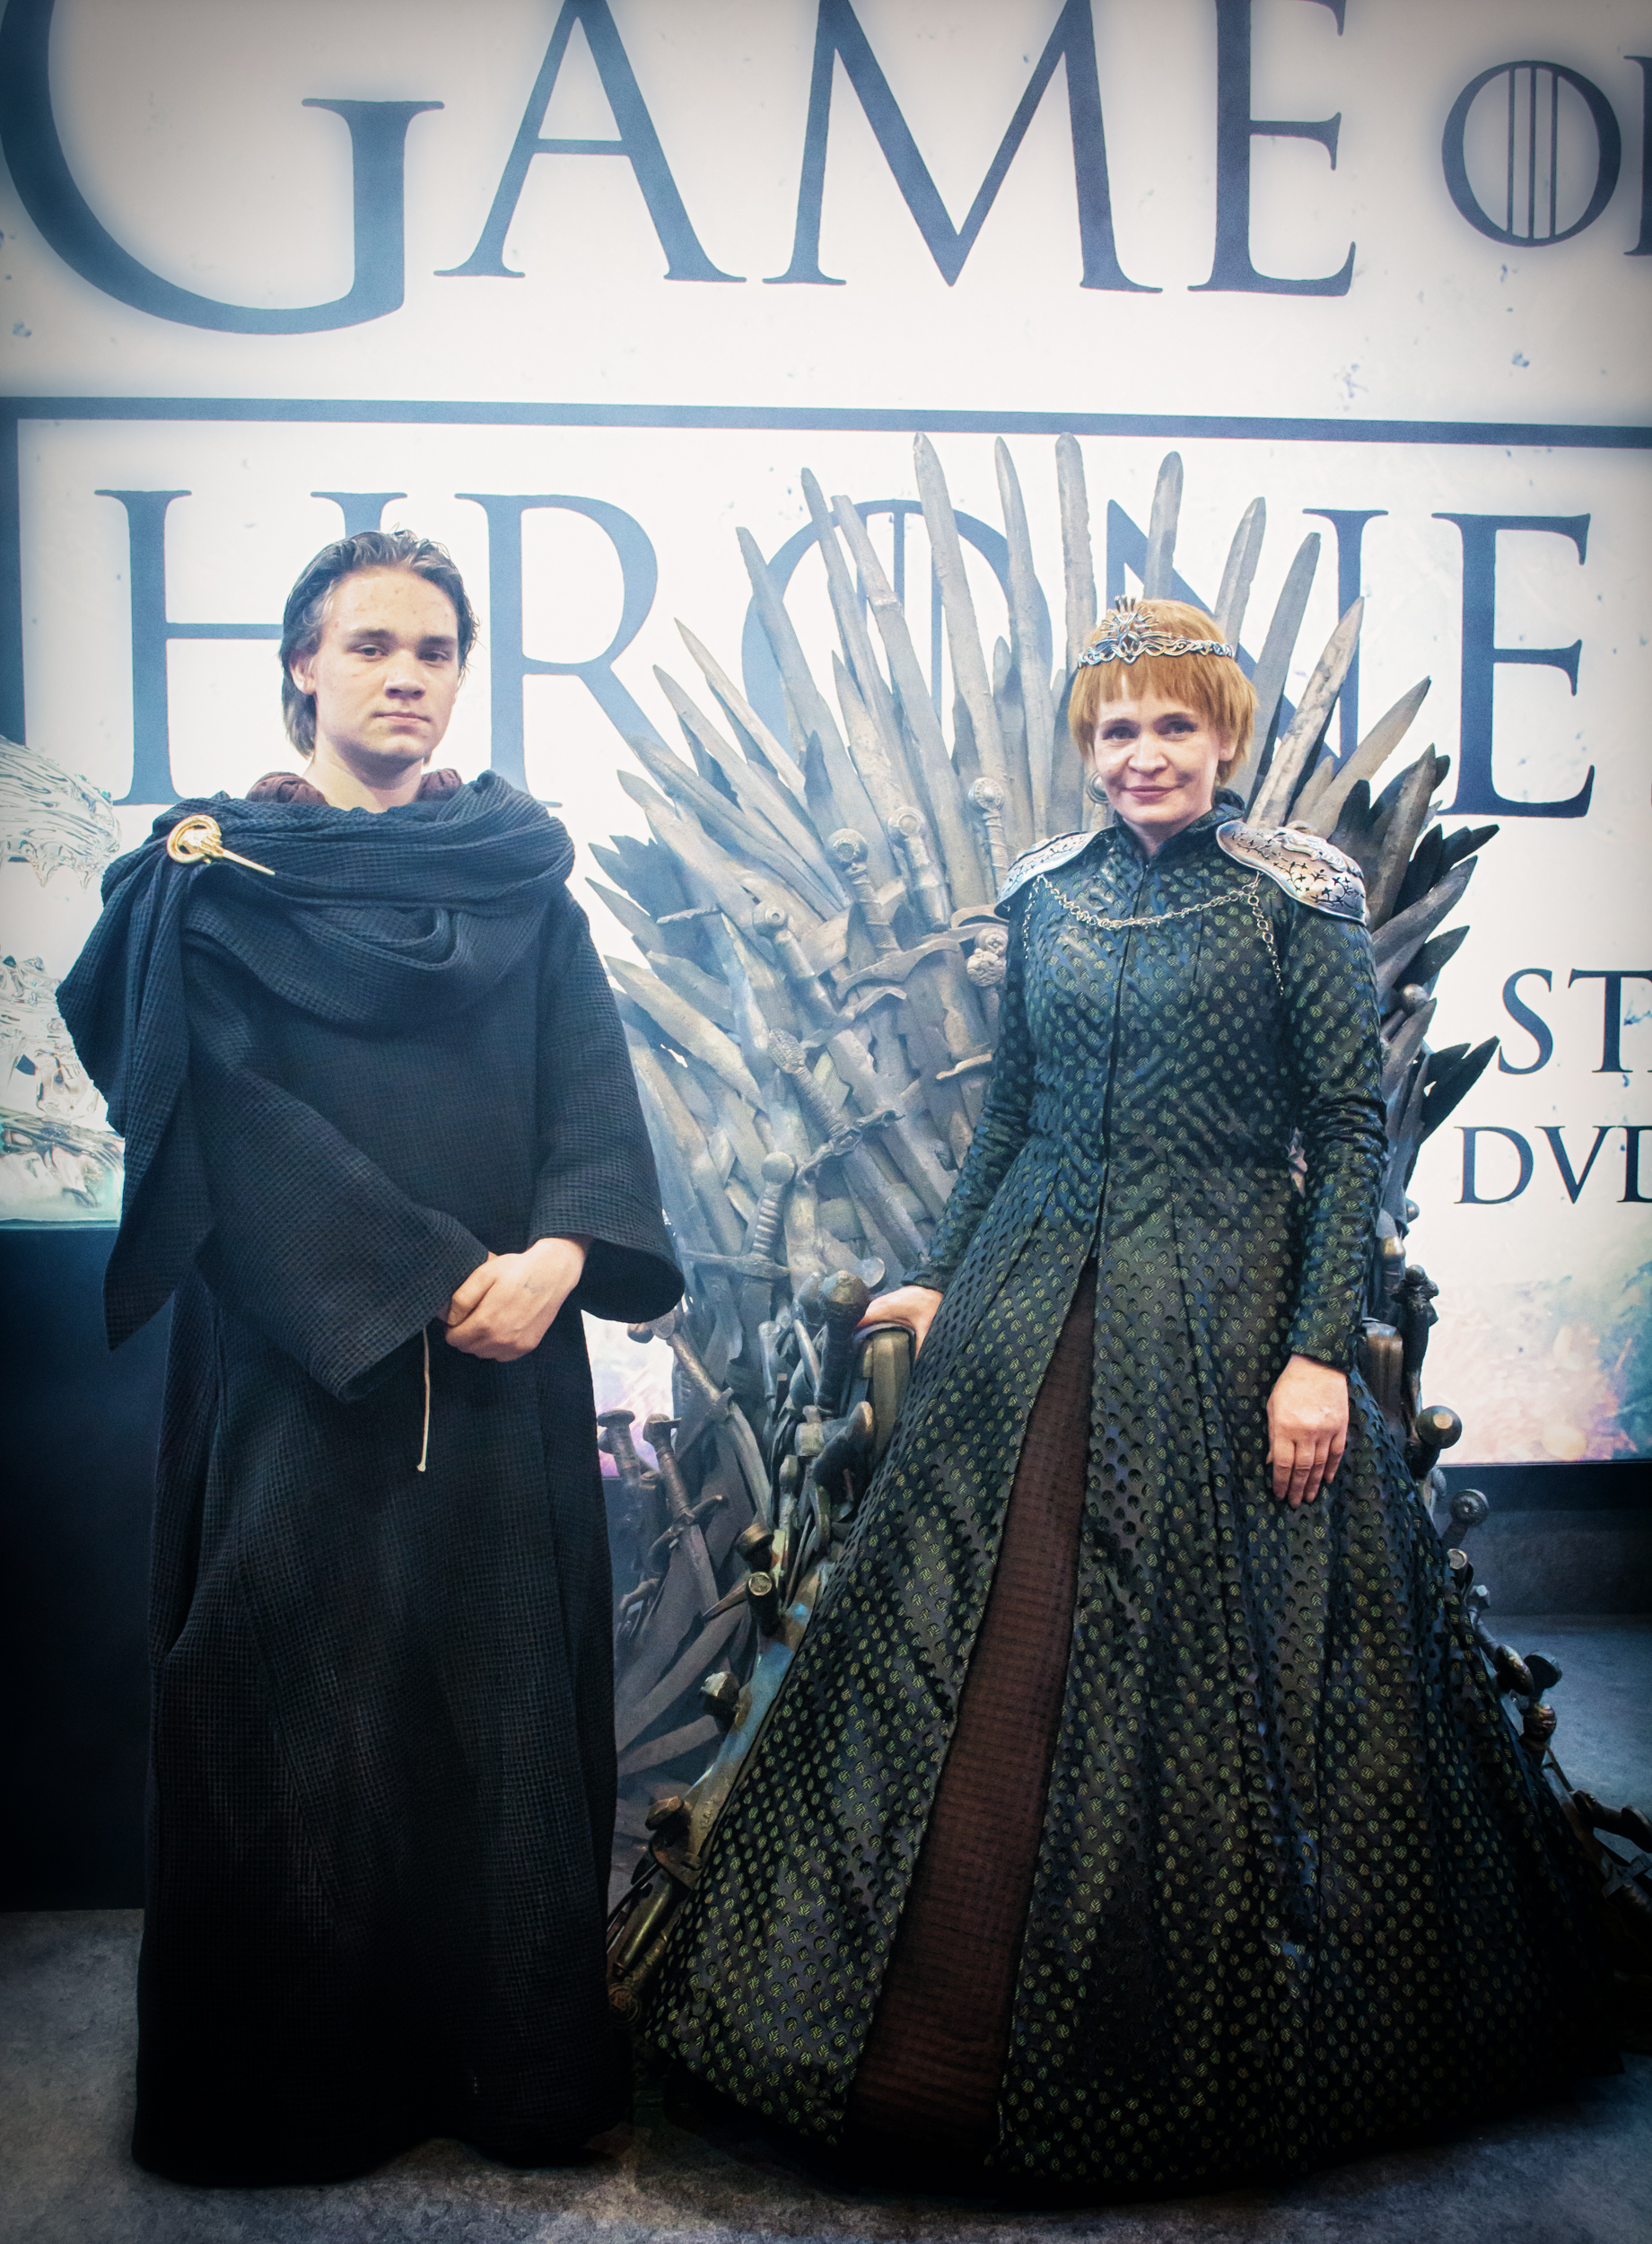
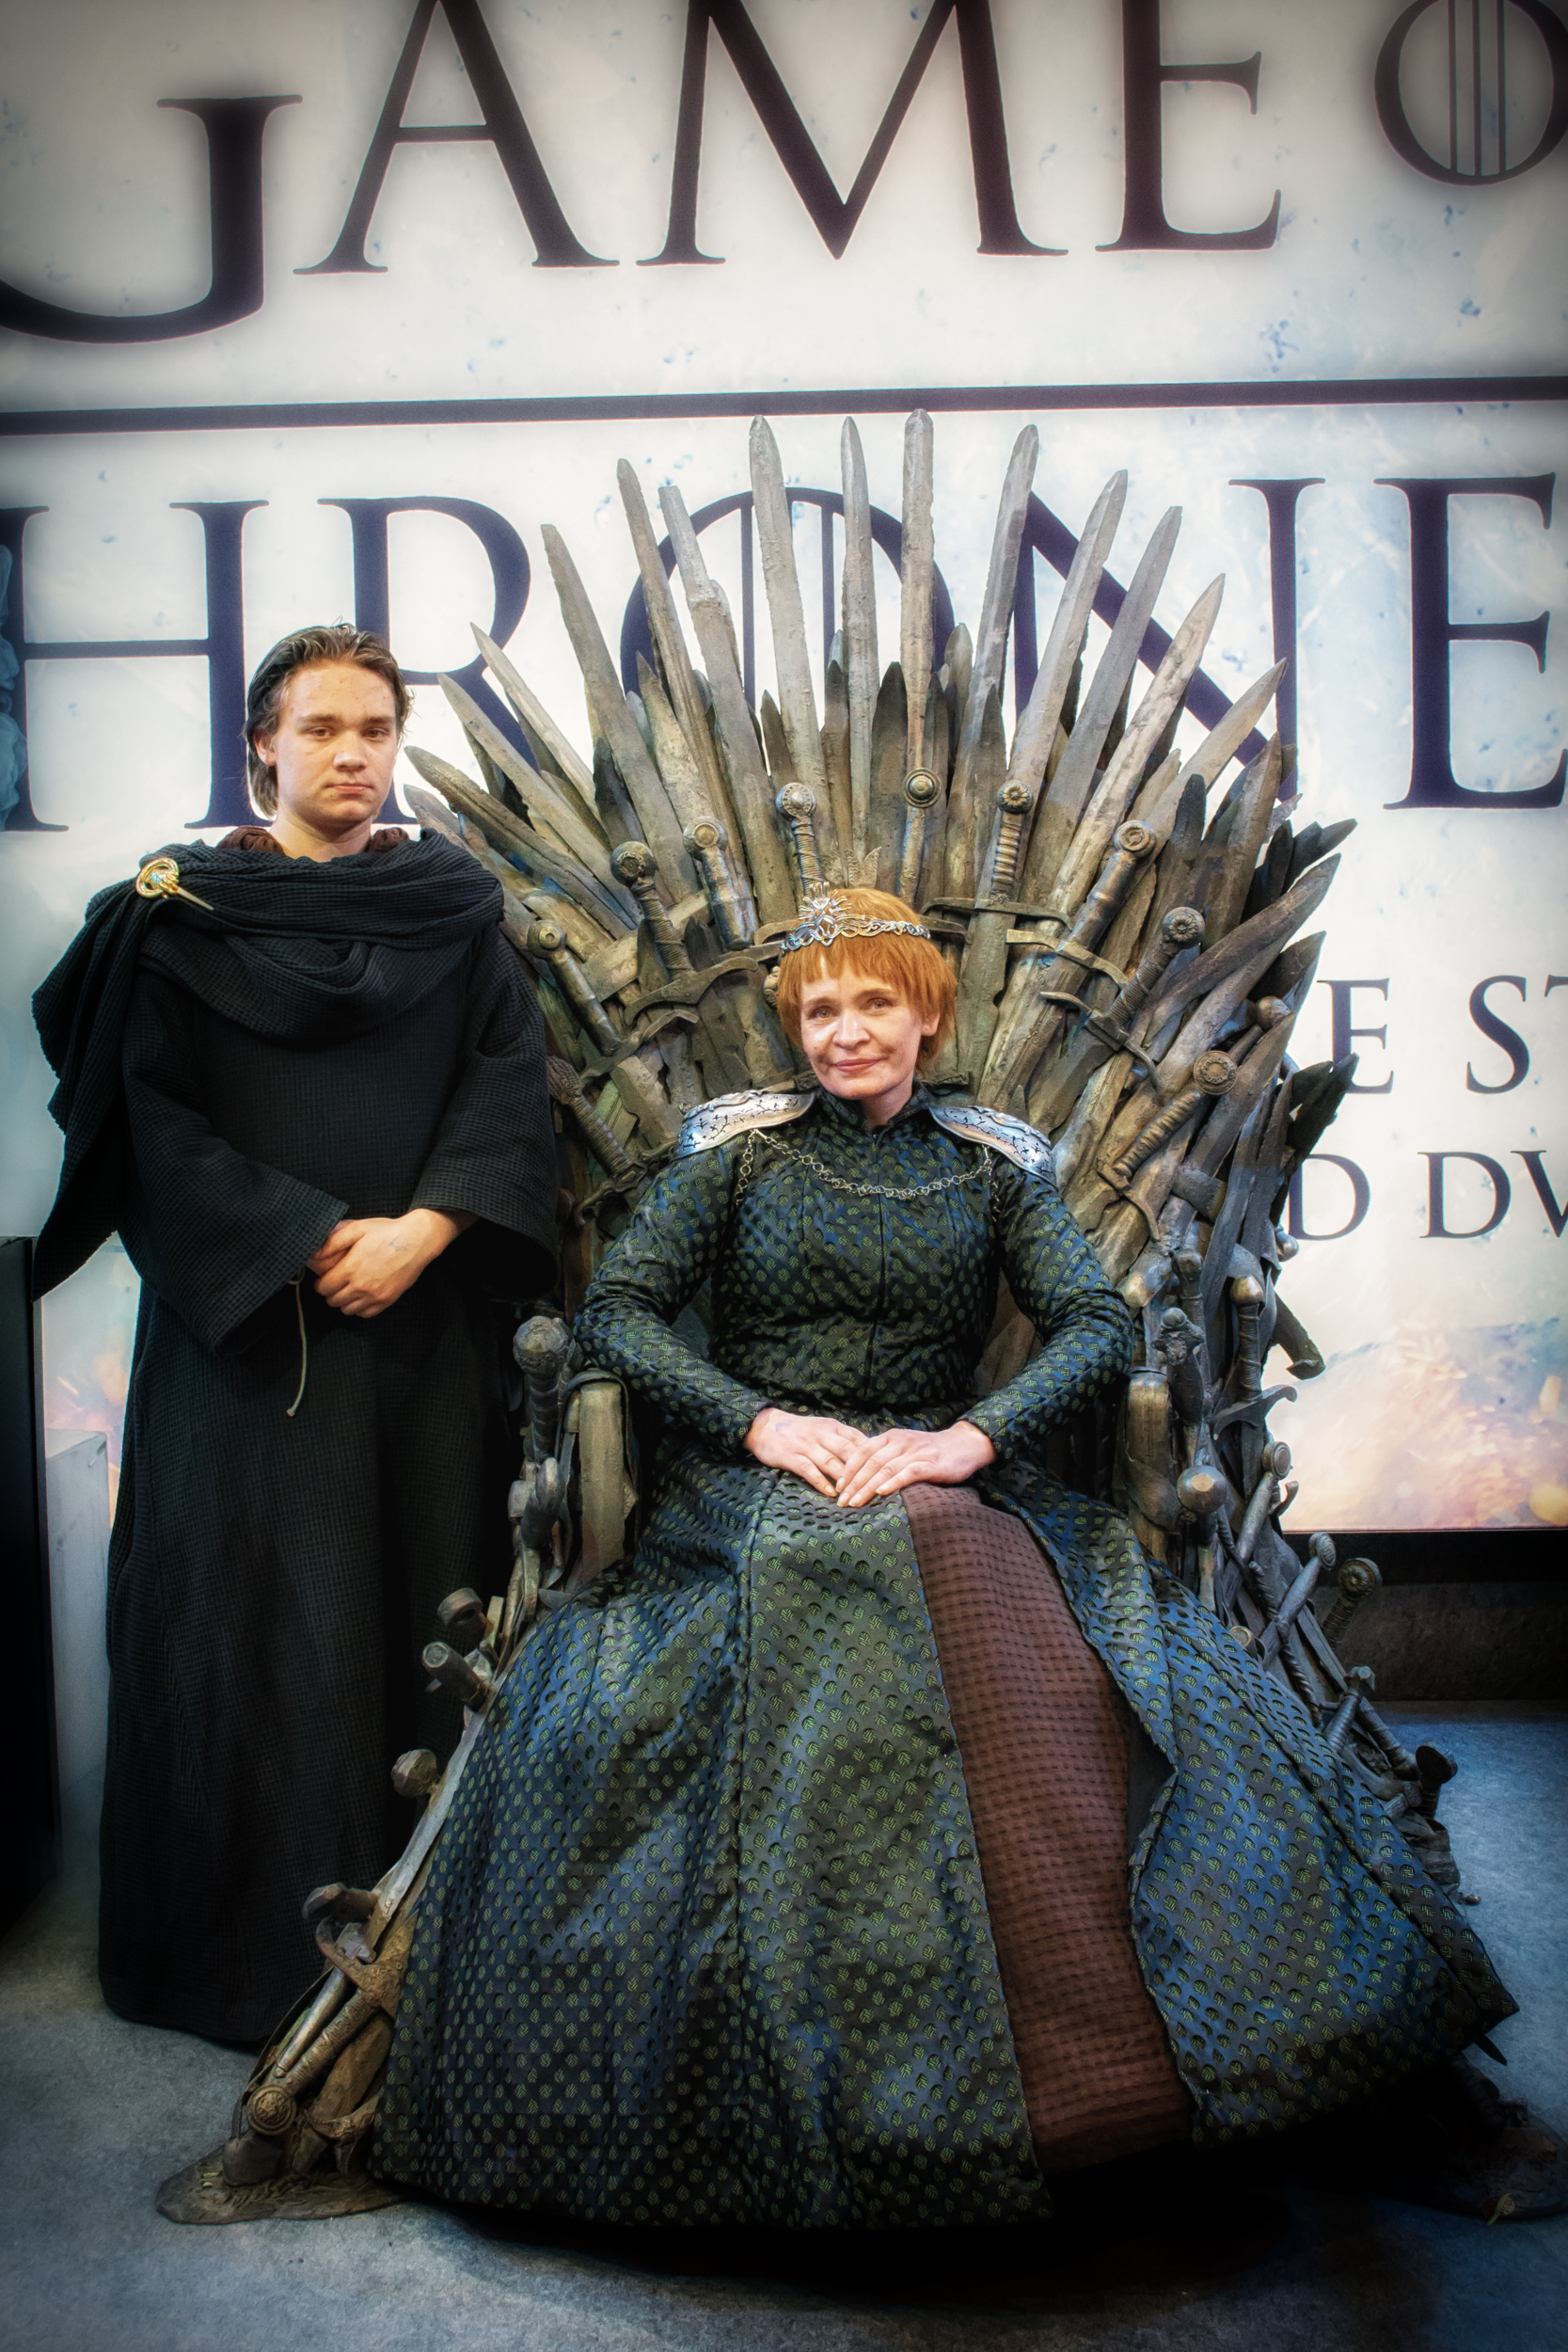
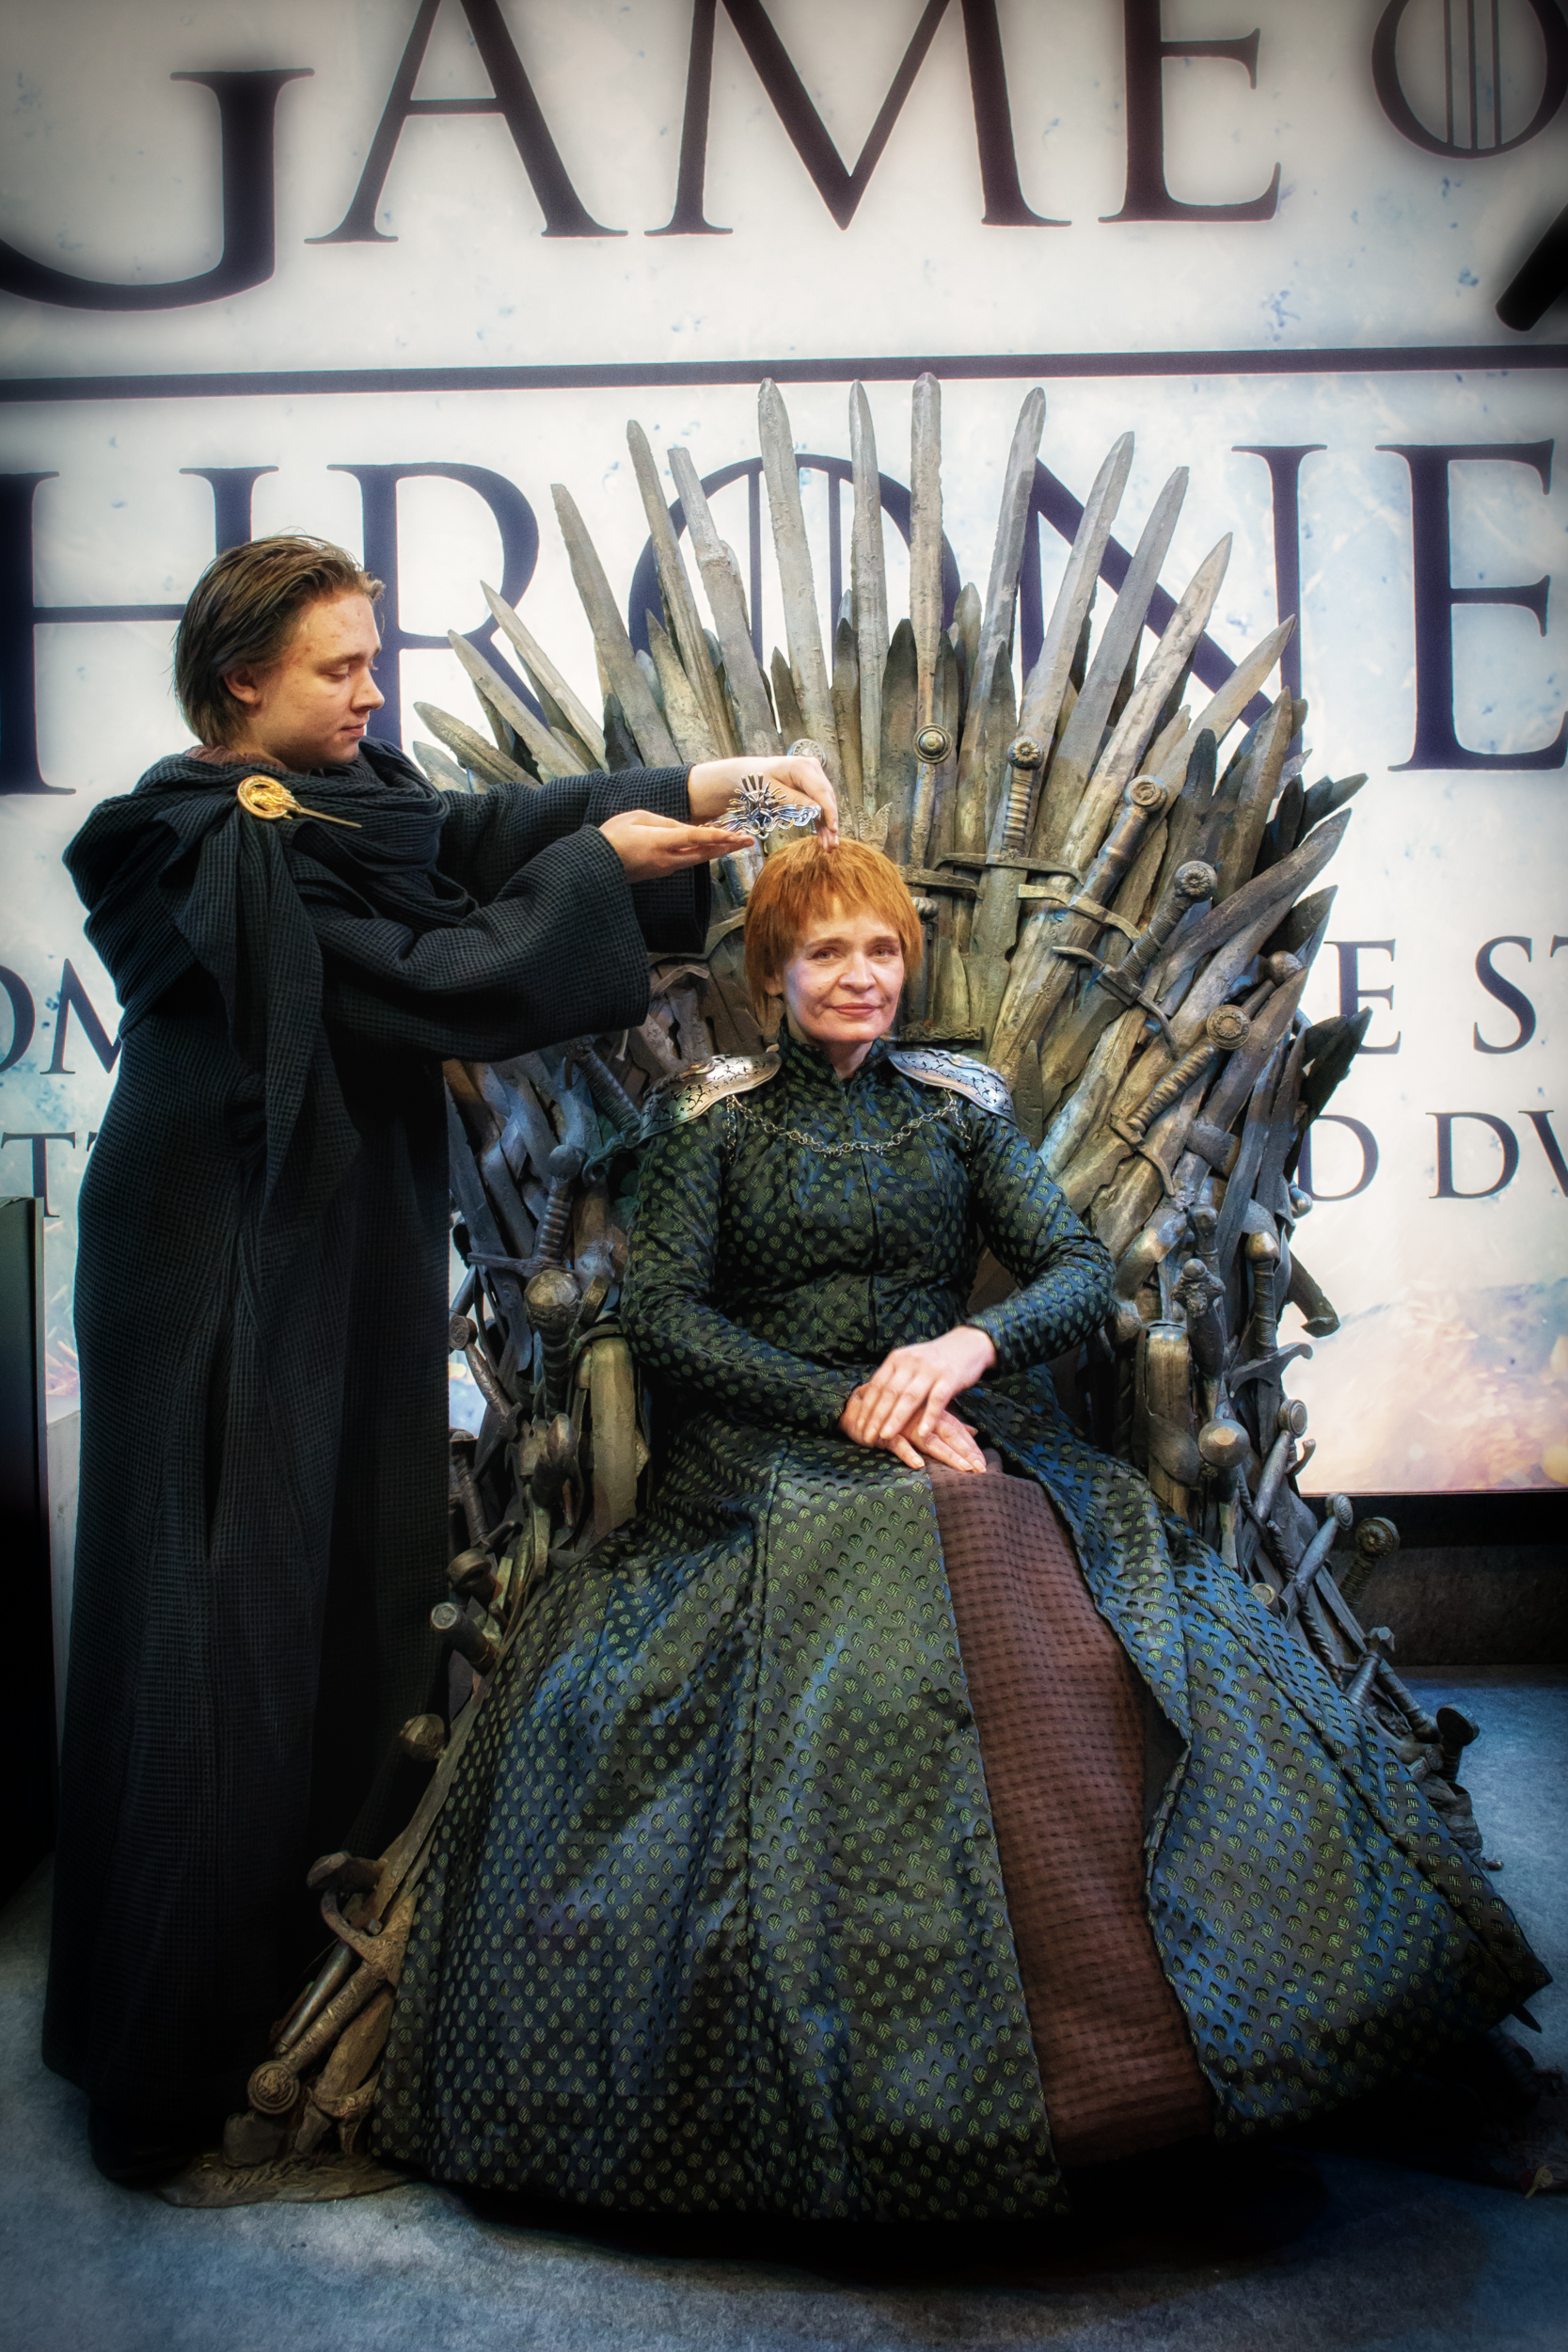
Finished gown
Here’s the finished gown. The photos show me and my son (as Qyburn) at Comic Con Germany, Dortmund, in December 2017.
I’m so glad I stumbled onto your page. It has helped me immensely with my build so far! I was wondering if you shared the underdress fabric pattern anywhere? It’s so perfect and I’d love to use the pattern on spoonflower for my underdress fabric!
Is your pattern for the spoonflower fabric available? It’s so good and I’d love to use it for my own coronation cersei! I’m so glad I found your page, you’ve been a tremendous help and resource for me 😊
Wow your work is incredible! I’ve desperately been looking for the underfabric for Cersei’s coronation dress and yours is perfect! Is your design for sale on Spoonflower? Thanks!
(I didn’t link so here it is https://www.facebook.com/groups/GameofThronesCostuming/)
Hope you have a great day!
I admire your work! You also pay such close attention to detail, and that always amazes me. Are you a part/have you joined the Game of Thrones Costuming page on Facebook? (If not, I’ll link it down below so you can check it out) – It would be great for others to see this!
Thank you!
I have not yet joined that group, but I probably will as soon as I have more to show than just the planning and my pattern making. Still waiting for my laser-cut fabric; and I have to wait even a bit longer before I can order the printed lining fabric from Spoonflower 😉