Note:
In case you’re looking for a good fabric to make this dress, have a look at this fabric on Spoonflower.
It’s not perfect – after all, it’s all printed and therefore doesn’t have the ‚velvet stripes‘ – but at least it has the correct width of the stripes (approximately 1/2 inch) and is black and white with the tiny golden stripes bordering the black ones. Order a test swatch! I do recommend to get this fabric in ‚Organic Cotton Sateen‘.
The only reason why I didn’t use this fabric but went through the hassle with the velvet (described below) is that this printed fabric wasn’t available yet when I tried to make mine!
What I didn’t know when I got the velvet and did my happy dance about this, as mentioned on the ‚Planning‚ page, was that the biggest work was still ahead of me.
Follow me to the adventures of a costumer trying to create the perfect fabric…
Now, usually, it’s really simple to create a two-tone velvet from burnout silk velvet. Dupont invented the AlterEgo dyes, which are perfect for that purpose (and also provide a great party trick!). Basically, it works like that:
You pour the viscose dye and the silk dye from the AlterEgo dye range into *one* pot, then add a bit of salt, vinegar and the AlterEgo fixative.
Let me explain this to you with a colorful example: We’ll talk about red silk dye (for this example, the one called ‚Capucine‘, which results in a brick red) and blue viscose dye (for this example the one that is called ‚Bleu Molène‘).
If you mix red and blue, what happens? Right… purple. So if you pour the two dye colors into one pot, the water in the pot will become purple.
And if those weren’t AlterEgo dyes, your fabric would become purple, too.
However, as these *are* AlterEgo dyes, your fabric – I’ve used the burn out ‚flames‘ silk velvet from the purple Star Wars ‚Senate‘ gown for this example which I dyed about five years ago when first experimenting with the AlterEgo dyes; the original color can be seen on the left in the picture – will afterwards look like this…:
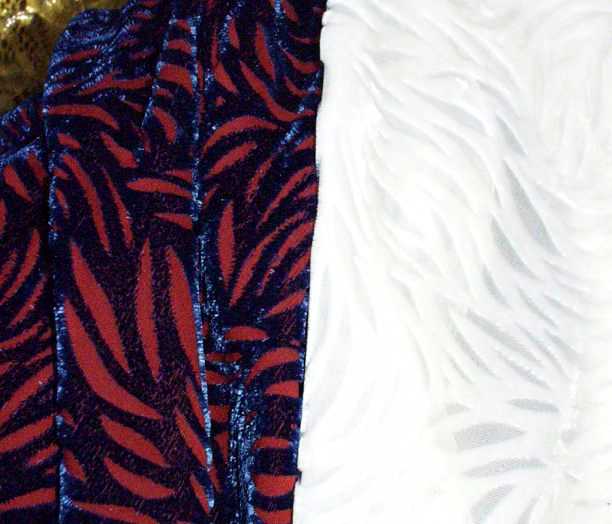
Cool, huh? What you can also see in this picture is that the red (silk) backing is showing through the (blue) pile wherever the fabric is parallel to the camera. That’s the ‚pile effect‘ I tried to explain on the ‚planning‘ page. So now you know where I know from what pile looks like on a different colored background.
Interesting enough, the colors I used back then to dye the velvet appeared in Star Wars Episode 3, and I daresay that they used almost exactly the same dyes as I did. I’m saying that they used the same dyes because I dyed my example much earlier than they started working on the movie (and I also had the example picture on the web earlier, back on my old site). These colors appear on Padmé’s long velvet cloak, on the collar that’s burned out to dots, to be exact. Compare the colors there to the ones you see in the example above; her pile is just a bit more purple which must have come from them adding a bit of Alter Ego Viscose ‚Aster‘ color to the dye. .
By the way, if you would dye a non-burned out silk/rayon velvet with those dyes, the effect would be closer to what could be seen on the red senate gown – this was obviously dyed with red viscose dye for the pile (though this must have been dyed with the ‚Garance‘ dye, which results in a pinkish red, plus a bit of ‚Tulipe noire‘ to darken it and green silk dye (probably the one called ‚Santoline‘) for the backing, making it look somewhat ‚changeant‘.
So how can that dye help with the black and white striped gown?
That’s simple… just leave off one of the two colors. I had white burnout striped velvet, so I intended to dye just the pile, and not the backing:
And that’s when things started to go wrong…
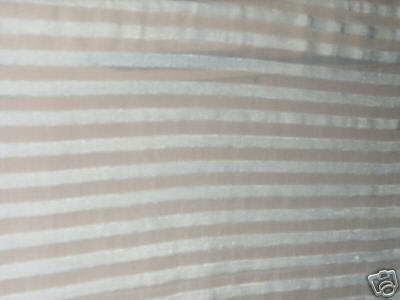
Now, I was a good girl and test dyed a piece to see if it would work. This is what it looked like…:
…and as you can probably see, it came out great, but far too light.
I just thought, well, then I’ll have to add more dye. By then I had figured that I wanted not just ‚black and white‘, but ‚black with a blue shimmer and white‘. If you’ve browsed my site a lot, you might know that I love blue very much, and I thought that this would give me personally the better color fit.
So I just added more dye to the bath. A lot more dye; hey, I had to dye 12 yards!
…too much dye, as it turned out. Or rather, too few fixative, which is why I don’t call that stuff fixative but ’separator‘: It doesn’t fix or fixate anything, it keeps the two types of dyes from dyeing the respective other fiber; it separates the two dyes on the fabric.
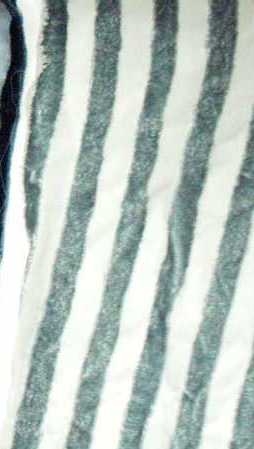
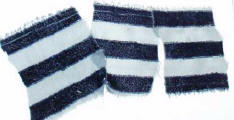
No more delays… here’s a picture of what my dye job looked like after it went wrong, right next to the test piece, spread out on a white surface (as the burned out chiffon stripes look a bit lighter on a white background, and as I was intending to line the whole, partially transparent and far too flimsy burnout velvet with white taffeta anyway…
As you can probably see, the blue shimmer of the velvet stripes is really beautiful. However, the fact that the chiffon also took some of the dye is not. As in: Not at all. I wanted the black and white Sleepy Hollow dress, not the black and grey Sleepy Hollow dress, dammit!
I had a few options:
- Bleach the velvet and start the dye job from the beginning.
Actually, I tried that; again on a small test piece and with a very mild bleach (as it’s silk, chlorine was no option!).
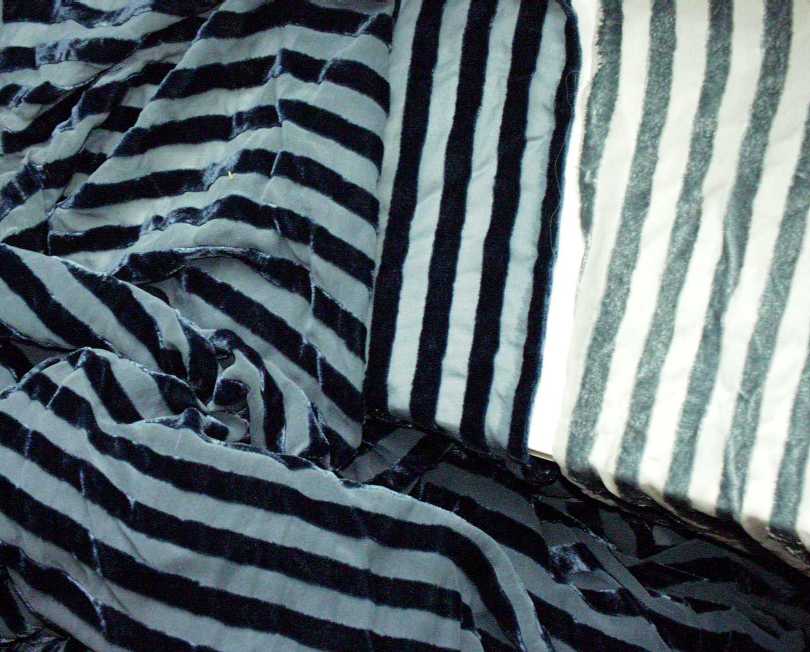
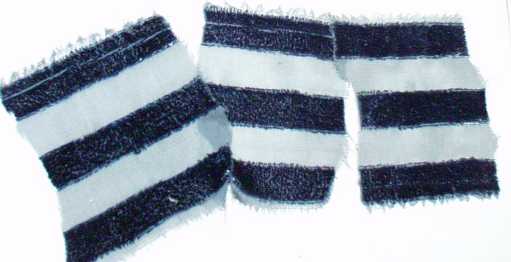
This is what the test pieces looked like – from left to right: No bleach, after 24 hours in the bleach, after 72 (!) hours in the bleach (picture is a bit too light, but I think you can see enough…):
As you can see, there’s little to no difference, except that the blue shimmer has completely vanished. - Trash the velvet (or sell it… or use it for something else…) and start looking for striped burnout velvet from the beginning.
No, Ma’am! I’ve searched for this for four years, so looking for it again was not an option. Plus, fabric, once in my possession, only leaves my house as a finished garment – *if* it leaves my house as it’s intended for someone else – or over my cold dead body… - Use the velvet as it is, and be happy with a grey and black gown.
To be honest, I was almost ready to go for option three. In fact, I was on my best way to do so.
That is until I asked on the Costumekittens board which golden outline marker to use. I tested a few…
and Siouxie suggested that perhaps I should use a fabric marker instead of the usual bottles of golden silk outliner to achieve a less frayed look.
Suddenly I had the weirdest of all ideas. I grabbed a pot of *white* silk paint and practically *ran* into the bathroom, equipped with a brush, pinned yet another piece of test velvet to the doorframe (!) and started to paint the backing of the chiffon stripes with that paint.
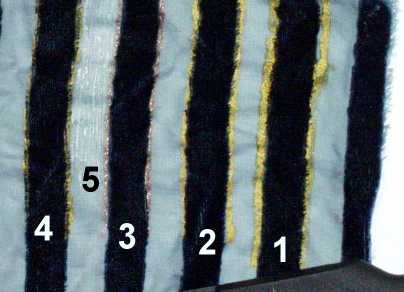
This was the result…:

From left to right: Backing of painted velvet, front of painted velvet, front of non-painted velvet, backing of non-painted velvet.
YES! This was my solution.
I hesitated less than an hour because of the tremendous amount of work that this would be, and after that, my whole fabric was partially pinned to the doorframe and about to be painted.
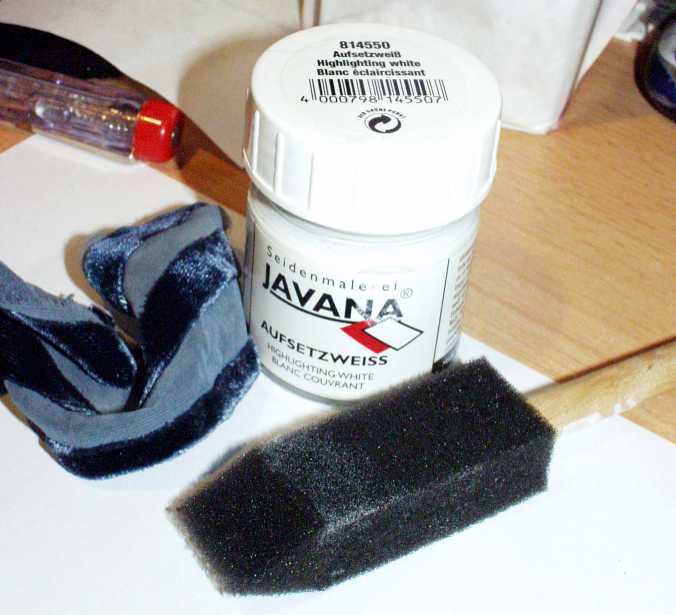
Some statistics on that work…
- One pot of white silk paint is enough to paint not quite 1.5 yards of burnout silk velvet.
- Each pot costs about $3.50
- I would need about 9-10 pots of silk paint for this project, resulting in a total price of about $35 for just the paint (which is actually still much cheaper than buying new fabric!)
- Additionally, I am working with a sponge brush, which would only last for about 3 yards. Costs for 4 sponge brushes: $4 ($1 each)
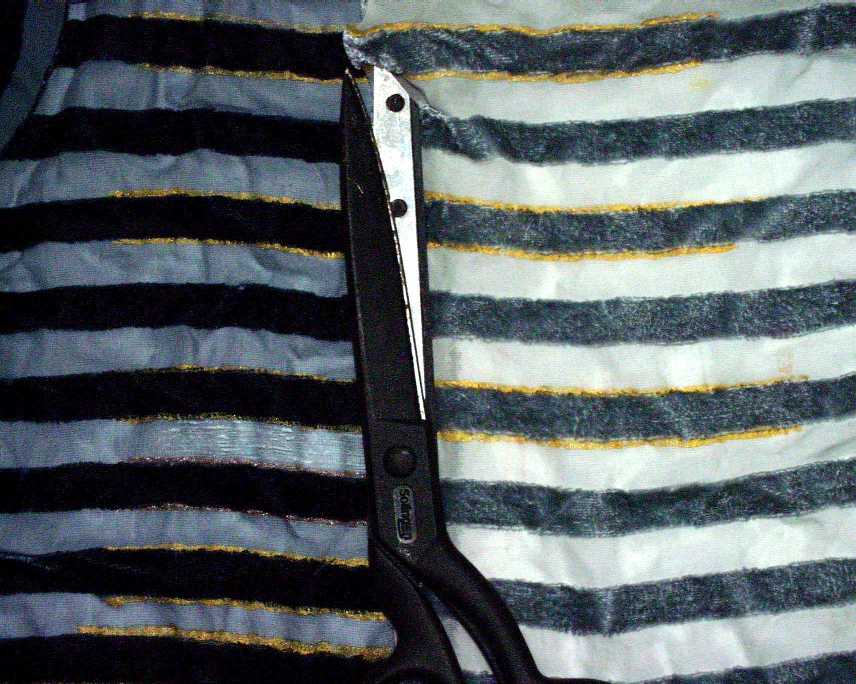
- It took me about an hour to paint each yard, plus another hour for thorough drying. That makes 12 hours of work, plus 12 hours of waiting…
- What this work took most of was patience – nerves – patience – nerves – patience – nerves. All of you who *do* know me know how much I *hate* boring and recurring work, and if this is not both, then I don’t know what possibly could be. And painting those stripes *was* boring.
So boring, that, in fact, I calculated how much yardage of stripes I had to paint.
Read and be amazed, if I had painted all those ~630 stripes in a single line, I would have painted a line that would have been almost 570 yards long… I’m not exaggerating this, I’ve measured and calculated it! (And, no, the thought that I’ll have to paint the same amount of thin golden lines doesn’t exactly help much, either…)
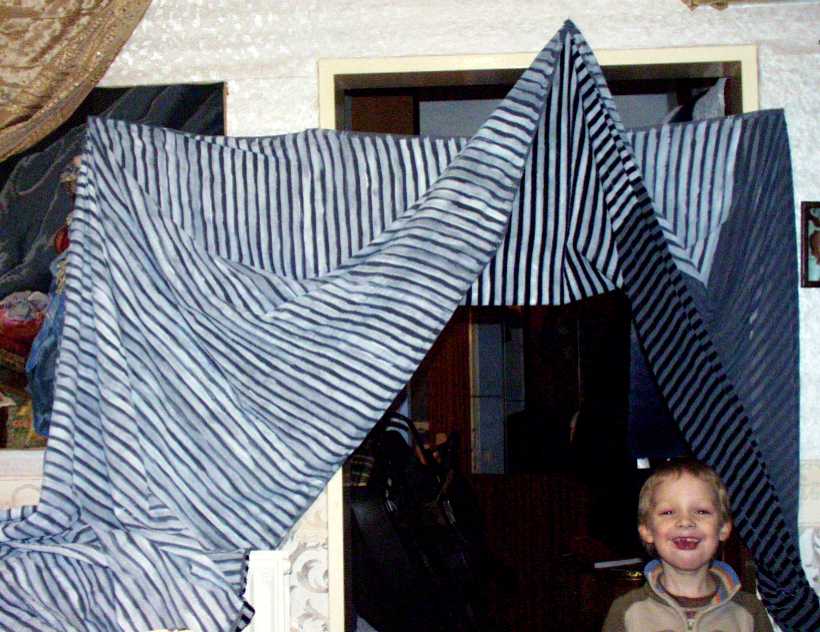
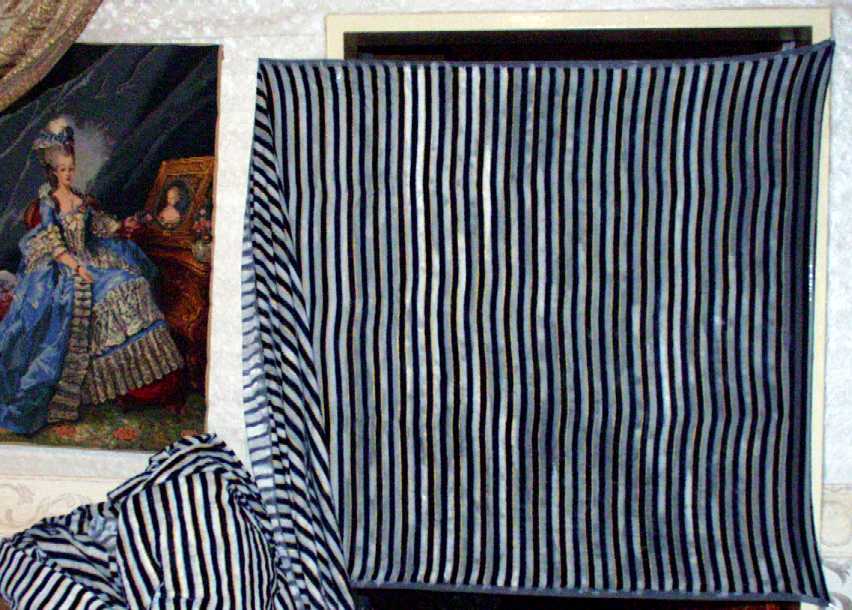
This is what the fabric looked like when I had painted a bit over half of it.
Left, partially hanging over my Marie Antoinette embroidery: the painted fabric from the backside; center: fabric partially pinned up to allow people to pass through the door (but it’s also a good opportunity to see the front of the painted fabric!), and on the right, hanging down: The not yet painted part of the fabric.
That funny little guy below the fabric, by the way, is my son 😉
What I extremely love is the slight irregularity of the hand painted stripes, they are a bit lighter in some and a bit darker in other areas. This also shows a bit on the front side of the fabric, giving a beautiful, textured, slightly aged look to it.
The beauty of that look, by the way, is the only thing that keeps me going on this project. I am by all means bored to death from painting the stripes, but as I have already managed to paint more than half of them and as I have so long searched for the fabric, I am by no means intending to give up in any way until I’m finished.
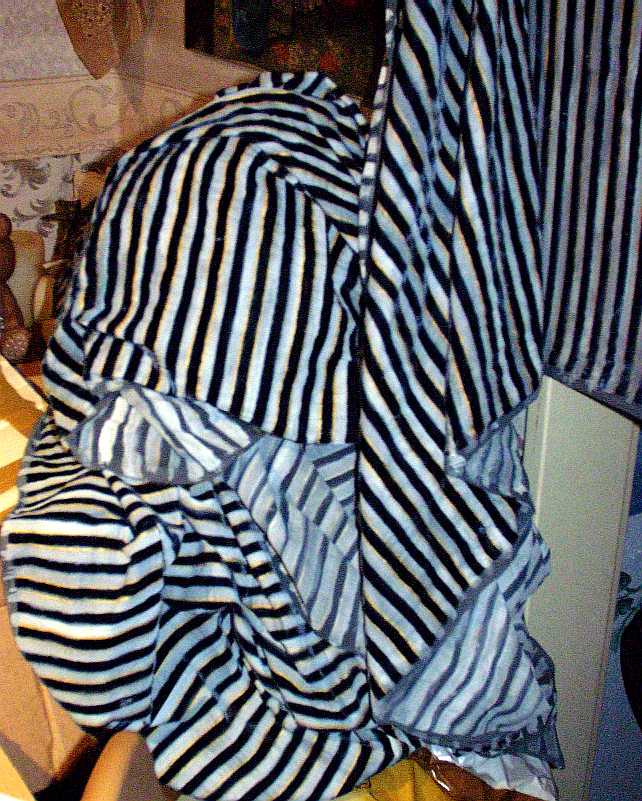
Almost finished!
Look at the right side, the end is close… 😉
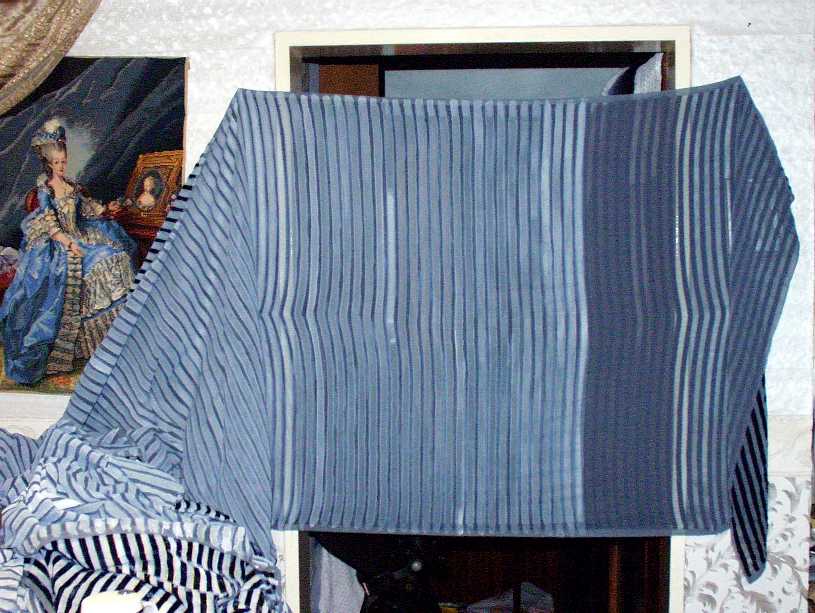
…though, of course, just for the white stripes. The golden lines still have to be done!
Here’s the first yard; I’ve currently run out of white paint, and as it is, I’ve already bought everything the stores around had in their shelves of that particular white paint (as I only have a little less than a yard to go, I don’t want to change the brand – I’m afraid the difference between two brands could be too obvious…). Now I’ll have to wait until they restock, which, of course, doesn’t prevent me from starting with the golden lines in the meanwhile…
Short update 17th of February 2007:
I’m finished painting *half* of all the golden lines. 3/4 of the painting work is done! Go me! (‚go me‘ just 1/4 more… please… I’m sooo bored… becoming slower because it bores me so… but I want to start making the gown sooo much…)
Update 19th of February, 2006:
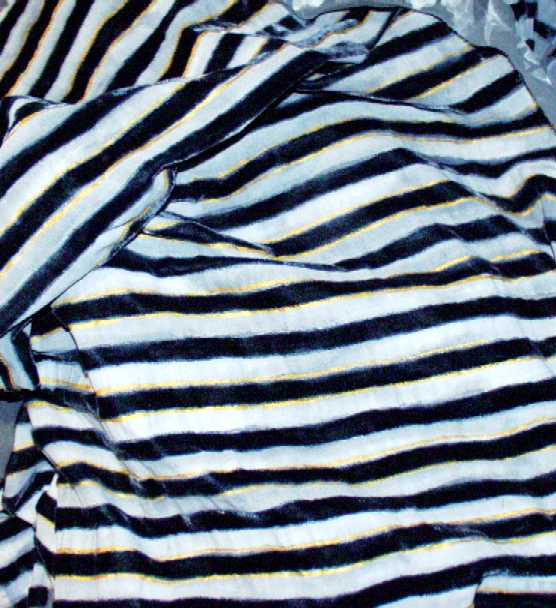
I’m *FINISHED*!!!
Finished painting the fabric. Finished painting 1260 stripes in white and lines in gold. Finished painting a total stripe/line of 1140 yards, emptying 16 (!) bottles of silk paint in that process.
Honestly, I cried when I painted the last six lines, believe me or not and call me a drama queen, I so fucking don’t care.
This is not the most perfect fabric in the world, but I definitely deserve an ‚A‘ for patience on this project so far.
And just so that I don’t forget it:
I listened to song #1, ‚Hummel gets the rockets‘, from „The Rock“ soundtrack (which I’m usually listening to when I have to do something that’s *really* insane – and I listened to that soundtrack *a lot* during this project!) while painting those six last golden lines. I have an extremely well functioning musical/feeling memory, so whenever I hear that song again, I can trigger crying, I know it.
There are just three other songs which can do that to me, one (Irene Cara – ‚Flashdance‘) I heard on my walkman in the 80’s when my dog was overrun by a car; Madonna’s ‚American Pie‘, which I heard again and again (approximately 50 times or so!) during the 39 hours of labor when my son was born; and Limp Bizkit’s ‚Behind blue eyes‘, which I heard almost exactly 3 years ago on the 28th of February 2004, my birthday, when someone gave me a very special gift. Whenever I hear those three, I have to cry, and now this is the fourth song I’m adding to the collection of ‚crying-triggering‘ songs of mine.
I’m proud that I came that far – so far!
21st of February, 2007
I’m afraid I have to announce that I’m putting this project to a temporary hold.
During the washing of the painted fabric, and I have *so* no idea why because I heat fixed it correctly, some of the white paint came off, taking some of the golden lines with it.
At the moment I *so* have absolutely no nerve to repaint the stripes. Plus, as I’ve already mentioned, I’ve run out of paint.
The fabric is ruined at this point, and I don’t know when or if I have the nerve to fix it. I *do* have an idea what I *could* do – this *could* ruin the fabric completely *or* save it. I’ll see what I can do, but this will take at *least* two weeks until I can start on it.
I still want the dress badly, and even if the fabric currently looks as if it’s been in and out of a trashcan… I will still try to save it. But not *right now*.
Stay tuned for updates (but don’t hold your breath too long…)!
Is there more to your planning that isn’t linked? Your site has it marked as finished but I don’t see anymore information after your unfortunate tangle with fabric washing
I read this post a while ago when trying to search for the right fabric for this dress. I couldn’t find it anywhere. Well…I found it. And I wanted to share it with you 😀 https://www.fabric.com/buy/uh-510/dior-flocked-stripe-onyx-white
It has the flocked velvet. It looks perfect 😀
Thank you for all the research you did!!!
That’s indeed a great find – except that the stripes are double as wide as they should be (which would be approximately 1/2 inch, not a bit more than one inch, like the fabric you found has).
But otherwise, only the golden stripes are missing; which could easily be painted in. Great find!