~Please also have a look at my other Star Wars costume reproductions! ~
Star Wars Episode 2
Anakin Skywalker
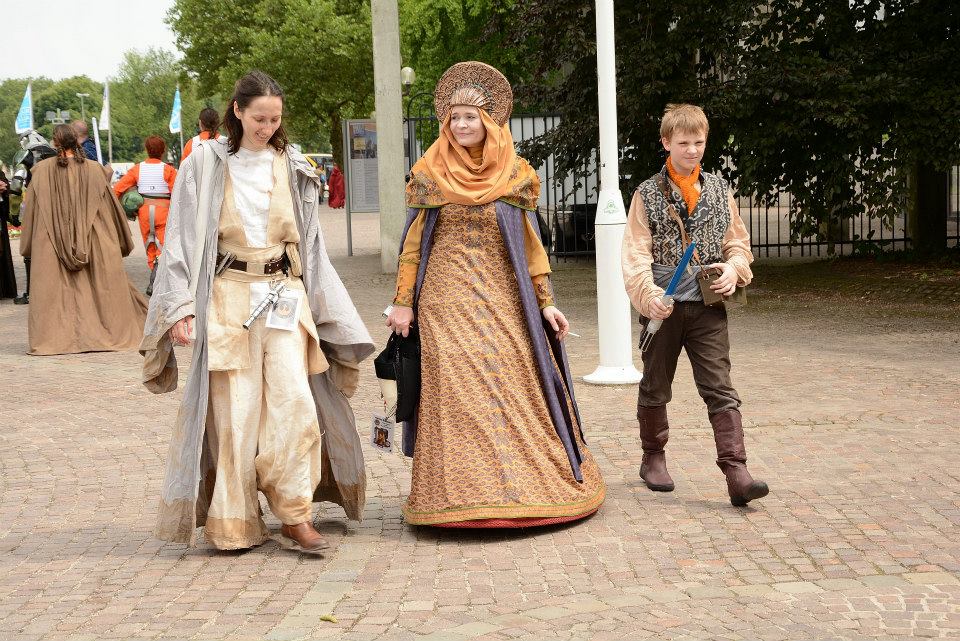
„Travel to Naboo“ outfit
With tutorial how to create fake mudcloth

My son (lucky me!) likes his costumes to match mine.
I have no other explanation why, when asked, he insisted on having an Anakin Travel outift to go with my own Travel dress.
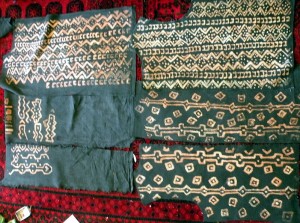
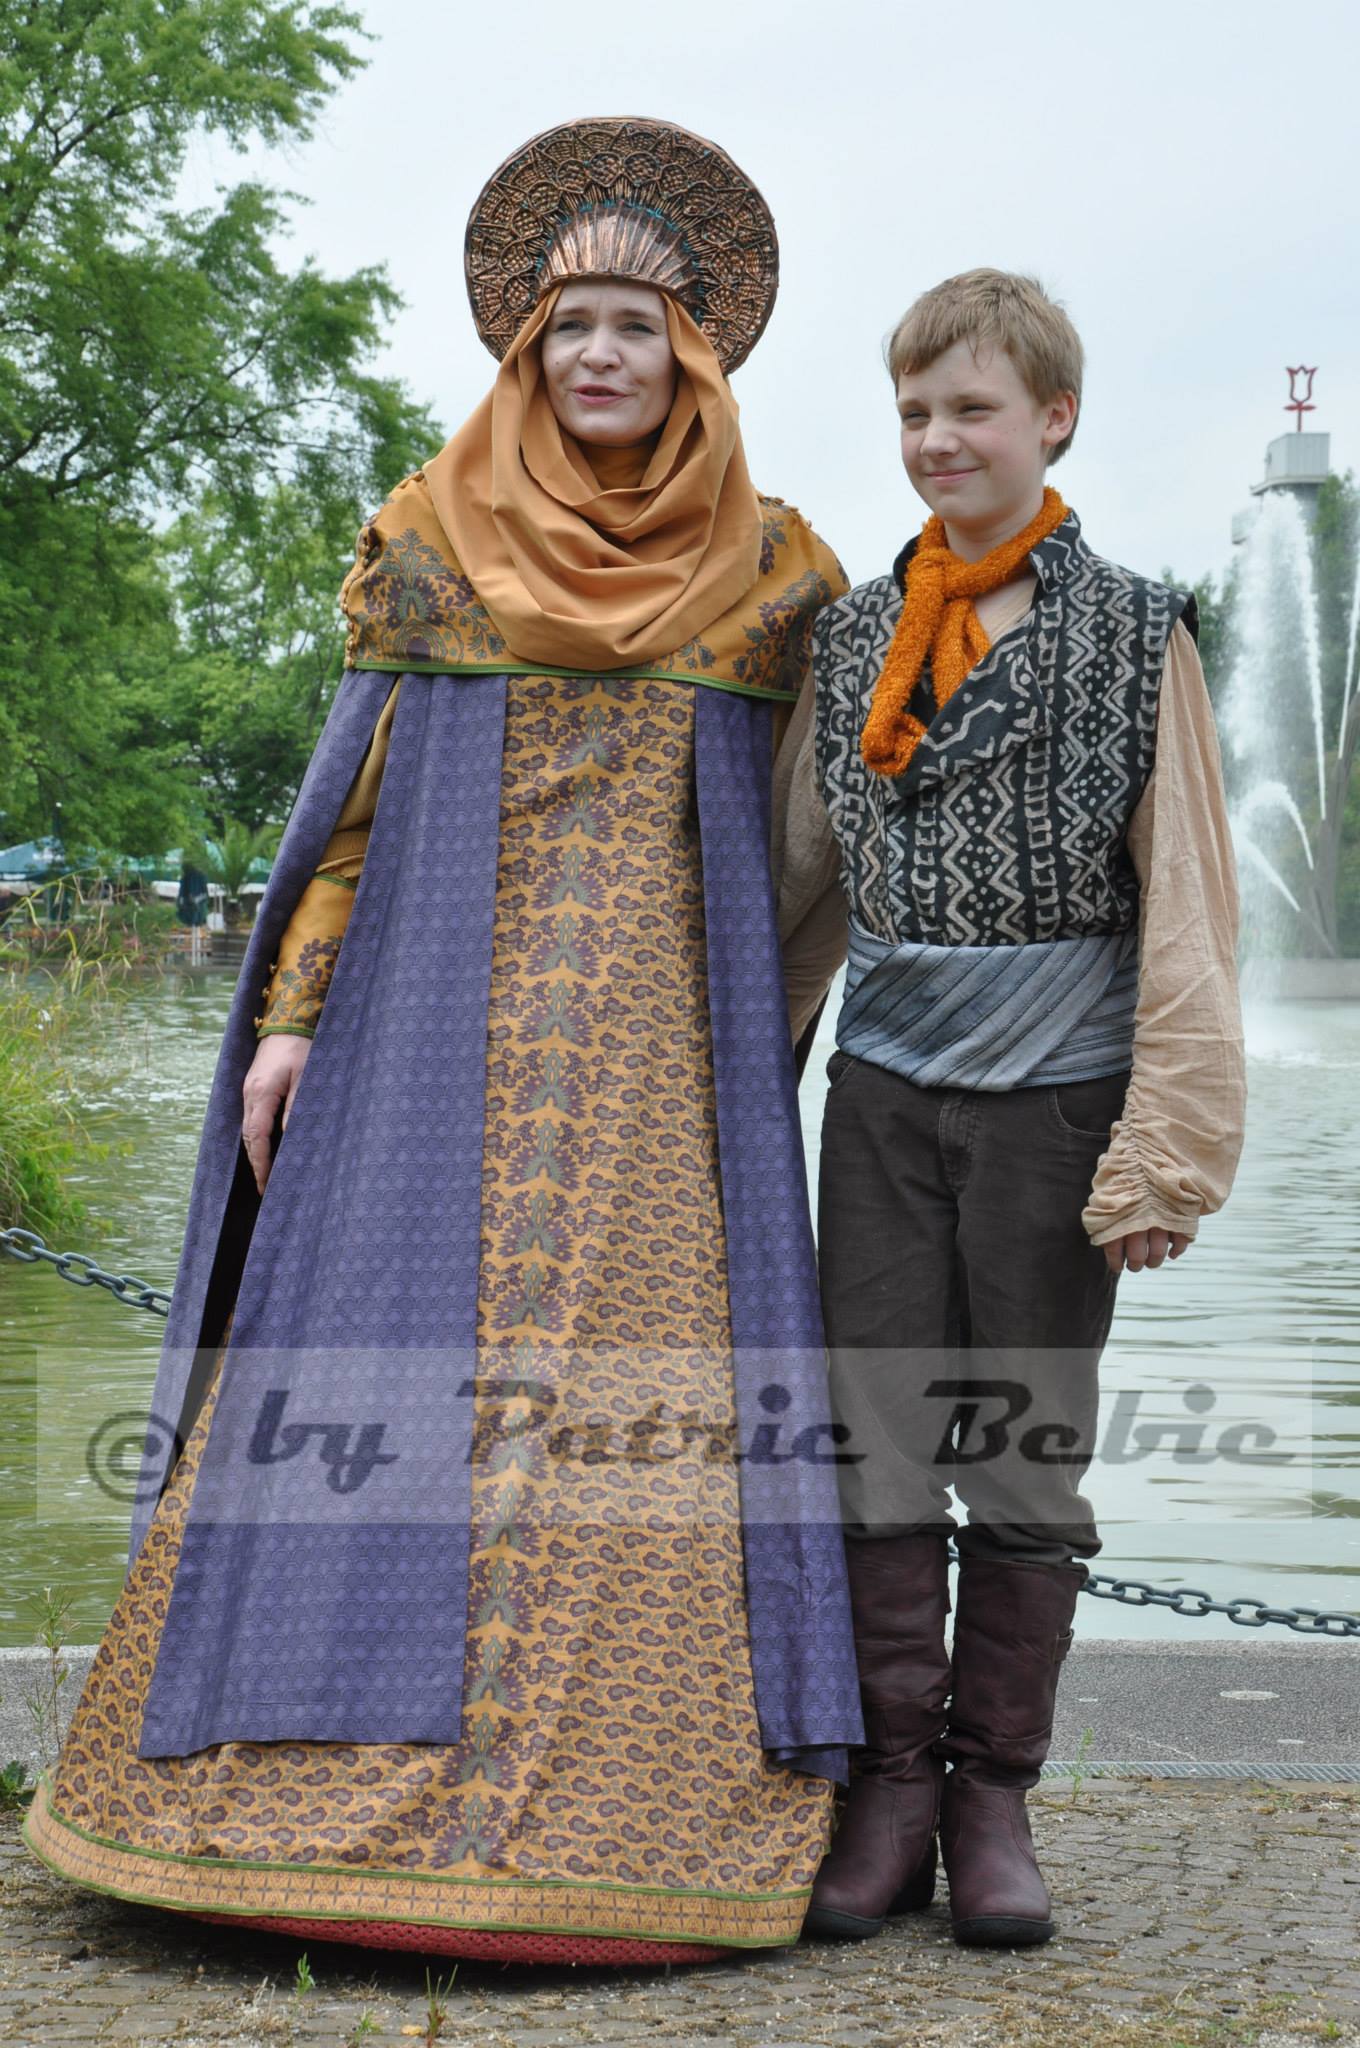
Anakin’s outfit is, shall we say, rather unusual for a Jedi. First, there’s that very beautiful vest / waistcoat, which, according to Padawansguide, was made from mudcloth; also called Bògòlanfini. You can read more about how actual mudcloth is created on this page.
This is a really beautiful material – in closeups of Anakin’s costume, you can see the really beautiful texture of that fabric.
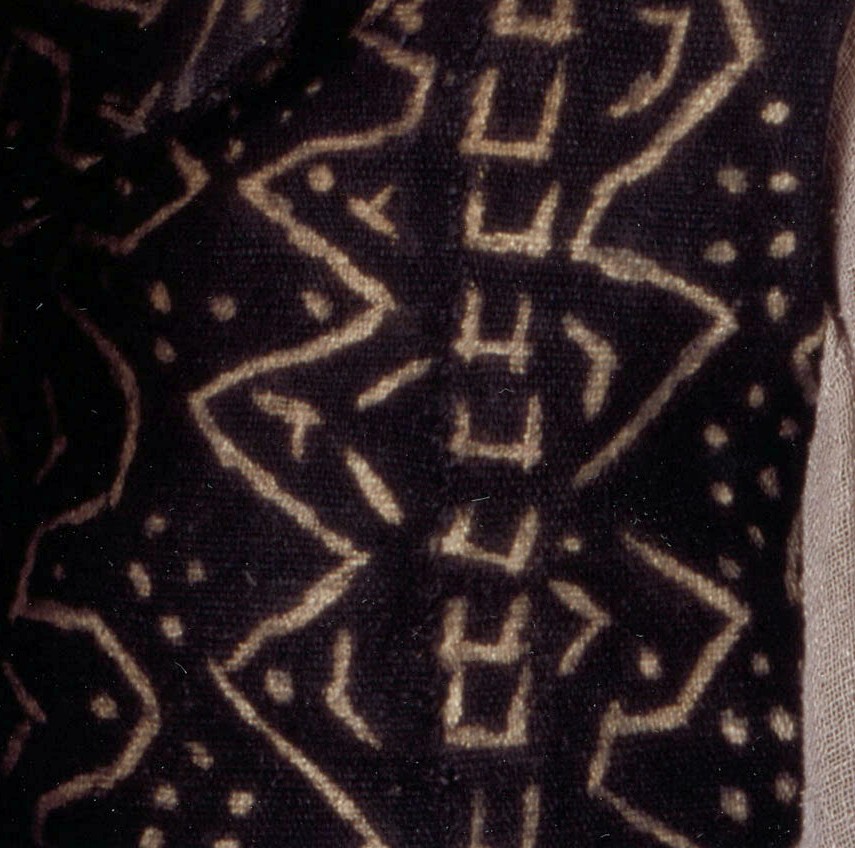
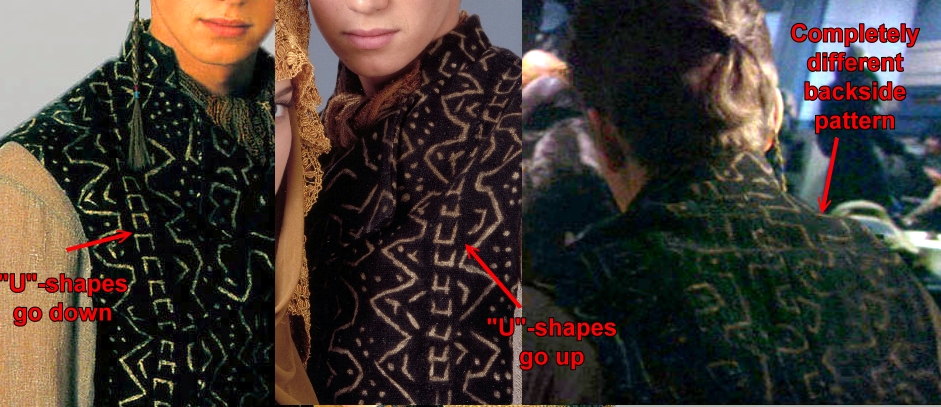
The other really interesting thing about that waistcoat is that the pattern is completely different on front- and backside. Also, left and right front of the vest differ as well, since the pattern goes „up“ on one side and „down“ on the other. I’ve illustrated what I’m talking about in this picture:
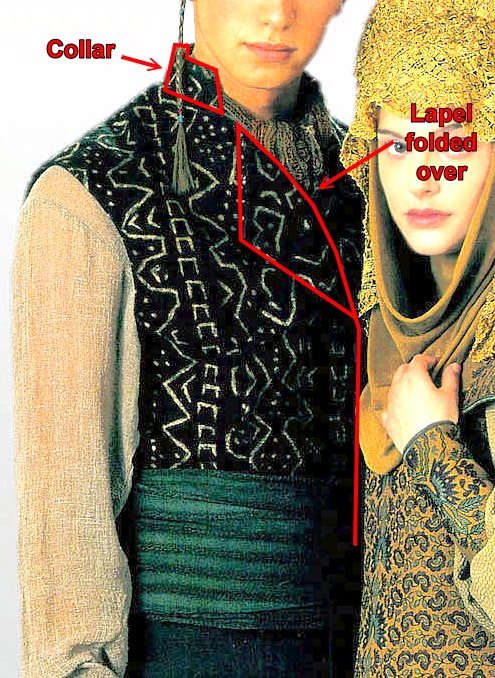
The pattern for the waistcoat is rather simple. There are two large lapels – a result of the front sides folding over – and a small standing collar.
Now, I understand that the really, really most DIFFICULT part on that vest – since it’s otherwise really simple! – is to find the appropriate fabric.
You can, of course, try and find mudcloth with a very similar pattern.
Or… you can make your own. Which is what I did. So here’s the tutorial for….
How to create fake Mudcloth
You will need:
- natural colored linen, medium weight.
And I really mean „Linen“, as in woven from flax fibers; not „Polyester that was woven to look as if it was linen“.
The only possible substitutes would be cotton which looks like linen; or silk that looks like linen (aka silk matka or finer Tussah silk). NO polyester, acetate, or otherwise „plastic“ fabrics. No blends with „plastic“ fibers either! - black fabric dye (and whatever you need to go with it – salt, maybe vinegar, etc.).
As to which dye – you will have to test that; in combination with what I am going to write (so please read this tutorial down to the very end before actually buying „some“ dye and then complain it didn’t work).
Personally, I used Simplicol Textilfarbe in schwarz (black); but that’s a German brand, so it isn’t necessarily available where you live. - Discharge paste; manufactured by Jacquard products which can, for example, be bought at Dharmatrading, Hand printed and Rainbowsilks.
The smallest bottle (238ml or 8oz) is enough to actually make TWO waistcoats. - A small, hard brush. Really small. Really hard.
- Baking paper. DON’T use plastic coated baking paper; just the ordinary stuff.
- A squirting bottle.
- A proportionally printed template of the pattern. I measured the height of shoulder-to-waist on my son, then cropped a photo of Anakin to that area, resized it to the measurement which I took from my son and printed it out.
- A black sharpie. That will help eliminate bleached areas that, well, should not have been bleached.
- An iron to iron the fabric. This is really important; without the iron, this tutorial will NOT work (as in: not at all).
- a pattern, if you don’t want to make one from scratch.
I started with Simplicity 7297, view A, and just drafted the collar to it plus added a small standing collar from a strip of fabric. Also, I lengthened that vest a bit so instead of having ‚points‘ at the front, it’s now straight.
After telling you the „what to use“, here’s the „how“:
- Start by dyeing your fabric. It doesn’t really matter if you do it in a pot, stove top or in a washing machine; as long as the result is even and not blotchy.
- Let fabric dry, iron thoroughly afterwards. This is important because you do NOT want to work with wrinkled fabric.
- Draft your vest / waistcoat pattern with chalk to the FRONT side of the fabric. Of course… with linen it doesn’t really matter which side you use as ‚front`‘ or ‚back‘. I also strongly advise to make a muslin (=sewn test piece) of the vest first, so you can be SURE to have a fitting pattern – alterations to what you are creating are, well, difficult to impossible.
- Cut out all fabric pattern pieces.
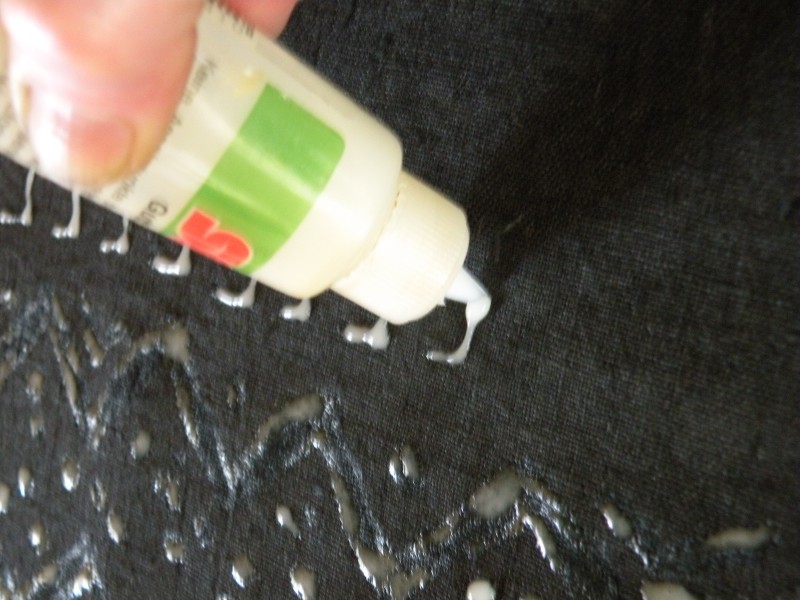
- Fill some of the discharge paste into the squirting bottle.
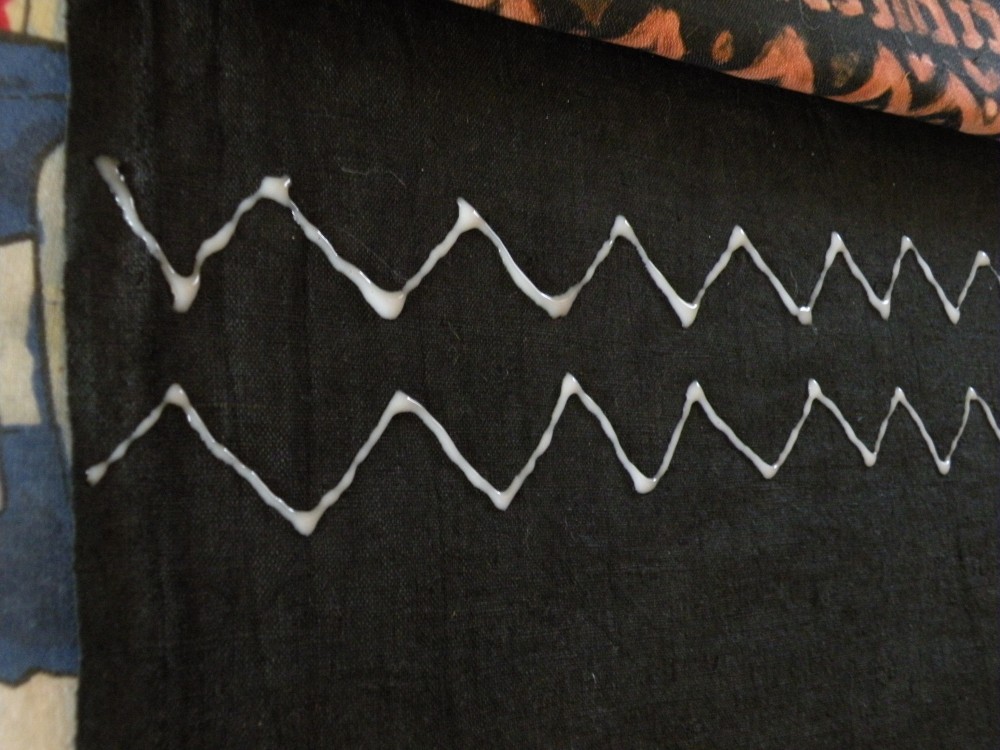
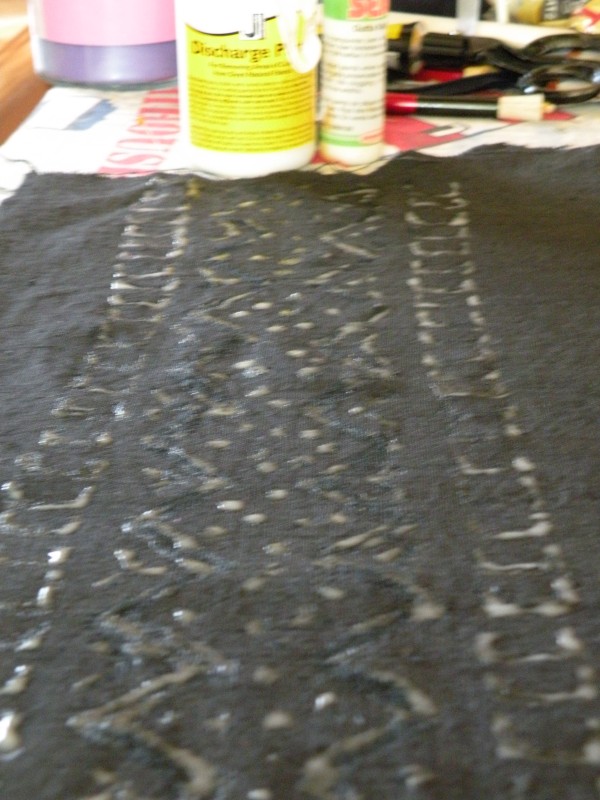
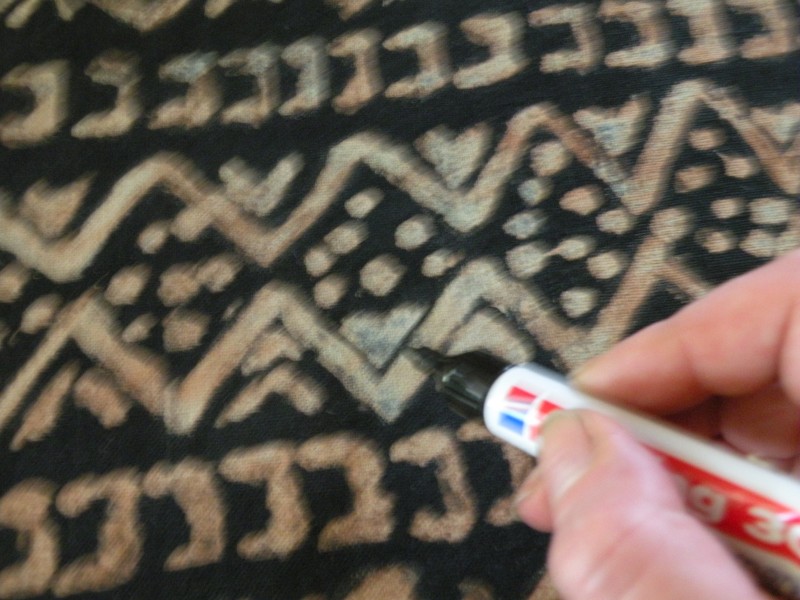
- Now… with your template right next to the vest piece… start squirting the discharge paste in thin lines to the fabric. Like this:
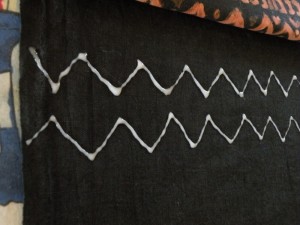
 As you can probably see, I started with the „zigzag lines“; then added the dots, and afterwards, a row of the „U“ shapes. In between squirting, I brushed the discharge paste into the fabric (you can see that in the bottom picture – the zigzag lines and dots are brushed; the ‚U‘ shapes are not). Keep in mind that you’re not aiming for a completely even, geometric look. The original vest’s fabric pattern IS pretty irregular, and neither even nor geometric in the very strict sense.
When you have finished squirting /brushing about HALF of one vest piece (which means front left, front right, back left or back right), lay the fabric (with the still WET discharge paste!) out on your ironing board. Actually I WORKED on my ironing board so I didn’t have to move the fabric pieces 😉

- Now – CAREFULLY so you don’t SMUDGE the still wet discharge paste! – place a piece of baking paper, large enough to cover the ENTIRE area of what you painted, over that vest piece.
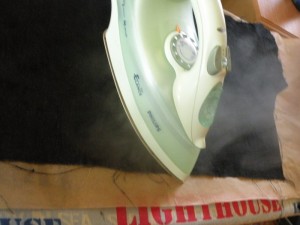
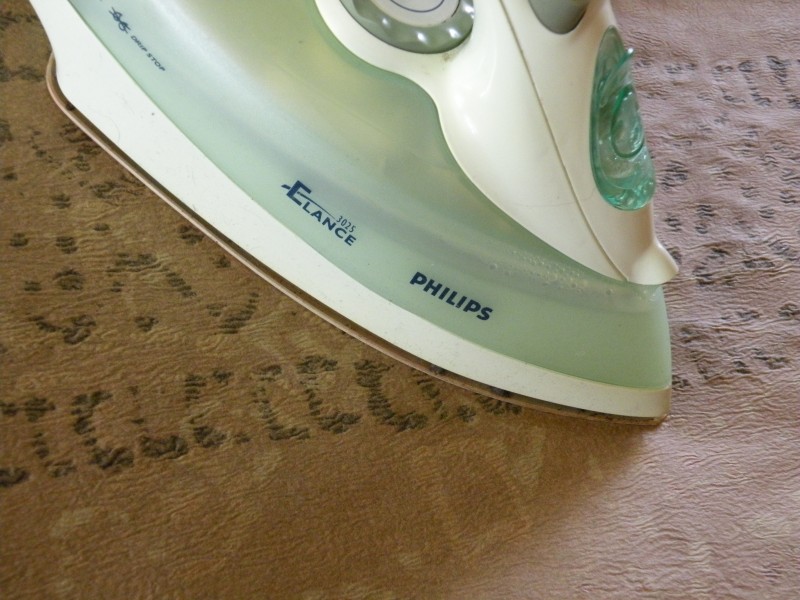
 Then… set your iron to ‚Cotton‘ (which should be the highest possible setting) – no steam at the ‚baking paper on top‘ stage! – and start to iron over the baking paper.
 Yes I DO know that the discharge paste’s instructions say to wait until the paste is dry. But NO, that is NOT what you want to do – you want to iron OVER the baking paper, which is on top of the still wet, fresh discharge paste.
 - When you see that the discharge paste begins to dry (there’ll be less dark wet ’spots‘ visible through the baking paper – and yes, that can take time!), flip the baking paper / fabric layers – without moving the baking paper on the fabric! – so you end up with fabric on top, and baking paper beneath it.
 As you can probably see, the wet discharge paste can also be seen (as darker areas) on the backside of the fabric.
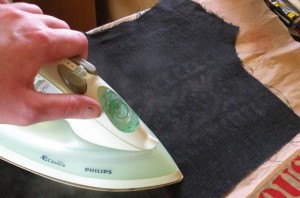
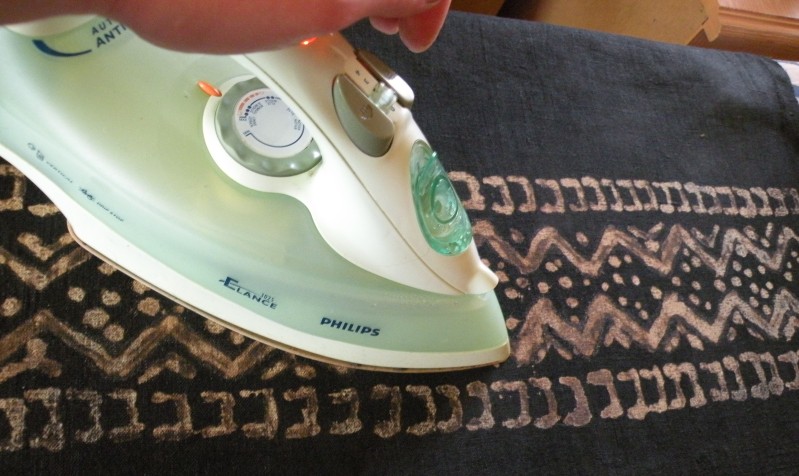
Now you want to iron AGAIN, this time with steam. PLEASE BE CAUTIOUS. Do NOT breathe in that steam, nor let it get into your eyes. Actually, I ironed those pieces with an outstretched arm; to keep away from the steam as far as possible.
 As for how long to iron this – well – I let the iron rest for three seconds on the fabric, then moved it approximately half an inch, then let it rest again… yes, it’s a rather slow process.
 - After SOME time, you will notice that something happens. This, to be precise:
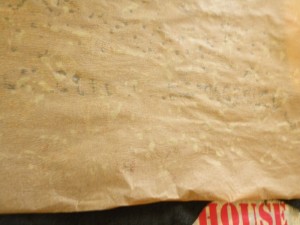
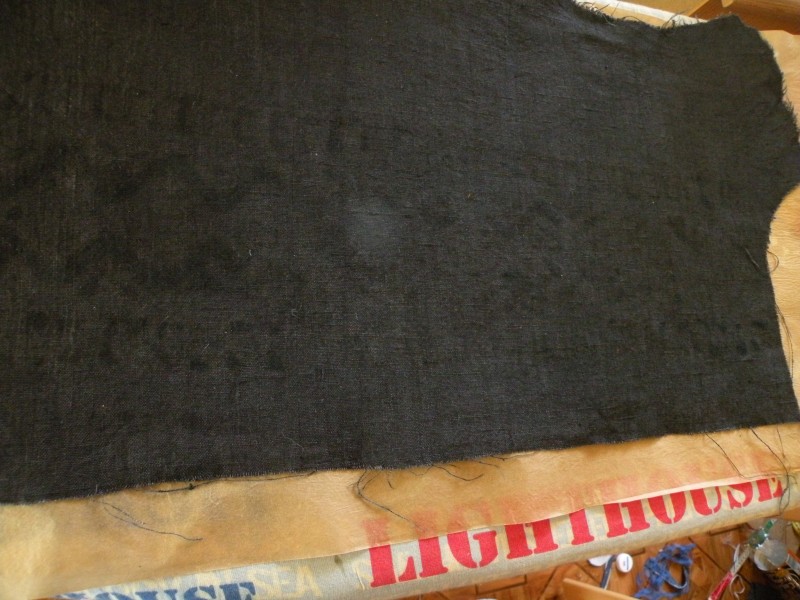
 As you can probably see, the pattern – which previously showed up as being ‚darker‘ on the fabric – now turns to being ‚lighter‘ than the fabric.
As soon as you’re not seeing ‚darker‘ wet spots any more, it’s time to lift the fabric up, remove the baking paper and turn the fabric around (so you’re, from then on, looking at the front side of the fabric). - Keep ironing the front side.
And this is where I tell you that precisely THIS is the part you want to test beforehand (checking if your dye can be discharged, that is). Dye a small test piece first, make a tiny test drawing, iron according to the instructions. Your fabric is NOT supposed to discharge to „white“, but to „natural light to medium beige“.
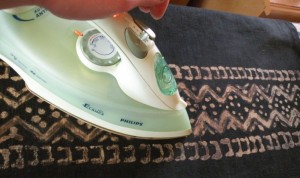
Eventually, it will look like this…
 You may discover that you have some areas which are not-as-discharged as others. No problem; you can always squirt / paint more discharge paste in those places, and repeat.
 - You may also discover that, no matter how careful you were when laying out / flipping the baking paper, some of the discharge paste has smudged to areas which you would rather like to be black.
No problem!
 Use a waterproof black sharpie to correct the smudged areas.
 - In the end, you should end up with at least 7 discharged pattern pieces:
 Front left, front right, back left, back right, the insert facings for the folded-over lapels, plus the collar (the latter is missing in this picture).
Coming to think of it, I should have painted the lines a tad more narrow. It would have definitely helped to NOT brush the squirted discharge paste, but just leave it as ’squirted lines‘. Then again of course you have to keep in mind that this is a rather small, kid’s waistcoat. If I would squirt / paint the lines in the very same way on an adult-sized waistcoat, they would appear to be thinner. - WASH the pieces thoroughly, to remove the excess discharge paste. Personally I did that in a bathtub with just a bit of hair shampoo. After that, let the fabric dry, then iron again.
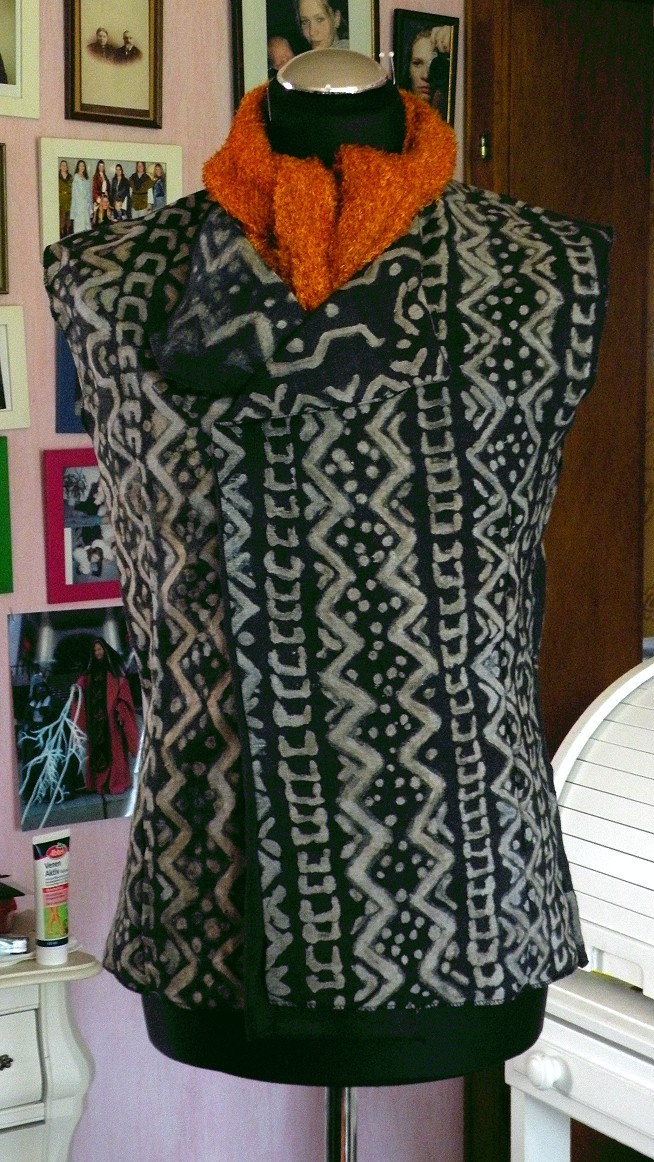
- Sew the pieces together according to the instructions that come with the pattern. Fold the lapels over neatly, add the standing collar. Since I could not spot buttons on Anakin’s waistcoat, I added invisible snaps.
Here’s a first picture of the vest (one inside lapel still missing):
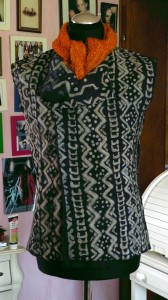
The beauty of this discharged fabric is its texture, which is like NOTHING you would be able to achieve by just „painting“ the fabric with some lighter paint. It’s really, really beautiful.


My son wearing the finished costume at Star Wars Celebration Europe:
~Please also have a look at my other Star Wars costume reproductions! ~