~Please also have a look at my other Star Wars costume reproductions! ~
Note: After finishing the costume (of which the making process is documented below), I took my dad to the German FedCon (biggest Sci-Fi convention in Europe). Read the report here!
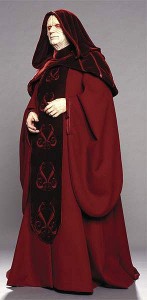
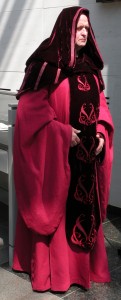
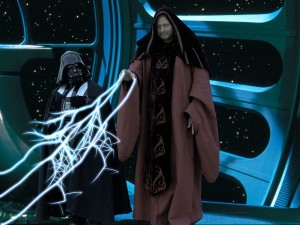
Red Emperor Palpatine – original (left) and my finished reproduction (right)
Eventually, my dearest relative – my dad to be precise – wanted to know what „the fuss is all about“, or, in other words, what makes a costume wearer at a convention different from the „tourists“ (who wear regular everyday clothing), and why some people – like me – waste dedicate a large amount of their lifetime creating time and materials consuming fabulous costumes.
So I decided that NOT a long and boring explanation was in order, but that he should actually experience it himself – by wearing a costume at a convention.
A weekend of discussion with my son (and without my dad, because he has seen NONE of the Star Wars movies!) provided various options; only few of which were actually desirable. See, my dad is growing old. He likes comfy clothing. So face masks (like for Boss Nass, which would have been fabulous!) were totally out of question. Also, a too heavy, movement restricting and / or warm costume was out of question as well. I still wanted it to be a recognizable costume; and one that would make a few heads turn for that matter.
My dad had opted in for „something as comfy as a bathrobe, at best“.
Bathrobe? Oh dad, you have no idea how close that actually comes to one of the costumes…
So we finally agreed on this Episode 3 costume of Senator Palpatine / The Emperor / Darth Sidious (hey, that’s three characters in one!):
 The Emperor’s
 bathrobe Red Robe
I know, it looks rather heavy. But if I make it from wafer cotton fabric (something likely to that – at least texture-wise – seems to have been used on the original costume as well – in case you’re looking for THE original fabric, google „basketweave wool“!) and silk velvet, it won’t be that heavy; and also not too hot.
About the face makeup… my dad doesn’t know about that yet; I will have to break the news of the makeup to him last minute before the convention.
Also, I will be using Kryolan makeup, which will cling to his skin even if he starts to sweat (which usually happens pretty soon).
But… robes making first.
The greatest „problem“, if there is any, that I saw with this costume is the fold on top of the sleeve, near the elbow. That fold or pleat isn’t just draped; it’s sewn in. And instead of going for the draping method, I went for the grid method to see what the actual pattern piece of the sleeve would have to look like.
What the heck is the grid method, I hear you ask?
That’s very simple. Instead of the robes being made from regular, non-patterned fabric, imagine it being from regularly checkered fabric. If it WERE made of checkered fabric, you would be able to – more or less – draw the pattern from just thoroughly examining the checkered pattern and all seams and drawing it down on grid paper.
But the robes aren’t made of checkered fabric, I hear you say!
Oh, wrong! To some extend they are. That’s what wafer cotton is about 😉 Here’s a smaller crop of the fabric from the exhibit pictures:
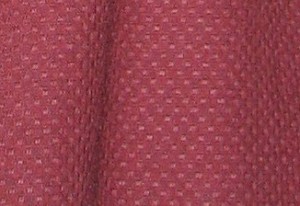 That’s almost as good as checkered fabric!
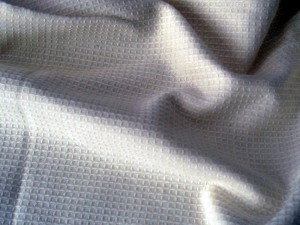
This, by the way, is the wafer piqué cotton fabric that I have selected for my reproduction (still white; need to dye it red):
Nevertheless, before I can sew and dye that fabric, I need a pattern – a sleeve pattern in particular.
So I spent an evening drawing digital lines over one of the exhibit pictures; using about every fifth ‚thread‘ as a base for my lines. This is what I came up with:
 Here you go: checkered sleeve, perfect to take a pattern from – you just need to be willing and able to count the lines from the bottom upwards and draw it out!
There’s just one smaller ‚mystery spot‘ – the part of the sleeve that is actually COVERED by that pleat – of which I didn’t get a clear checker pattern; but that part can be draped out when actually making the sleeve.
Also, the sleeve consists of two parts: The outer part – checkered here – going from mid front sleeve hole over the shoulder to mid back armhole, and the inner part – going from mid back armhole along the underarm and back to the front.
I only have drafted the checkered pattern for that outer sleeve part; but that doesn’t matter – since the front and back seam of that outer sleeve part have to match the very same seam line on the inner sleeve part, I can draft the inner sleeve part by basically just changing the armhole shape from ’shoulder covering‘ to ‚going along the lower part of the armhole‘.
There’s another thing that should be kept in mind:
The picture I overlaid with the grid only basically shows most of the FRONT of the sleeve. The side and back part are, if at all (side), only partially visible. Here’s a comparison between that front/side view and the actual side view of that sleeve:
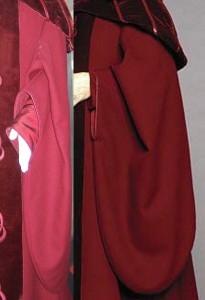 From that picture I can conclude that the width of the sleeve (from „hand to back of the sleeve“, that is) is a bit more than half as wide as from ‚bottom of hand opening‘ to ‚bottom of the sleeve‘.
Also you can see very clearly how the ‚front/side‘ exhibit view shows just about half the width of the sleeve, compared to the side view.
Here’s the pattern that I concluded from my grid overlay and the width study of the sleeve shown above:
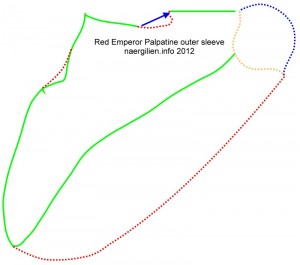 Green lines: The sleeve pattern I concluded from my grid overlay
Red lines: Corrections to that pattern – at the hand opening (top to center side left of picture) my grid overlay apparently became a bit wonky;
then there’s the „mystery spot“ on top of the sleeve (above); the blue arrow showing how that part has to be tacked down to produce the pleat;
and the long bottom red line shows the concluded pattern to produce the width of the sleeve.
Blue dotted line: Approximate shoulder part for what goes under the small cape, outside pattern piece of sleeve;
Orange dotted like: Approximate underarm part for the inside part of the sleeve.
Of course, this is just an approximate pattern. As you can clearly see I had to ‚guess‘ about half of that pattern piece. But it’s an extremely helpful base to start for draping the sleeve pattern.
„But wait!“ I hear you say. „That’s a scaled pattern. How will you make that fit your dad without doing a gazillion, gradually enlarged mockups?“
Folks… stay calm… again, that is very simple. If you didn’t read my „enlarging patterns“ tutorial, I suggest you do so immediately 😉
But there’s another method: I call it the ‚proportional enlarging‘ method; and it goes like this:
First, you take a picture (as in, with a camera) of the person in question – here’s my dad, and as per his request, his face is pixellized. Note that next to him, there’s a measurement tape with centimeters. The colors indicate ’10 centimeters each‘. That measurement tape in the picture is important and comes in handy in the process of creating a proportional costume:
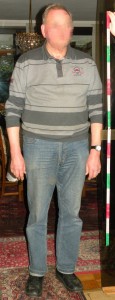 My dad with the measurement tape. The hand at the top of the tape belongs to my son by the way.
Now, using any image editing software you want, you copy and paste a good picture of the costume in question over the picture of the person. Like this – note that an animated *.gif file is neither required or even helpful when actually creating this (it’s much simpler and more helpful to just create a layer that can be opacity changed); but it’s a good illustration of what I’m trying to show you:
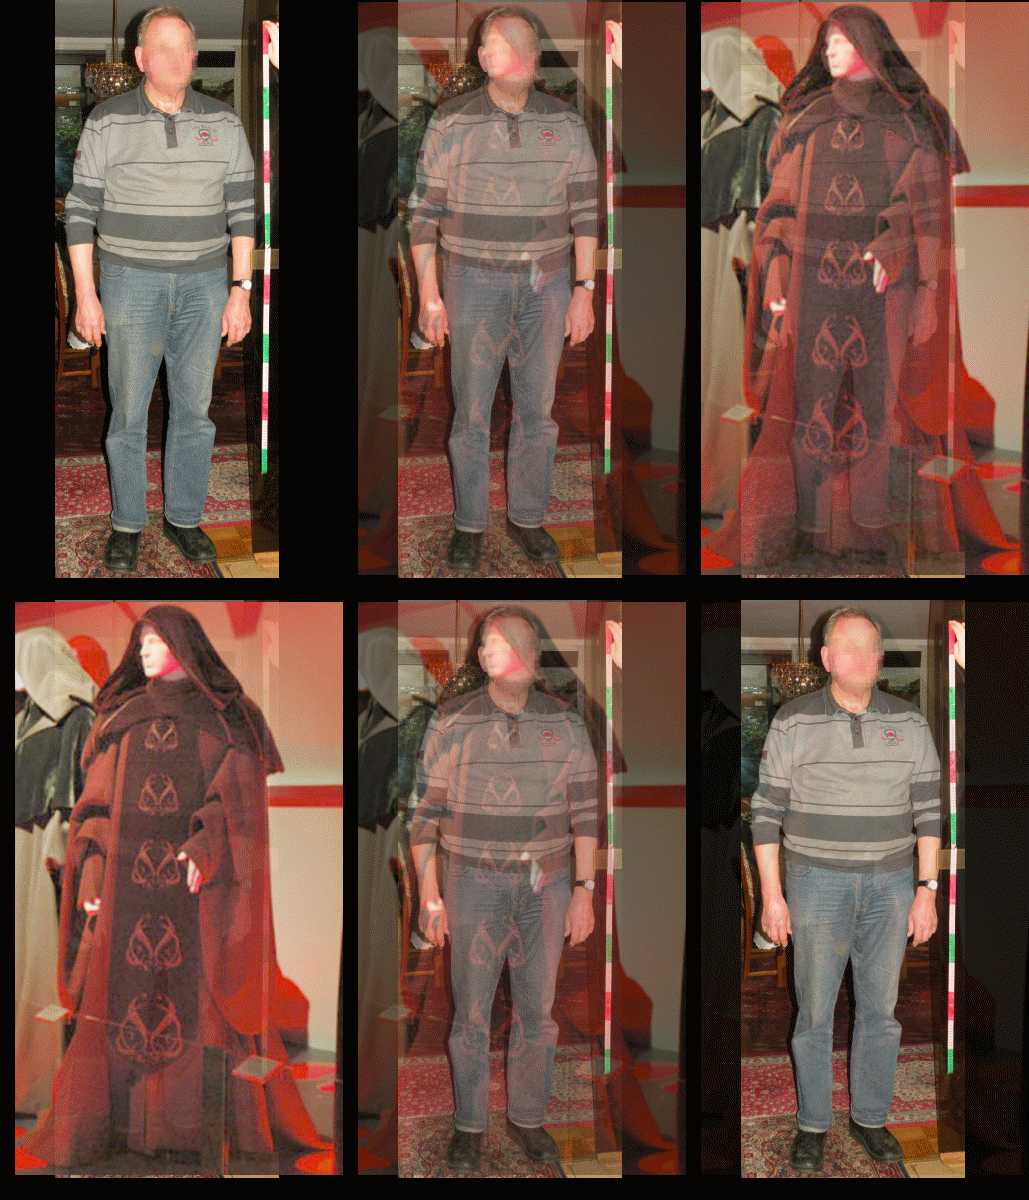 And this is my dad gradually morphing into Palpatine.
Now you can see that I have:
a) a measurement tape (which I can cut out and move around in the picture to determine exact lengths or rotate by 90 degrees and even have the width of things that I need to create!)
b) my dad’s exact proportions, compared to the original costume and, conclusively,
c) I can exactly see (by basically combining a and b) how long and wide, for example, the embroidered tabard (and even the single embroidered symbols!) has to be for my dad’s costume.
Also, I can see how long the distance between, for example, the bottom of the hand opening to the bottom of the sleeve has to be; and can conclude from that (and other) measurements the exact size at which I have to draft the sleeve pattern out in real life size. It’s just a bit of math, really.
That, my dearest readers, is the ‚proportional‘ method. I used it for many of the costumes I created (a good example is my son’s Darth Vader costume – particularly the chest- and belt boxes; a few pictures of which you can see on this page – and also the proportional enlarging of my Jamillia sleeves and collar and the proportional sizig of the embroideries of the underdress was done like this. Also, of course, it helps in creating an exact sized headpiece for my Apailana costume, and so on, and so on – once you got used to that method, the possibilities are endless.)
I kept this method a more or less well guarded secret for a long time; but I don’t see a point any more in keeping secrets; I want to share my knowledge so that once I’m gone others can profit from it and think of me when they put to good use what they learned from me. Having suffered a (mild) stroke DOES give you a different perspective on life; that much I can tell you.
Then, of course, there are the embroideries; but if you have, for example, seen my Queen Jamillia underdress or my Padmé Tattooine Poncho, you’ll know that the five times repeated symbol on the silk velvet tabard isn’t exactly a problem for me 😉
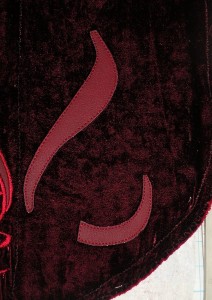
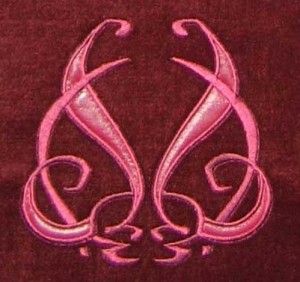 The Sith Symbol embroidery / appliqué.
The shiny lighter red parts are appliqués of the same leather that was used for the stripes on the hood and short mantle.
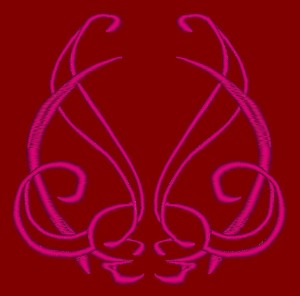
Here’s a preview of the symbol in my embroidery software – of course, the appliquéd leather parts of it are missing; but you get an impression:
The pattern for the mantle (which is actually more like a short cape, made from many pieces) and the hood looks (IMHO) like this, laid out on my living room floor:
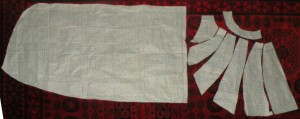 Hood is left (obviously), cape is right.
Center front of cape is „upside“, center back is at the very right. Yes, it’s complicated, sort of 😉
The part of the hood that’s gathered and sewn to the cape is at the bottom; the part that goes over / behind the head is at top / left, and the face opening is at the right side of the hood pattern piece.
My dad, by the way, was funny when he tried the pinned cape (made from lightweight cotton, which will end up being the lining for the cape).
Him: „So many pieces! Why don’t you just make it as a circle with a hole in it?“
(Hey, apparently the man somehow knows how sewing patterns work! I had no idea about that and it surprises me greatly…)
Me: „Because that would end up being too wide at the bottom, and the curved shoulders wouldn’t work that way either.“
Him: „Good lord! You’re doing way too much work.“
Me: „I’m just trying to make a good replica…“
Him: „You think anyone would notice the difference if it WERE just a circle?“
Me: (After a short thought on basically miles-long threads I read on the boards of the 501st which were just about single SCREWS on armor!): „YES!“
And here’s the sleeve pattern, drawn out and the shoulder / underarm area is adjusted to fit my dad:
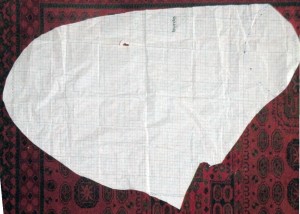 Shoulder part is towards the right, bottom of sleeve towards the left side of the picture. Hand opening is at the bottom; center back seam of the sleeve at the top.
I had a few problems over the last weekend when cutting out my fabric pieces and sewing them together – or rather, trying to do so.
First, I ran out of black thread (when sewing the silk velvet pieces down to their stabilizing cotton base).
Well, I thought, I might as well continue with the coat; after all, I had pre-washed the wafer cotton and it was ready to be sewn.
Guess what… First – on Saturday – I made a mistake (the sewn-in pleats on the front? I sewed them down in the wrong direction on one side of the coat AND noticed that after I had finished the ENTIRE piece… so it was all about watching TV while ripping seams). Then… when trying to sew them down the correct way… I ran out of RED thread. That was Sunday, and therefore no chance to run and buy more thread quickly. 😥
Then I thought, well hell, why not start to embroider the front tabard. Oh wait a minute, I don’t have red polyester thread left (which I would have needed in case I would embroider something that needs to be dyed AFTERWARDS).
Also… on close inspection… the pleather I wanted to use for the ’stripes‘ on the hood and cape and the appliqués of the embroideries was a tad too light; and of course pleather can’t be dyed so I have to find pleather that’s a tad darker.
So that was my mostly unsuccessful weekend: ripping seams and running out of thread. I think a thorough pleather- and sewing / embroidery threads shopping spree is in order now that it’s Monday.
Yet and still I now have the impression that Palpatine doesn’t WANT to be sewn by me. Or maybe it’s just my depression kicking in again, who knows.
But wait, there is something I discovered while having nothing to do.
Look at this picture:
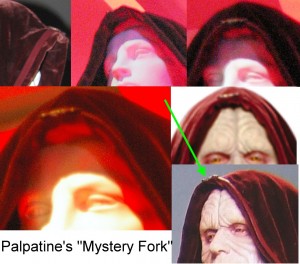 A composition of the pictures which actually SHOW what I mean
That copperish / reddish golden ‚thing‘ there, right on top front of the hood. It seems to ‚come‘ from the inside of the hood and then bends ‚outwards‘. Best seen in the bottom right picture (where the green arrow points to), but it can also be seen in the other pictures. It almost looks like an interestingly bent fork, with the handle INSIDE the hood, and the, well, fork bent towards the OUTSIDE.
What the heck is this?
My best idea is that it’s something that keeps preventing the hood border from flapping down on the forehead (which it definitely would if it weren’t for that thing); but I have no idea WHAT it actually is; nor do I seem to be able to find even just ONE picture that shows it clearly. Which seriously gives me a sad.
Funny enough – while the ‚fork‘ (Fork. Not ‚force‘. Oh how I love playing with words…) is there on a) the exhibit pictures of the costume and b) also on the promotional pictures of the movie, it’s apparently absent in the movie itself.
See these pics (much lightened to make that part visible) – the hood in the movie almost looks as if the front edge of the hood was padded. It’s definitely way more ‚rounded‘ than it is on the exhibit- and promotional pictures (where said edge is absolutely flat):
In the end, I used a shaped piece of bag stabilizer (!) to stabilize the hood like that. The piece looked like this before being sewn into the hood:
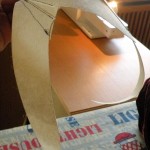 |
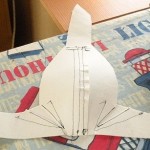 |
| The rounded thing at the center lies on the head, the side ‚wings‘ are stabilizing the sides of the hood. |
Before I get to showing pictures of the dyed fabrics (YES! I bought thread. And pleather, for that matter – in dark red!), I’d like to get back to studying a detail on the costume again – the leather strips that are sewn to the cloak (and the edge of the hood for that matter).
Take a close look at this picture – and yes, of course you can enlarge it by clicking it, just like all the pictures on this page:
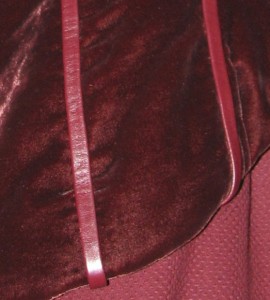 That is an extremely helpful pic from the FIDM exhibit, showing said strips.
What you can see is that…
- The strips aren’t just strips, but their edges are folded over. You can see that best on the strip to the very right, of which you basically see the side view.
- The strips aren’t sewn down visibly. There SEEMS to be some sort of puckered line along their centers (best seen on the center strip!), but that puckering does NOT come from a seam that is running OVER the strip; as you can also clearly see. In case of doubt, look at the glossy part at the bottom, where the strip curves towards the inside of the cape. Nope, no visible seam there.
- The very right strip shows something else, and that’s that you can almost ’see‘ beneath it. So the strips aren’t glued on either.
My conclusion from these observations is that those strips are basically ‚flat piping‘.
You know what piping is, don’t you? That’s basically a cord sewn into a strip of fabric, which is then sewn into a seam so only the ‚rounded‘, cord-filled part of the piping remains visible.
This here seems to be the same – just without the cord inside the strip. Instead the strip has been flattened down – if you look at it from a cut side, it basically looks like a ‚T‘.
The puckering, in my opinion, comes from handstitching from the backside of that flat piping; just catching the backing of the pleather that was used for these strips. This handstitching is necessary because without it – and this is something I, too, experienced when sewing my piping! – the piping wouldn’t remain flat; it would try and become rounded again, even without a cord filling, since the pleather is pretty much non-flexible.
Here are pics to illustrate what I wrote:
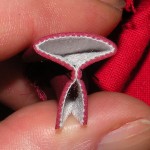 The profile of the flat piping. As you can probably see, it looks more or less like a ‚T‘.
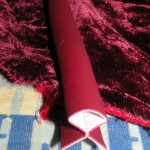 Piping „sandwiched“ in the seam between two of the cloak pattern pieces.
Note: The velvet looks like panne velvet, but of course it’s silk velvet. I just didn’t tumble it yet so it will become ‚fluffy‘ again after the dyeing process.
What you can also see is that the top portion of the piping tends to take up a rounded shape.
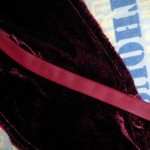 Piping ‚tacked down‘ from the ’seam‘ side, just catching the surface of the pleather backing, so it stays flat. You can see the puckering like on the original costume… but you can’t see what causes it (also like on the original costume 😉 ).
Here’s some embroidery progress for a change; or rather, how I did the embroideries:
First, the fabric is put into the embroidery hoop. I’m using sticky stabilizer in the hoop and just stick the fabric on top of that.
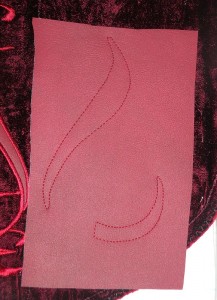
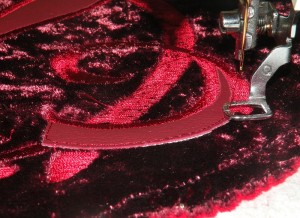
Then I place a piece of pleather on top of the fabric, and (because I digitized it so ;-)) the parts of the pleather appliqué are tacked down first.
After that, I cut the appliqué shapes down to those seams:
And after that I just let the embroidery machine with my digitized pattern do the rest (and yes, it STILL looks like godawful panne velvet. It’s still silk velvet; but in this case, I’ve ironed the pile down to keep it flat while embroidering over it. A thorough tumbling when the embroidery is finished will restore the fluffy silk velvet look).
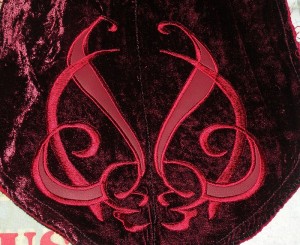
…until, eventually, one of the five embroidered shapes is finished. At the very top of the picture, there’s a crease in the fabric on the left part of the embroidery; it’s not like the embroidery was shear, just a question of bad layout of the fabric in this pic. Just thought I should mention that.
Let’s compare that to the original embroidery…:
 Original embroidery on Palpatine’s movie costume
…yes, I’d say it looks pretty good 😀
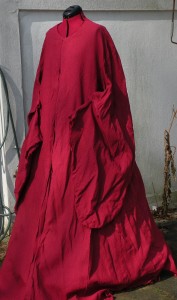
After embroidering two more symbols, I draped the sewn coat, the embroidered tabard and the front portion of the cape on my dress mannequin, just to get an impression what they look like together.
Note that my dress mannequin is, well, female. Also, compared to my dad’s shape, it’s really tiny even if I adjust it to its largest possible size. So it didn’t exactly look ‚fitting‘, but you get an impression:
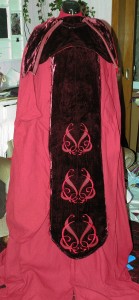 Also, digital cameras HATE red. The overall coloring in this photo is way too bright red, compared to the color the fabrics actually have. Oh well.
…still saying it looks pretty good. Tomorrow I can do a test fitting on my dad, to determine if it really fits as good as I think it does. And yes, I wish dress mannequins were infinitely resizeable.
Here are some better pics of the very same combination (just that I had finished the tabard embroideries) which I took outside when the sun was shining:
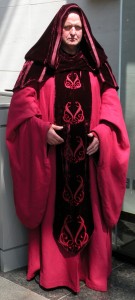
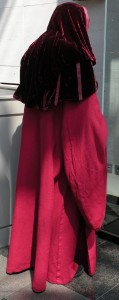
And, finally, here are pics of my father wearing the costume; more pics can be found on the FedCon XXI-page:
 |
 |
 |
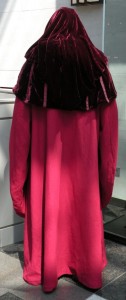 |
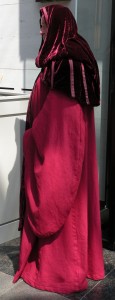 |
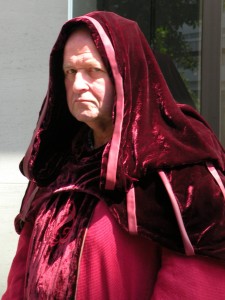 |
  The real Emperor compared to my dad. The red robe I made is darker in reality; but you can probably see how well the shape works. |
||
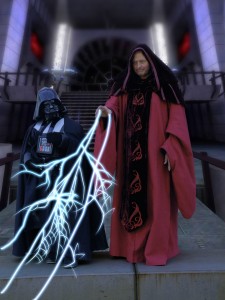  Could not resist photoshopping a bit Could not resist photoshopping a bit  |
||
…Mission ‚give dad a cool perspective on costuming‘ accomplished! 
~Please also have a look at my other Star Wars costume reproductions! ~

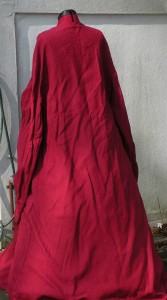
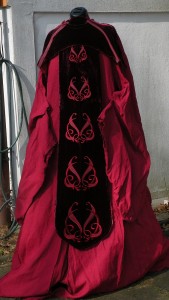
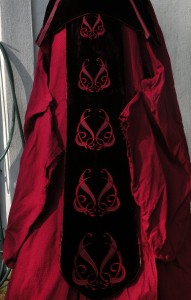
Wow….
I just noted this costume of yours…. FANTASTIC
I wish I could buy one ‚ready to fly‘ as I have no sewing experience…(;
If any further info is available for this „Senate Palpatine Costume“ I will be happy to get it…
Regards,
David
What would you charge to make one for me?
This is AMAZING! Wow, I am impressed. I’m in the 501st Legion and I want to do this costume as well. Yours is the most comprehensive job I’ve seen yet on this red robed Sidious.
Can I ask you a favor? I was hoping you could send me a copy of the patterns you used? I am married to a beautiful seamstress and she is willing to help me. But she says that it would be most helpful to have a pattern to work off of.
Any chance you still have it kicking around?
Hope to hear from you soon.
Jeff Dee/ TK503
Thank you for the compliment!
Sorry, but I do not give my patterns out.
But I’m kind of wondering – the seamstress you are married to should be able to make her own patterns, should she not?
This is unbelievably brilliant! I repeat: brilliant! 😀 How did your dad like it?
Thank you 🙂
My dad liked it a lot – see him wear it and read an event report on my FedCon page 🙂