On Thursday, the 7th of September, 2006, I had the great pleasure of being able to examine and take the pattern from an original costume from Hamburg’s ‚Phantom of the Opera‘, namely the ‚Blue wishing gown‘ that was worn during 1990/1991 by Renée Knapp.
As following I will publish my examination results; and also links as to where obtain a reprint of the original fabric.
General notes about this page and the pictures
Not that it would be most important; but as I had some unpleasant experiences with some Titanic costume exhibit pictures, I think I’ll have to put up some rules about the usage of the pictures shown on this page:
- You may use up to 5 pictures from this page on your own website (no hotlinking!) if you keep the caption (red letters) on the photographs intact. Up to 10 pictures you may take if you additionally provide a clickable link to this page on your page near the pictures you took.
- Under no circumstances may you remove the red letters. If you wish to show just a part of one of my pictures on your page, please put a clickable link near the picture you cropped – a link that points to this page, that is, NOT to the image.
- You must not use my pictures or examination words in any publication, be it a commercial one or for educational purposes, printed or online, without asking me first. My email address is given on each of the pictures and also at the bottom of each page of this web.
- You’re not, I repeat, NOT allowed to use my images commercially without asking me AND getting WRITTEN permission from me first.
In terms of law, „written“ doesn’t mean email but snail mail or fax by the way.
I feel obliged to write this since it recently happened (as of March 2012).
Aria Clements of Aria Couture took the pattern repeat picture of the Wishing gown fabric from my site (said pattern repeat was created by me from two different photos of mine; so there’s NO mistaking!), photoshopped out the copyright tag (while bragging on her Facebook account how tendious the work on the fabric was; and what a ‚good job‘ her husband is doing with it!), and then uploaded it to her Spoonflower shop as a ‚for sale‘ fabric.
Without asking me first, of course.
And, to someone she obviously had contact to, claiming how she was totally right to remove my copyright notice and use the photo. *snort*
What Aria fails to understand is that I DO have a copyright on that photo of the repeat.
I have NEVER claimed to own the copyright on the design of the Wishing Gown’s fabric; but I DO have a copyright on that photo; which actually isn’t just ‚a photo‘ but was tiled up by me using two different photos of mine.
I’m well aware that she claims that I claim to have the copyright on the design itself; but that is not true (just like many things Aria claims).
You can learn much more about Aria here and here– that page and the forum thread are lectures which I totally recommend just so you begin to understand the extent of what she’s doing.
Under „Designing fabrics“ on the first page, you can find screenshots of her wishing gown fabric that she produced from using my photo. If you’re not totally blind you’ll see how it’s not just exactly the same repeat but was derived from my photo.
By now (and only after I filed a DMCA takedown notice, which she didn’t counterfile to – which she COULD have without problems IF the picture she used HAD been her own; and yes, she knows that since that part was pointed out to her in the DMCA notice of which she got a copy!) she changed the fabric on her Spoonflower website; but still – the part of ‚taking it and just pretending she made it‘ enraged me a lot.
Particularly because I followed the story of Aria over the years AND because I’ve seen how much she claimed to have worked on her fabrics (or rather her husband? Or maybe her again? Who can tell with Aria?), and because I know that she just stole the designs of the Wishing gown fabric, the ‚Scarlett Barbecue dress‘ fabric and the ‚Joker‘ shirt fabric without asking first.
Of course I’m aware how she will probably tell people that I’m probably just writing this because I’m oh so jealous of her mad skillz. Uhm – take a look at my entire site and do some good thinking about WHAT exactly I should be jealous of. *snort*
I know some of these rules must sound hard and somewhat unfair to some of you, but still today I find my Titanic costume exhibit pictures in various places on the net, and other people sometimes claim to have taken them; so please have some understanding for my rules. Then again maybe you understand the rules.
In case you’re looking for a really authentic reproduction of the ‚Wishing gown‘ fabric, look no further – it’s available here (and here in an „iridescent“ version).
Here is a picture of those two variations of the design printed out on fabric by Spoonflower (this is the quilting weight cotton), compared to one of my photos of the original dress fabric. The two reprint fabric were photographed outside by daylight; the fabric of the original gown was photographed inside with a flash; hence the color variation. Click to enlarge the image!

Of course, Aria, who I mentioned above, offers a ’slightly similar‘ version at her Spoonflower shop (and, of course, claims that „you can’t find a fabric closer to the original than this without actually buying the original fabric“ – *lol*)… but, well, if you’ve read the story above and followed the links, you will probably have an idea how much you should trust her (or rather not trust her!).
And now on to the dress… again, a few notes that seem important for the understanding of the pictures…
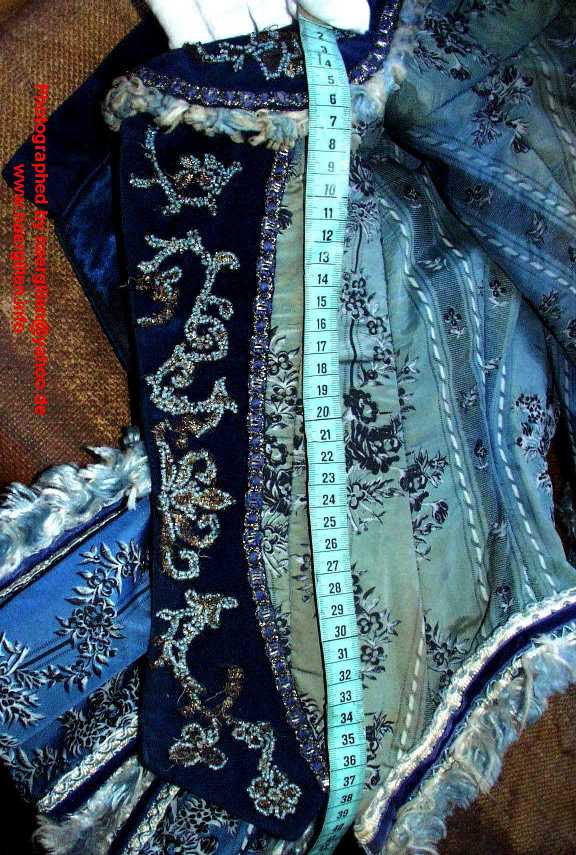
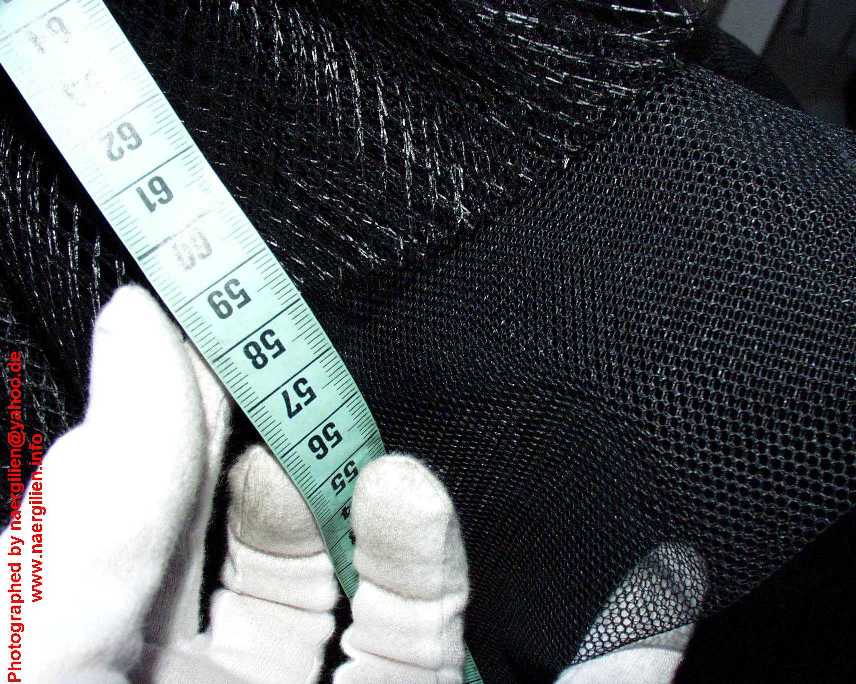
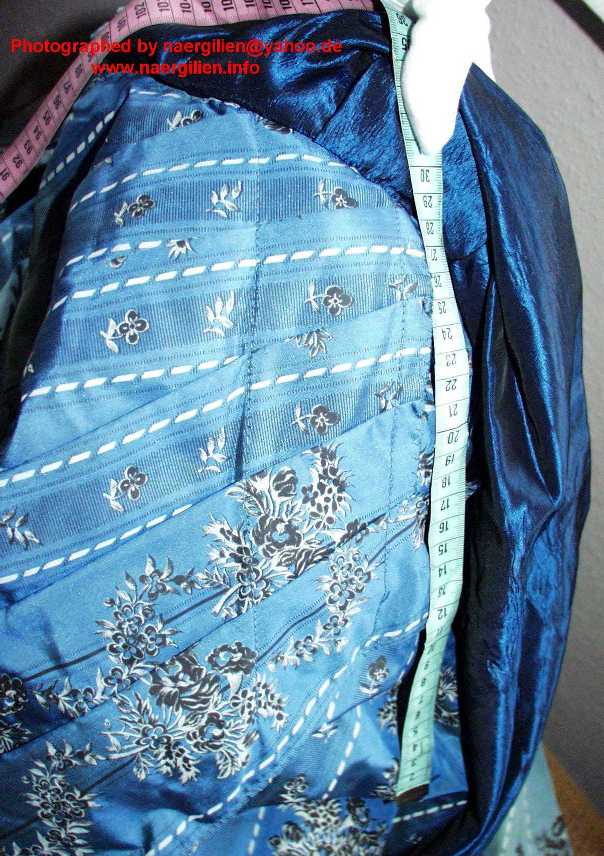
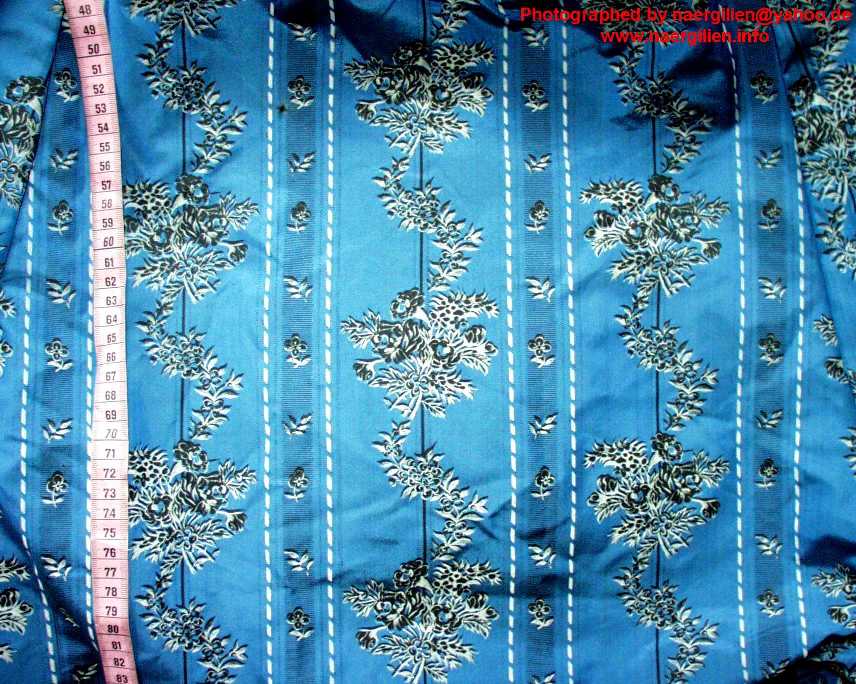
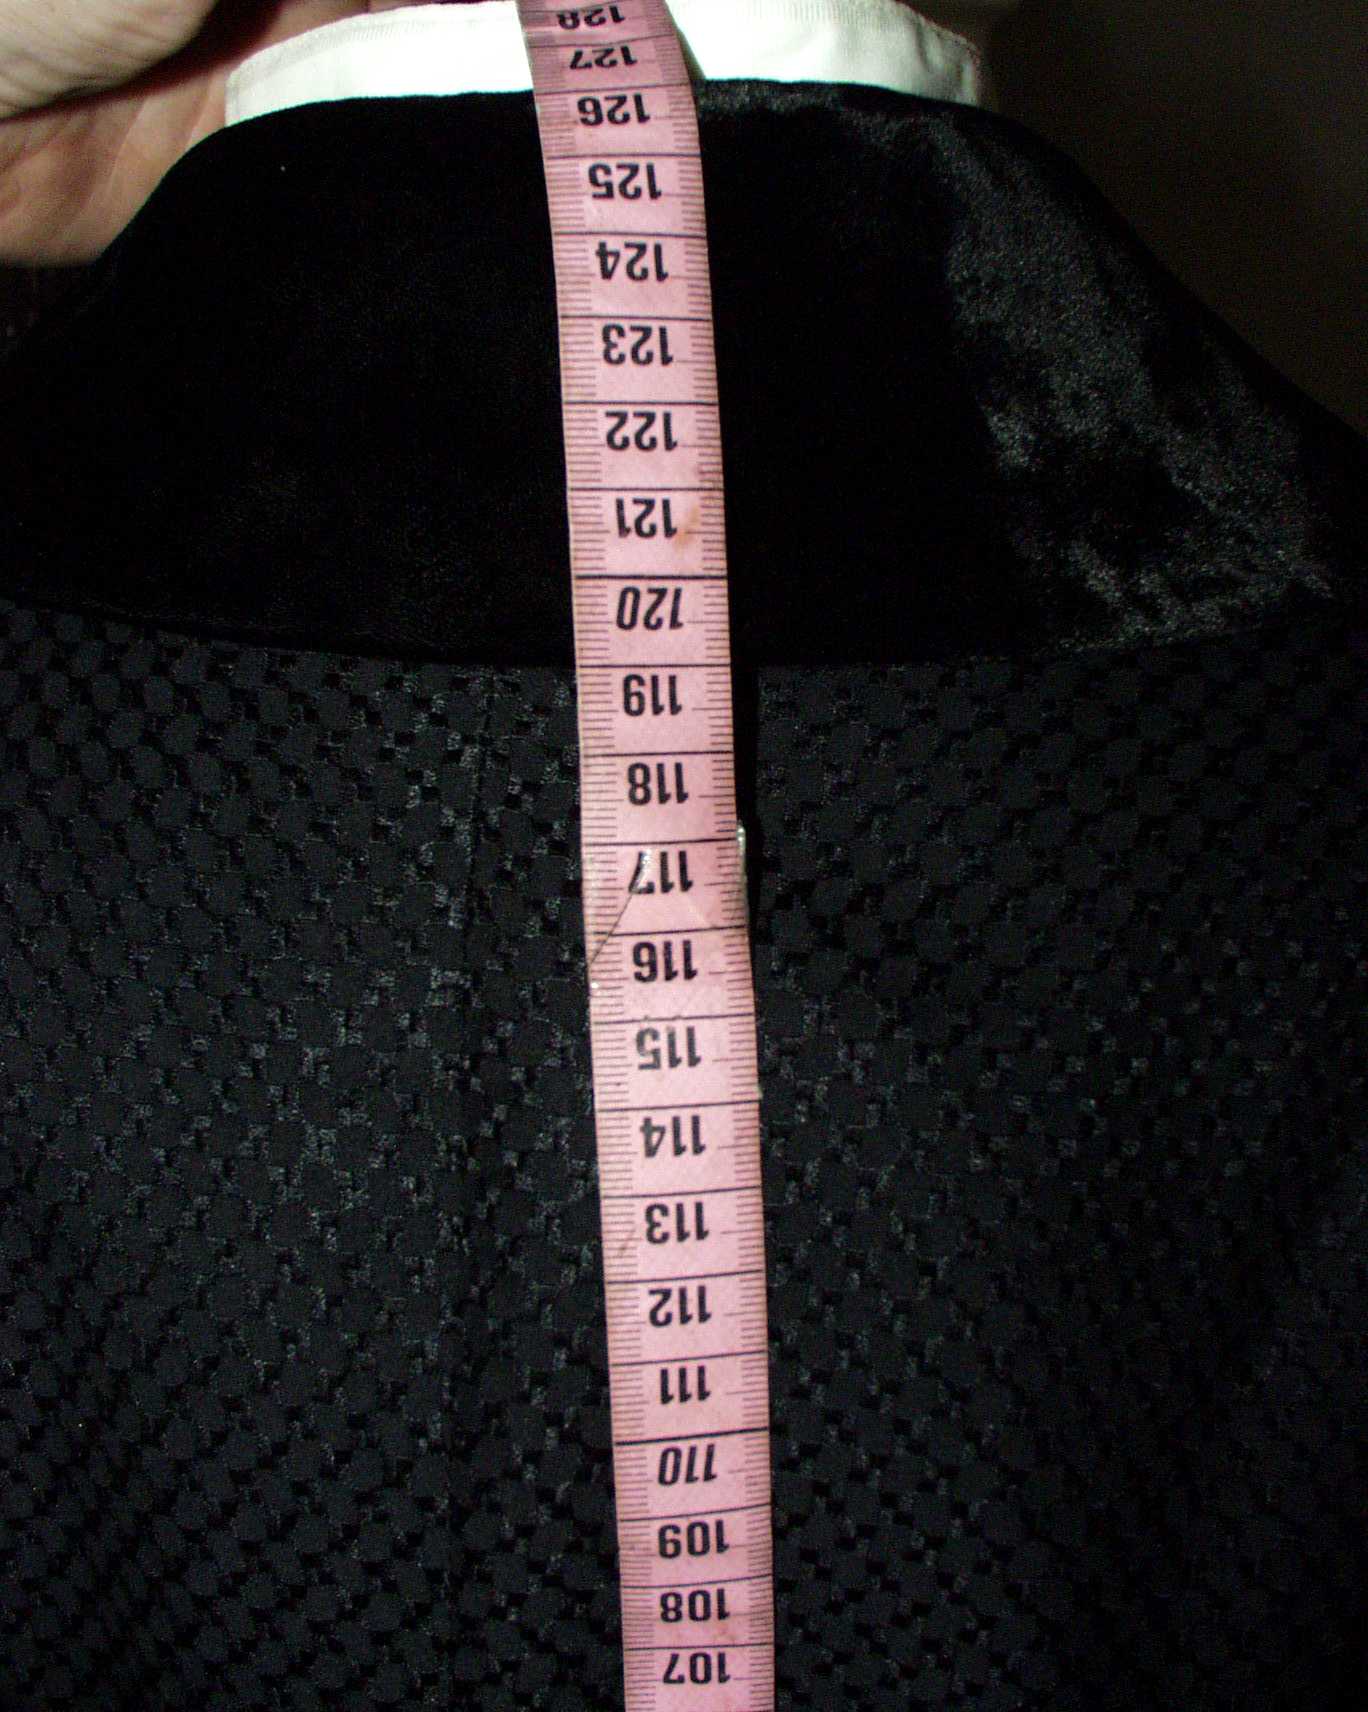
- The measurement tape that can be seen in many pictures shows centimeters, not inches. 2,54 centimeters equal 1 inch; so about 2 and a half centimeters are an inch.
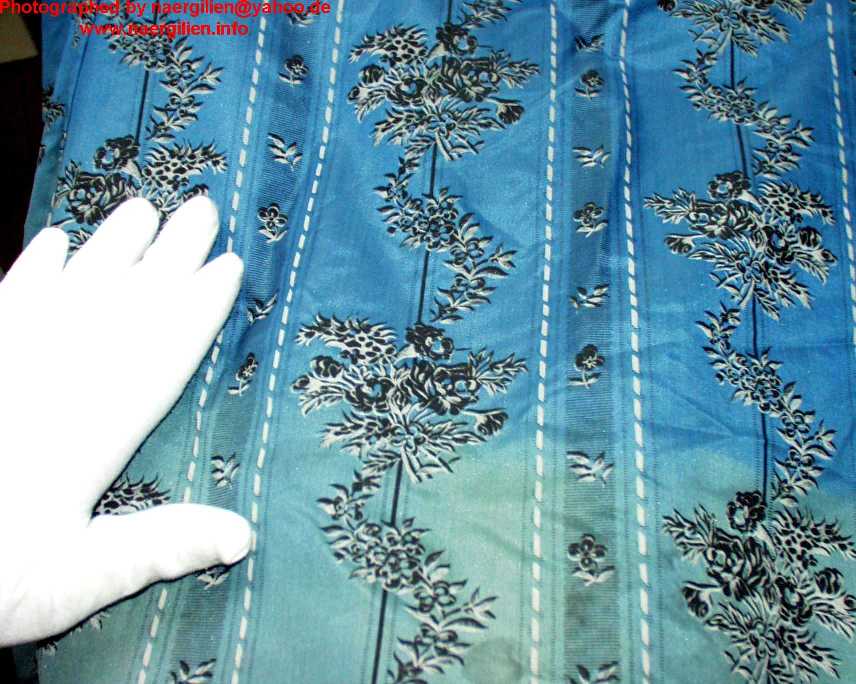
- The pictures in which my hand(s) can be seen show me wearing white cotton gloves, which I generally wear when examining historic gowns. The acid in the sweat on the hands would make the silk disintegrate faster, so I’m wearing them to protect the gown *from me*.
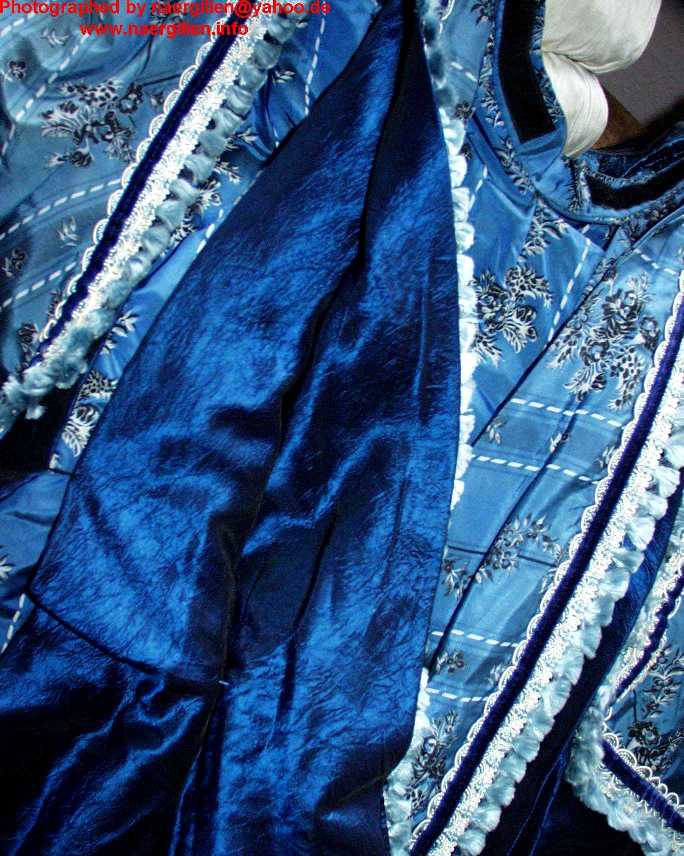
- The dress has color faded badly in most places that were facing outside; but other places, such as the underskirt where it has been covered with apron and drapes. have not faded at all. This might explain the funny colors you will notice in some of the pictures. I’ll write down in the texts for the images if, and where, the gown has badly faded and where I think the original color is still showing.
About the dress materials:
- The printed ‚outside‘ is probably silk taffeta. I guess it’s silk, because of the color fading which is *very* obvious in person (and not so obvious in the pictures I have so far posted).
- The ‚velvet‘ parts are a *very* short piled velvet, I could almost be tempted to call it velveteen. From the feel of it, I would call it cotton. It’s woven, not flocked, which is why I don’t particularly *like* to call it velveteen, as today’s velveteen is *often* flocked and not woven.
- The lining of the skirt is made of taffeta, also – but that’s a different material – acetate taffeta? It’s too stiff for silk. It’s a dark cobalt blue. This fabric was also used to line the drapery on the back.
- The underskirt (to which the crinoline netting is sewn) is made of some kind of diamond patterned jacquard – quite stiff, like the lining taffeta, so my best guess would be acetate or an acetate mix. Two different colors of that jacquard was used – a dark cobalt blue and teal.
- The crinoline netting is nylon with poly, I guess.
- The flat lining on the bodice is cream cotton twill.
- The bustle is made of the same cream cotton twill.
But I can just *guess* the materials, because I couldn’t do any burn tests.
The dress has also been cleaned a few times, so the fabrics look a little different than they would in any shop.
This is also the thing that brought me to declaring the colored lining materials ‚acetate‘, because I know what that stuff looks like as soon as it’s been cleaned – it ‚wrinkles‘ in a certain kind of way and the fabric ’sounds‘ different… have no idea how to explain that better, sorry.
The gown has been sold in an Ebay auction and has been won by Anéa, who runs a very nice website on Phantom of the Opera costumes. Congrats!
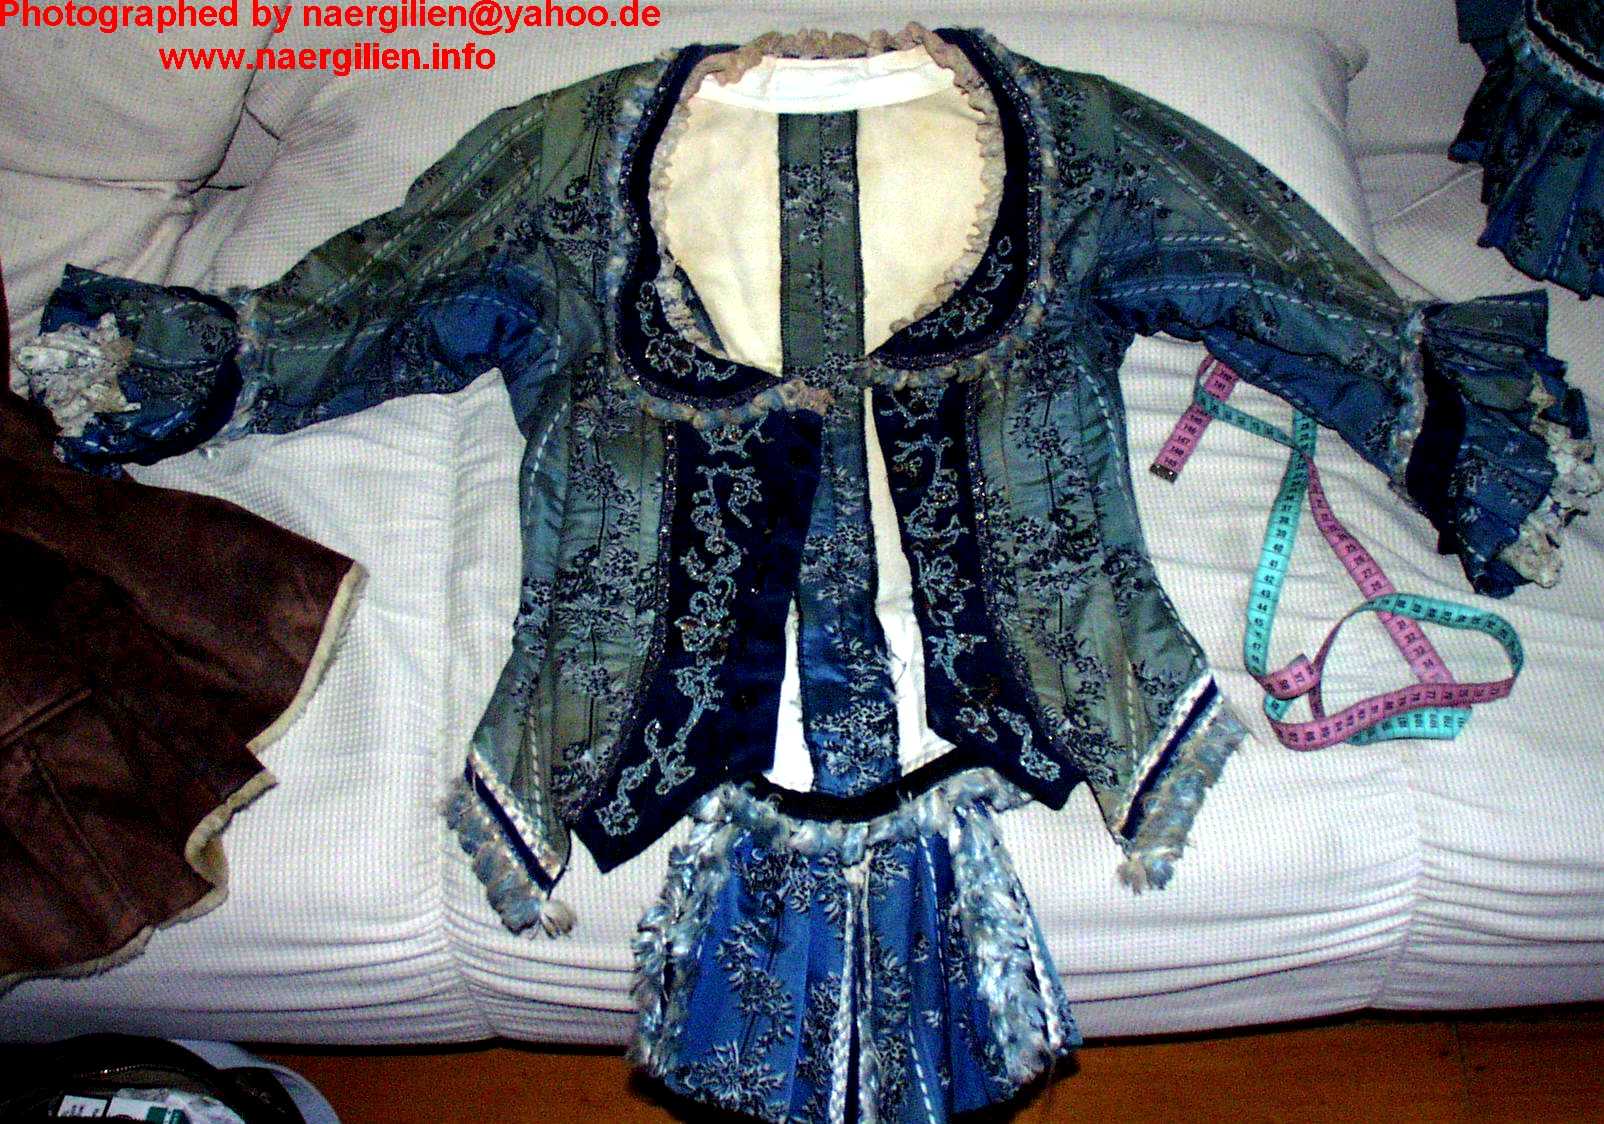
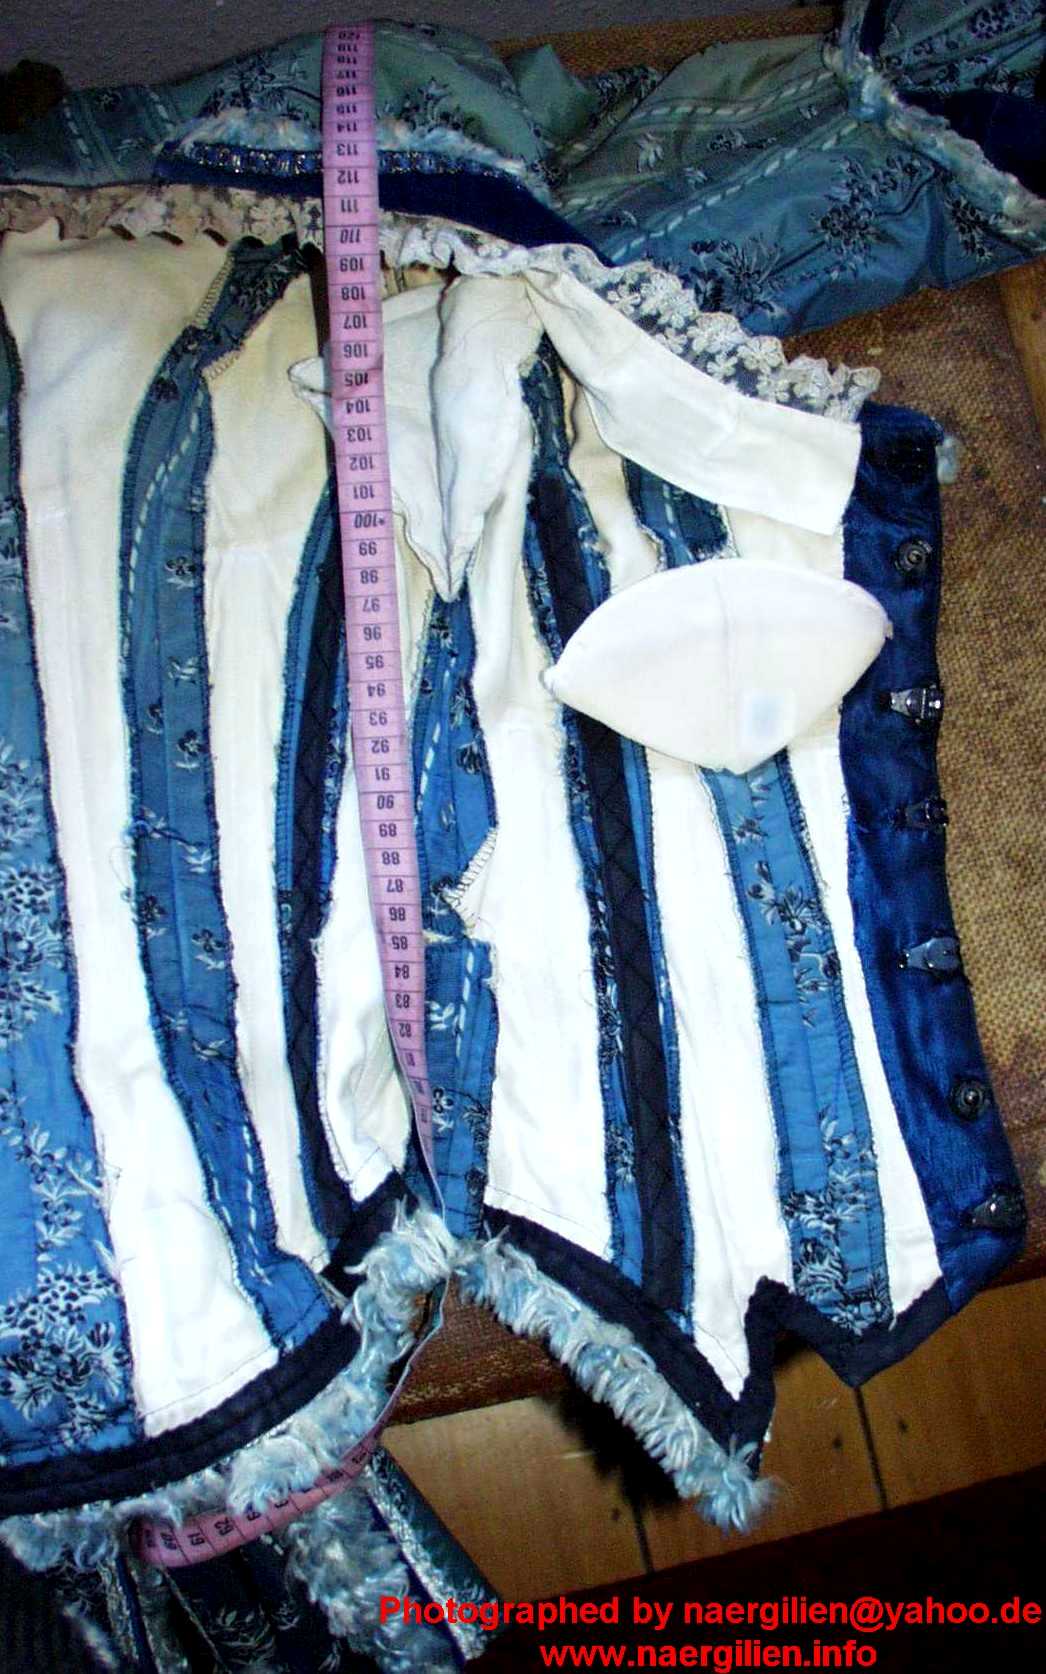
| The bodiceThe bodice is surprisingly historically constructed, with very few exceptions it could almost pass as an historical Victorian item. The shoulder seams are historically moved to the back side of the shoulder; the bodice has been boned on each side with 6 steel bones that were sandwiched between a double layer of flat lining cream cotton twill fabric; additionally two more steel bones in black casings were obviously added later on each side at the front side- and back side seams. | |||
 |
 |
 |
 |
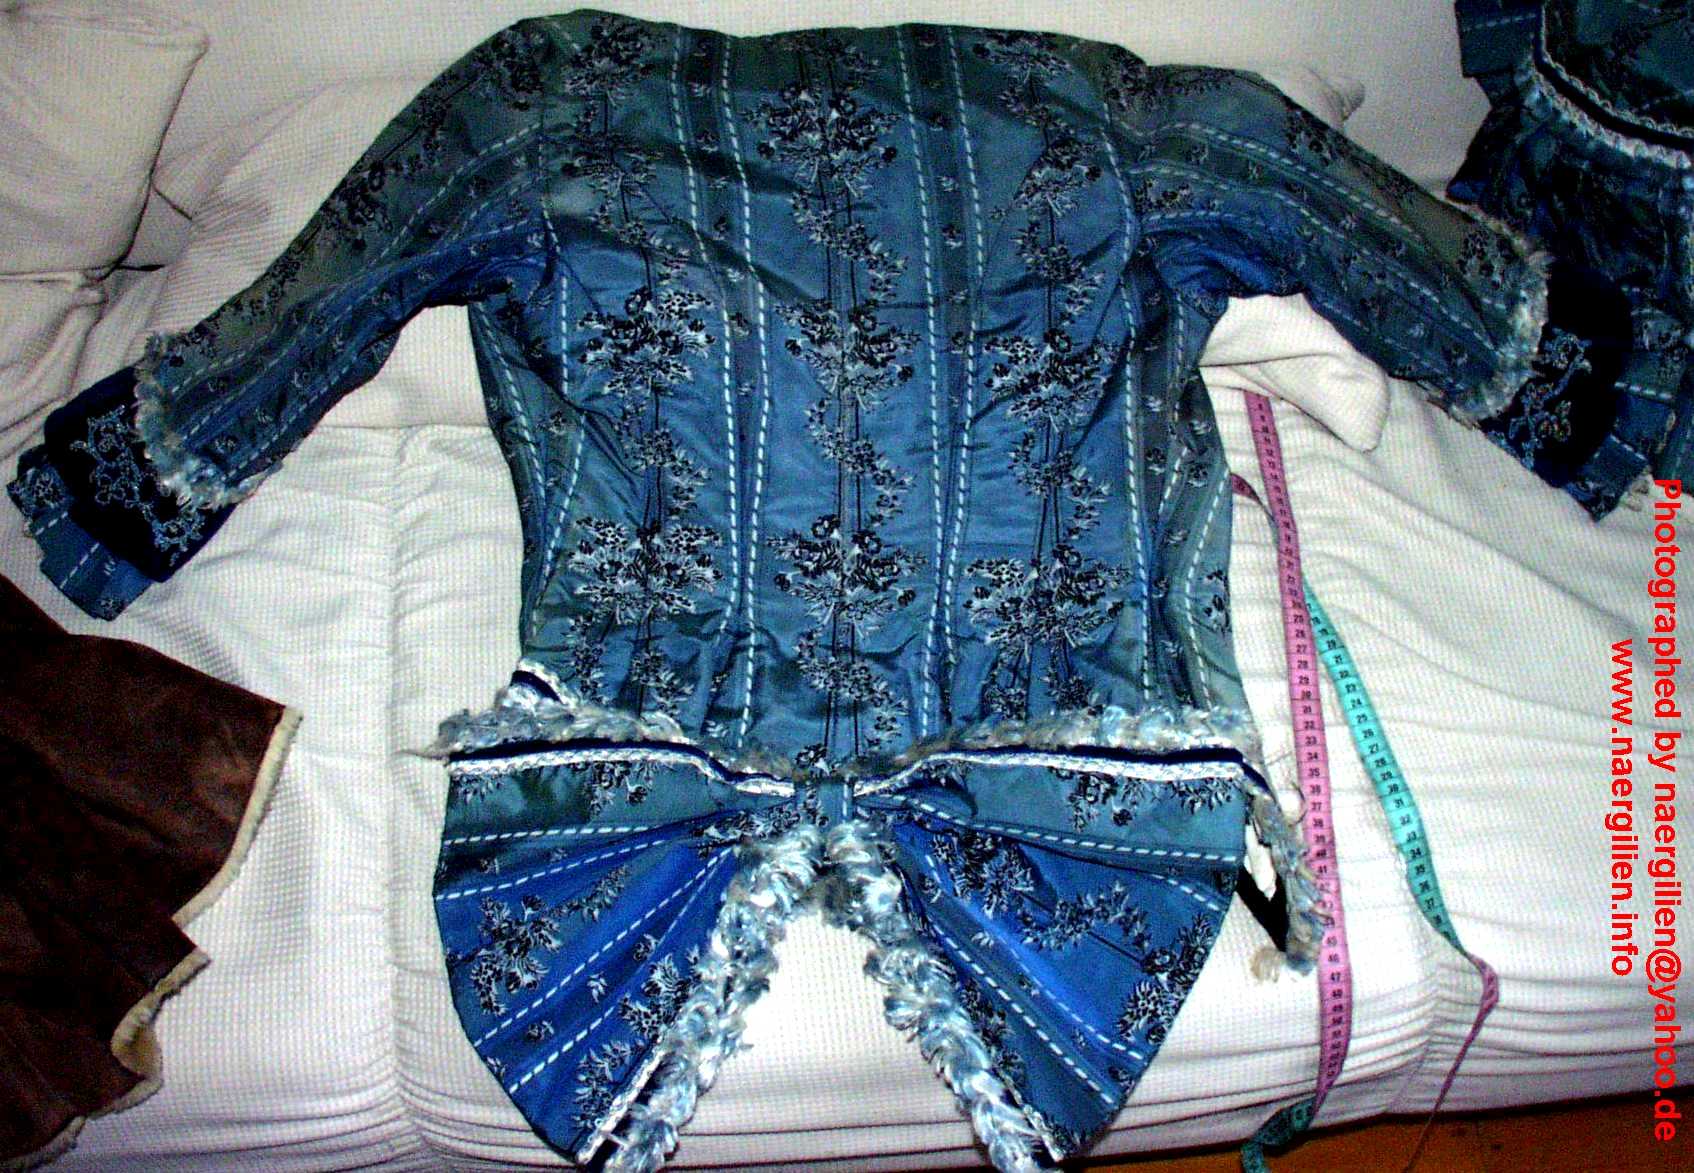
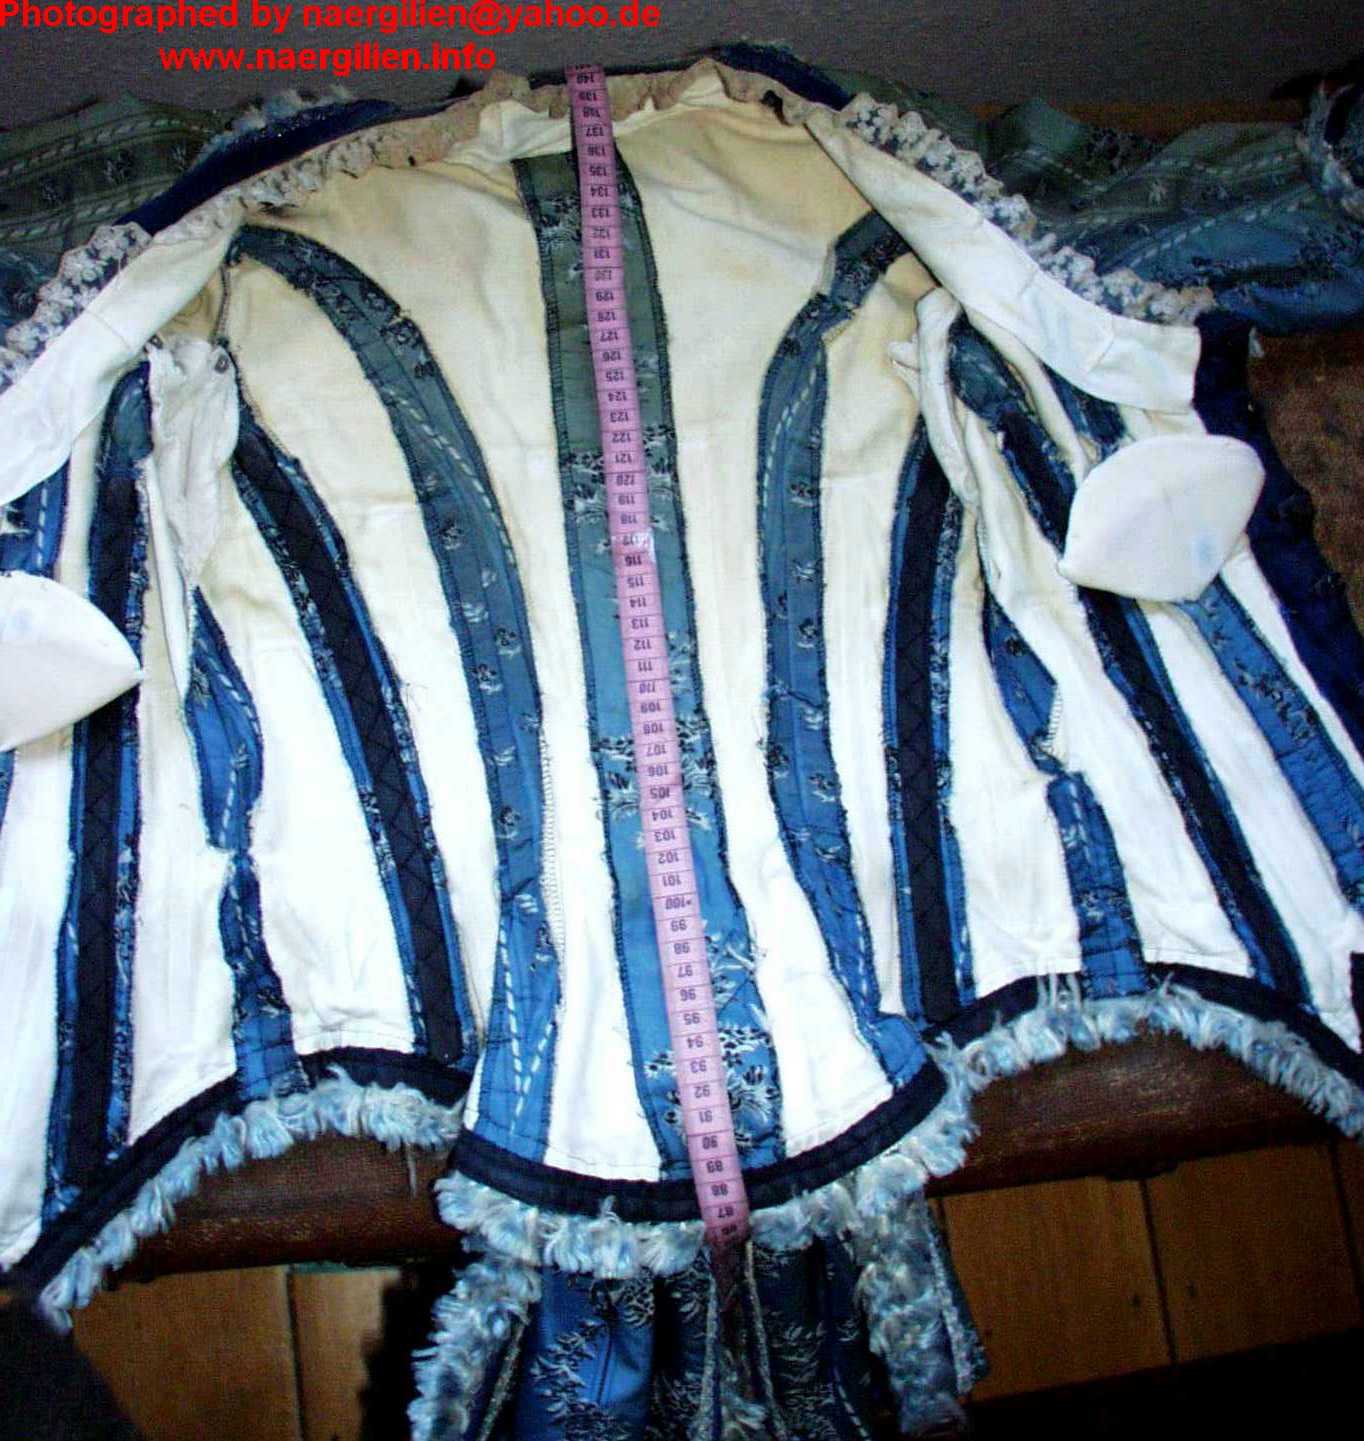
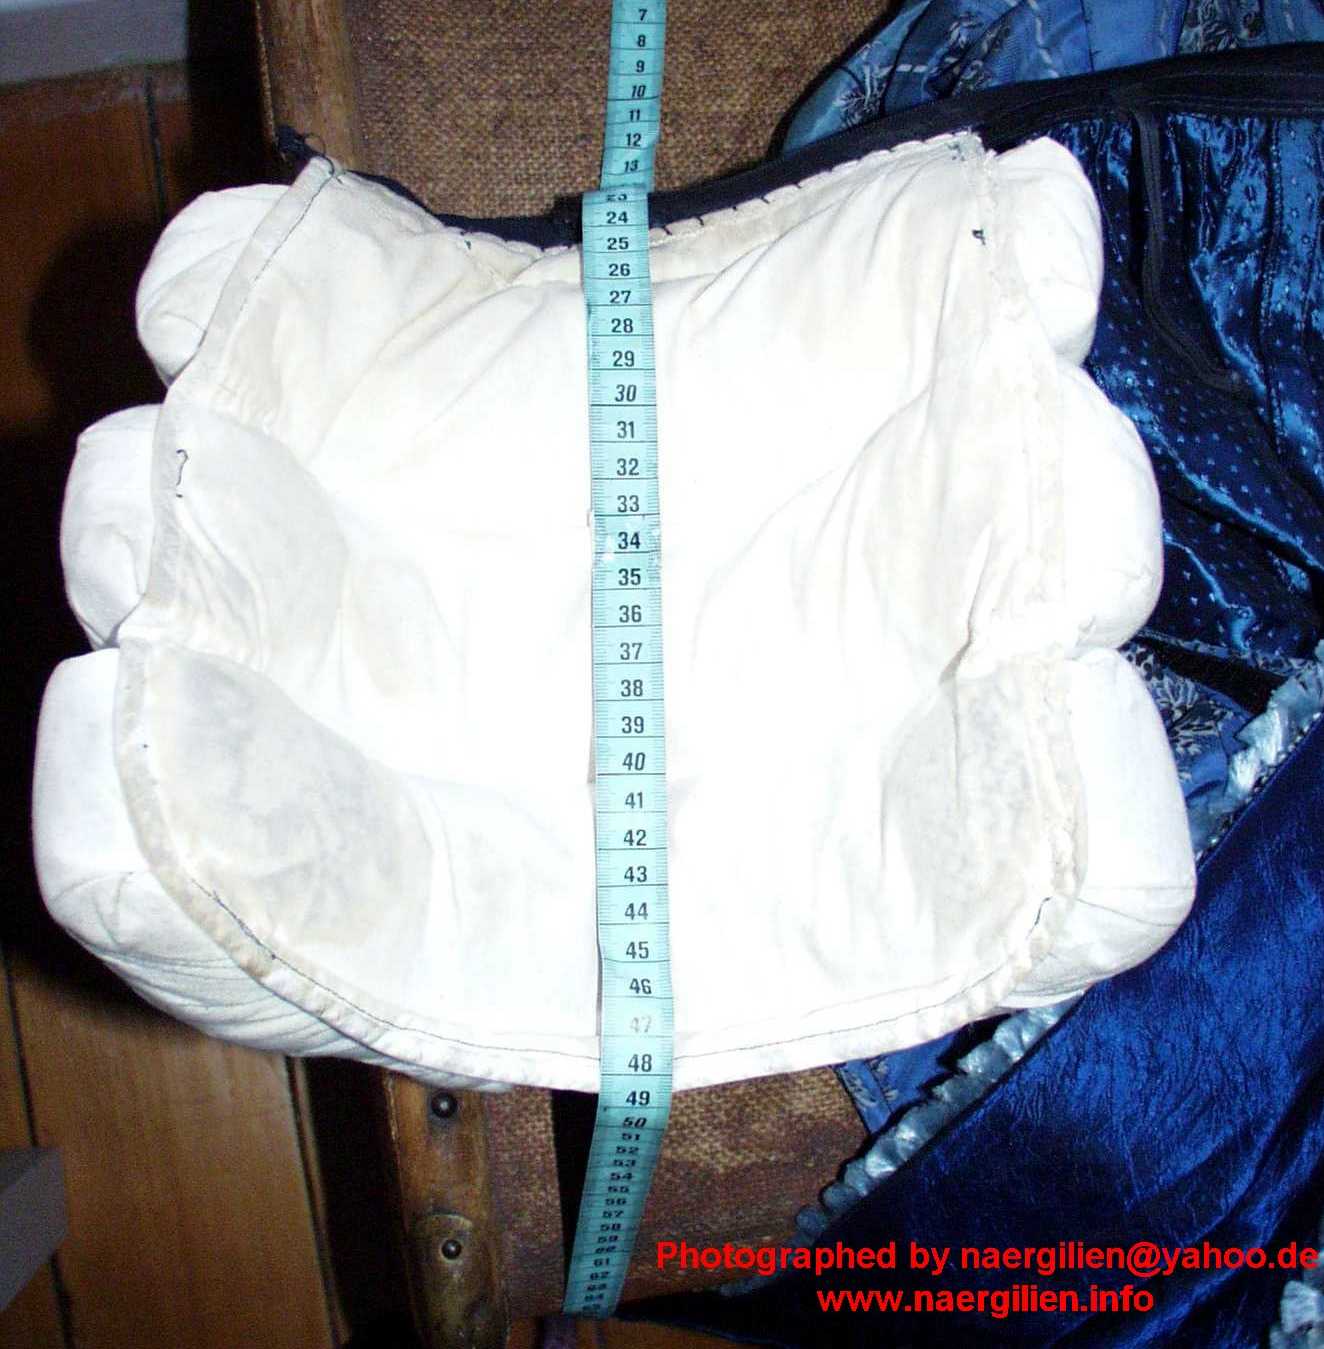
| Front and back of the bodice, spread out on a sofa. The color fading is noticeable by comparing the color of the bow at the backside with the overall color of the outside of the bodice. | Inside of the bodice. Note the bones that are sewn between the sandwiched layers of bodice fabric and flat lining of white cotton twill, plus the four steel bones in black casings that were added later. |
||
 |
 |
 |
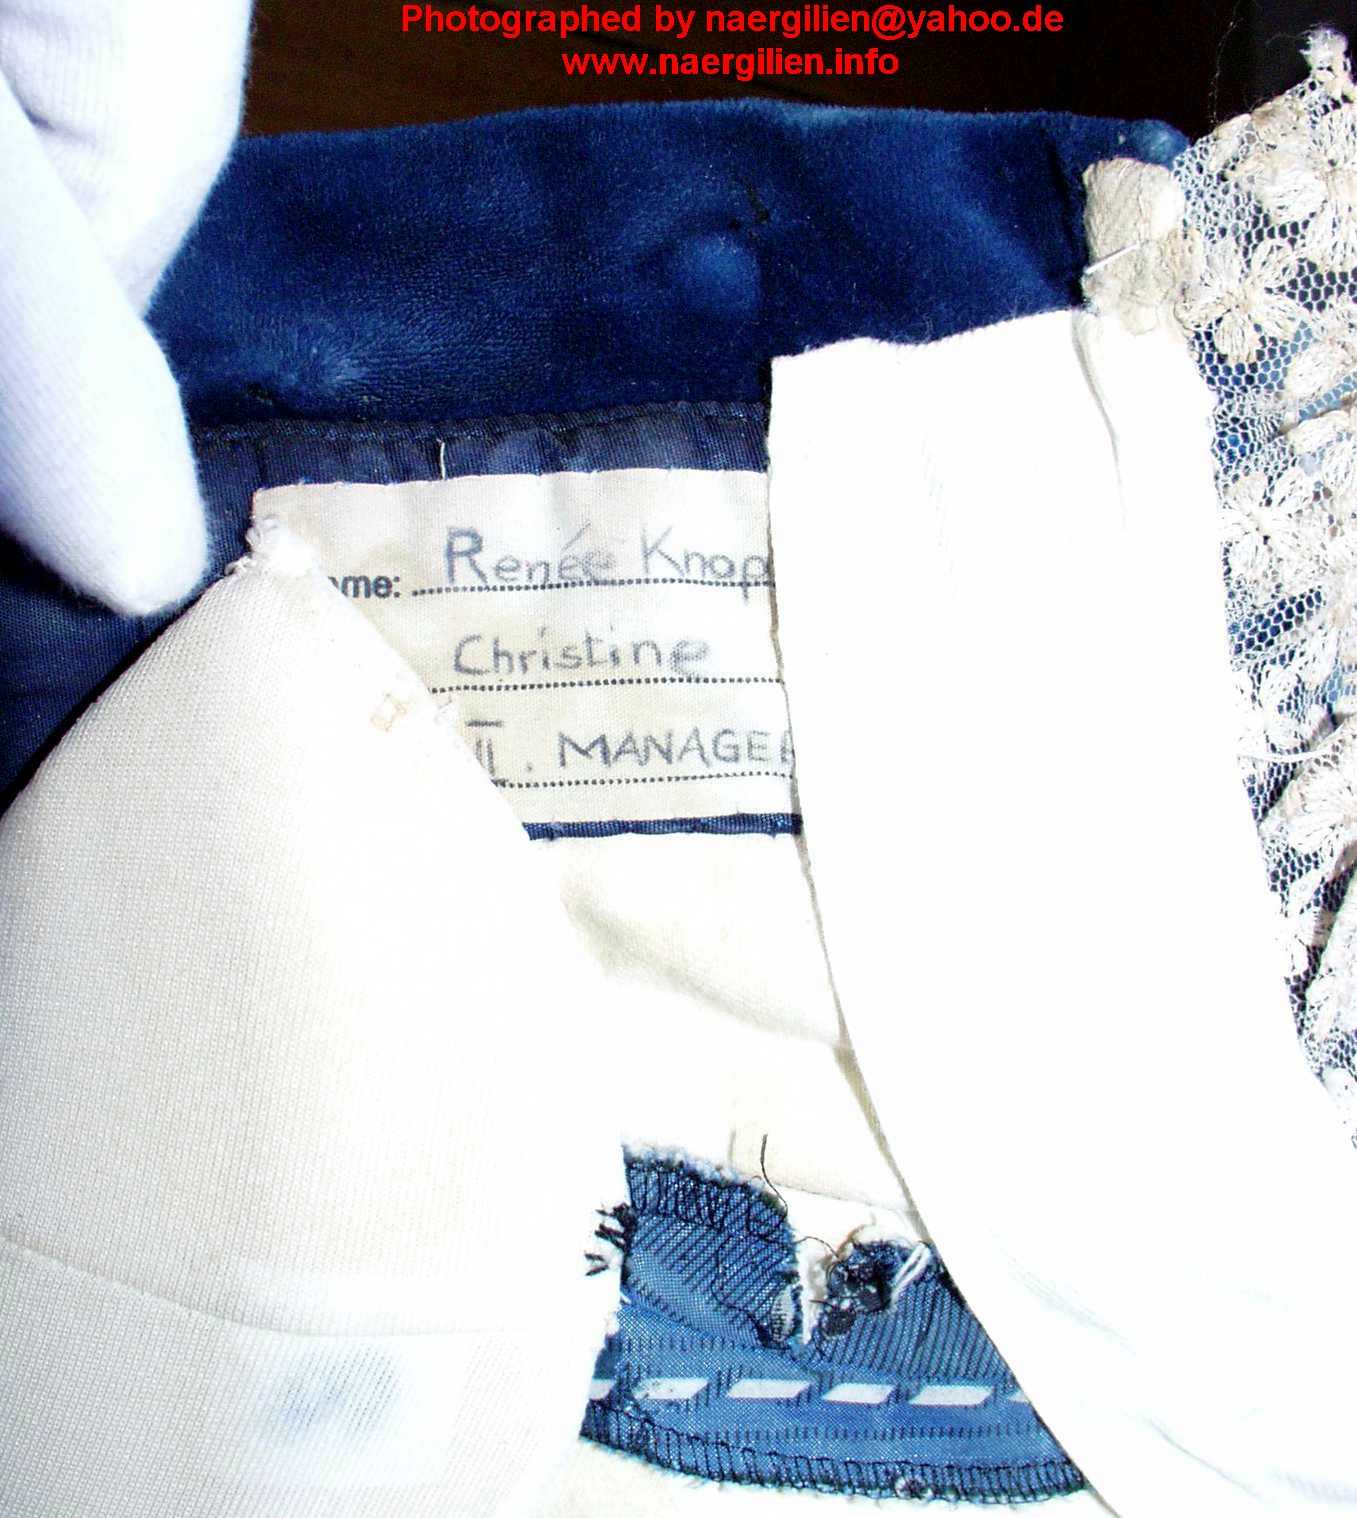 |
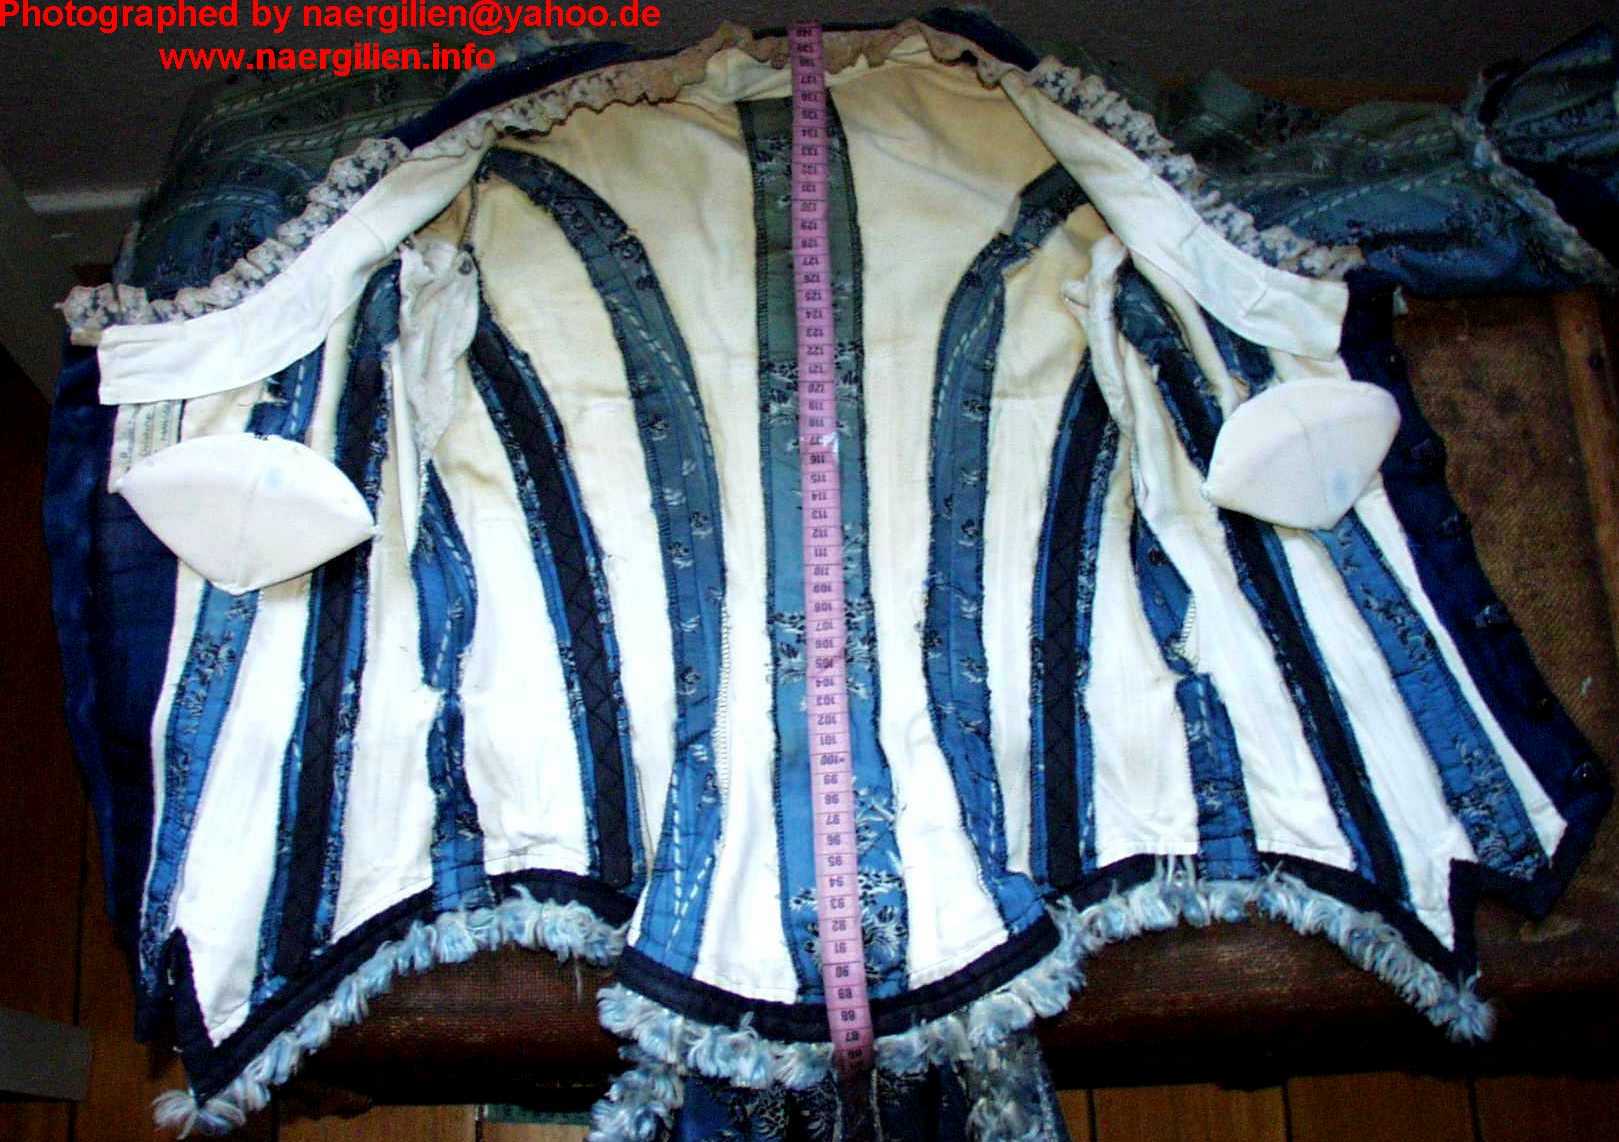
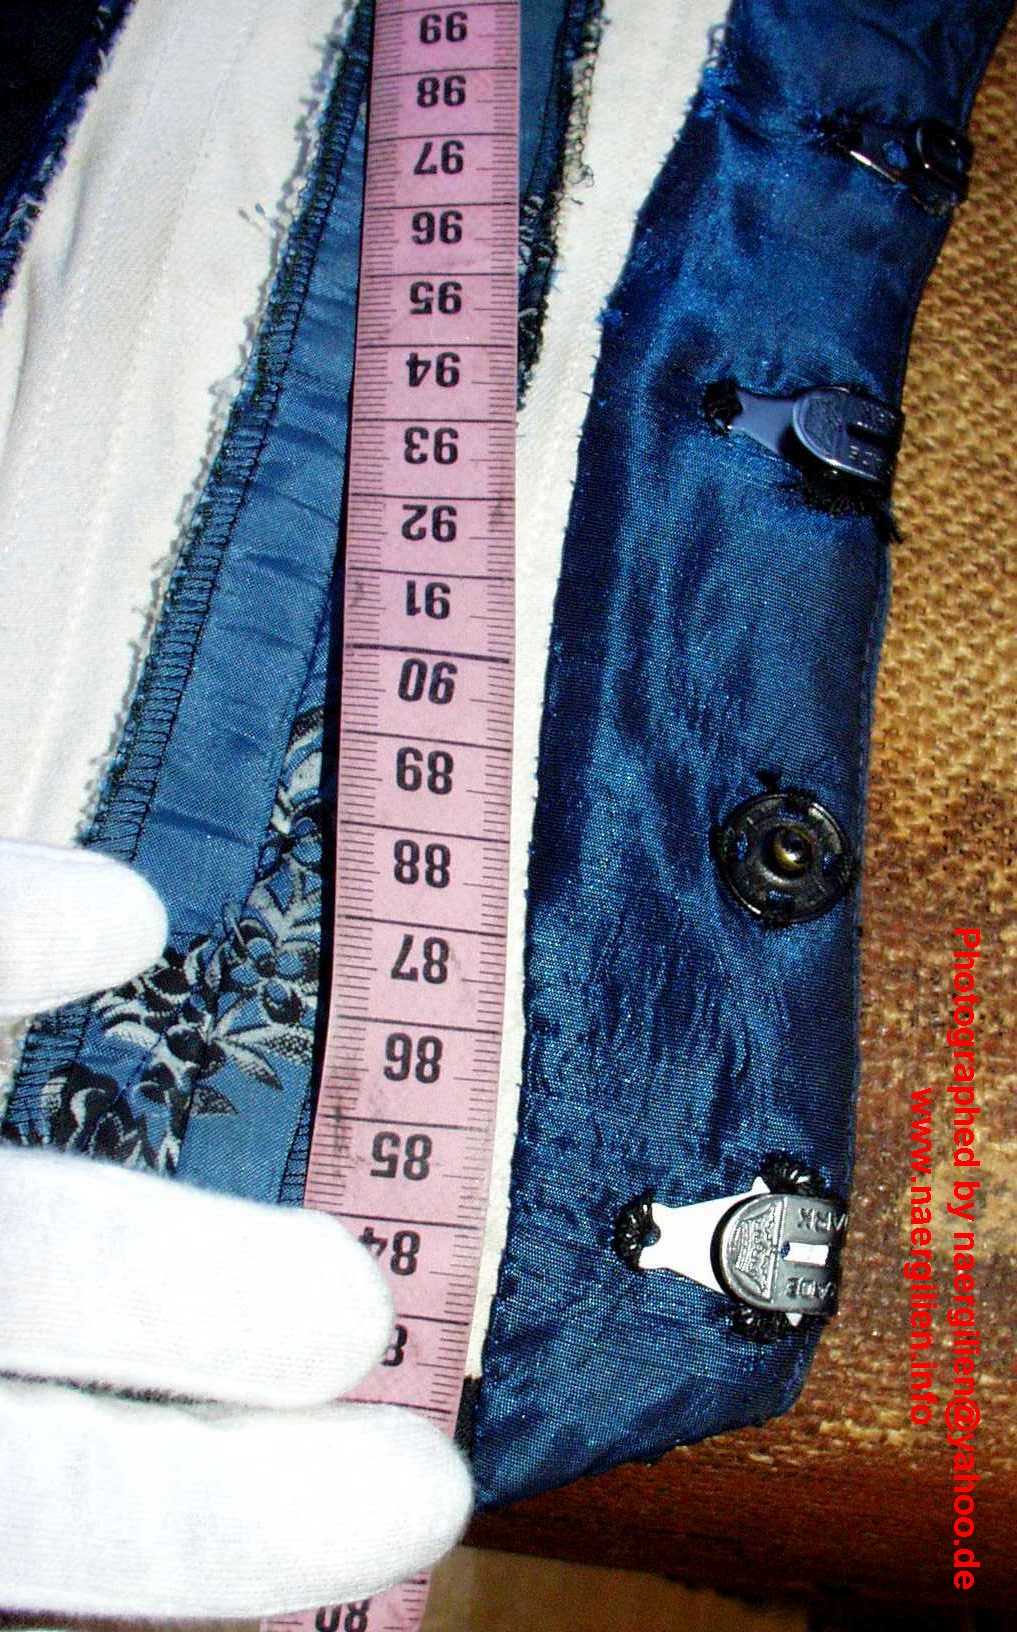
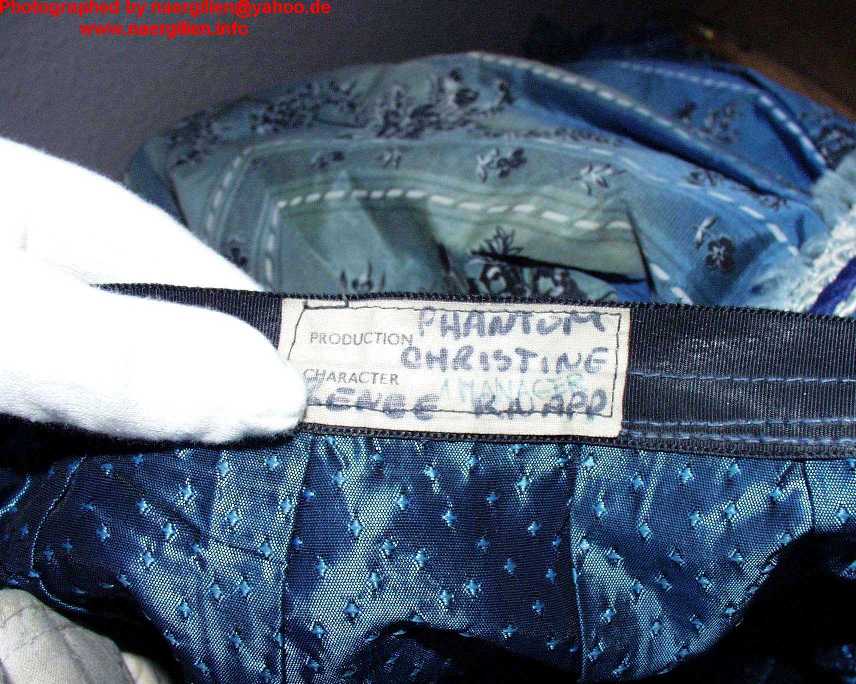
| Another, a bit closer picture of the bodice inside. Note the breast pad (a misused shoulder pad). | This picture shows the sandwiched steels a bit better. | Here’s a closeup of the front closure, which consists of hooks and eyes and snaps. | The name plate in the bodice. |
 |
 |
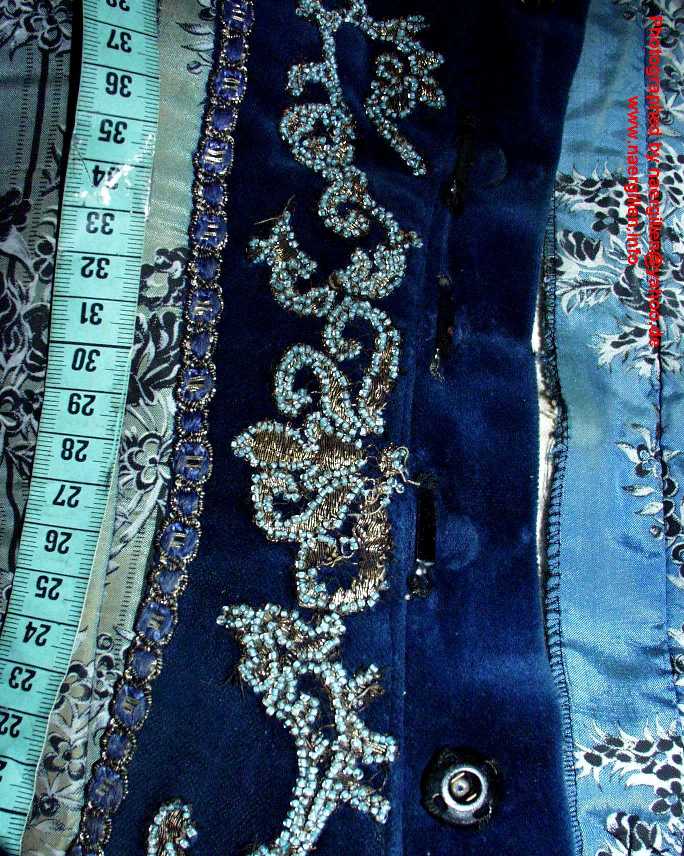 |
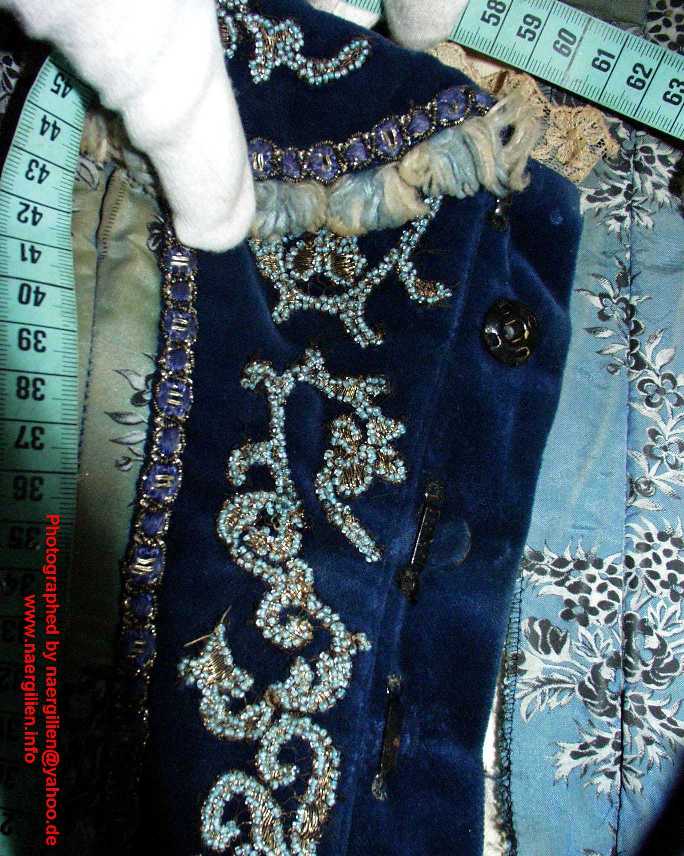
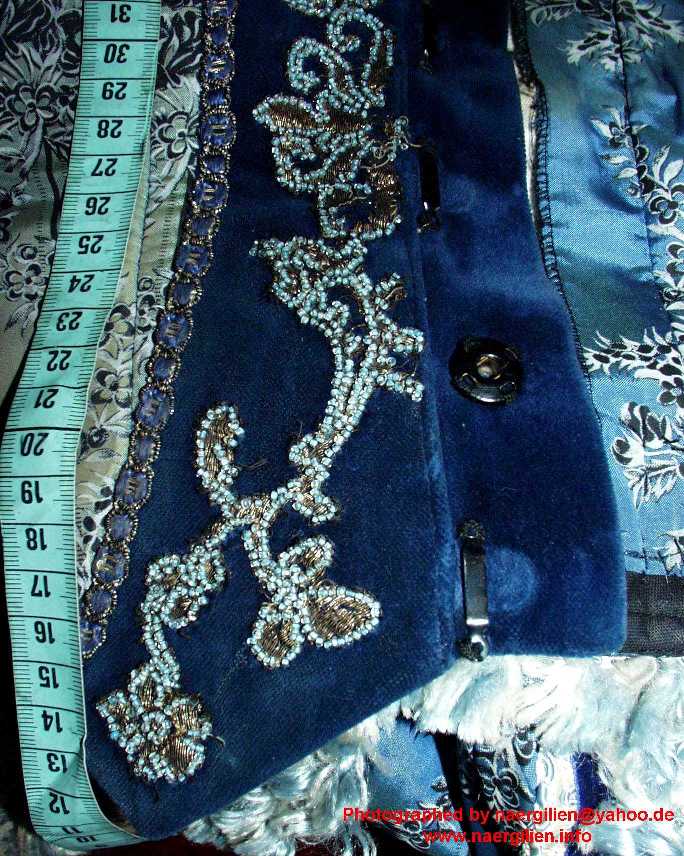
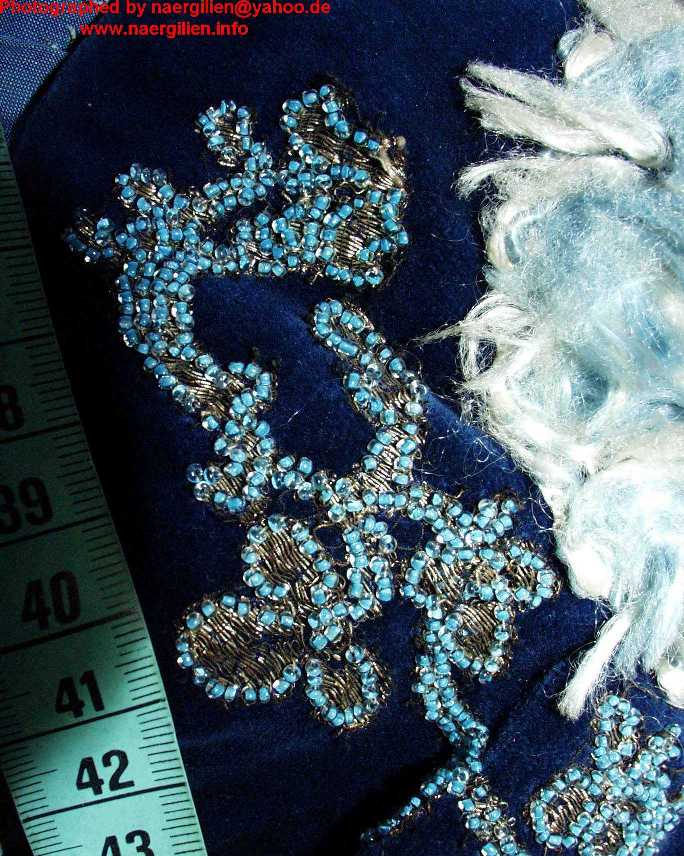
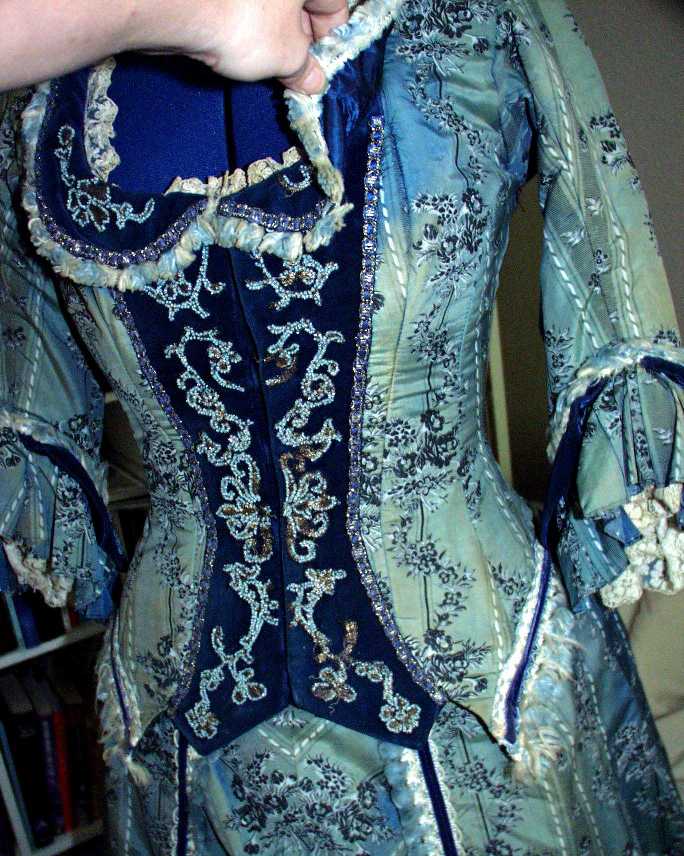
|
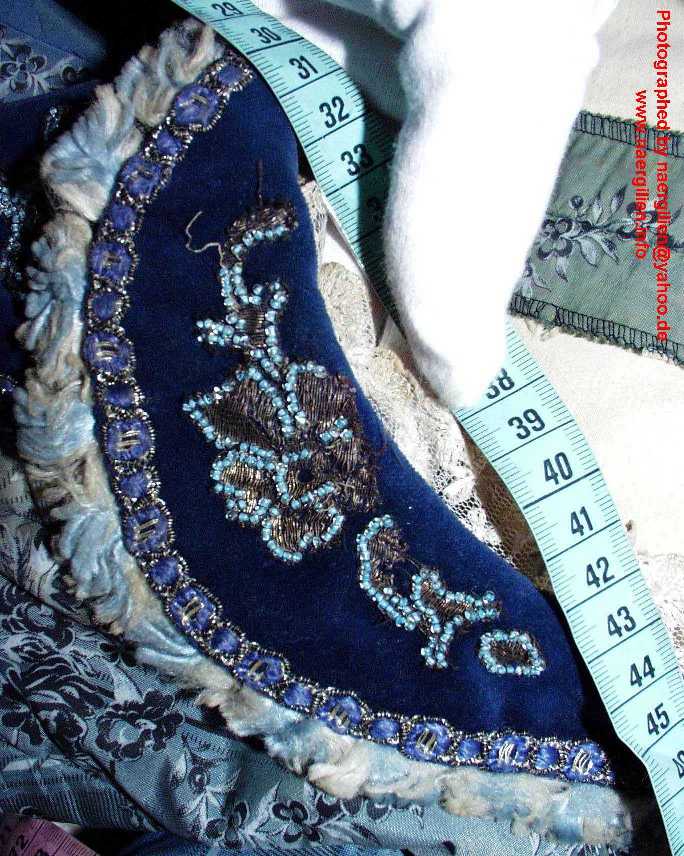
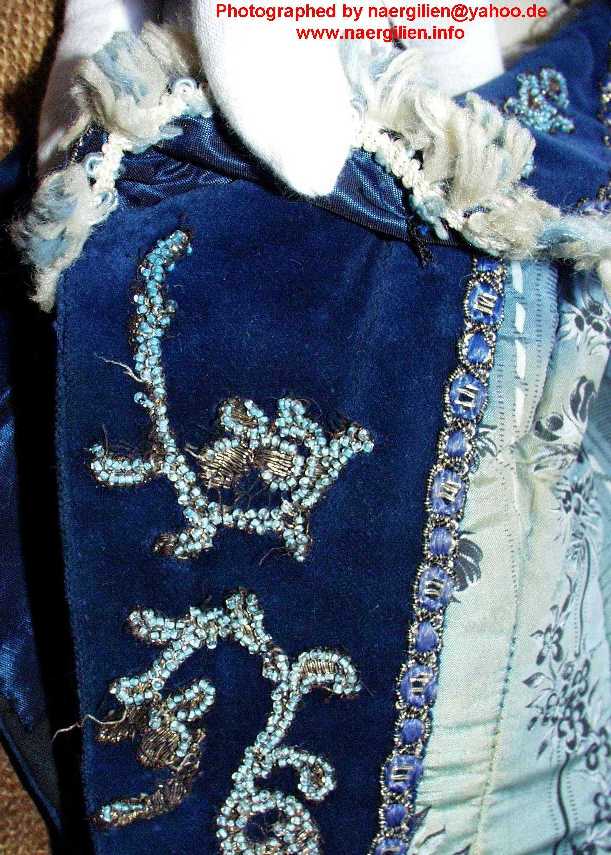
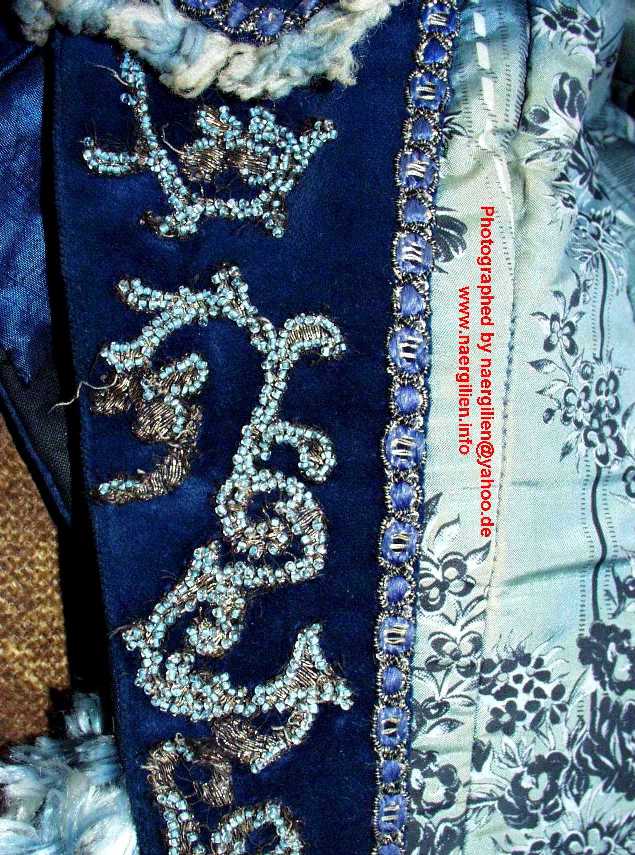
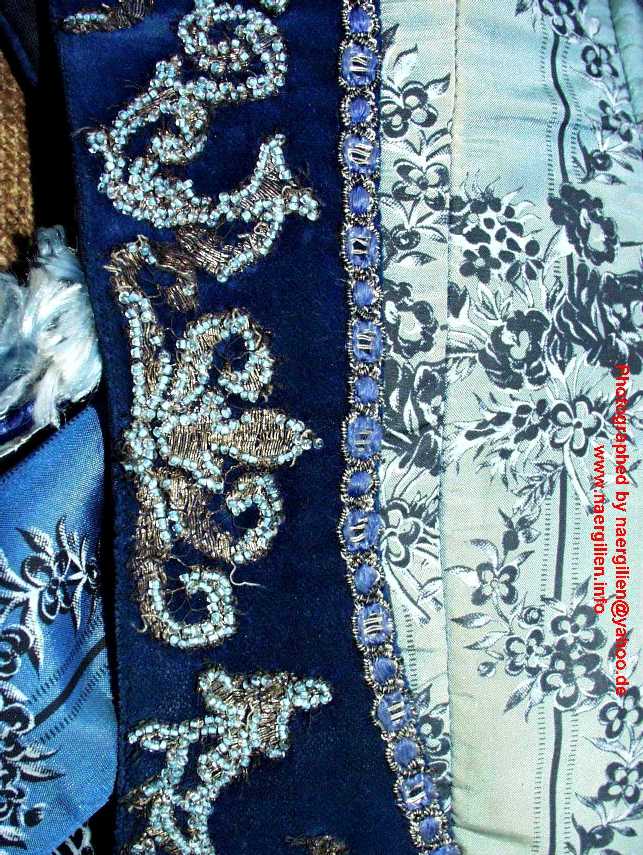
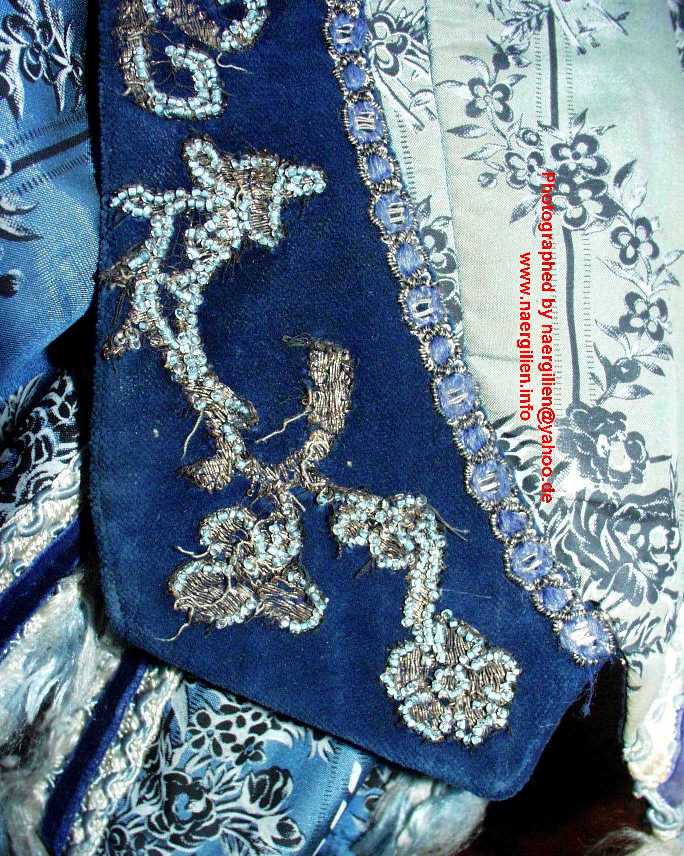
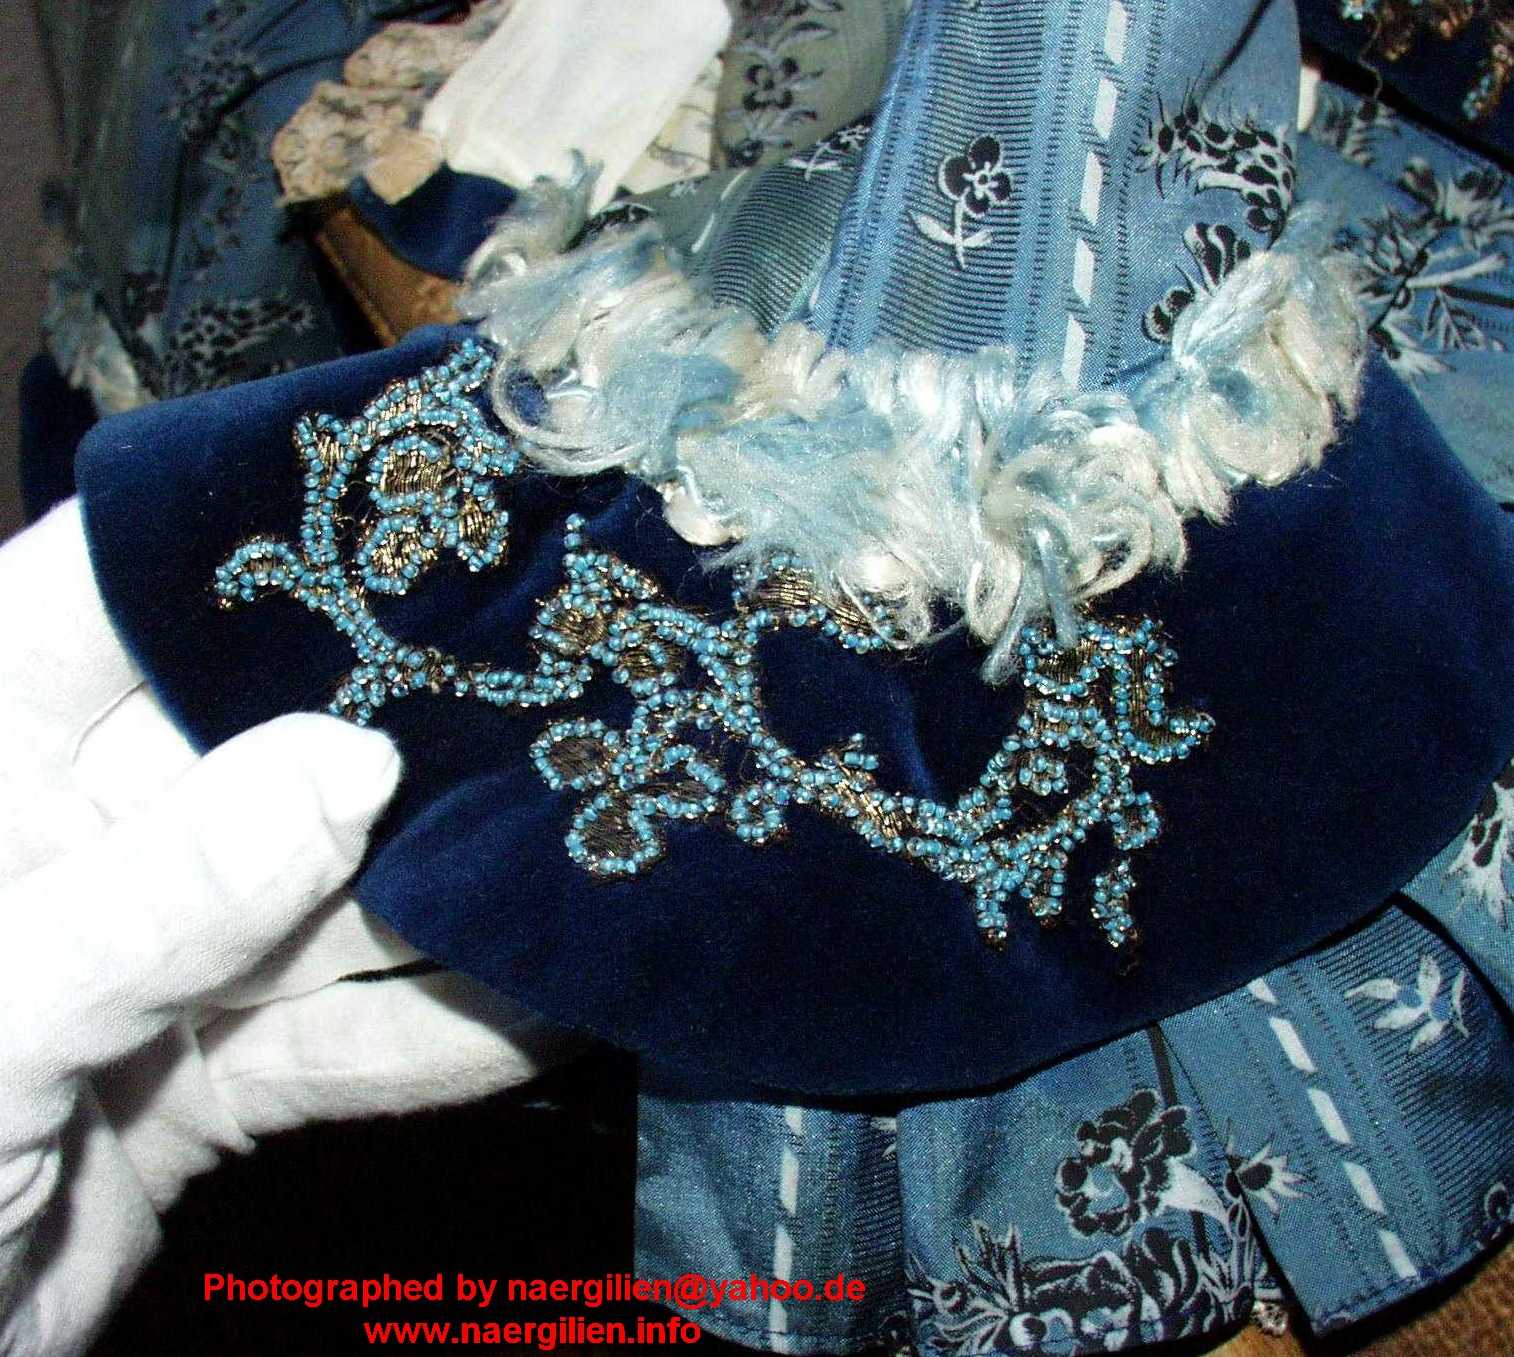
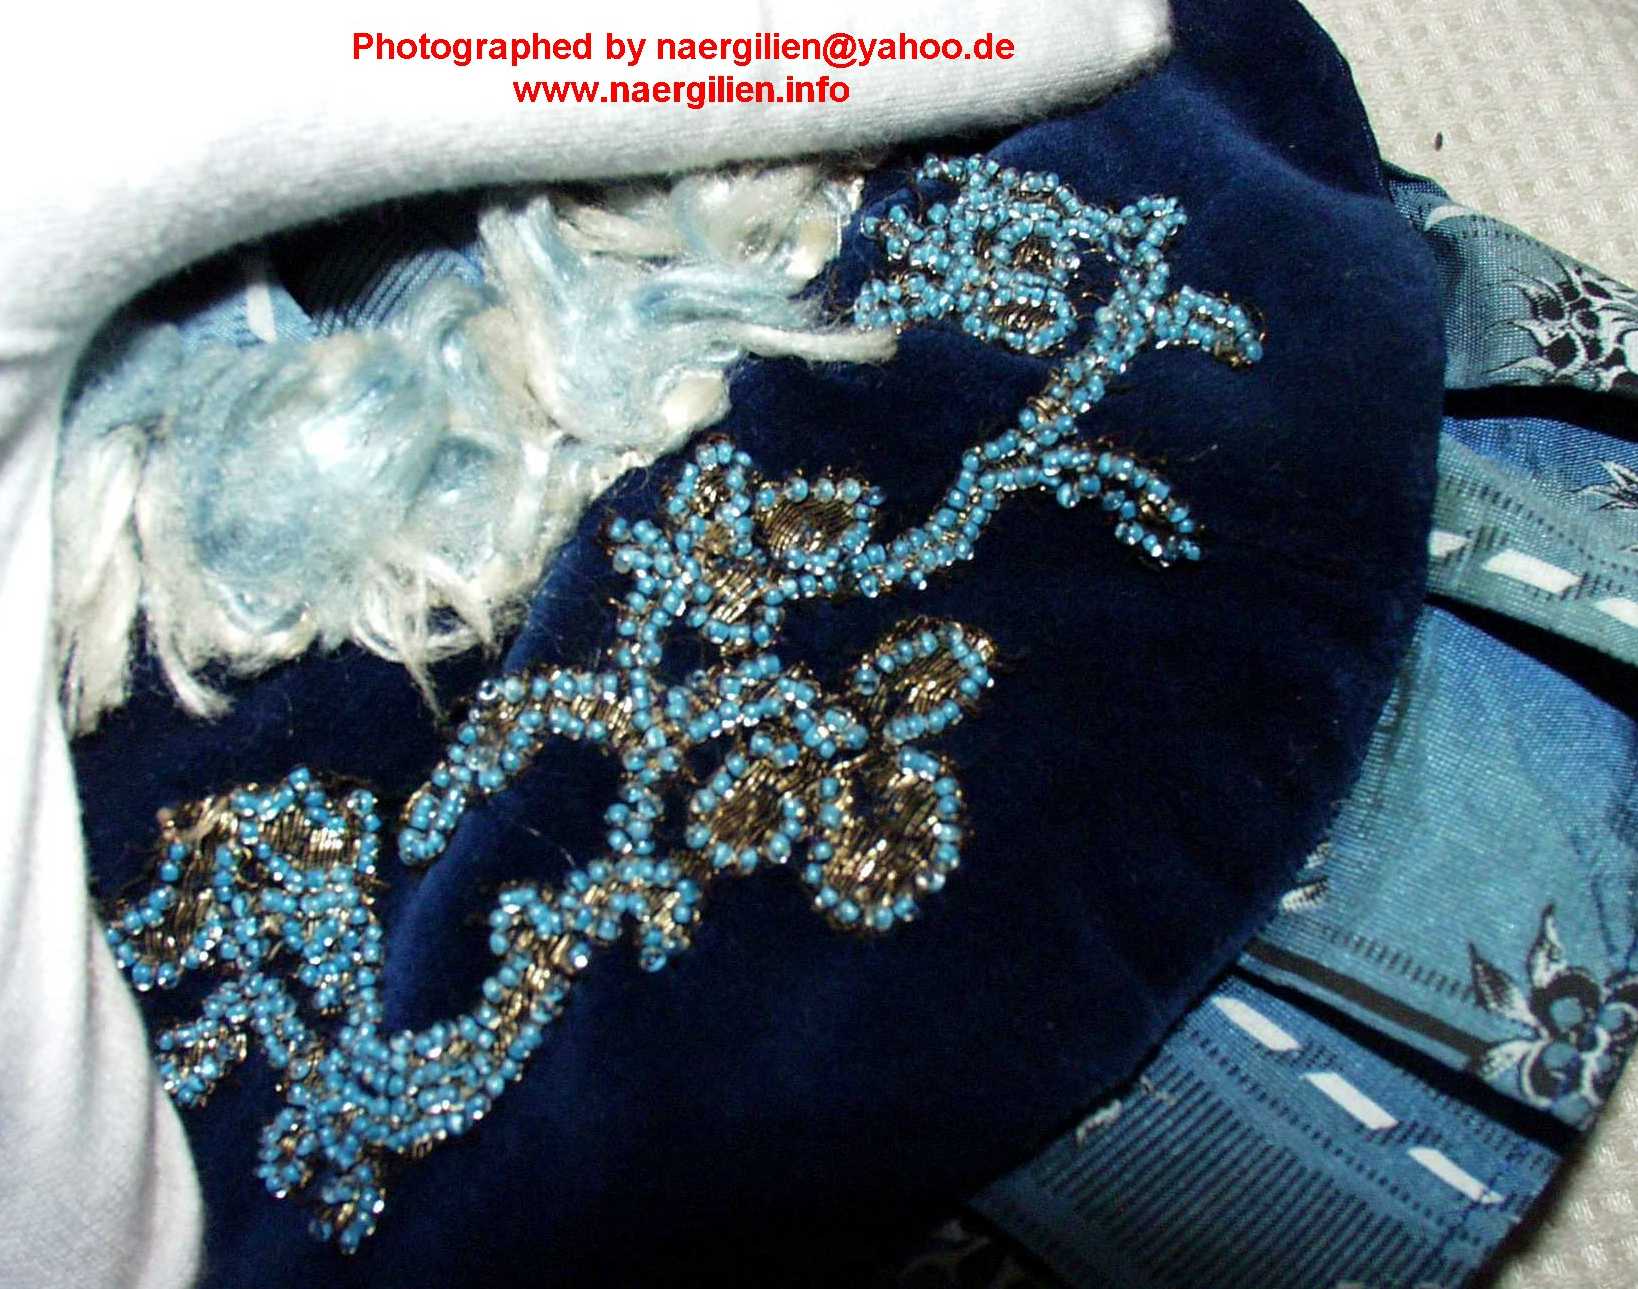
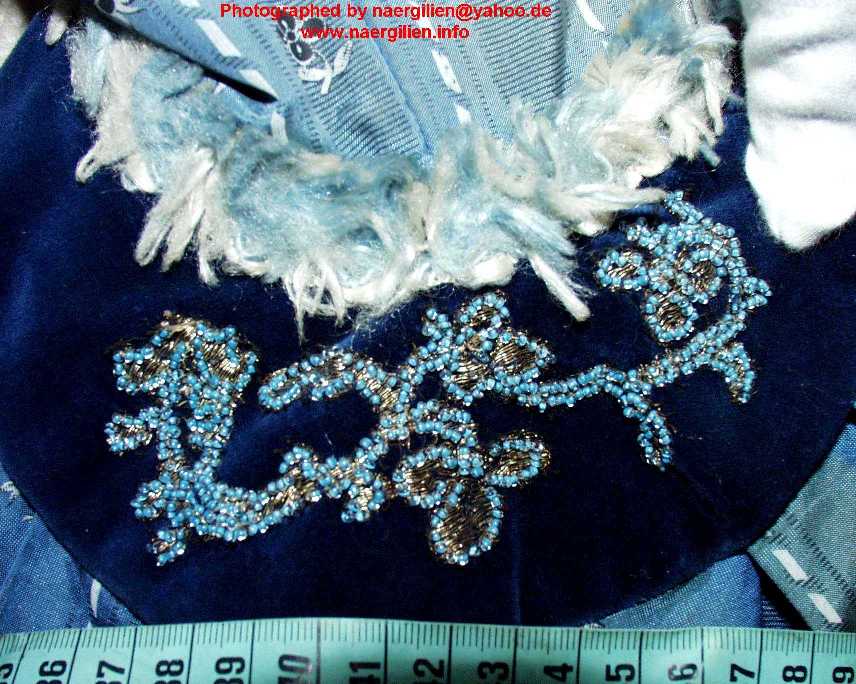
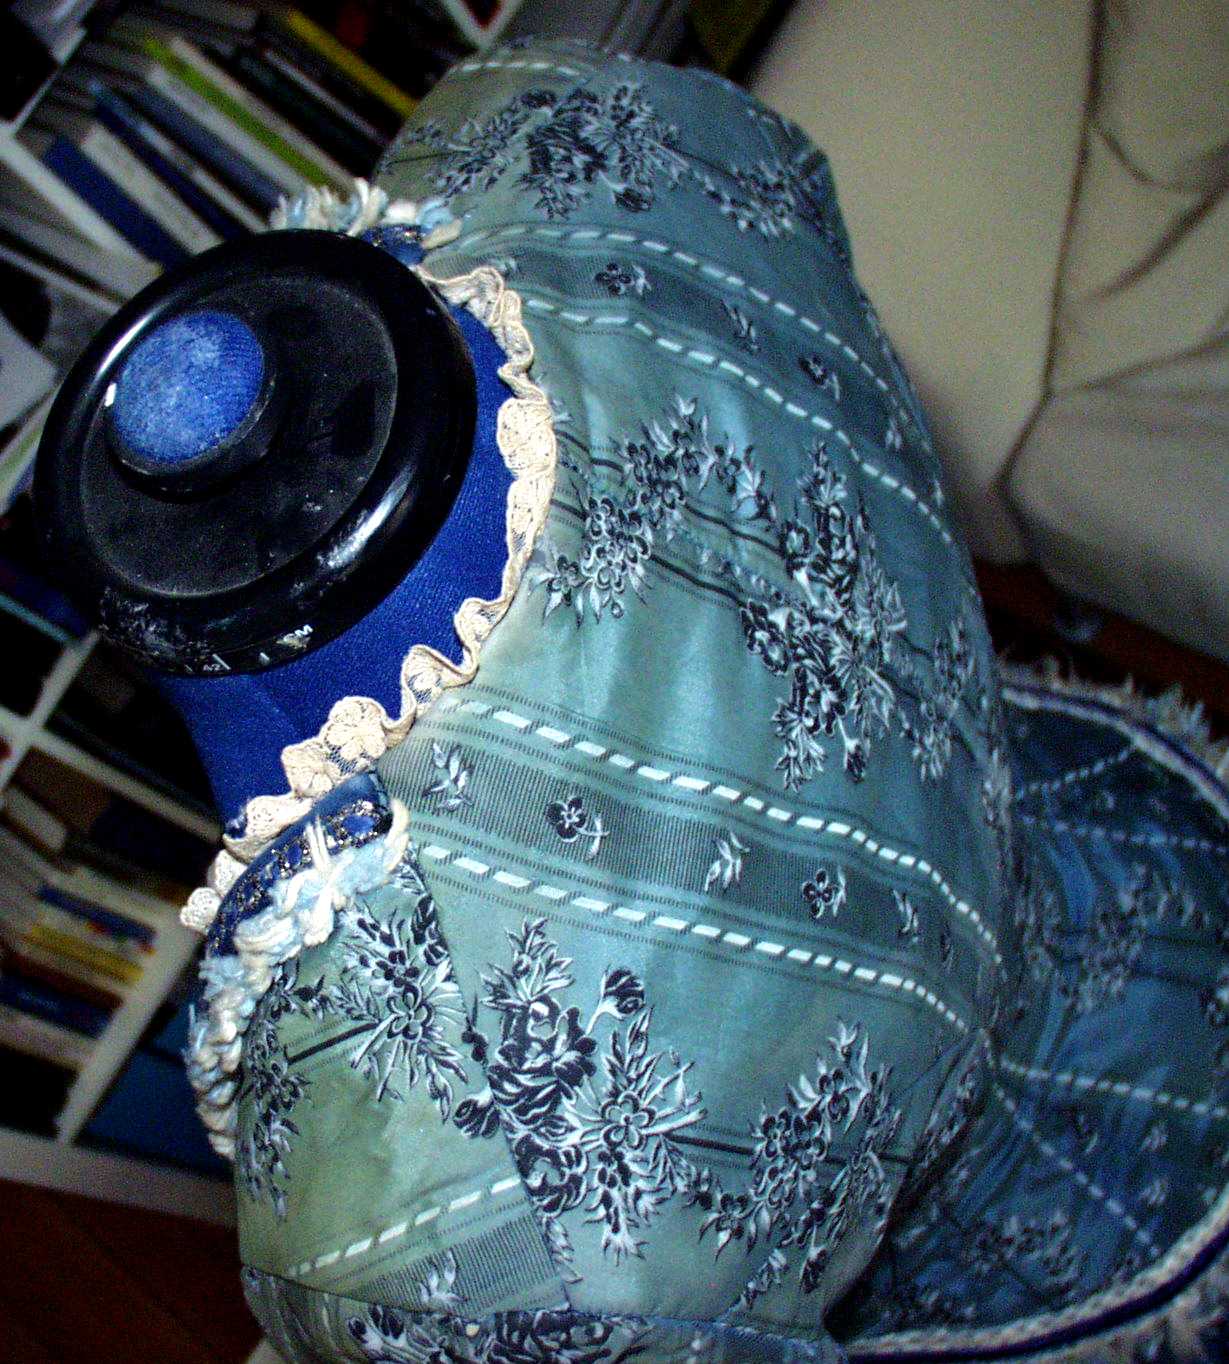
| This is a collage of the closeups I took of the front bodice embroidery. | Here’s the collar embroidery. | The embroidery consists of Goldwork – a golden, flat hammered thread was laid *on* the short piled velvet fabric and then sewn down with a black thread. The golden thread does not pass through the fabric. Additionally, the embroidery has been outlined with what seems to be tiniest, c. 1.5mm small *real* turquoise pearls. It looks like silver lined bugle beads in some pictures, but they are not. |
|
 |
 |
 |
 |
 |
 |
 |
|
 |
 |
 |
 |
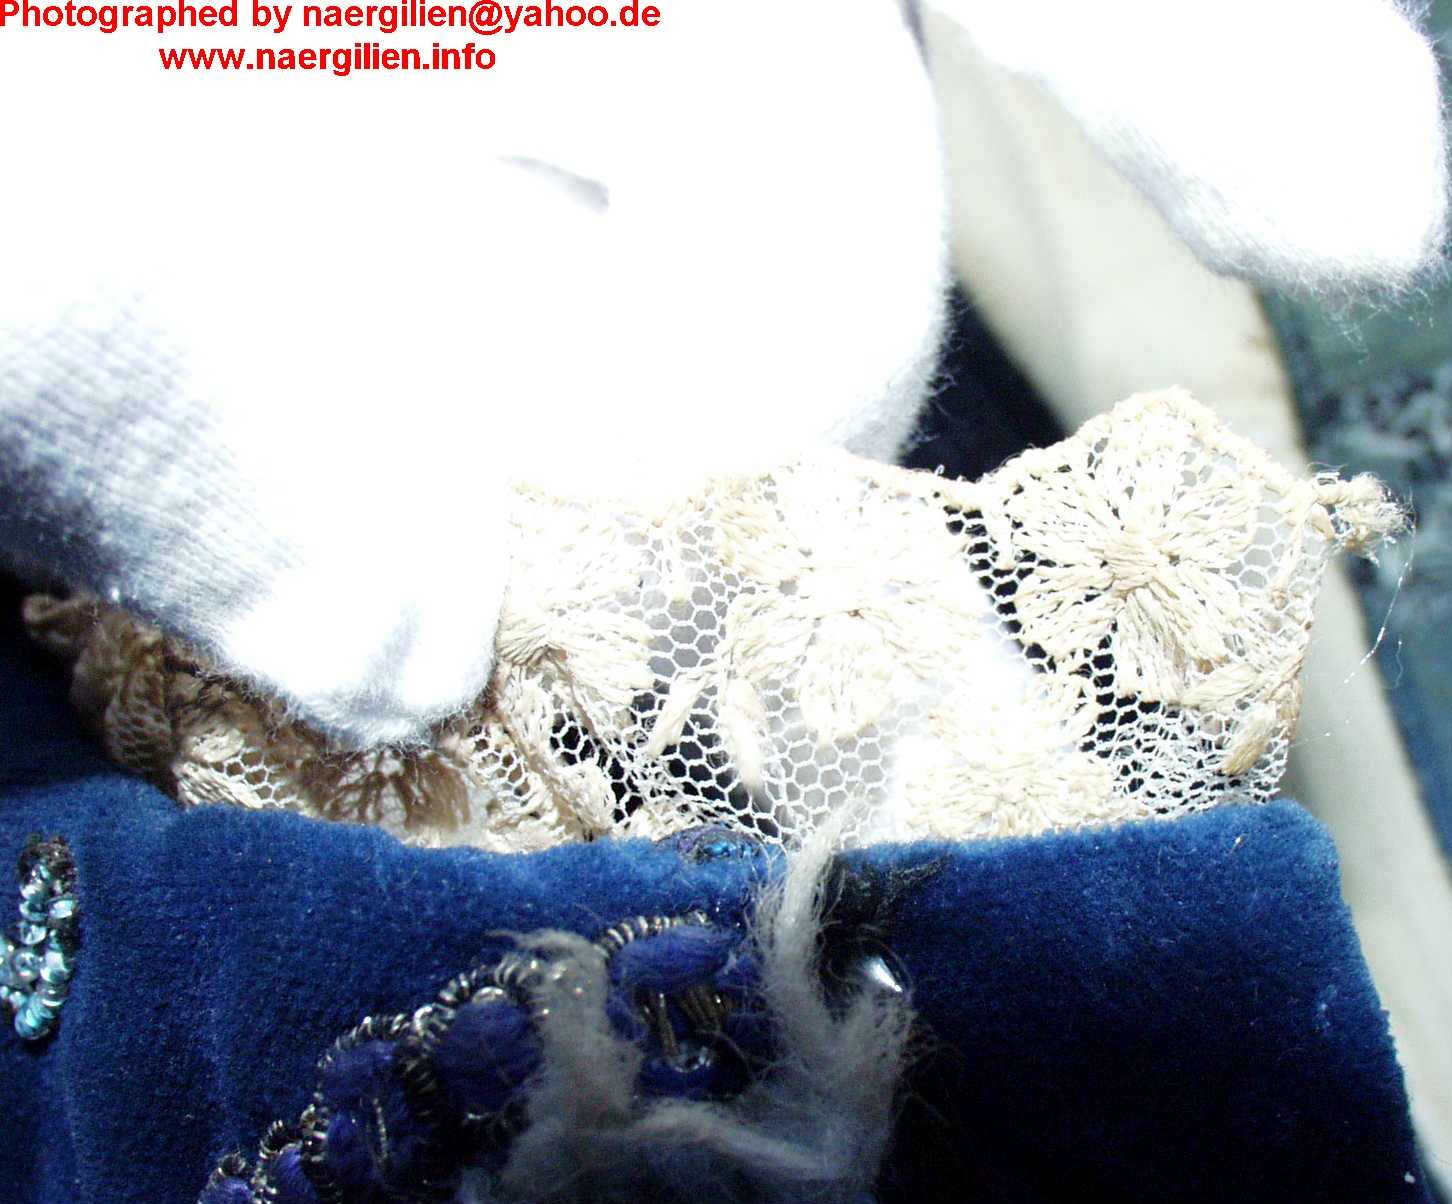
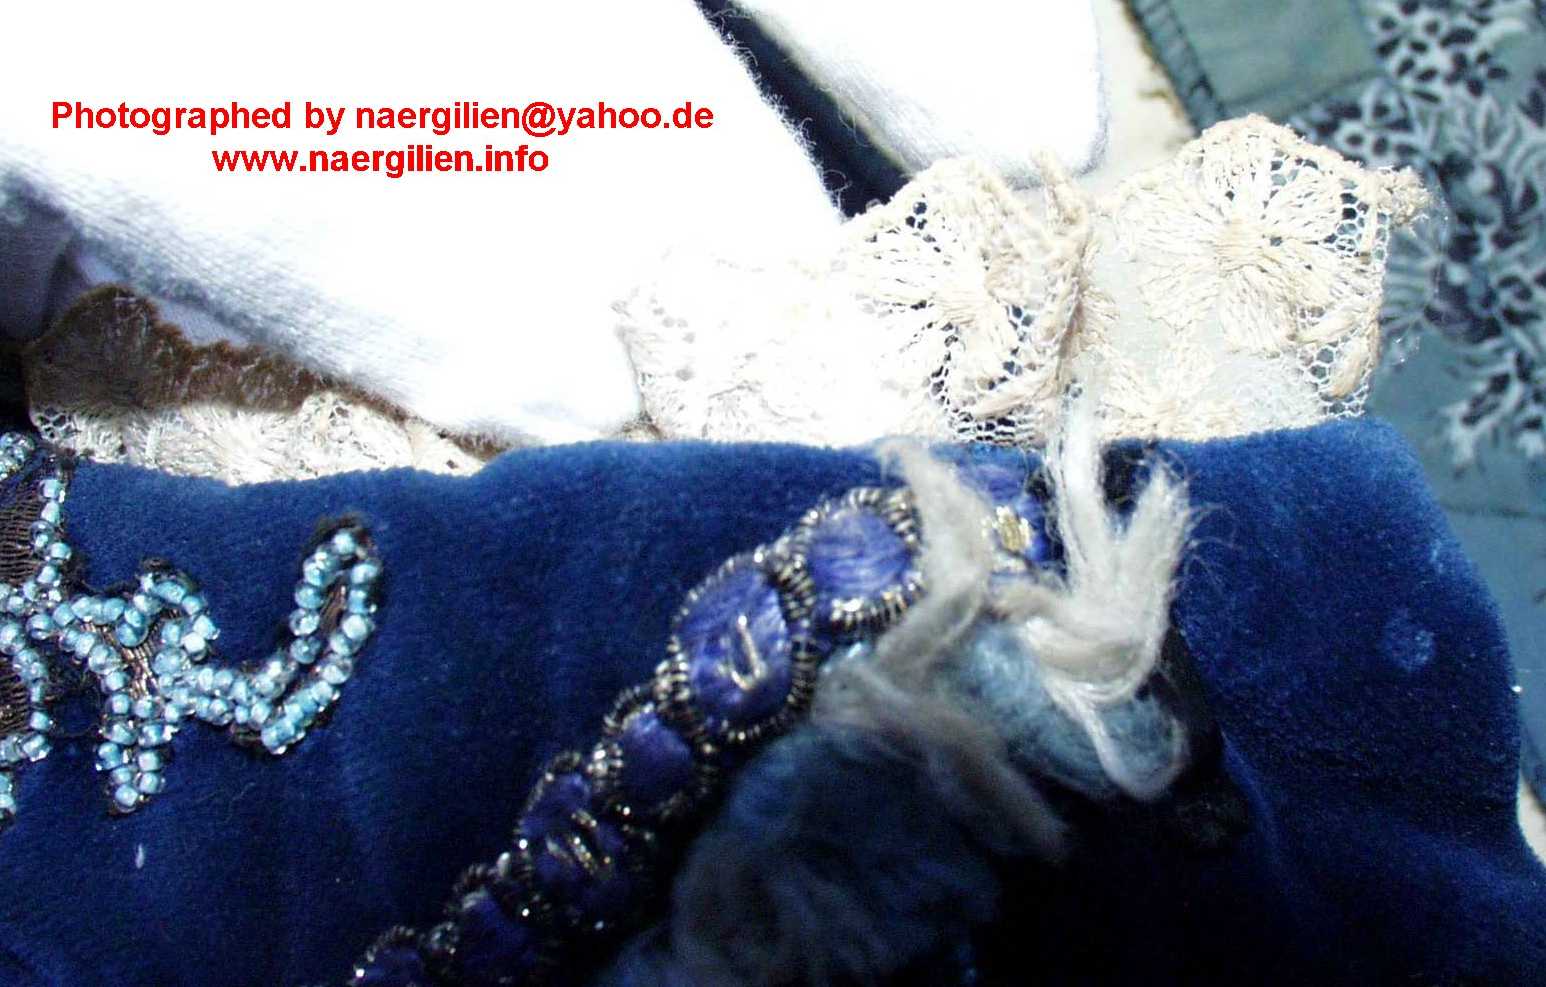
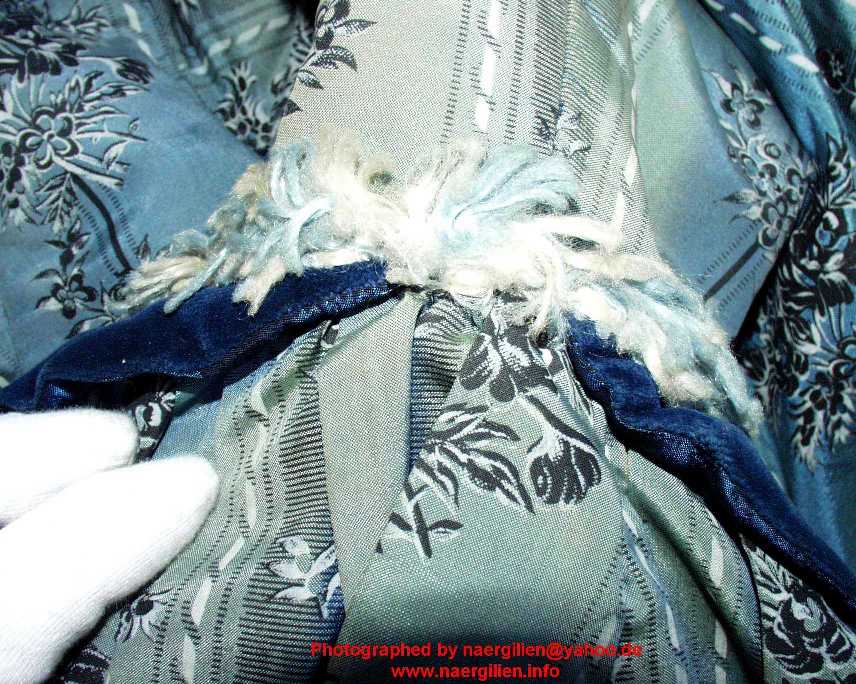
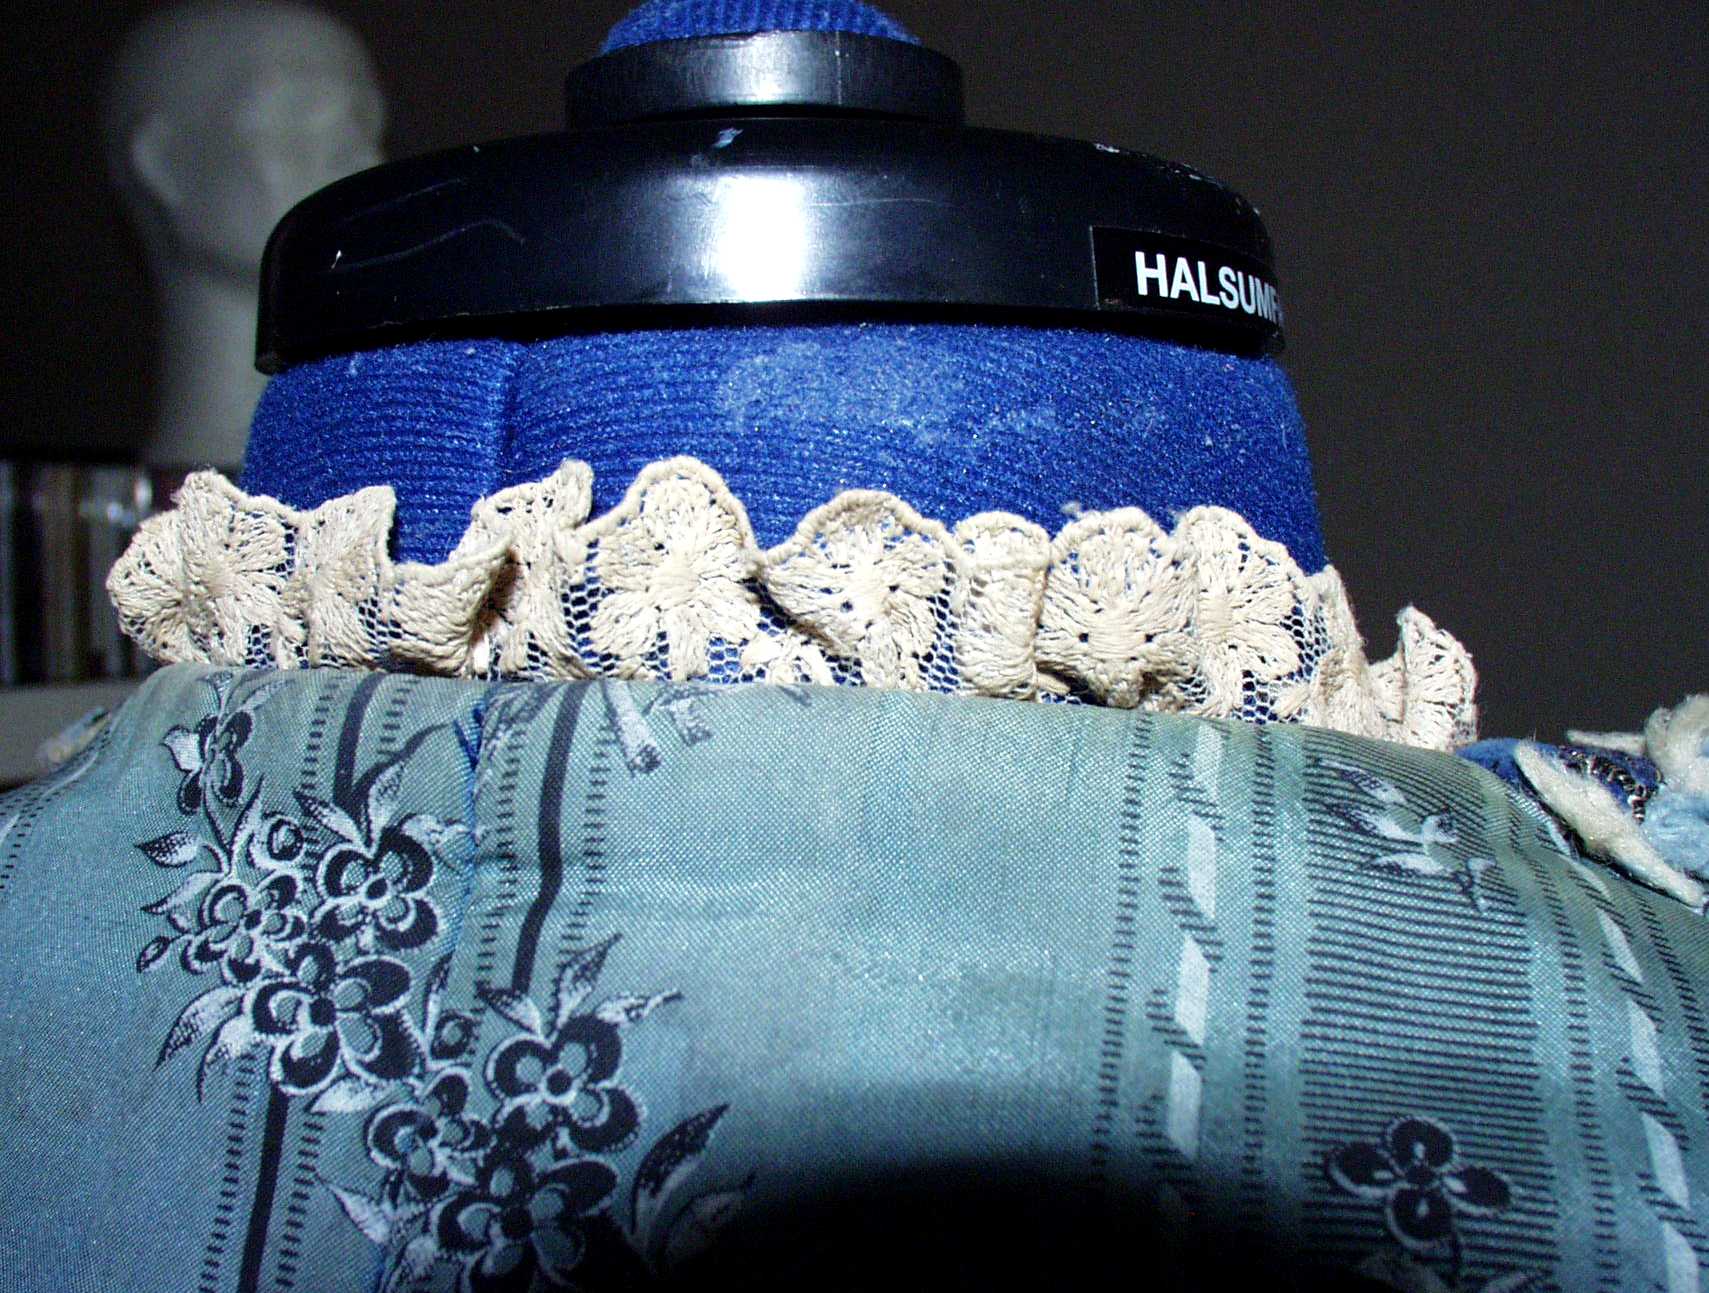
| These three pictures show closeups of the floral, embroidered tulle lace that was used along the neckline. If I would have to guess I would say that this is an antique lace, because it doesn’t look by far as if it has been machine embroidered. | This picture shows how the collar is caught down with a few stitches to the front bodice. | ||
 |
 |
 |
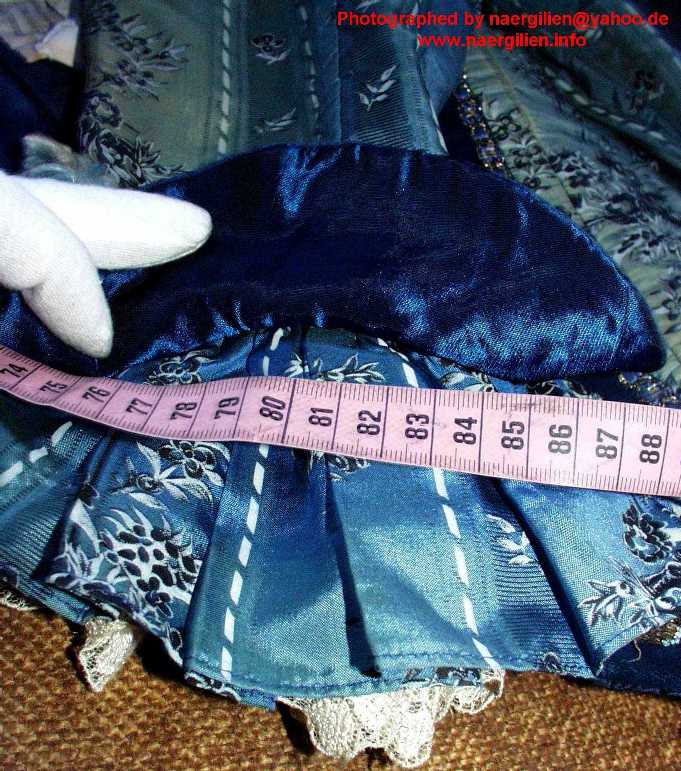 |
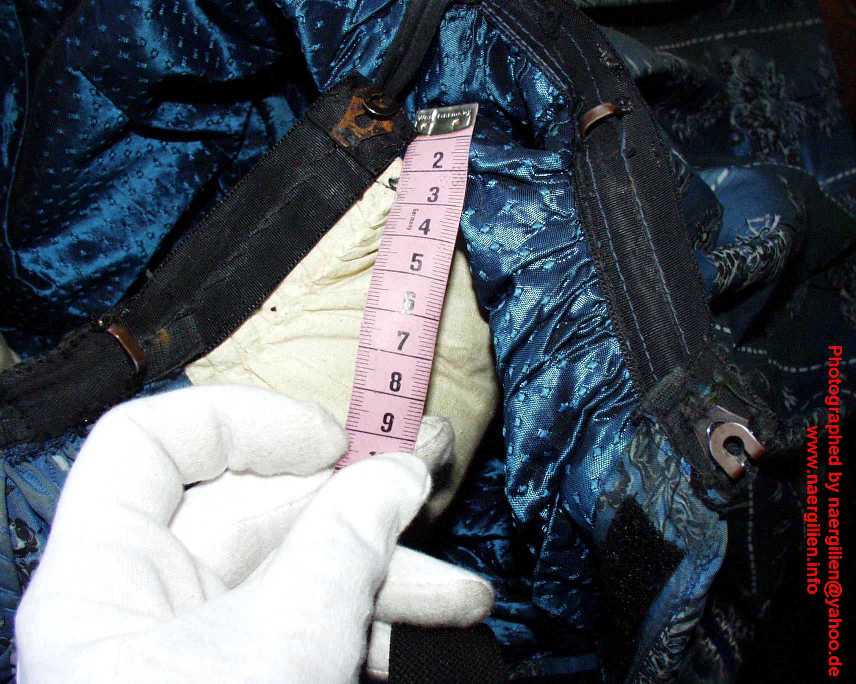
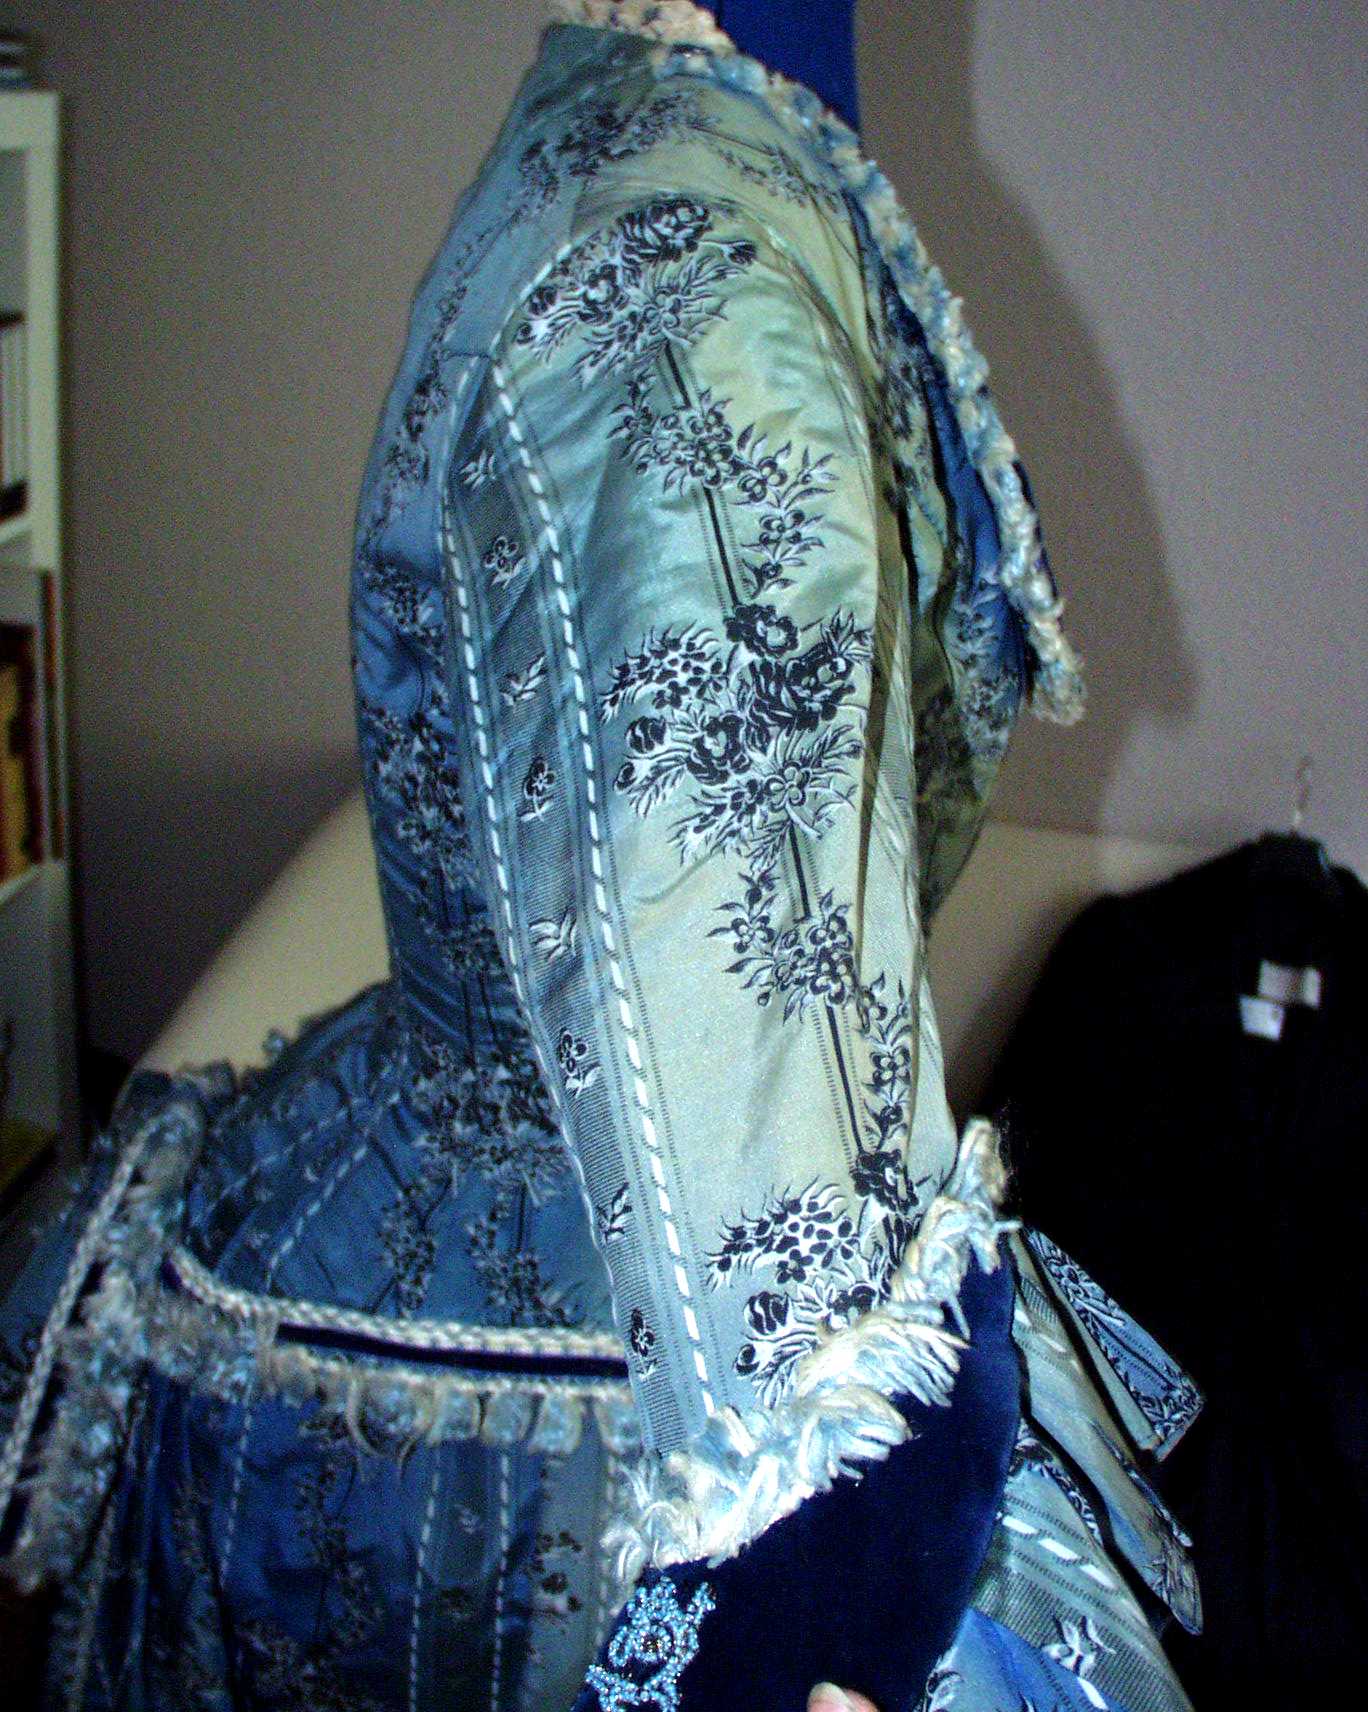
| Here are some pictures of the sleeve cap embroidery, which is worked the same way as the front bodice- and collar embroideries. The fact that none of the embroidery threads show on the taffeta lining of the cap (see next picture) tell me that the embroidery has been made before the sleeve cap was lined. | The measurement tape along the pleated sleeve flounce, which consists of a straight, pleated strip of fabric. Note the taffeta lining of the velvet sleeve cap, which I flapped back at the top of the picture. | ||
 |
 |
 |
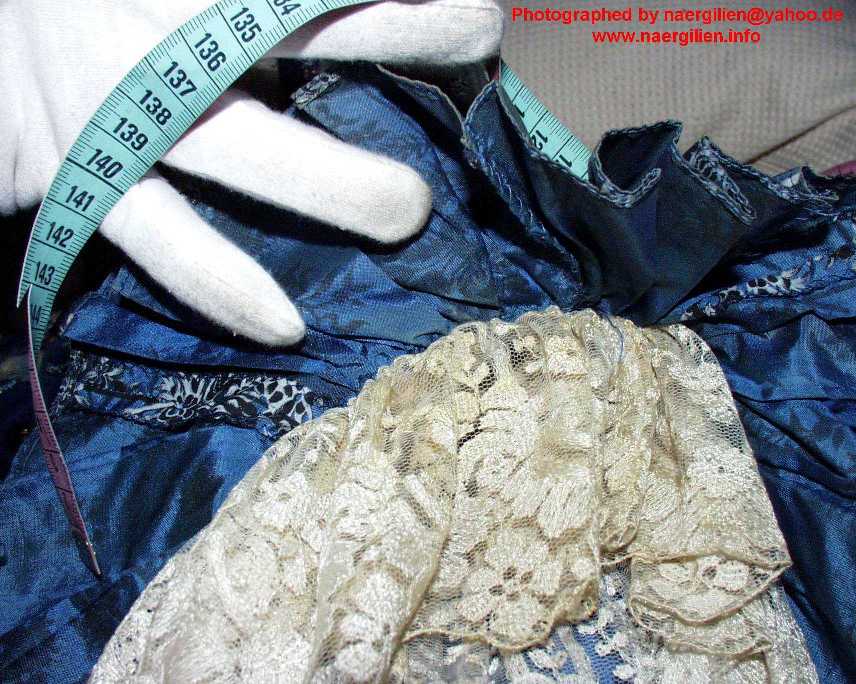 |
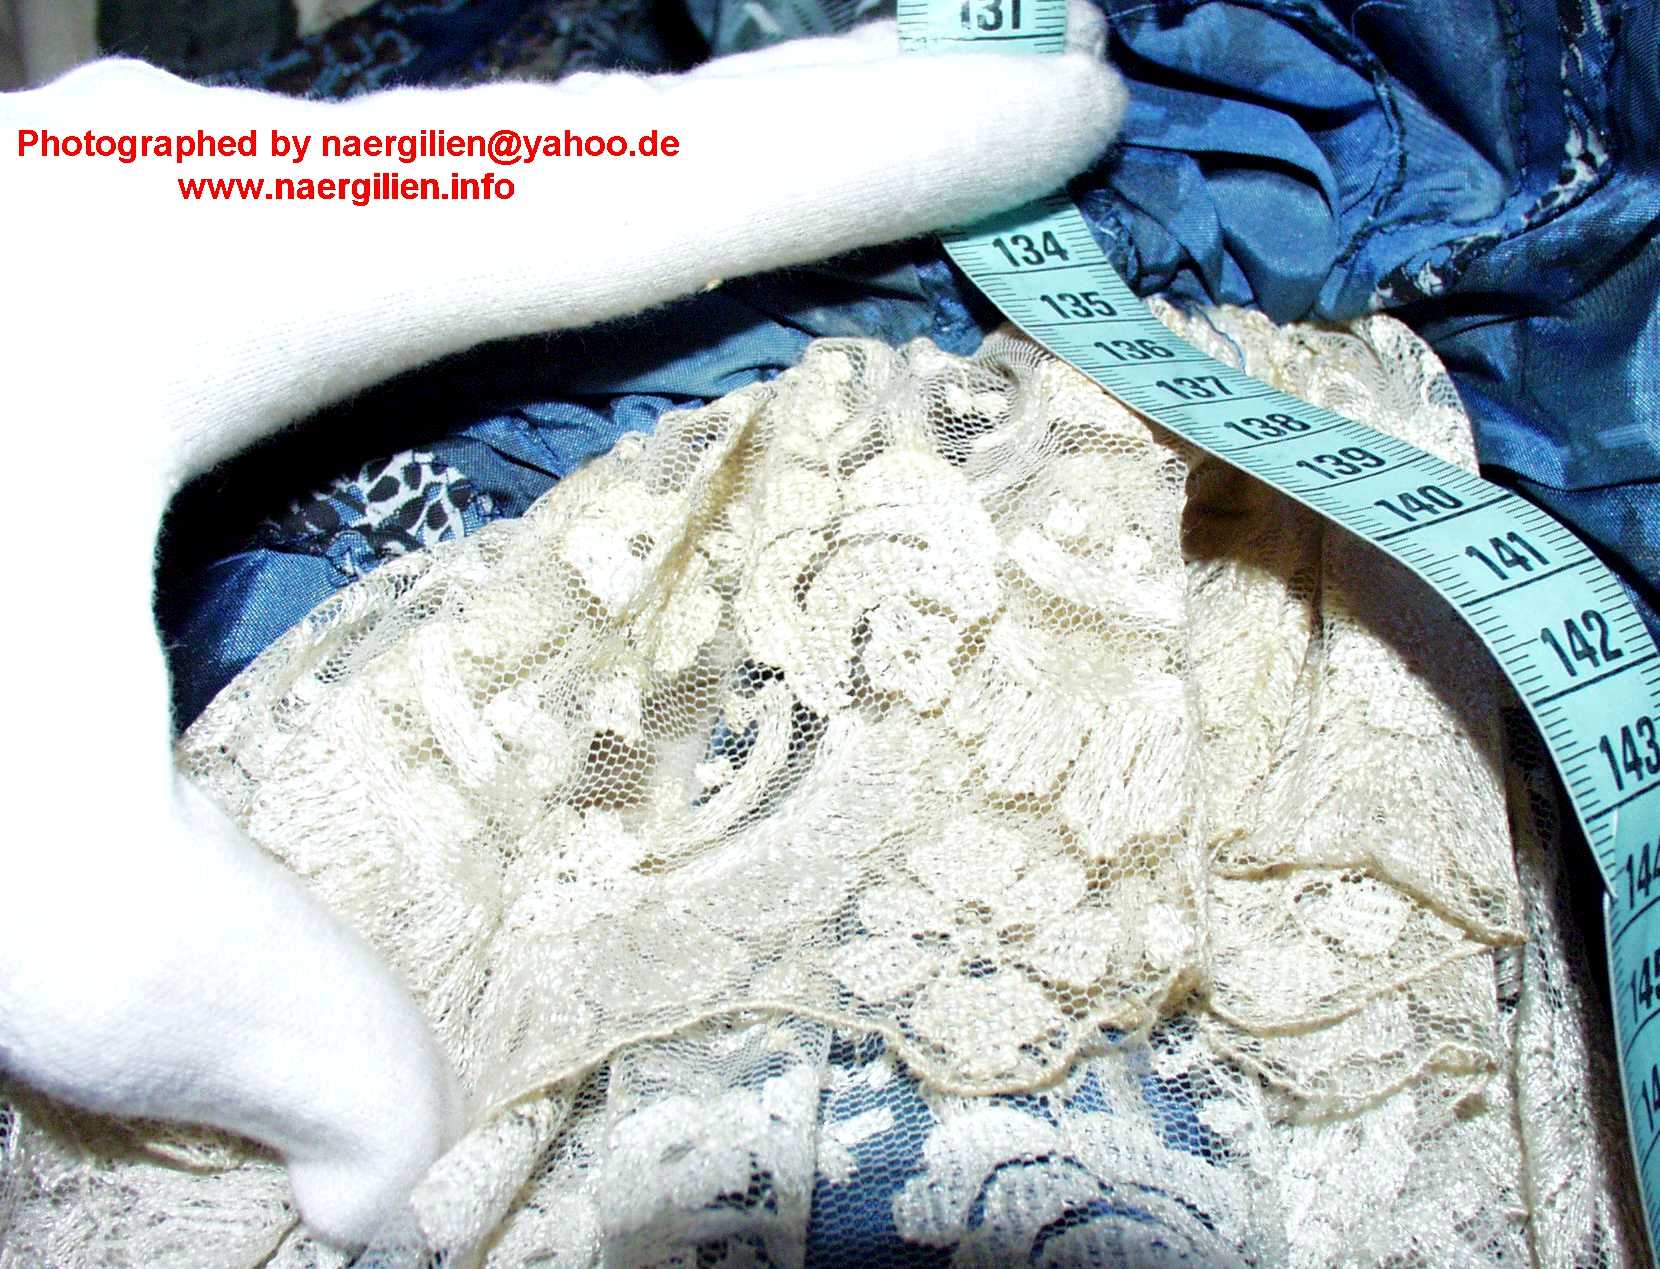
| This picture shows the end of the velvet sleeve cap at the front seam of the sleeve (which consists of an upper- and lower pattern piece for inside and outside sleeve, as it was historically done). | Some pictures of the lace sleeve flounce. This is embroidered tulle lace, and again I assume that this is antique lace, as it obviously has been hand embroidered. The floral pattern is likely to, but not the same as on the collar lace. |
||
 |
 |
 |
|
| This picture shows the inside of the sleeve. The upper edge of the lace has been neatened by covering it with a bias twill strip. | Here are two pictures of the ‚bow‘ which is attached to the center back bottom bodice. It consists of a self-lined strip of the printed taffeta fabric. | ||
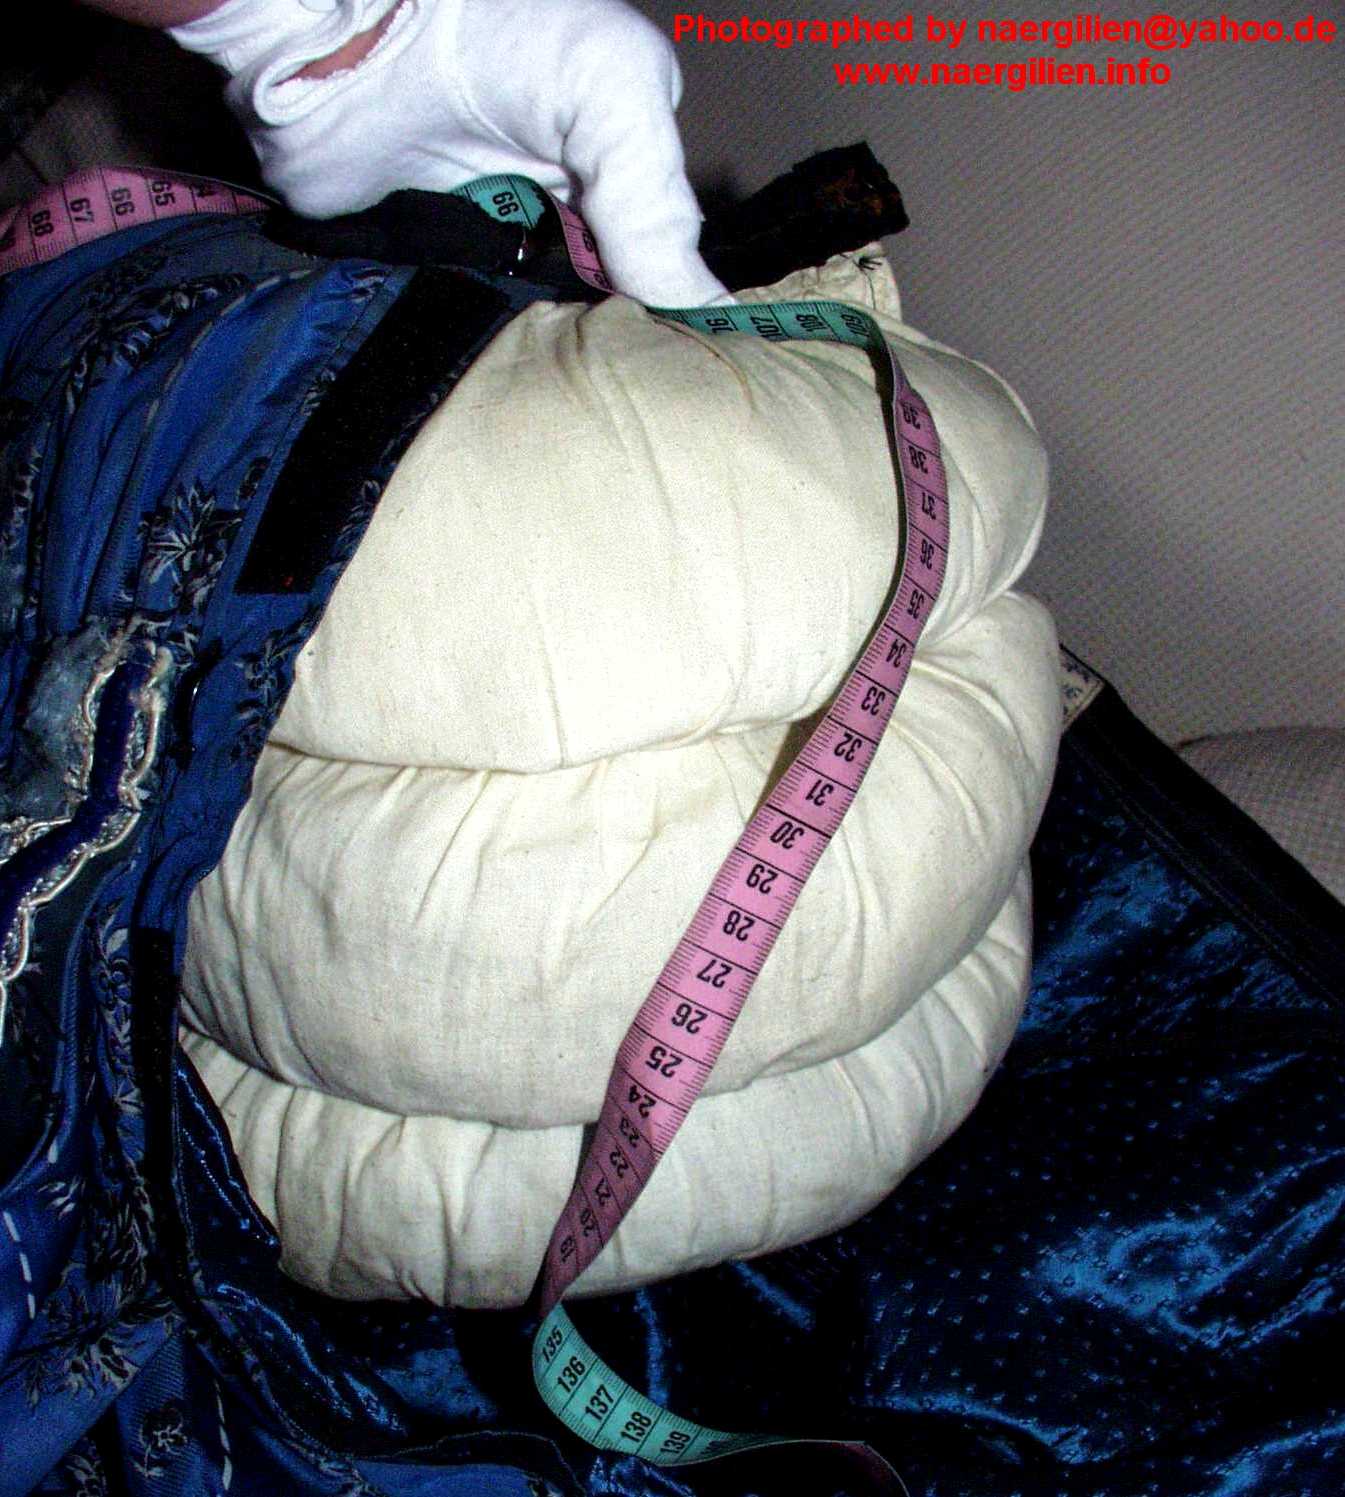
| The skirtThe skirt was sewn in one piece, that means in opposite to original Victorian constructions, the bustle, petticoat, skirt, paniers and apron have been sewn as one piece. I was most surprised to find a massive, non-removable three rows stuffed bustle of cream cotton twill at the inside of the skirt’s backside. The skirt basically consists of 5 parts: The sewn-in bustle, the petticoat with the pleated crinoline flounces, the apron and the paniers as well as the waterfall drape at the back. |
|||
 |
 |
 |
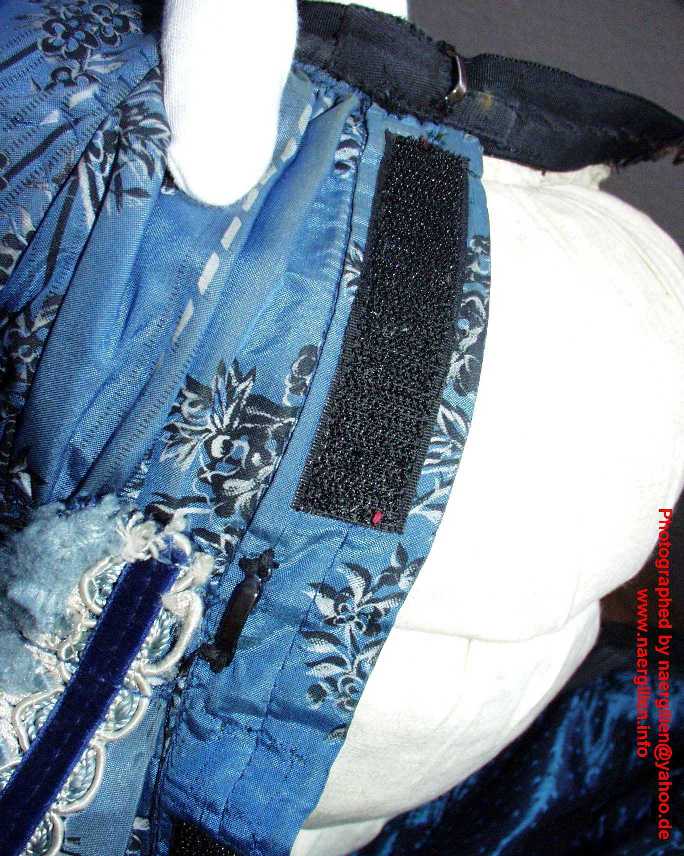 |
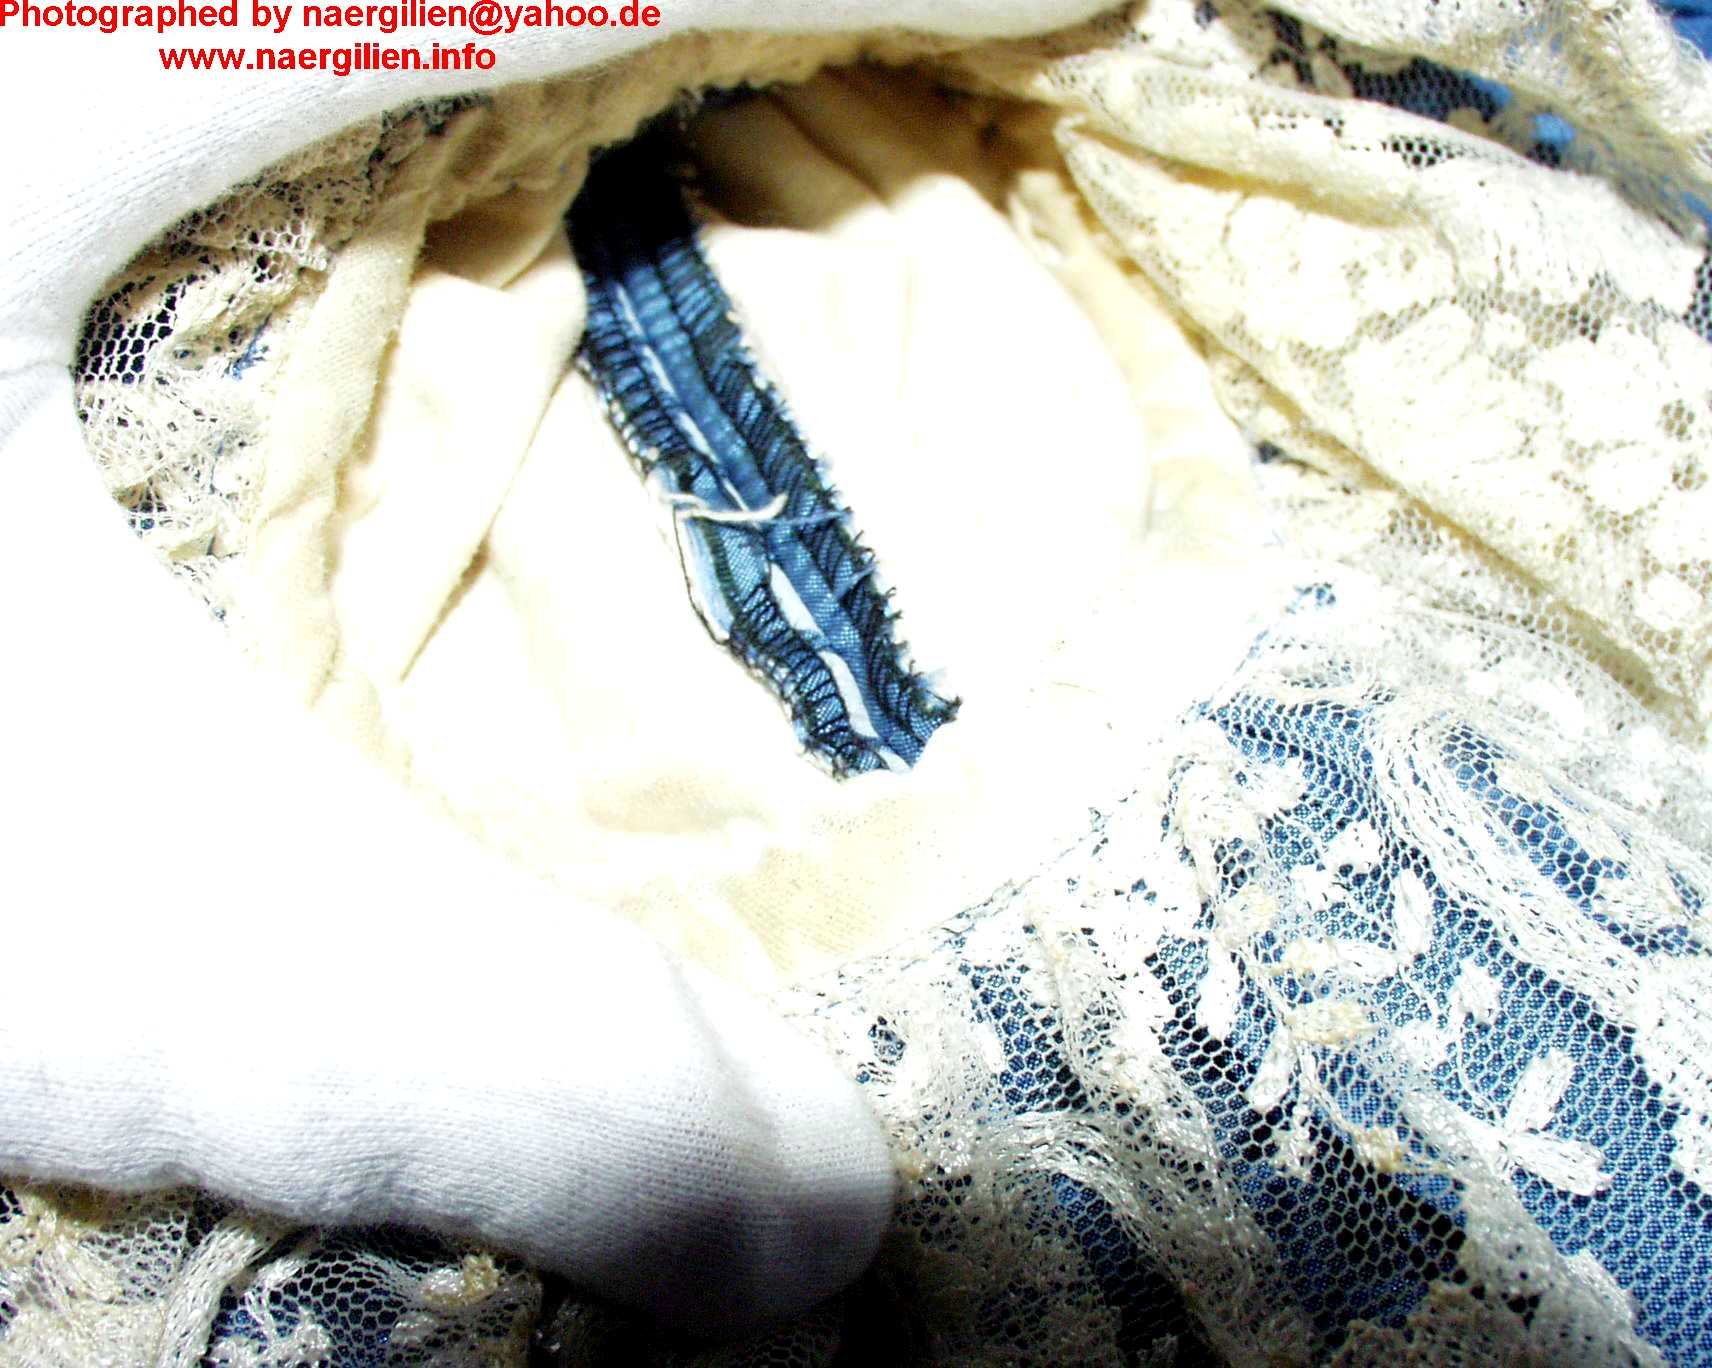
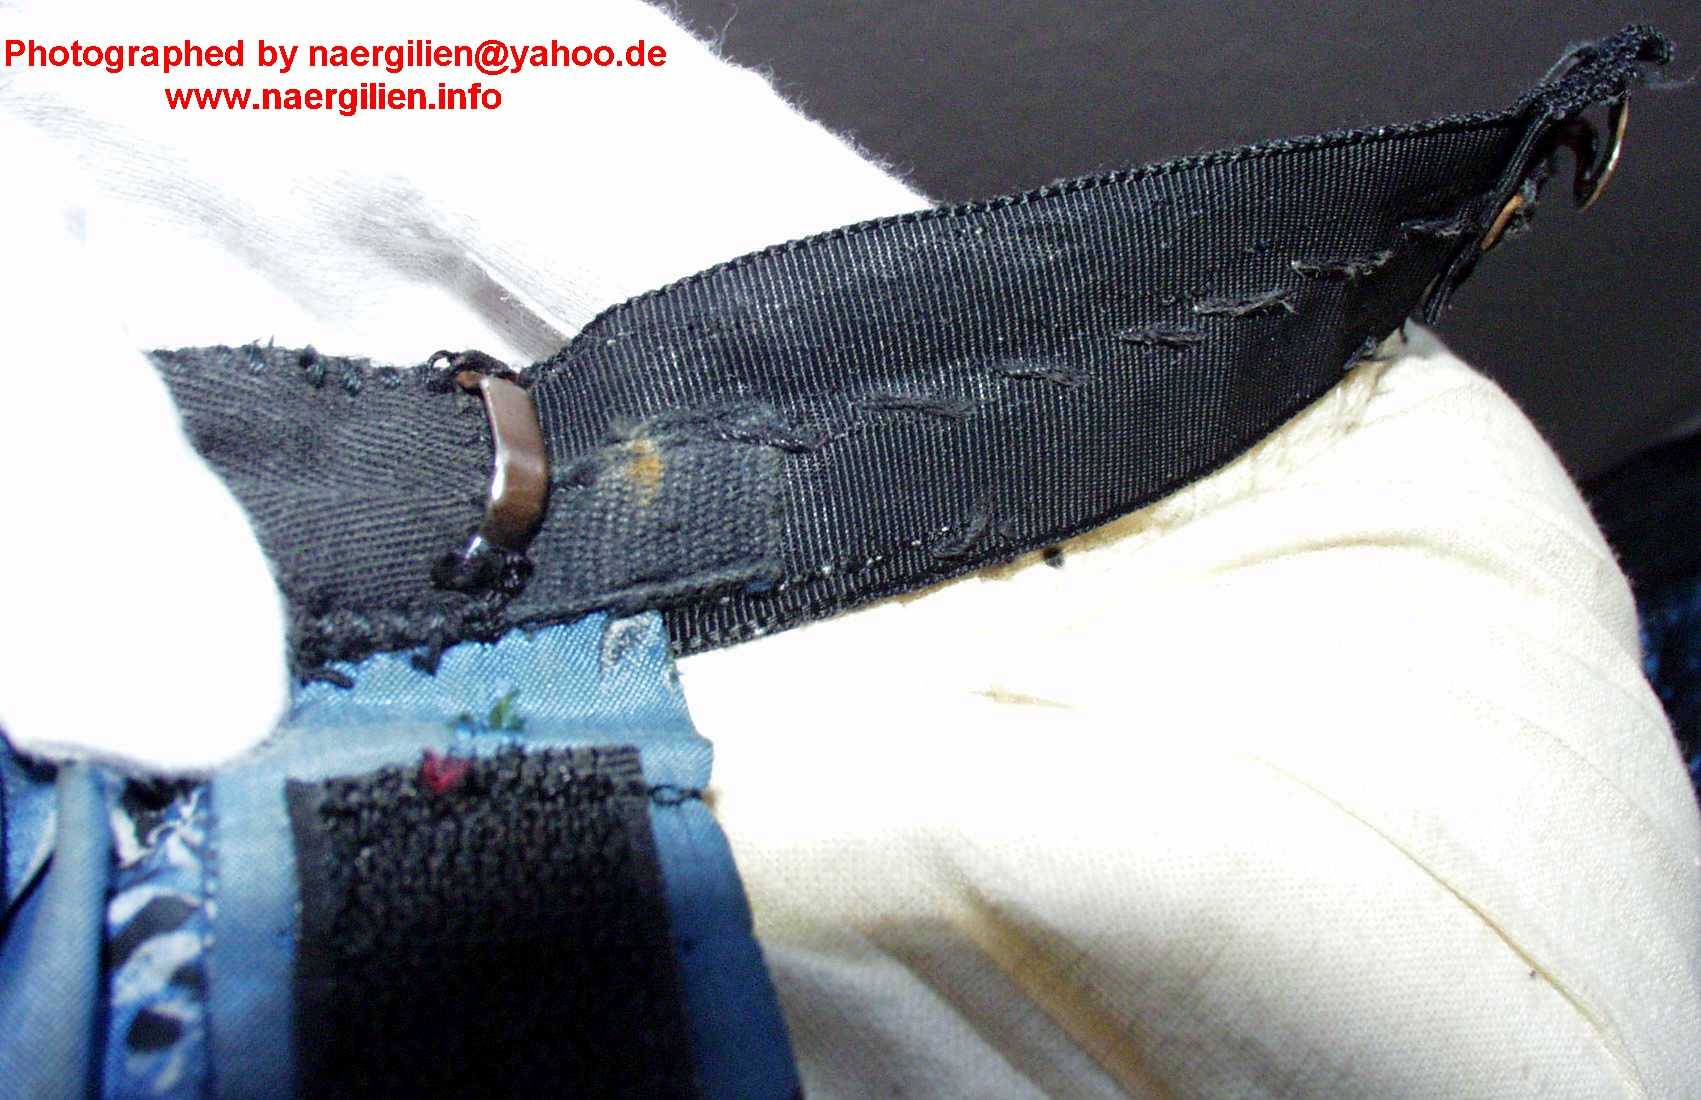
| Here’s a picture of the bustle. It is attached to the inside of the waistband, and goes under the left back side of the skirt. | This is the inside of the bustle. | The waistband with the bustle attached, Below the eye of one of the two hooks that close the skirt’s waistband, you can see one of the two velcro tapes that are used to close the back slit of the skirt. | Another picture of the upper of the two velcro tapes. |
 |
 |
 |
 |
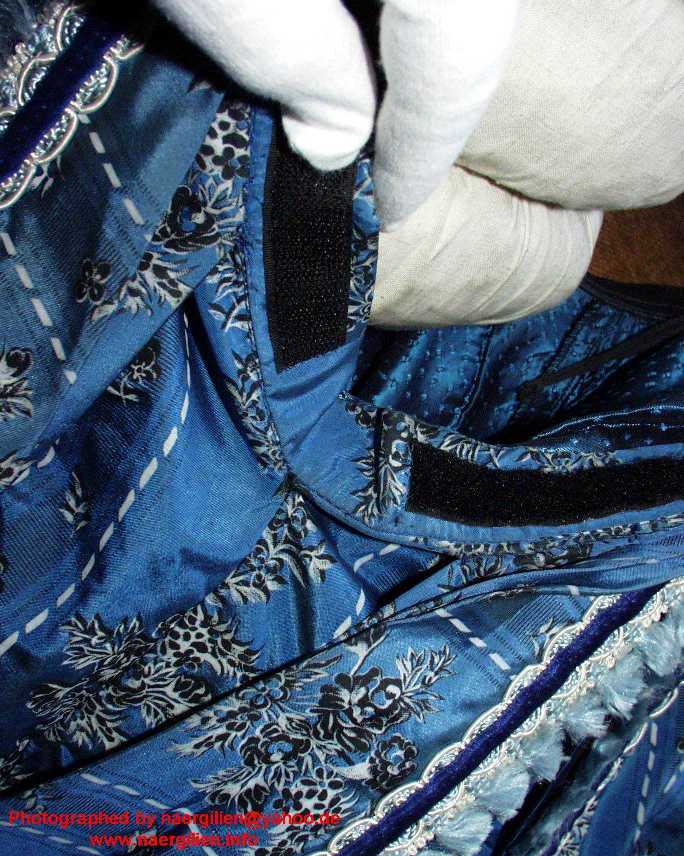
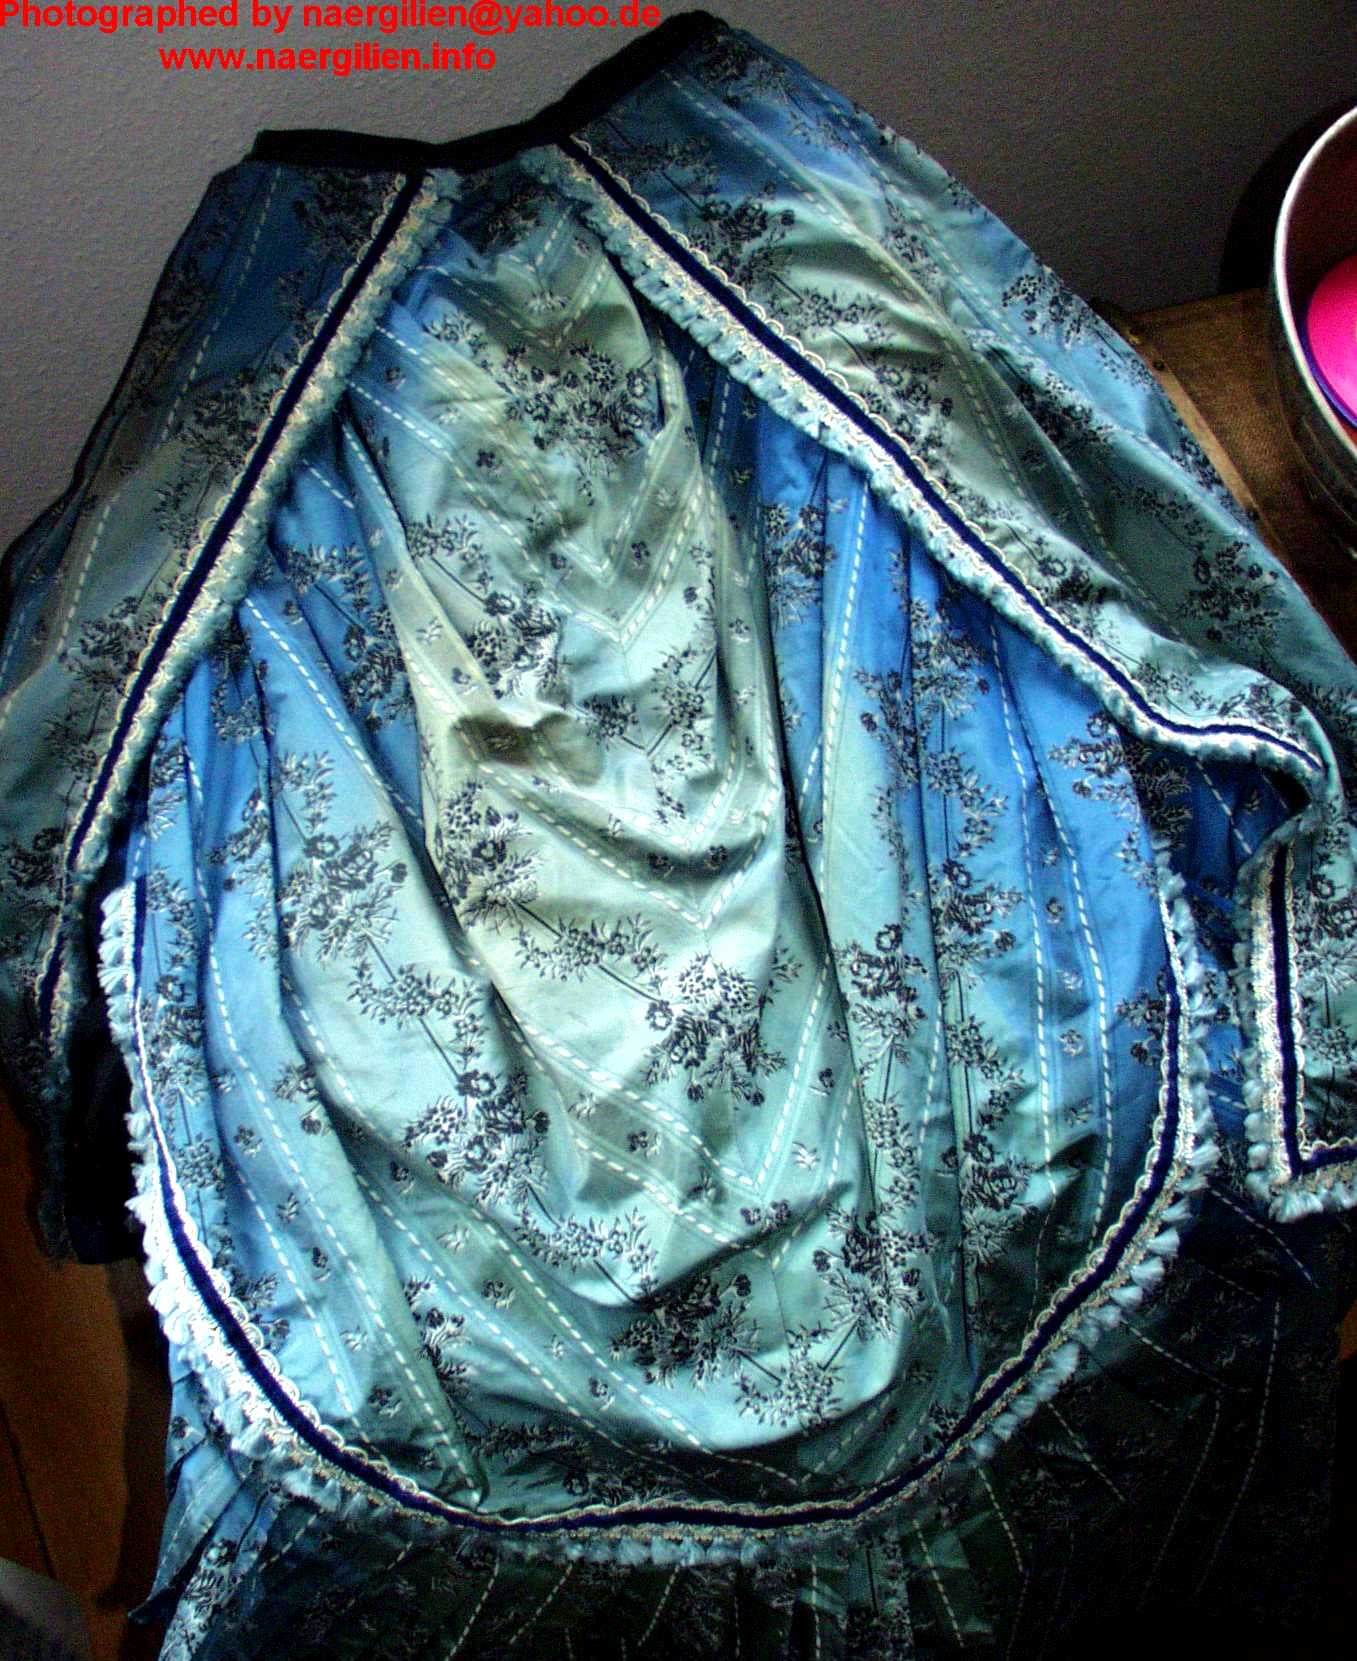
| Here’s the bottom of the center back slit, showing how the two sides of velcro tape are used to close the slit. | Here’s how the waistband closes over the bustle. Note that you can see the skirt lining, or rather: The sewn-in petticoat, below the waistband, which is made of blue-green jacquard that is irregularly patterned with small diamonds. |
The name tag in the skirt’s waistband. | The pleated bottom of the sewn-in petticoat, which consists of dark blue diamond-patterned jacquard. You can very clearly see the color difference to the upper, blue-green part of the petticoat quite clearly, and in opposite to the outer printed dress taffeta, this here is not a matter of color fading – two different colors of the diamond patterned fabric were used on the petticoat. |
 |
 |
 |
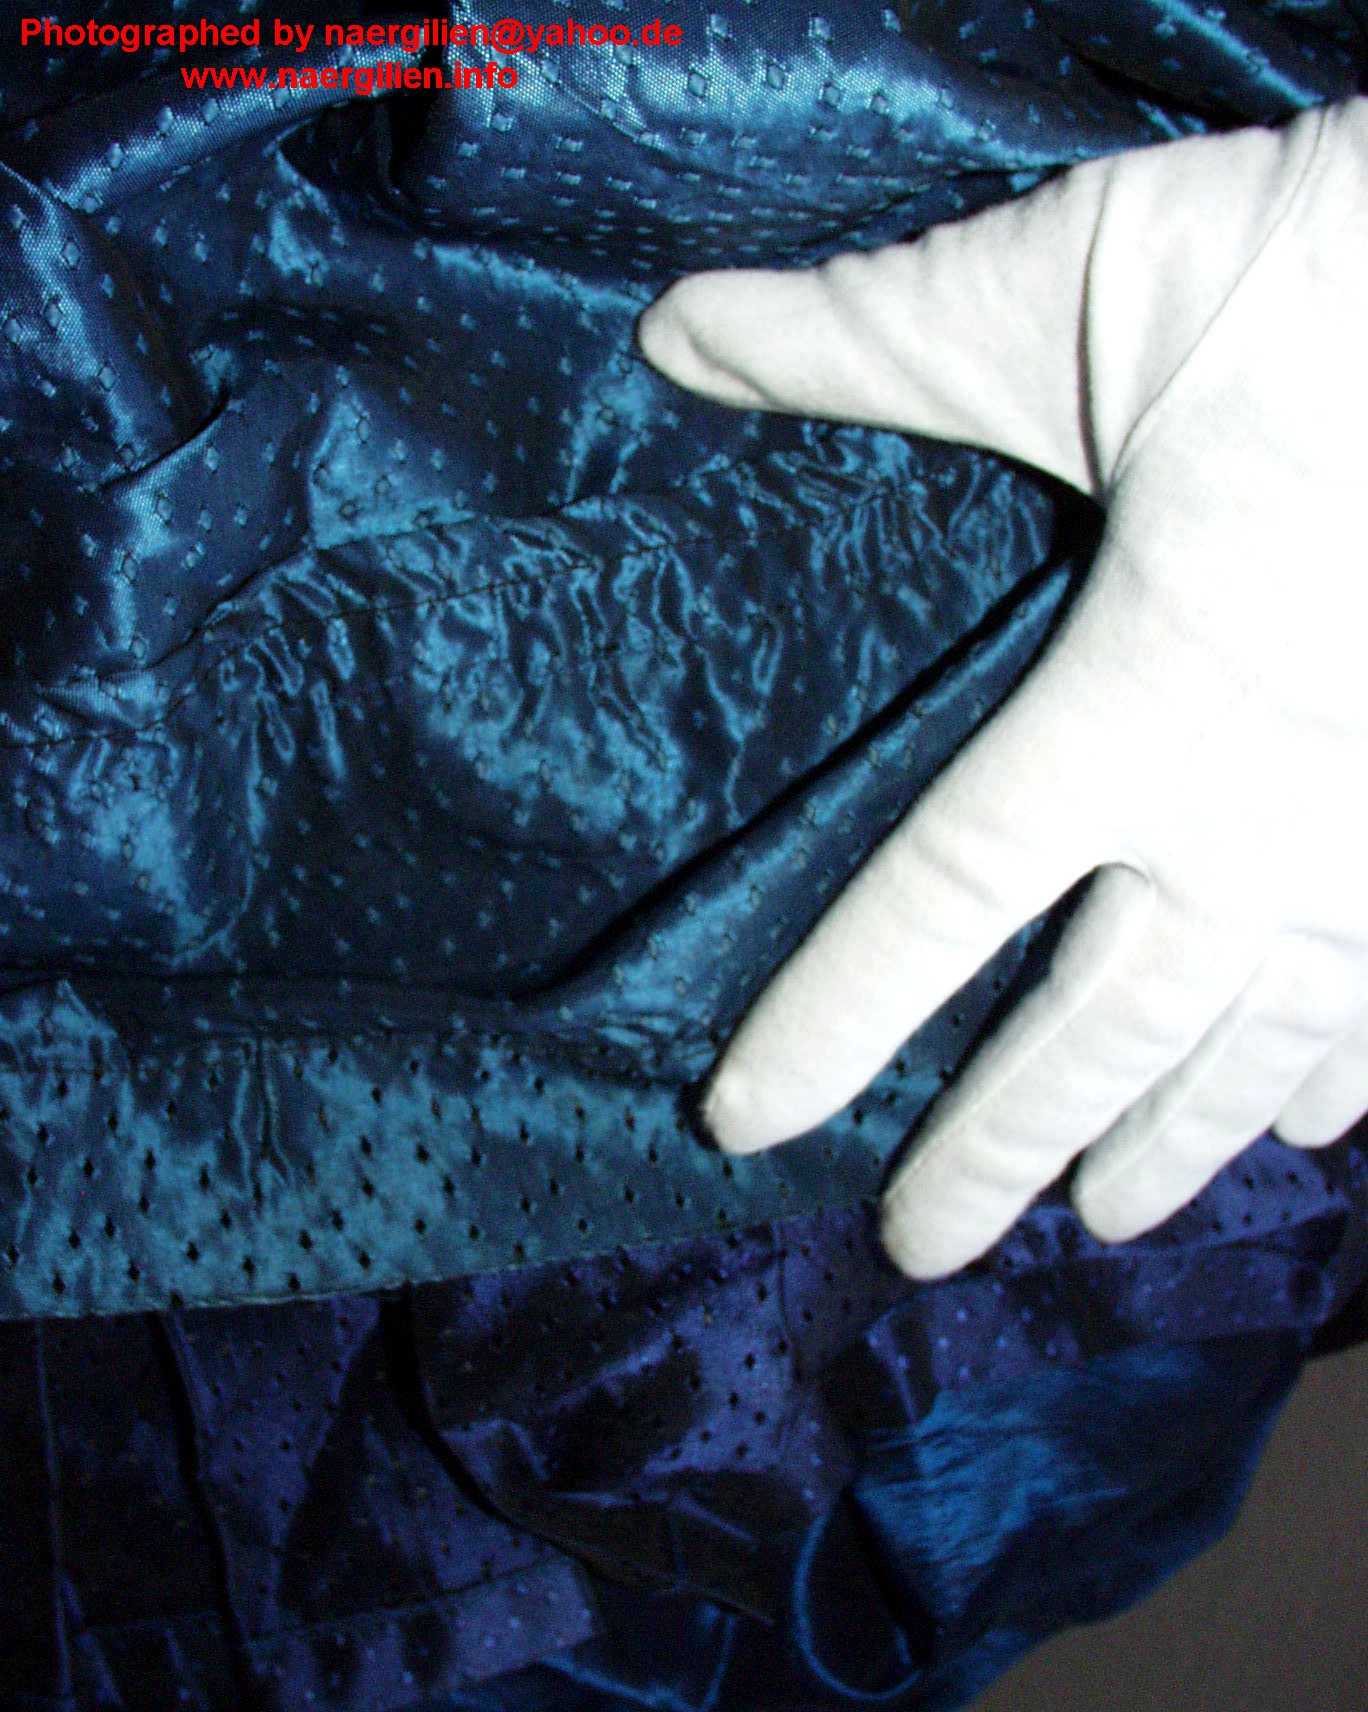 |
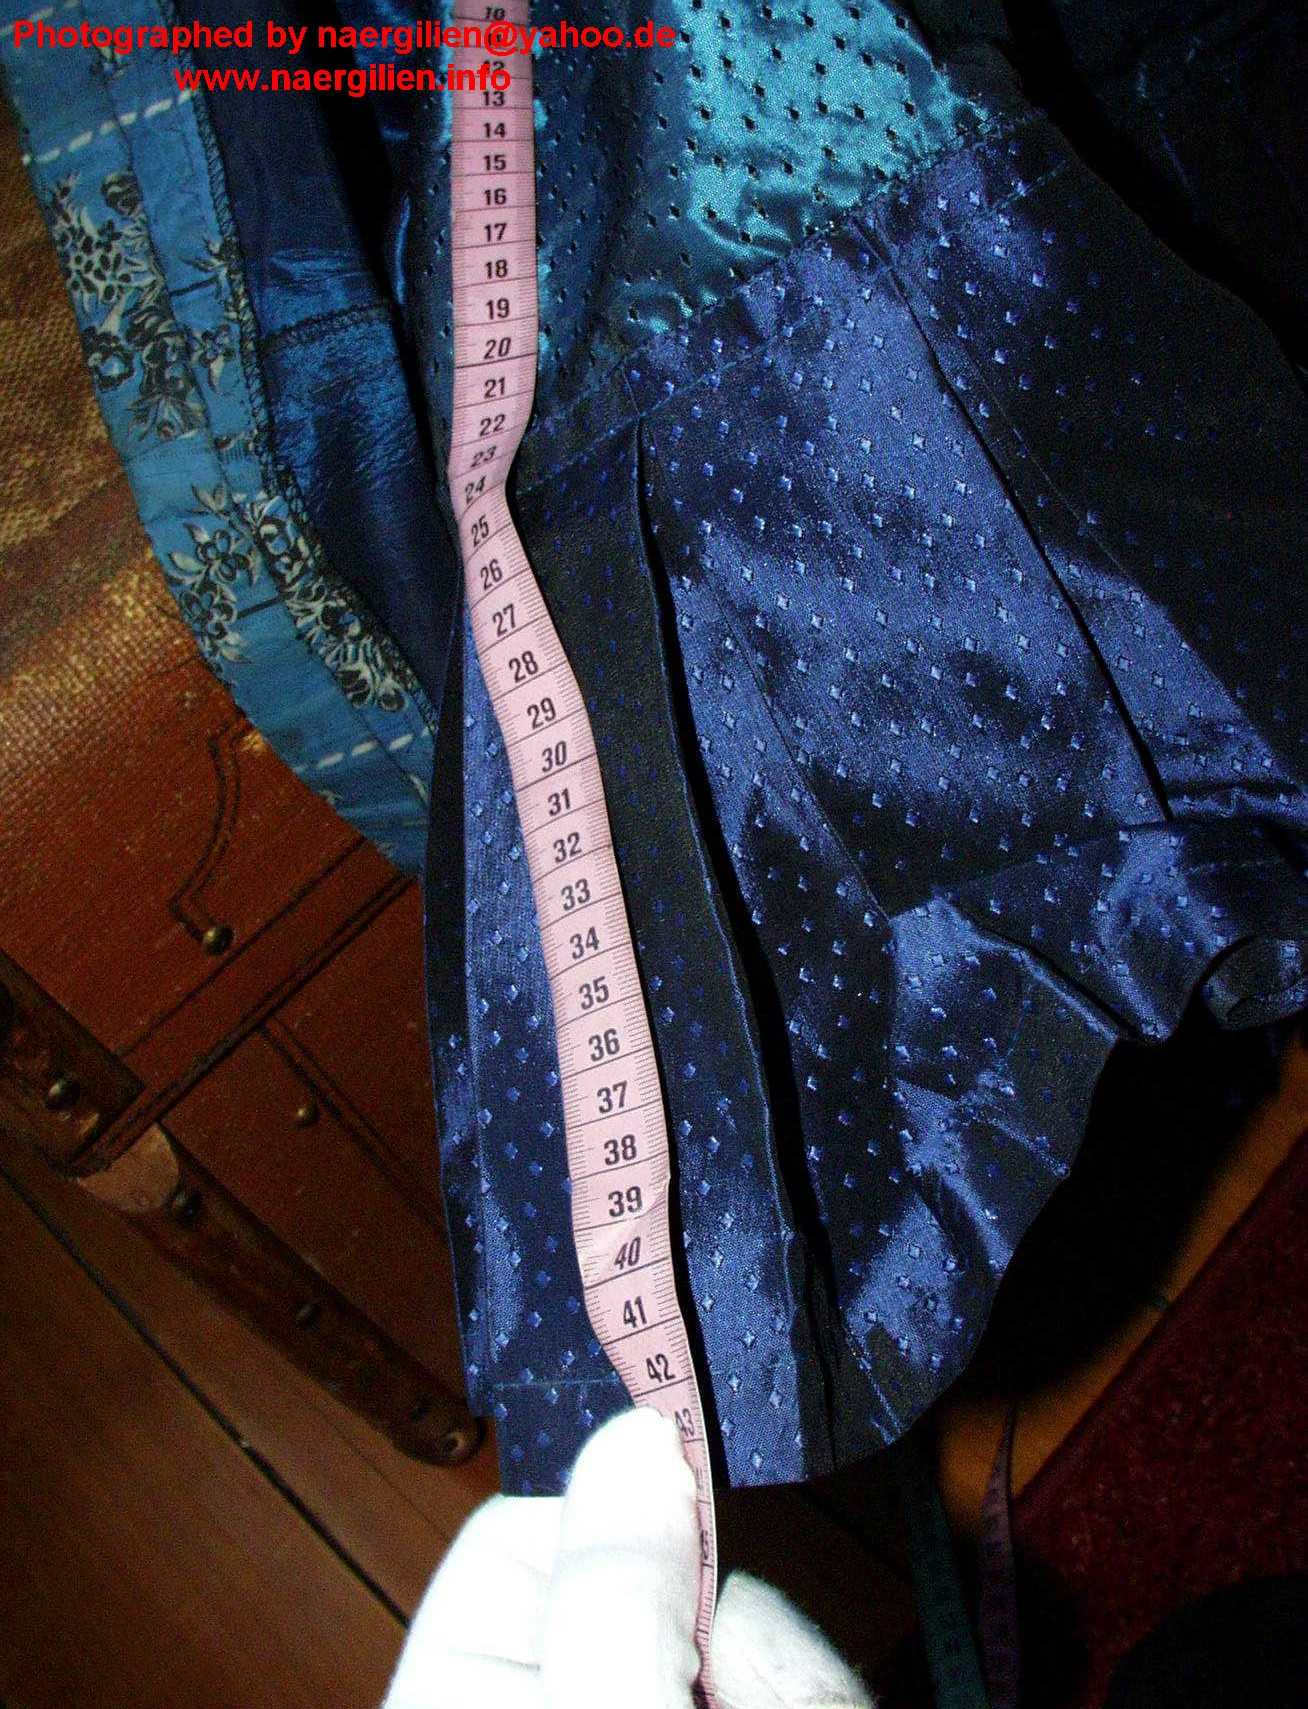
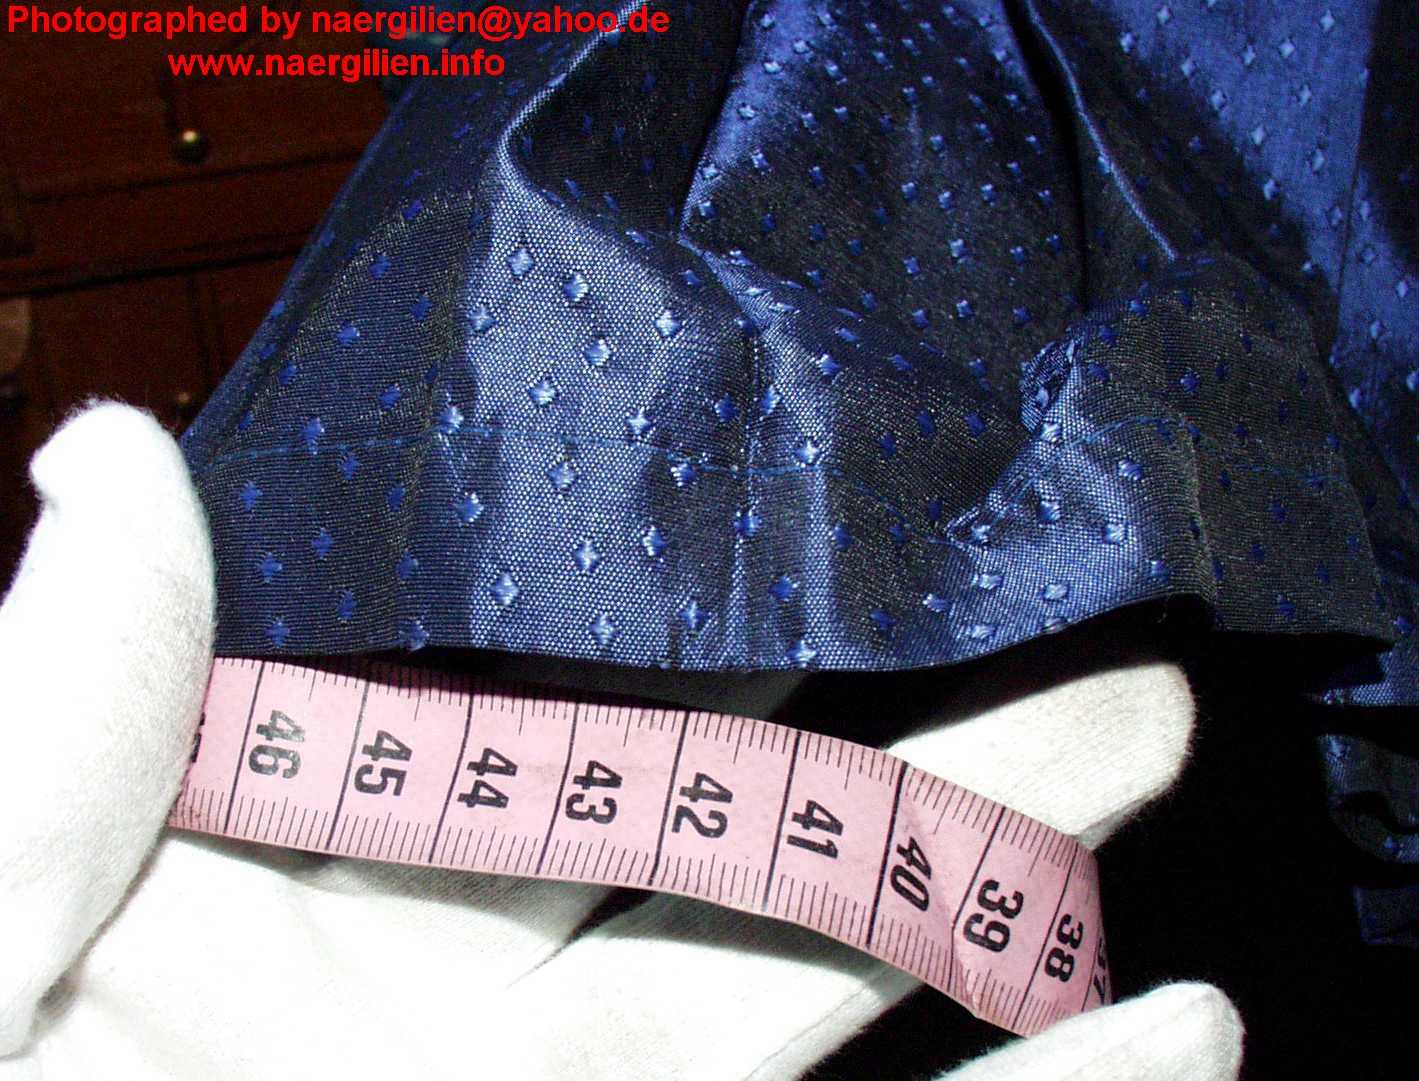
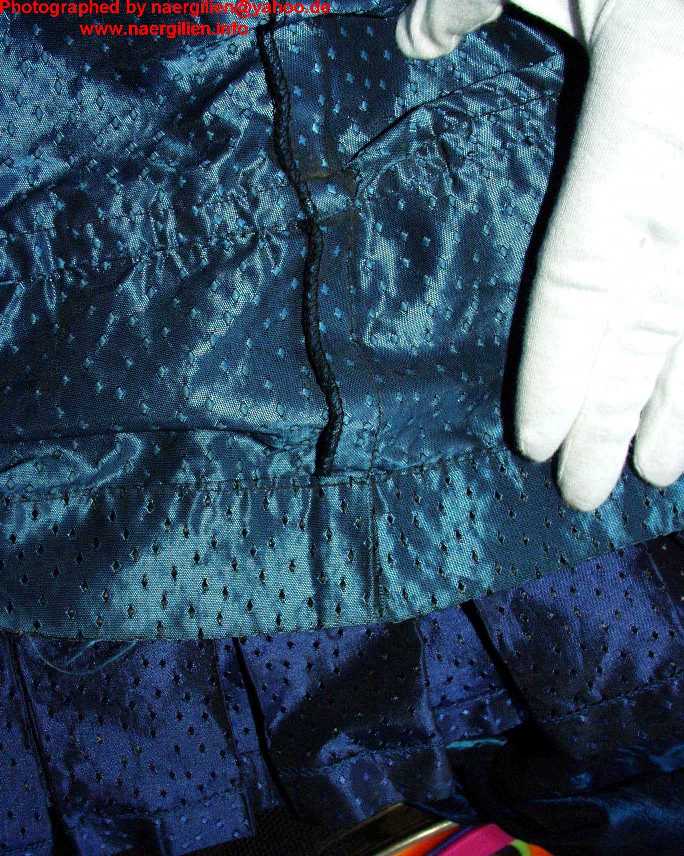
| Two pictures of the pleated flounces at the bottom of the petticoat. | These two pictures show the petticoat from the inside. You can see the double row of machine stitching with which the pleated flounce was attached, and also the bottom hem of the blue-green upper part of the petticoat. | ||
 |
 |
 |
|
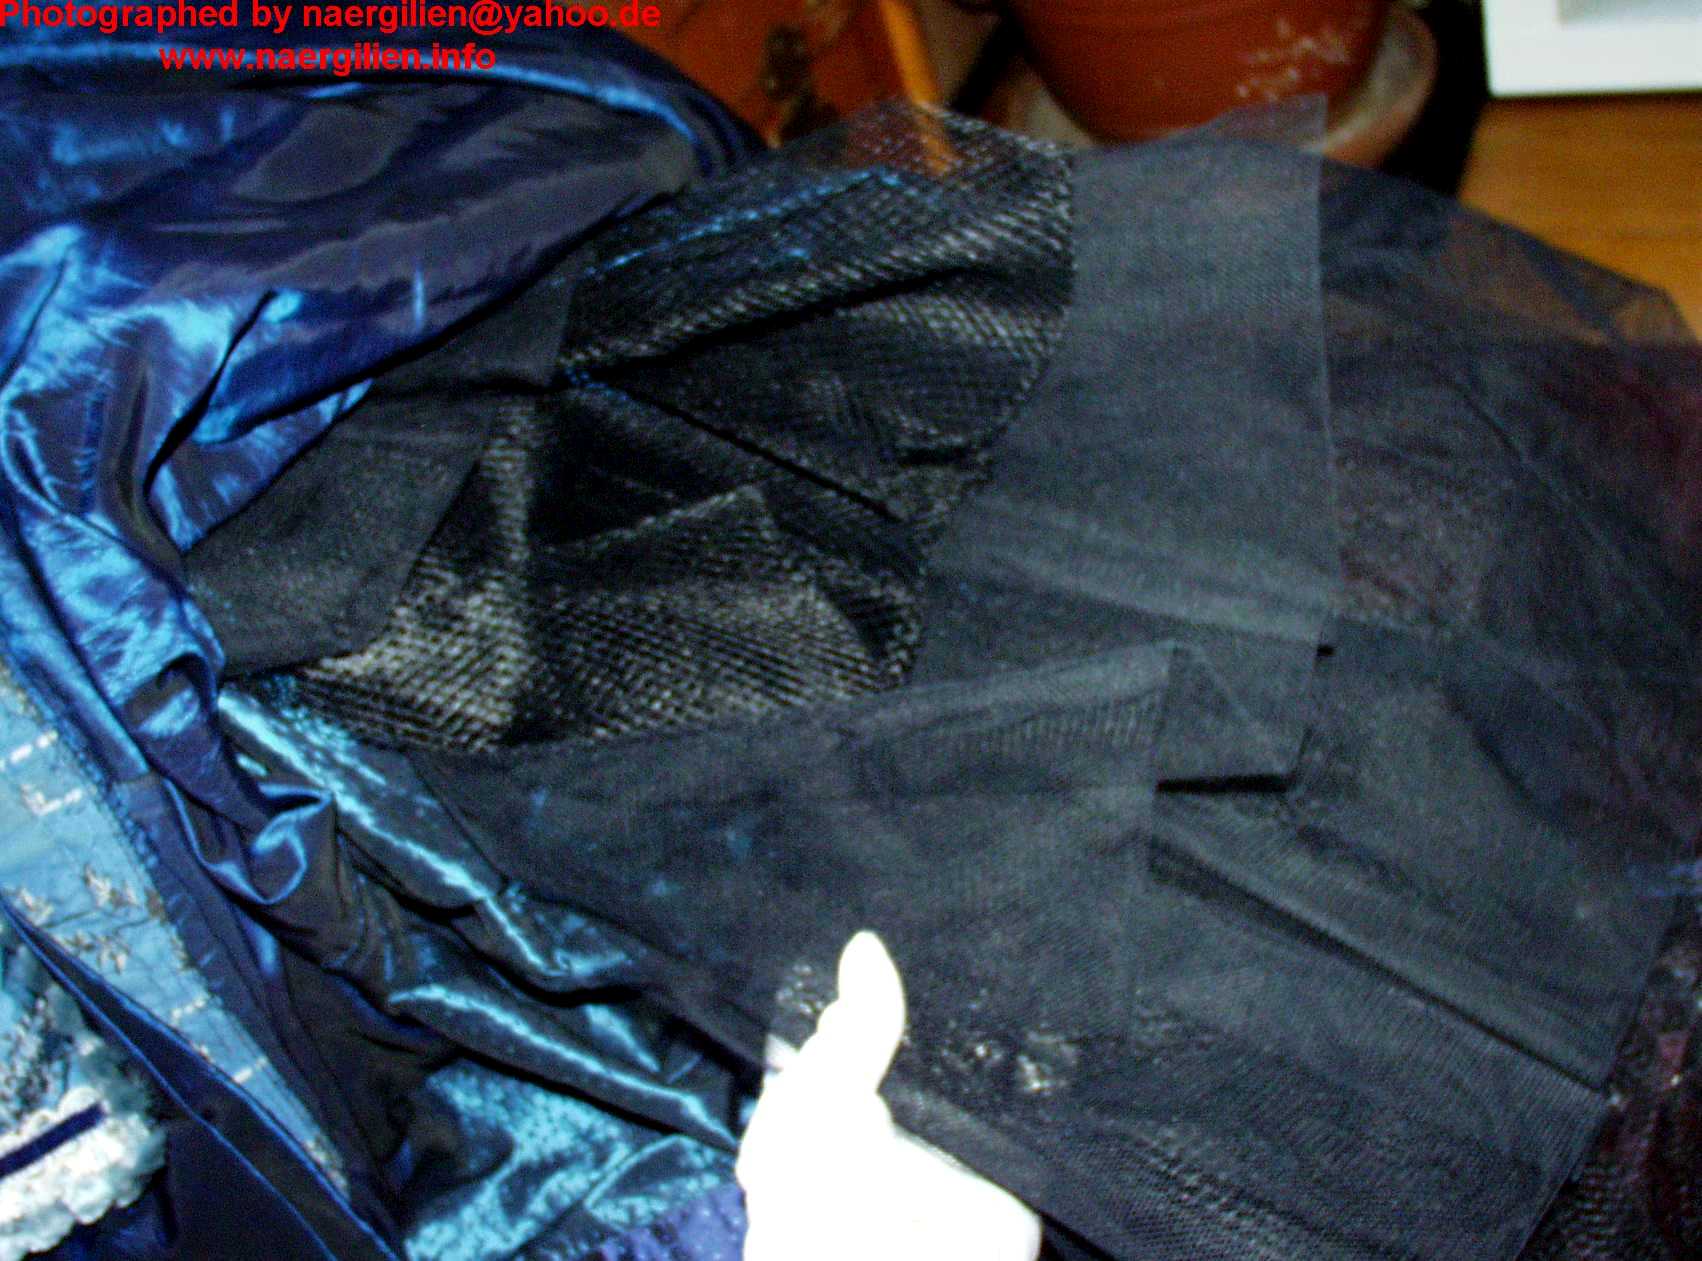
| This picture shows the ruffled rows of different black crinoline nettings that have been sewn in rows to the back-outside of the petticoat. | Here’s a closeup to show what I mean by writing ‚different nettings‘. I am not certain if this was done deliberately or if some layers have been added later, and the original crinoline fabric was not available any more. | Here’s a picture to show the spacing between the rows of crinoline netting. | |
 |
 |
 |
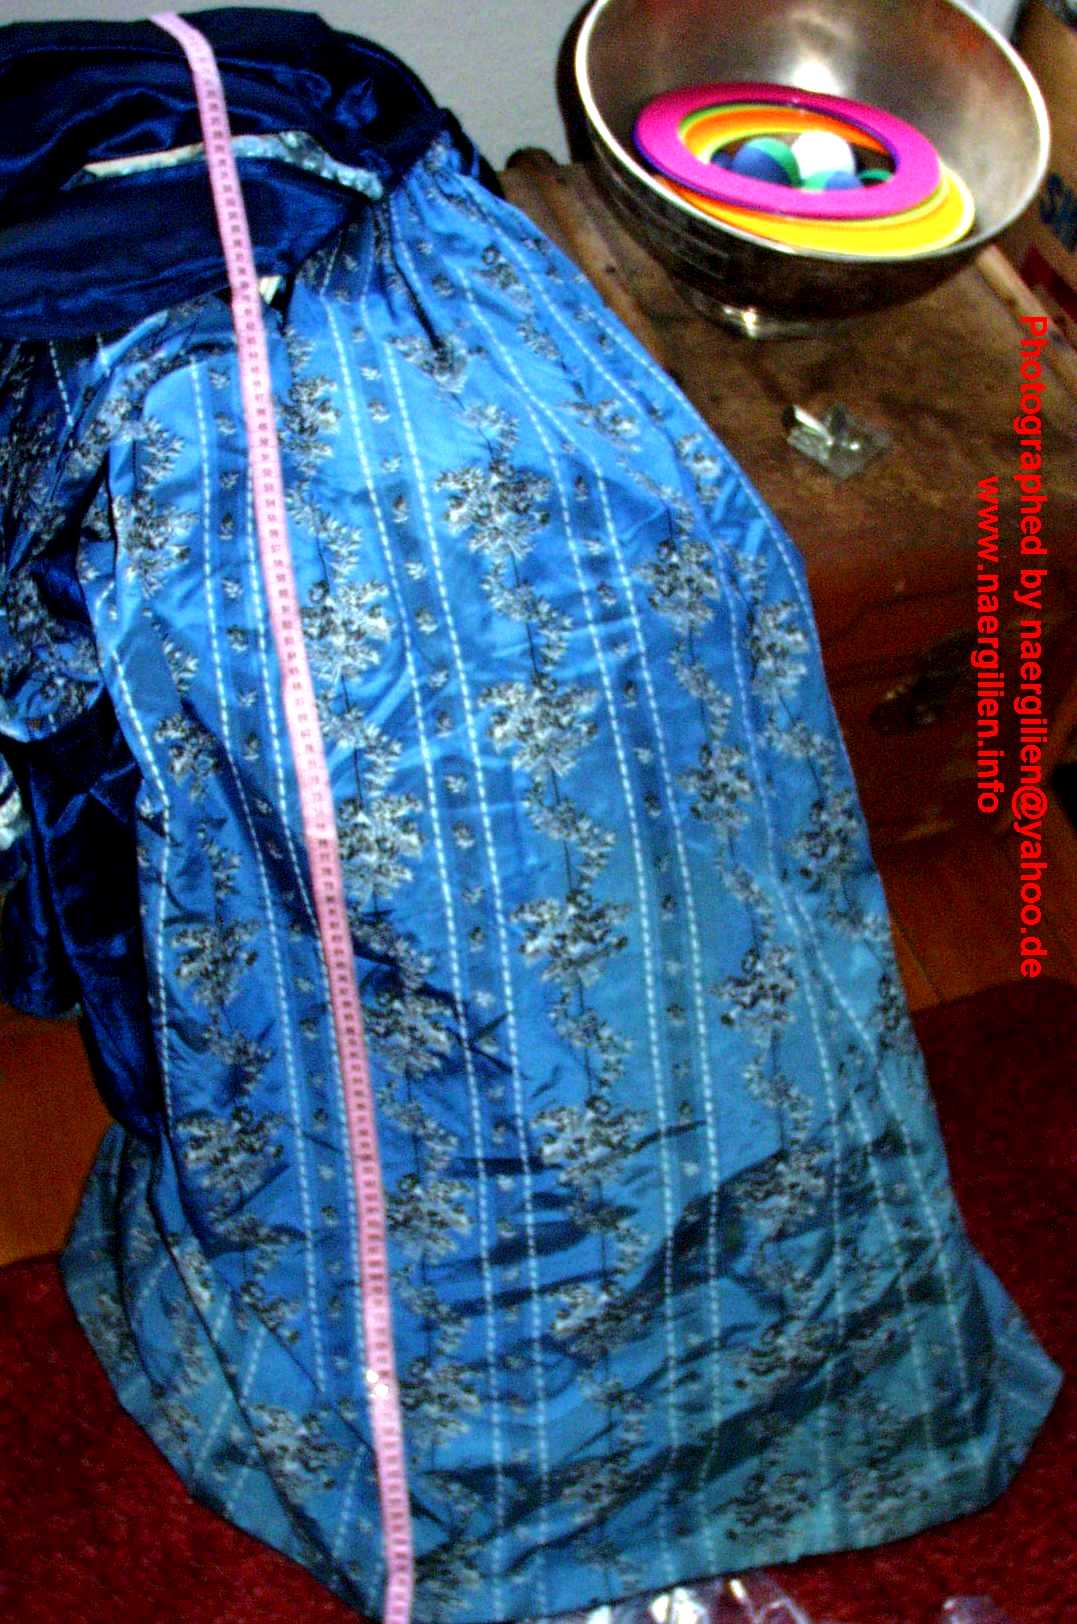 |
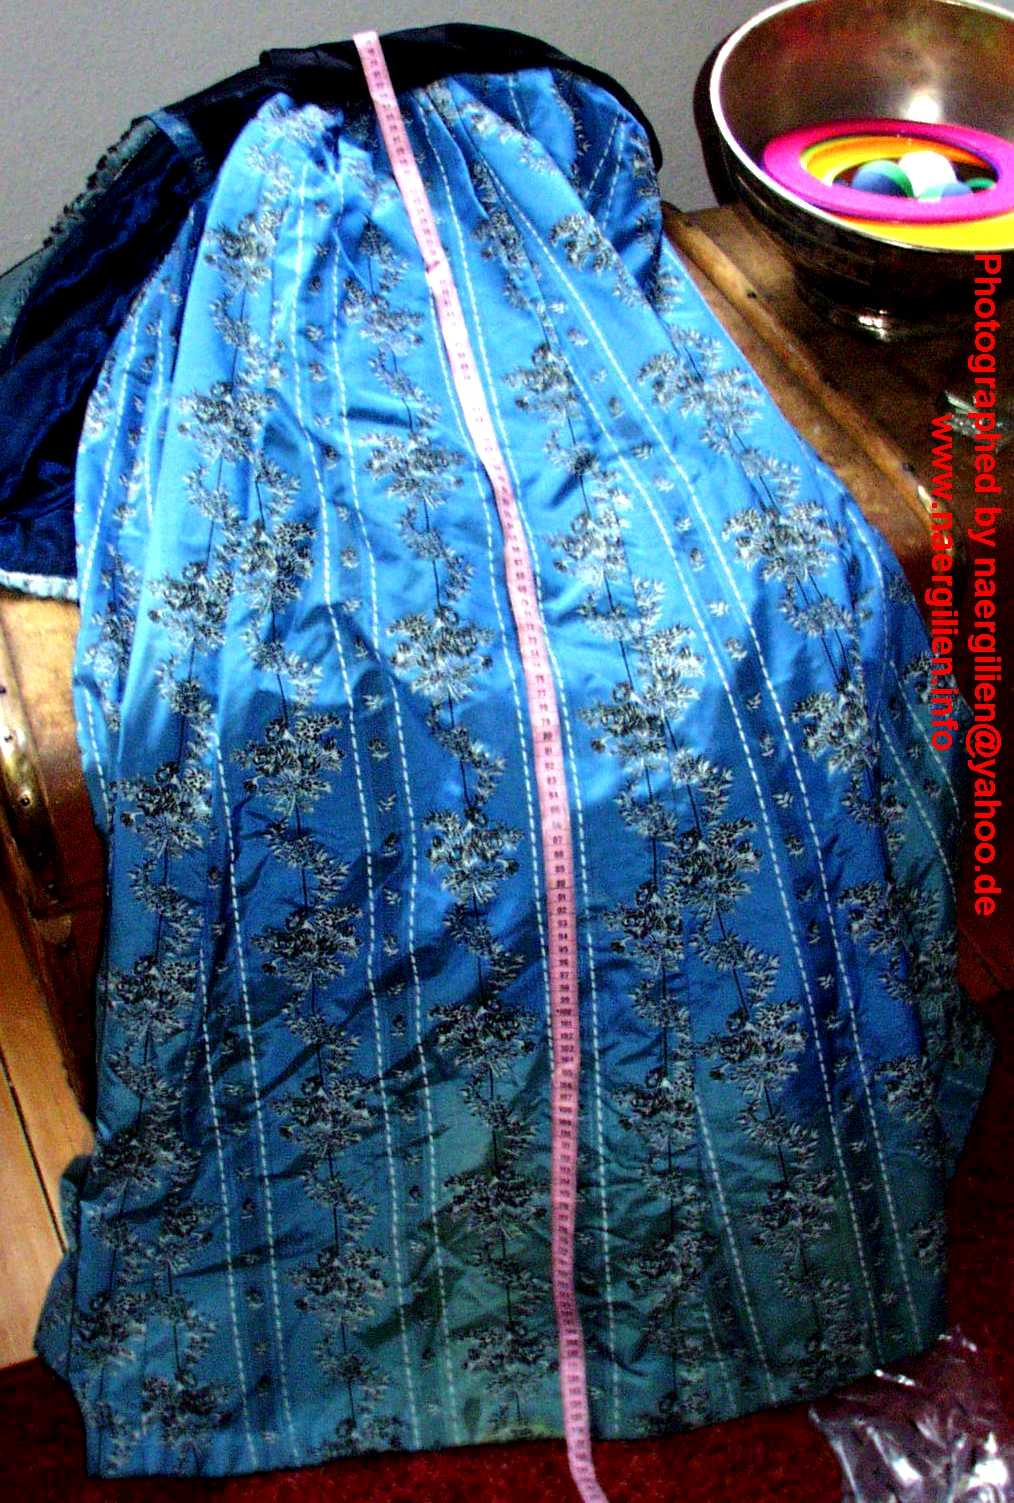
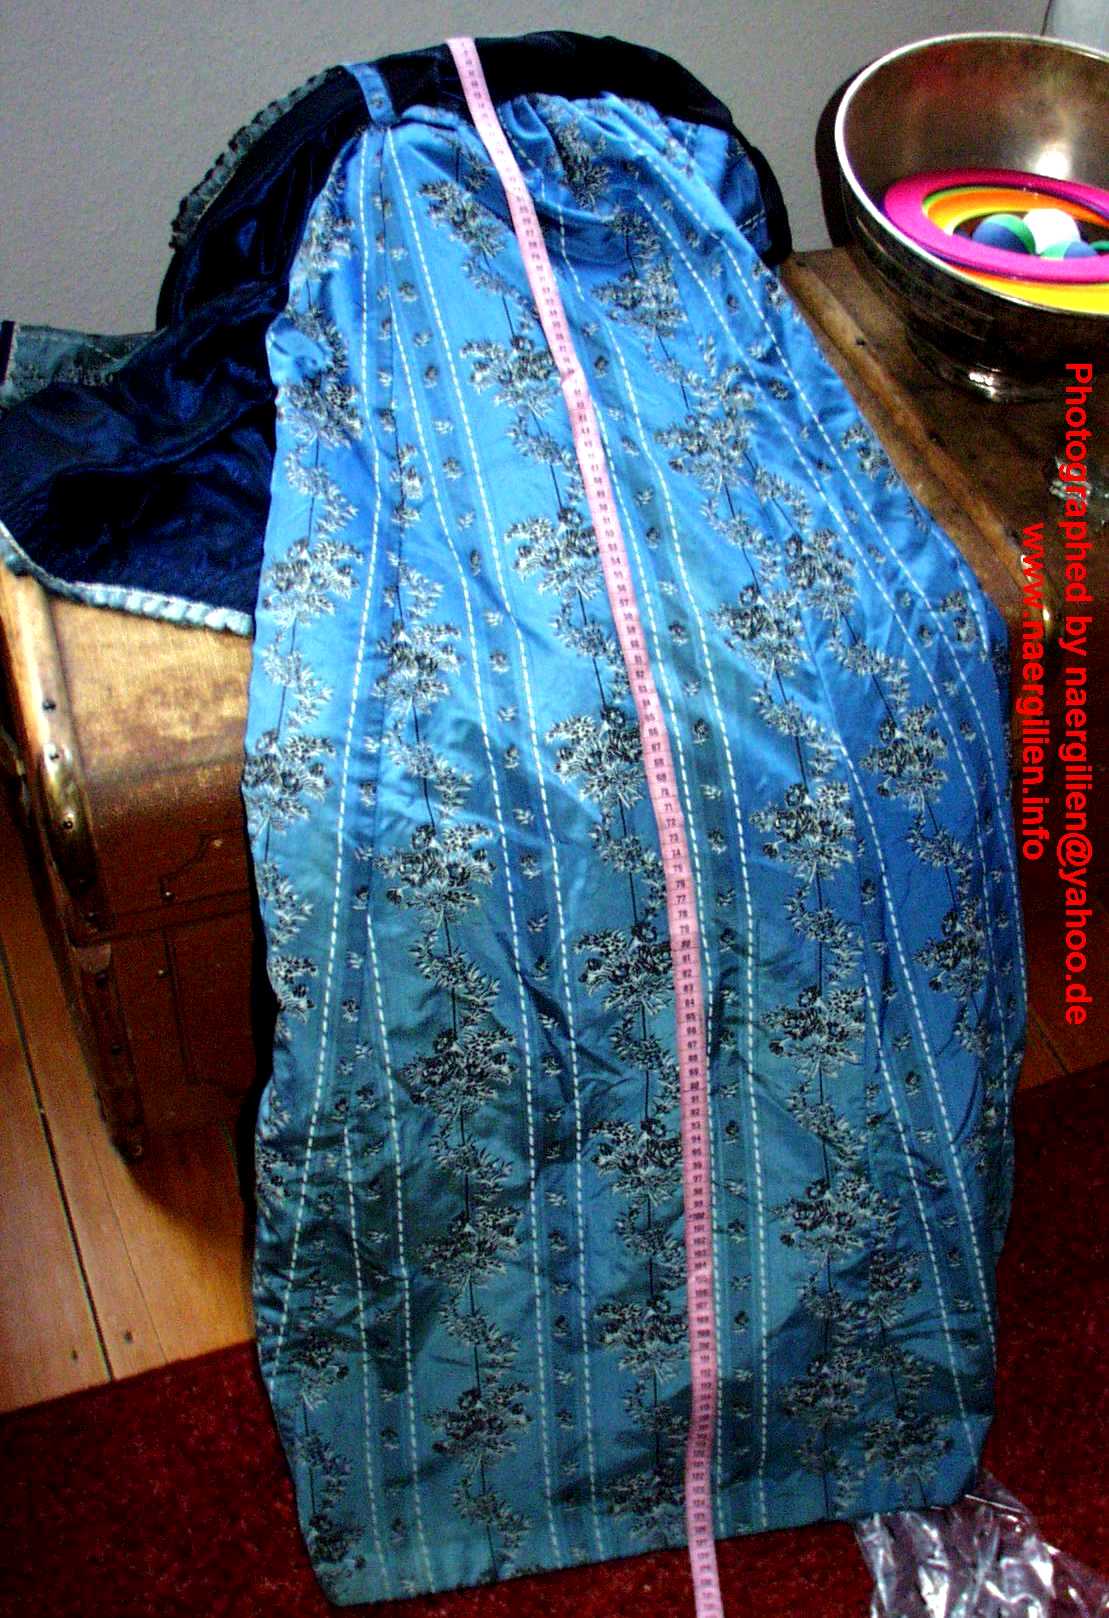
| Center front panel of the skirt. | Front side panel of the skirt. | Side back panel of the skirt. | Center back panel of the skirt. |
 |
 |
 |
 |
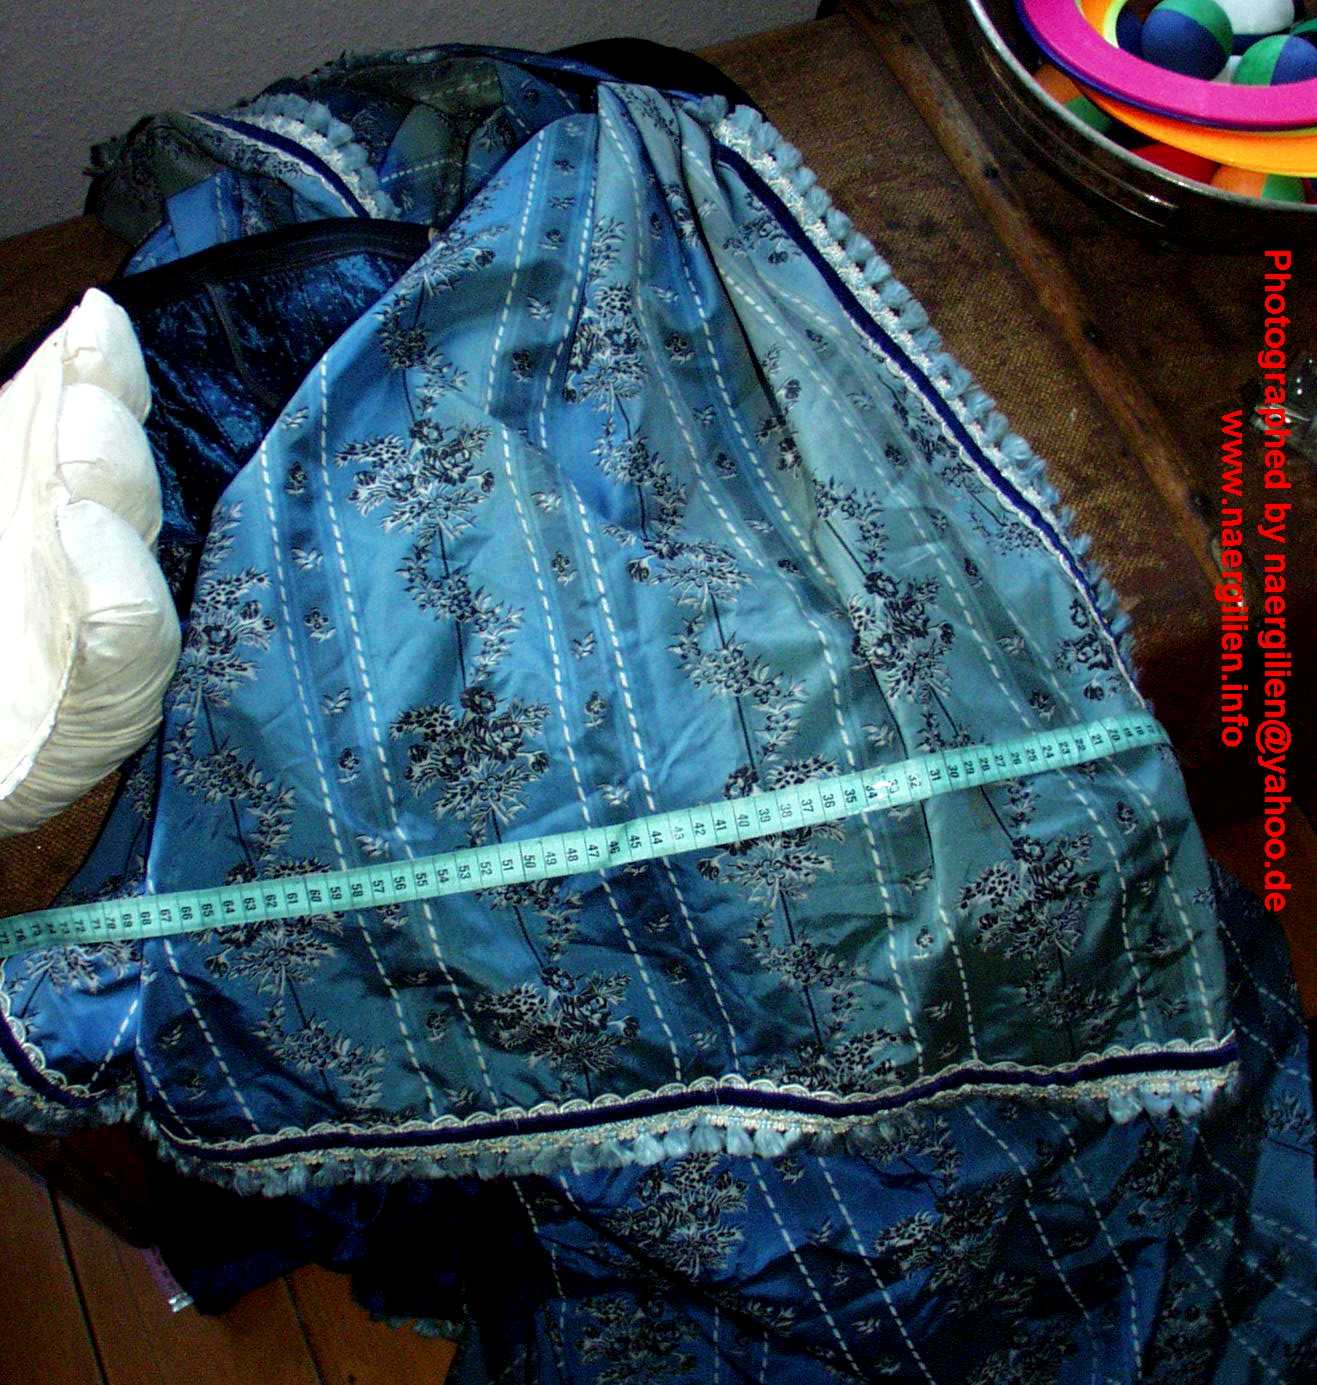
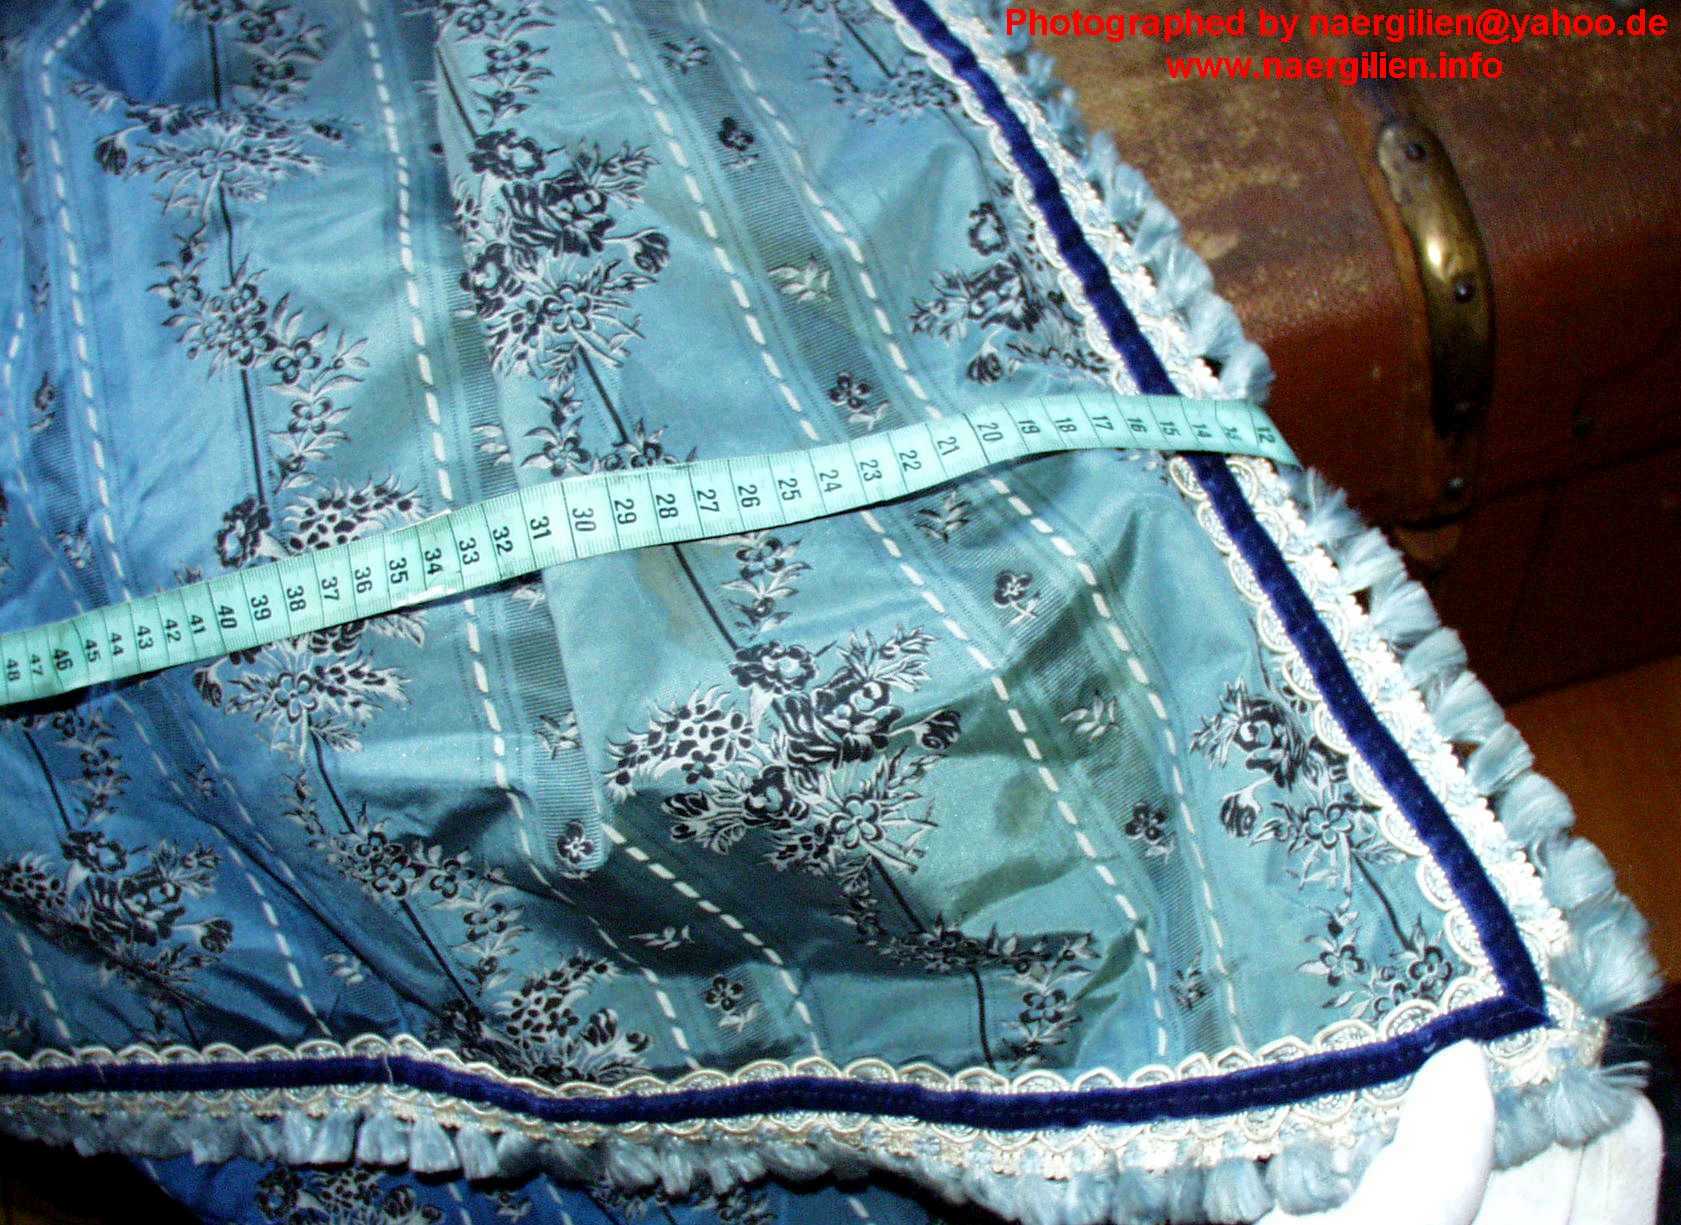
| This picture shows the color fading on the skirt: The upper part of the picture has been protected by the apron, the bottom part has faded. | Here’s what the skirt looks like with the apron down. Again you can see the color fading. | Here you can see the side top of the apron trim. As you can see from the color fading, the trim and ruffles do *not* go up all the way, but stop c. 20cm / 8 inch beneath the place from which the apron is covered with the side paniers. | Here’s how the side pleating of the apron has been tacked down with rows of stitches. |
 |
 |
 |
|
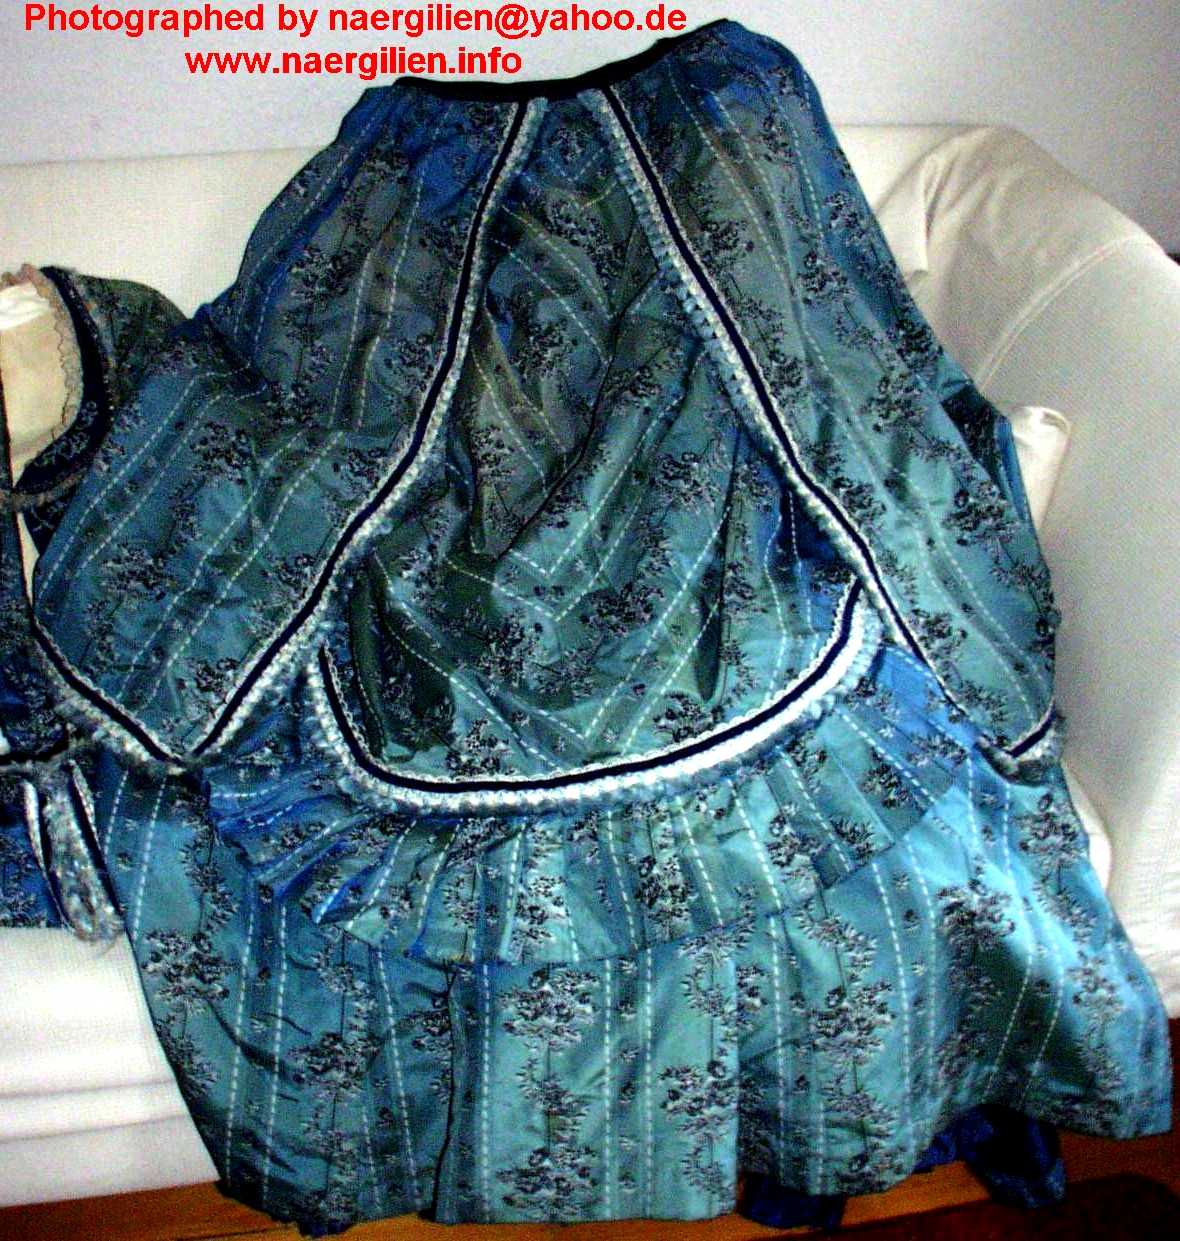
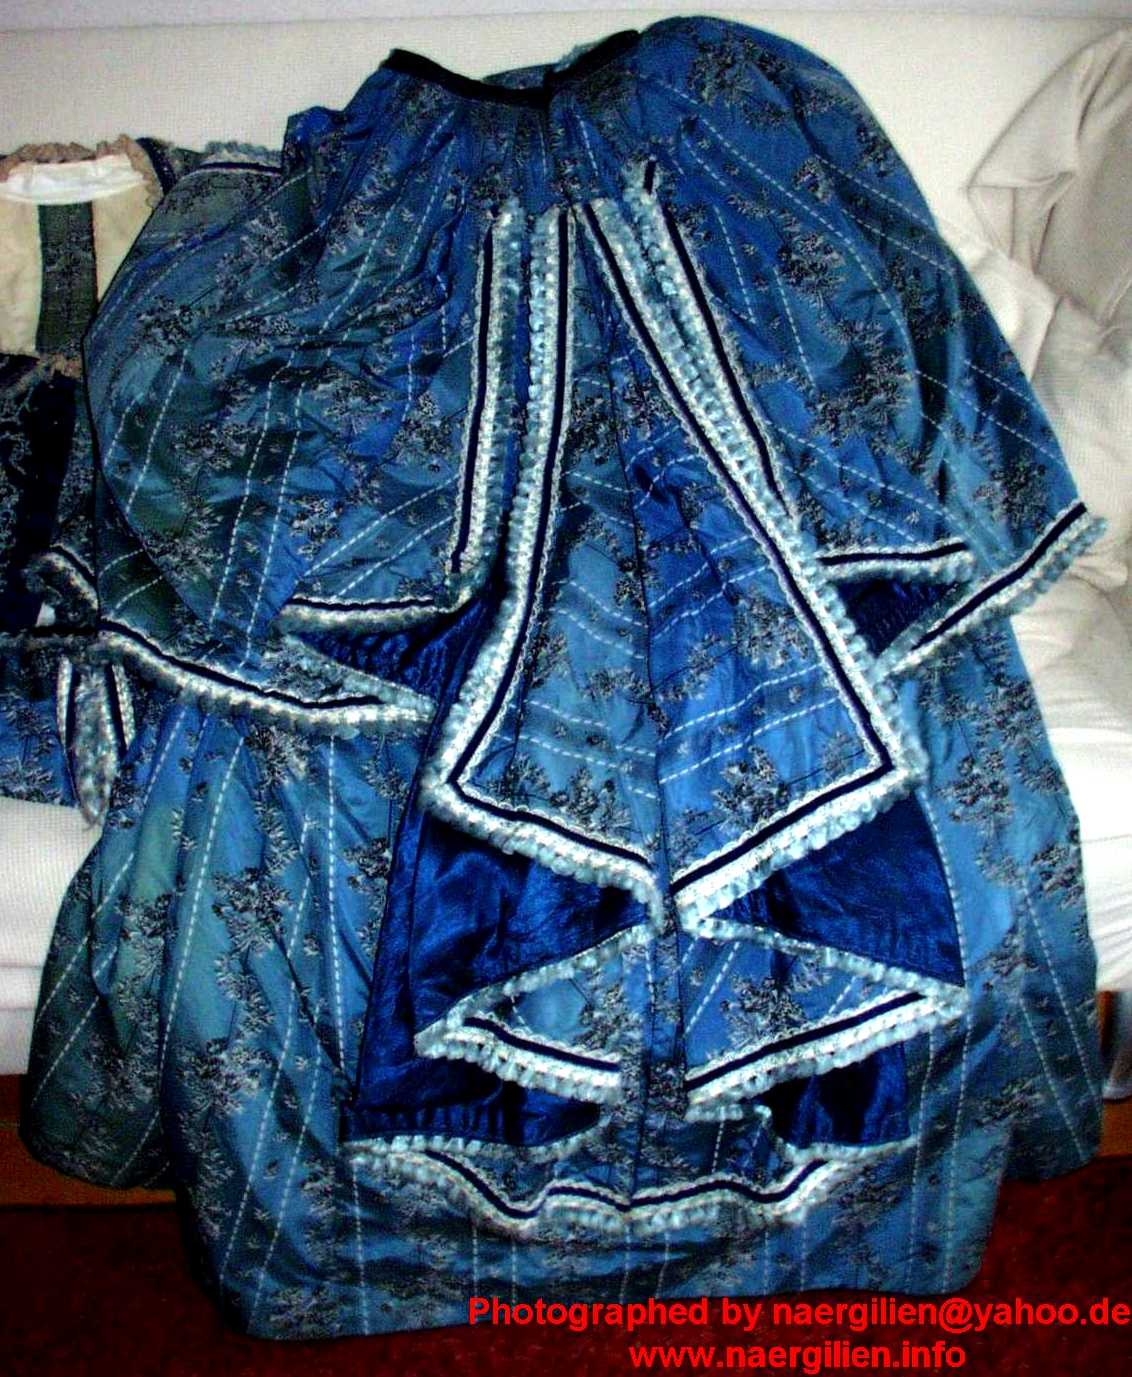
| Here’s a picture of the front middle of the skirt’s hem. It has been repaired several times with different threads – and hand stitches! In fact, the entire skirt hem and also many seam allowances on the bodice have been sewn / neatened with hand stitches. | Picture of the complete front of the skirt. | Picture of the complete back of the skirt. | |
 |
 |
 |
 |
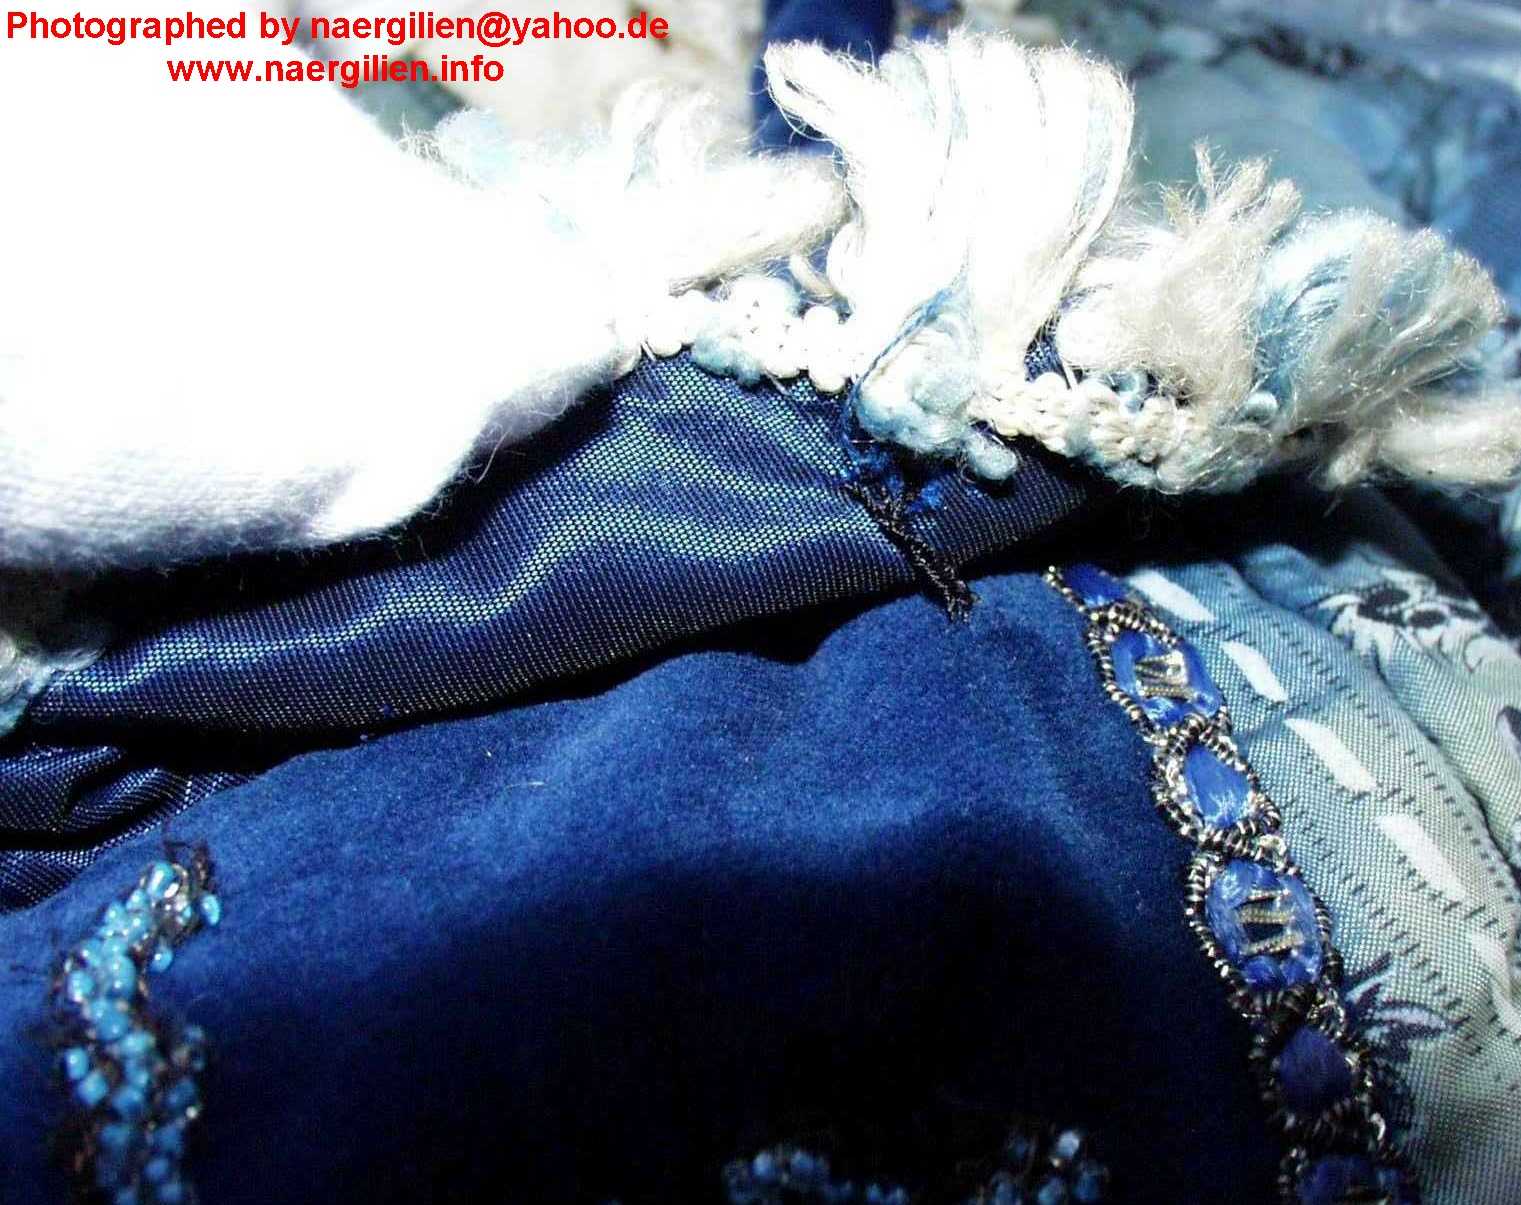
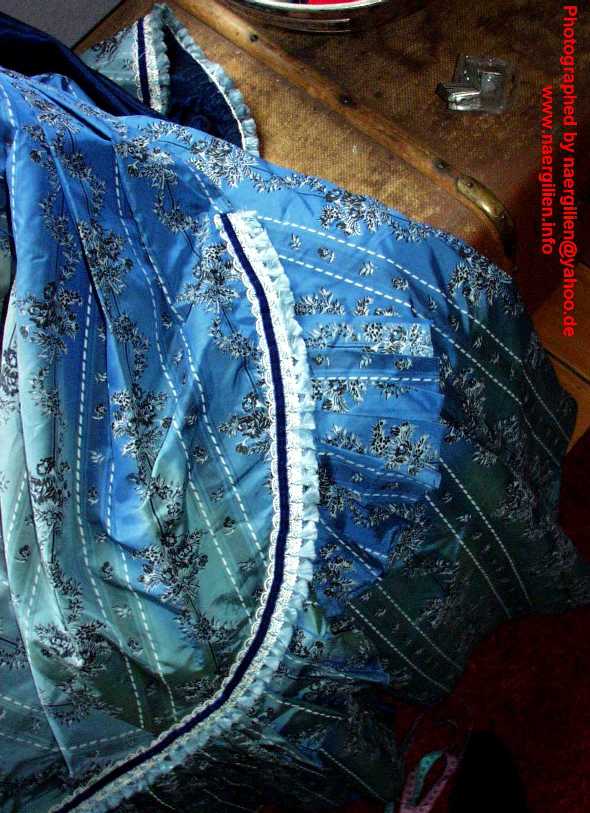
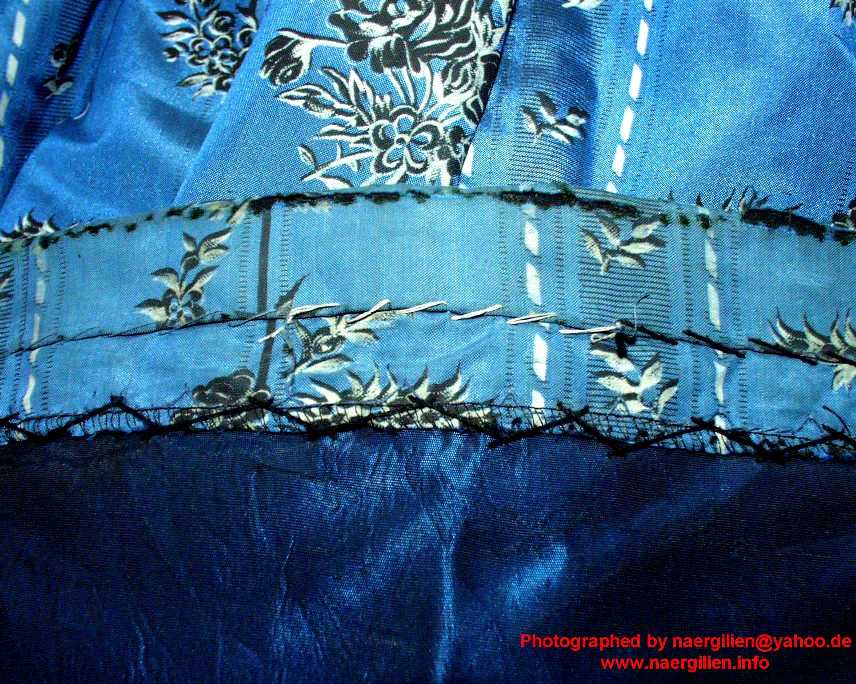
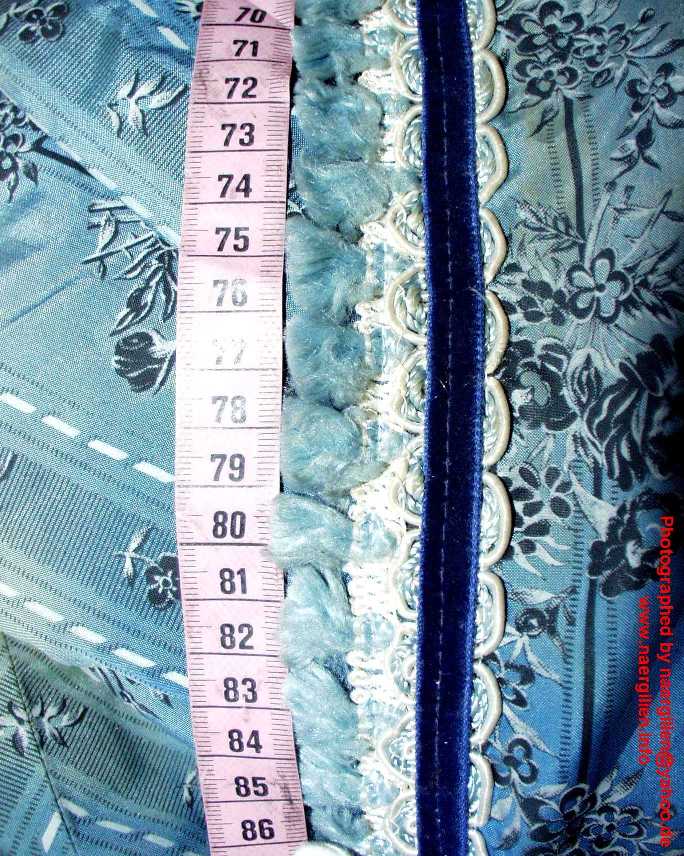
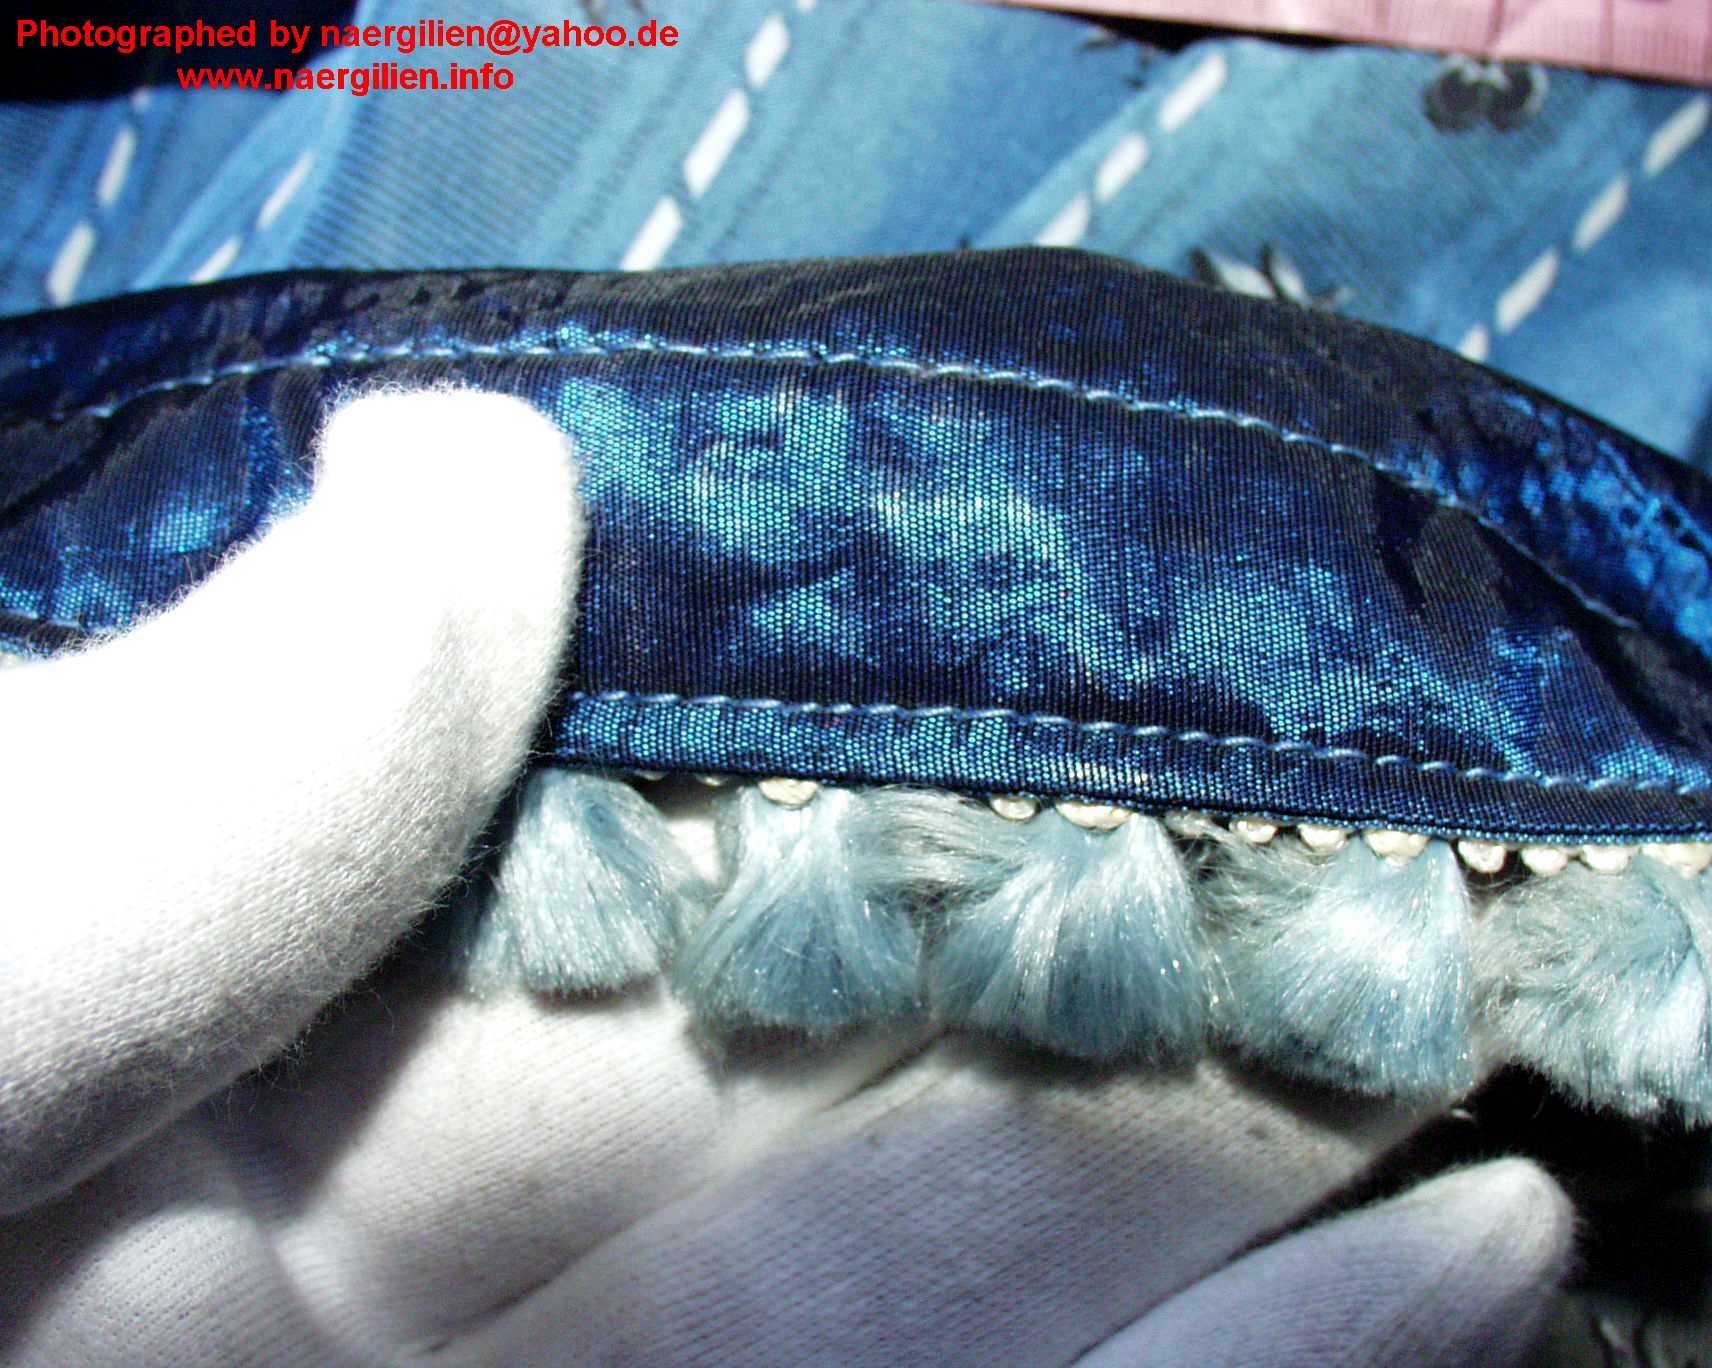
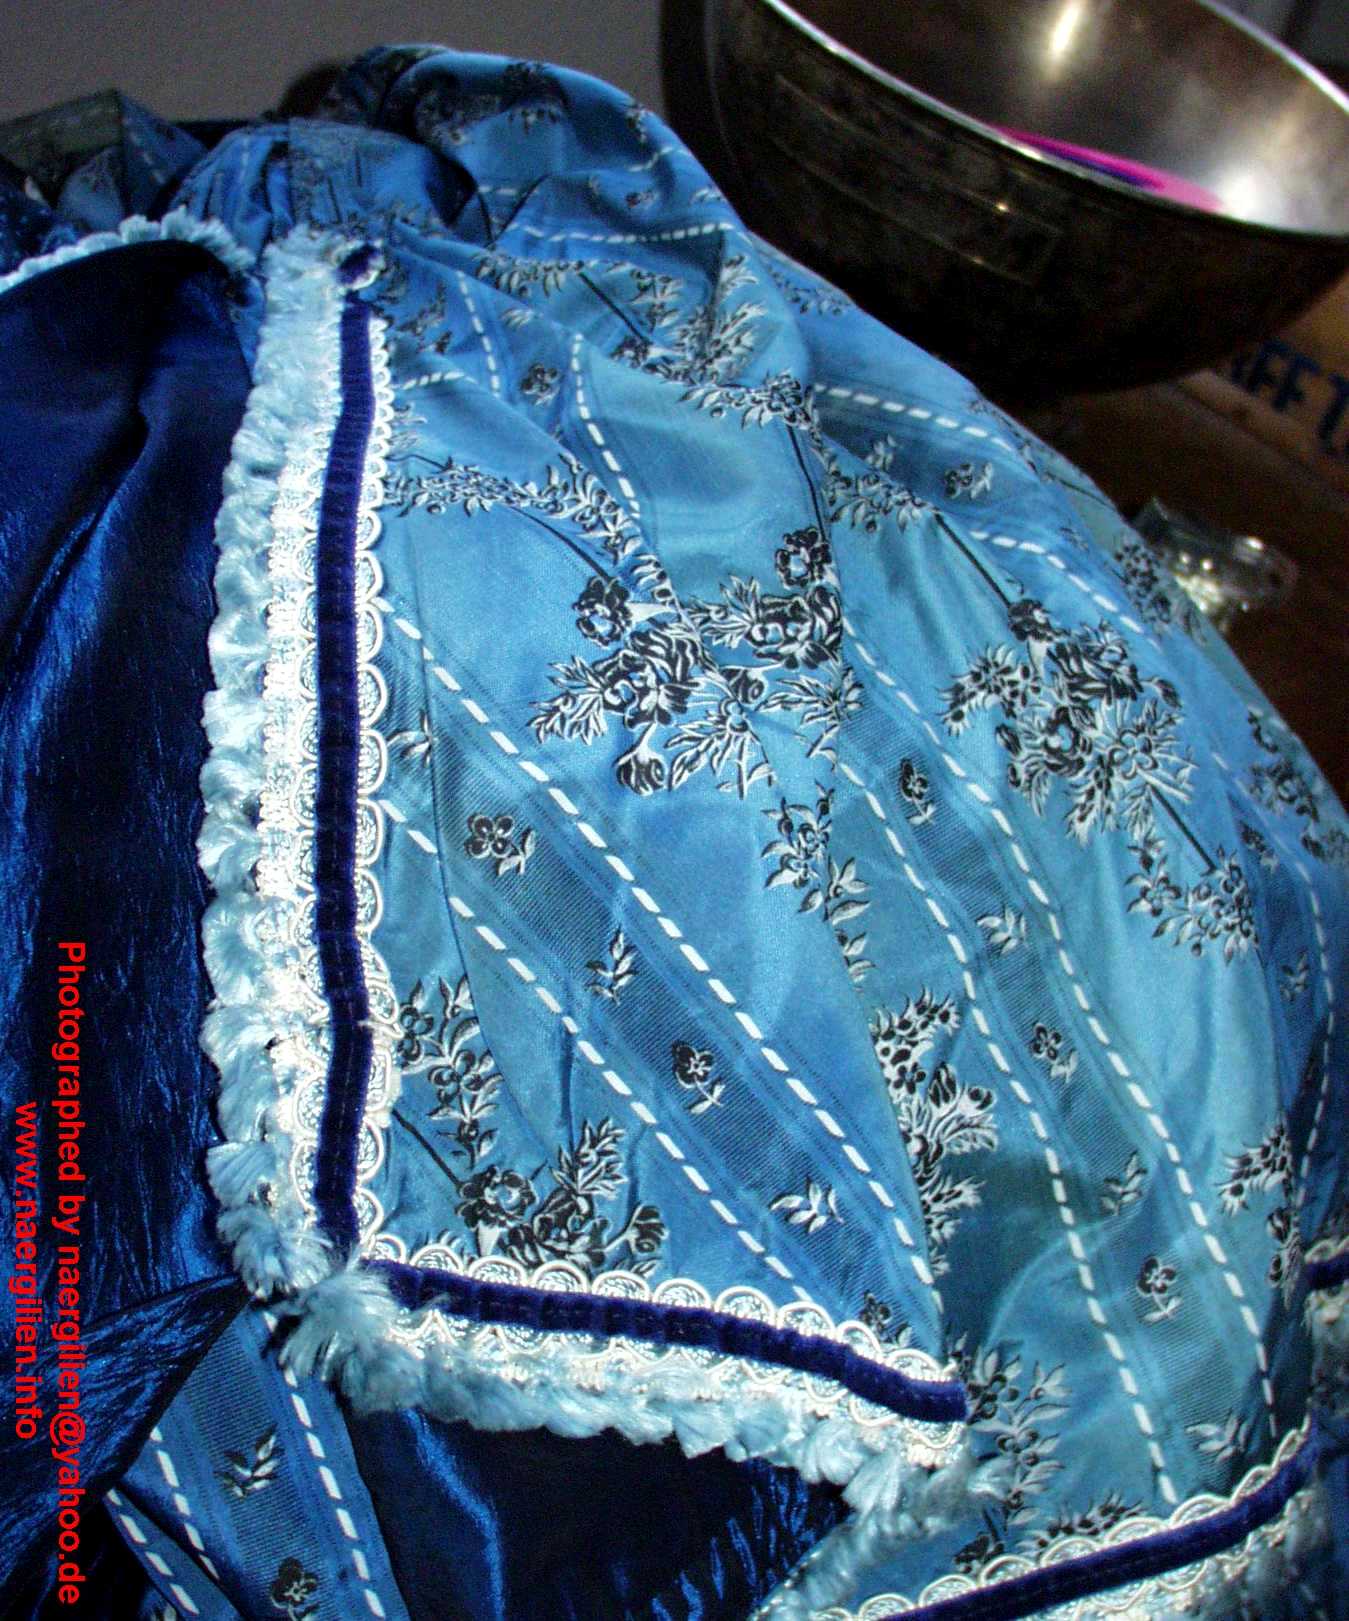
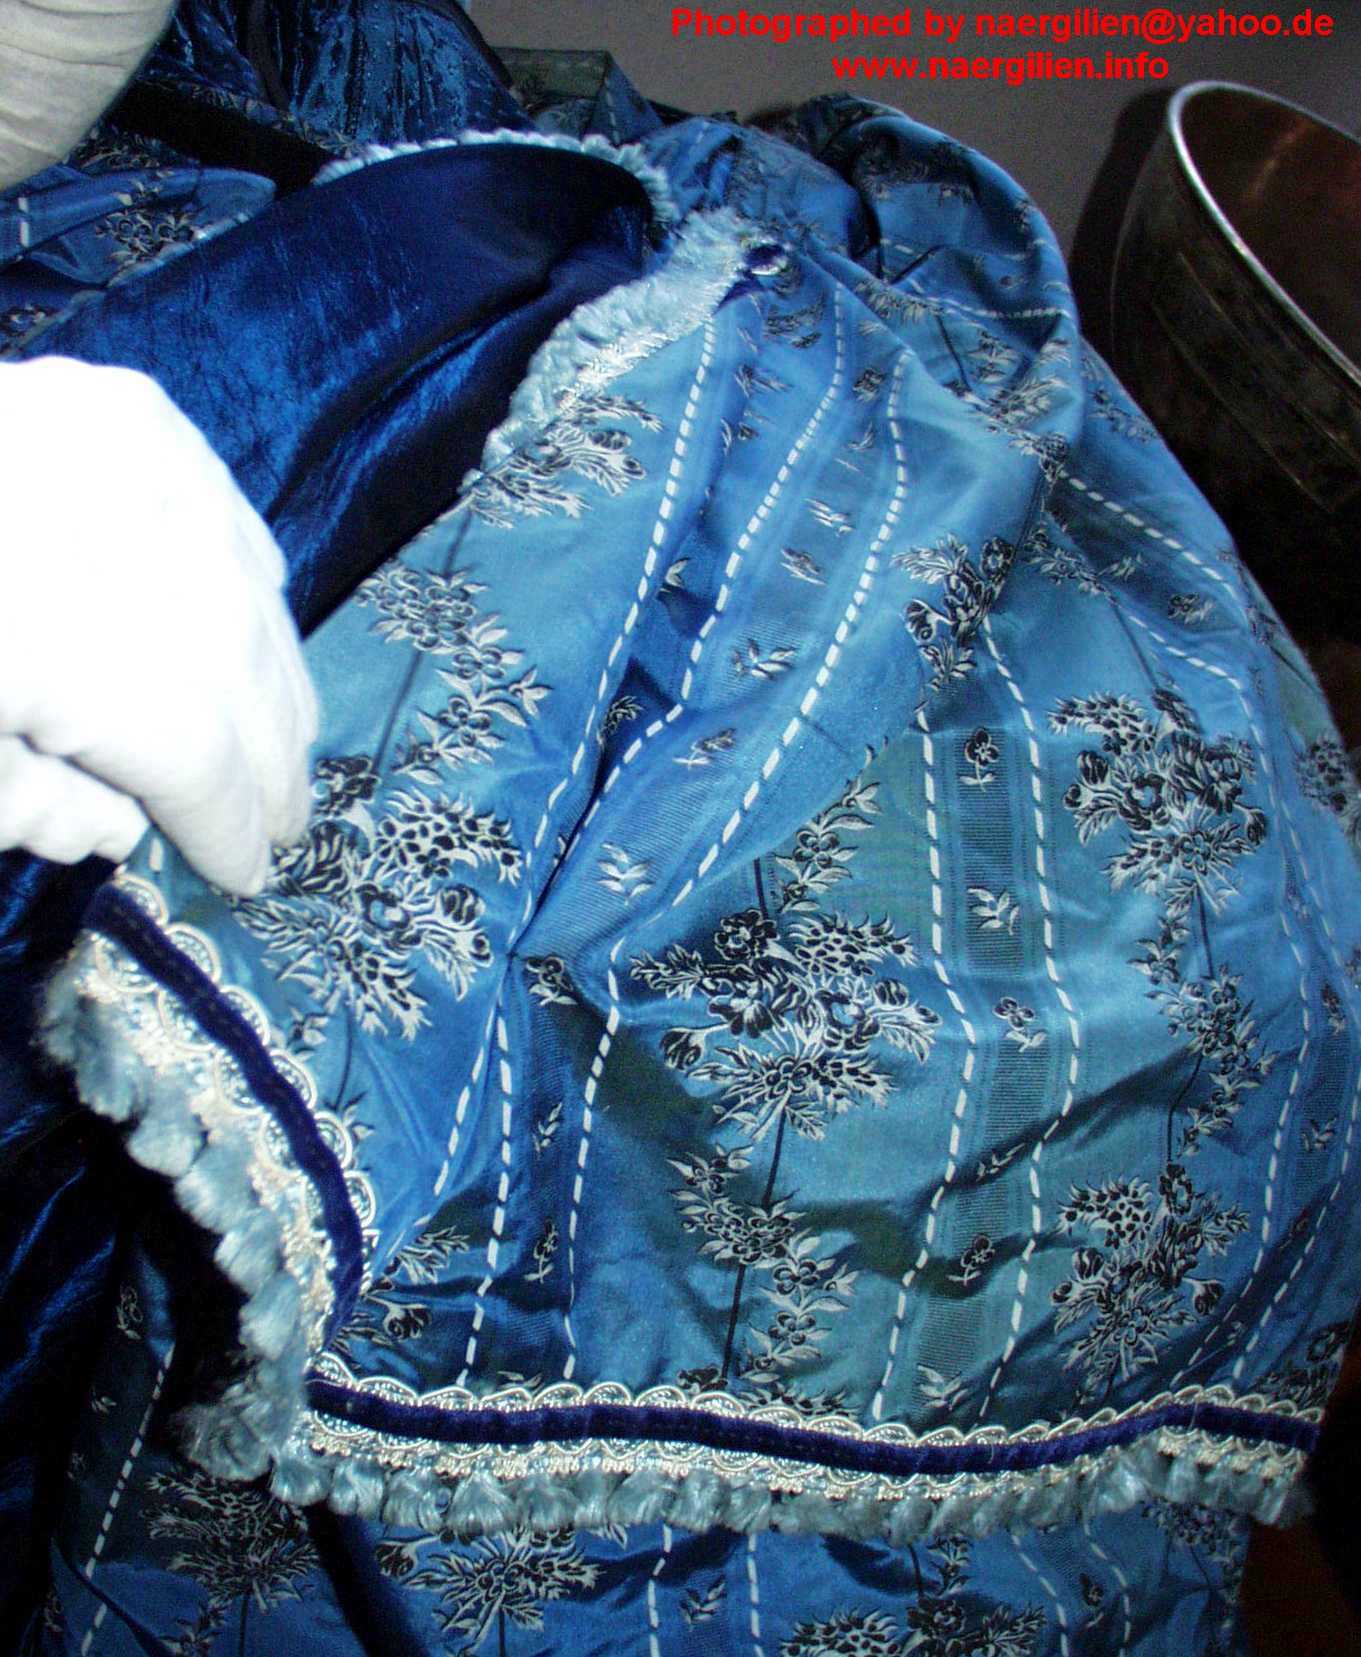
| Two pictures of the paniers trim. From looking at it, I would say that the trim consists of three different trims: One with the ‚fringe‘, another, matching one with the light aqua blue / cream gimp, and the narrow dark blue velvet trim. Those three trims have been sewn down together to make the trim border. |
This picture shows the backside of the paniers trim, which has been neatened with a strip of blue taffeta. | Picture of one of the side paniers. | |
 |
 |
 |
|
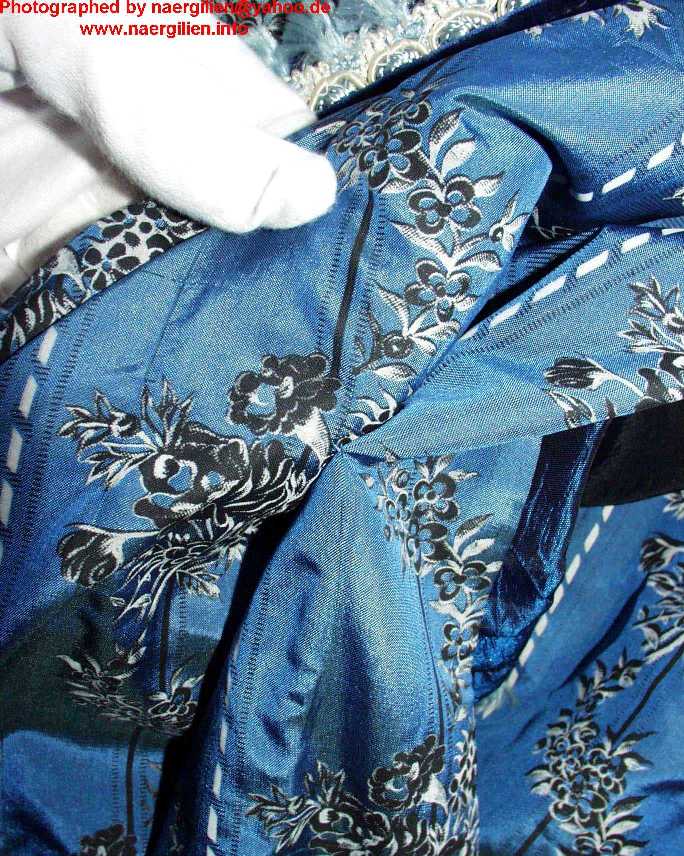
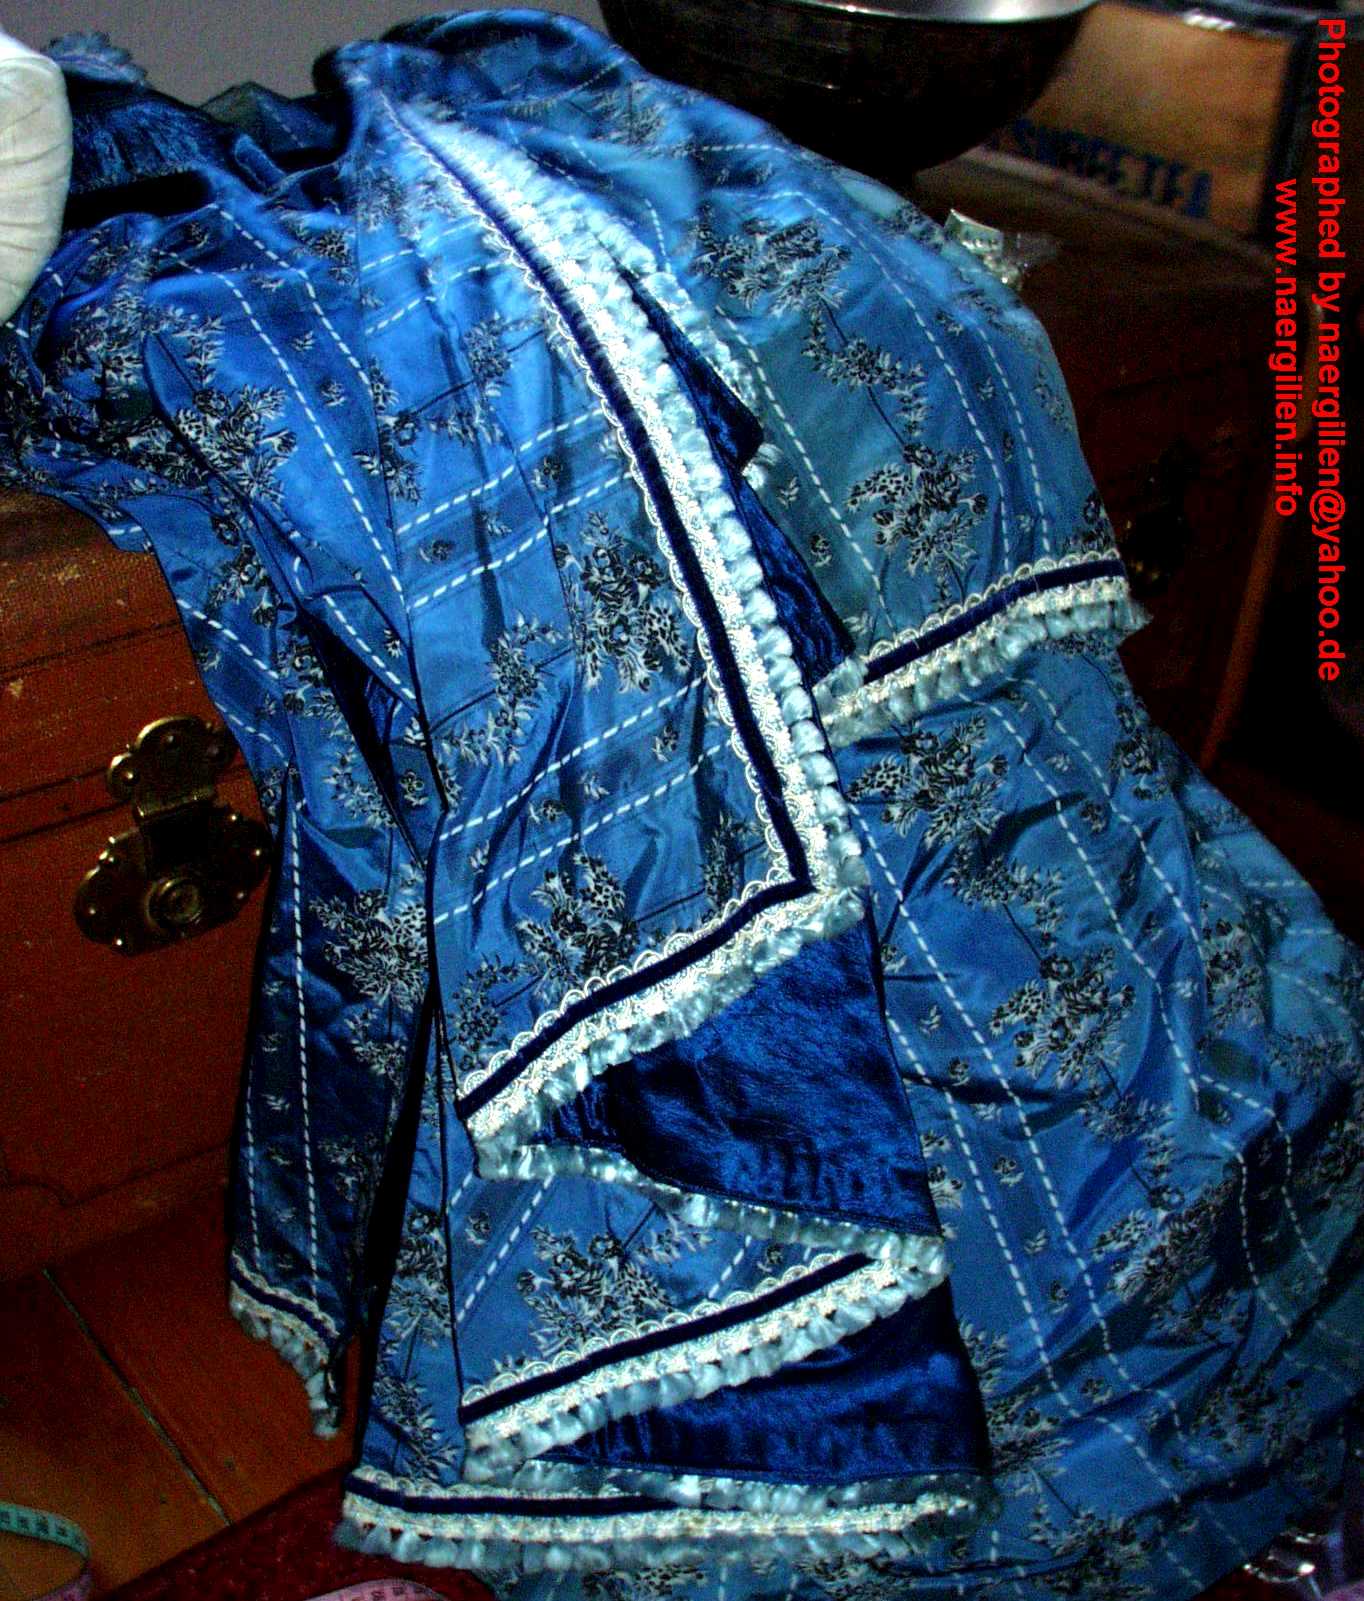
| Another picture of the front tip of the panier. | Picture of the back side of the taffeta lined paniers, that have been folded back. | Here’s a picture showing how the folded back paniers have been tacked down. | |
 |
 |
 |
|
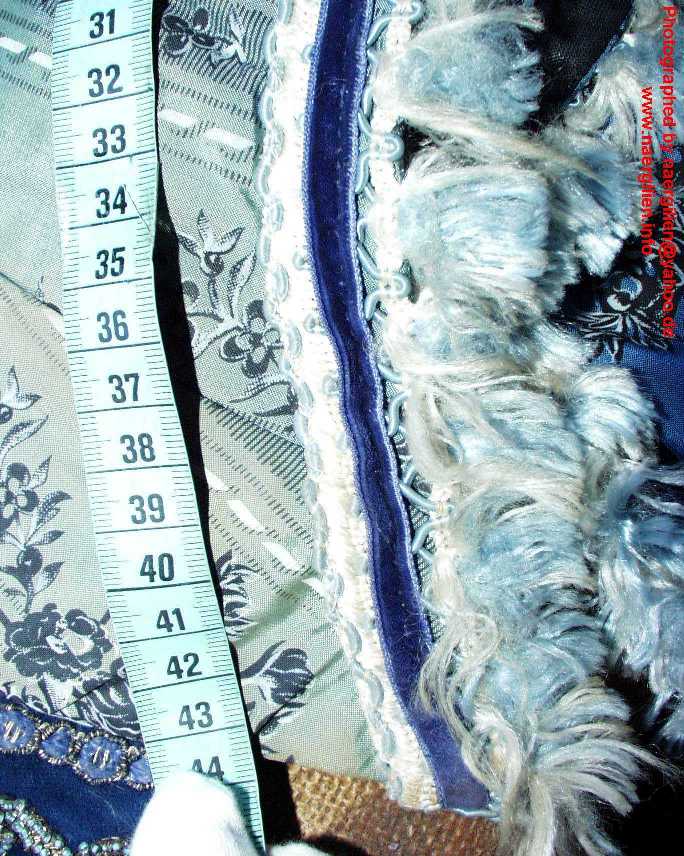
| Picture of how the waterfall drapery has been tacked down. | Back drapery picture. The drapery has been lined with blue taffeta. | A closeup of the back drapery. As you can see, the trim here seems to differ from the one that has been used on the apron, but in fact, it does not. The back trim seems to be bound in small ‚brushes‘ while the front trim is not, but I would say that this is the result of the front trim repeatedly brushing against people or things while the gown was worn, while the back of the dress seems to have been spared of such a treatment. |
|
 |
 |
||
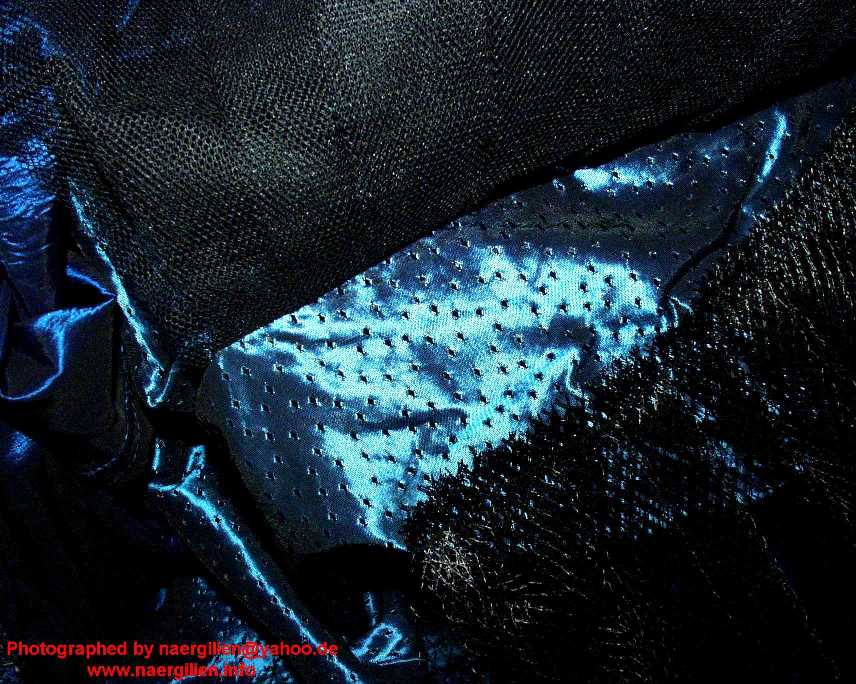
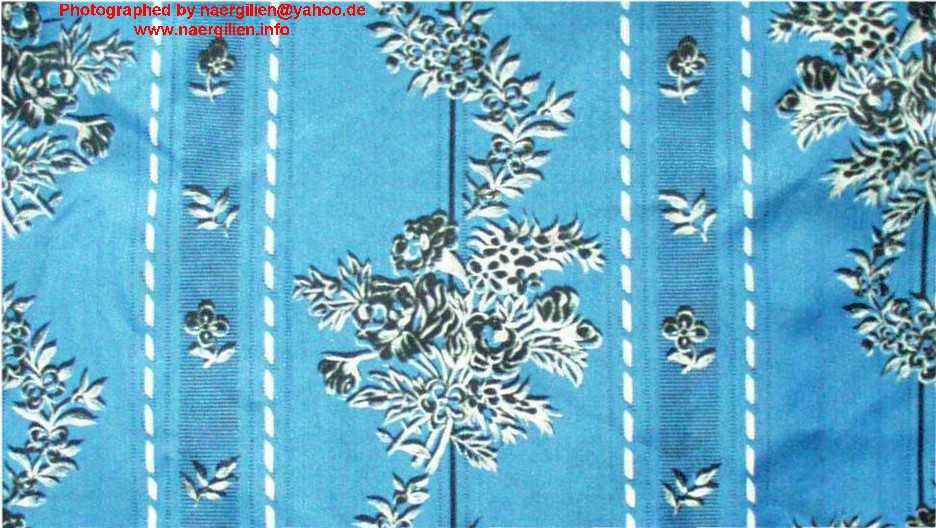
| This is the clearest picture of a non-color fade area I could find on the dress. The color is most likely to what I saw in person | This here is a pattern repeat. You can tile it on your windows desktop. If you wish to see what the exact size of the picture is, then you will just have to print this picture at the exact size of 13.4 x 23.75 centimeters 🙂 In case you’re looking for a really authentic reproduction of the ‚Wishing gown‘ fabric, look no further – it’s available here (and here in a changeant version). |
||
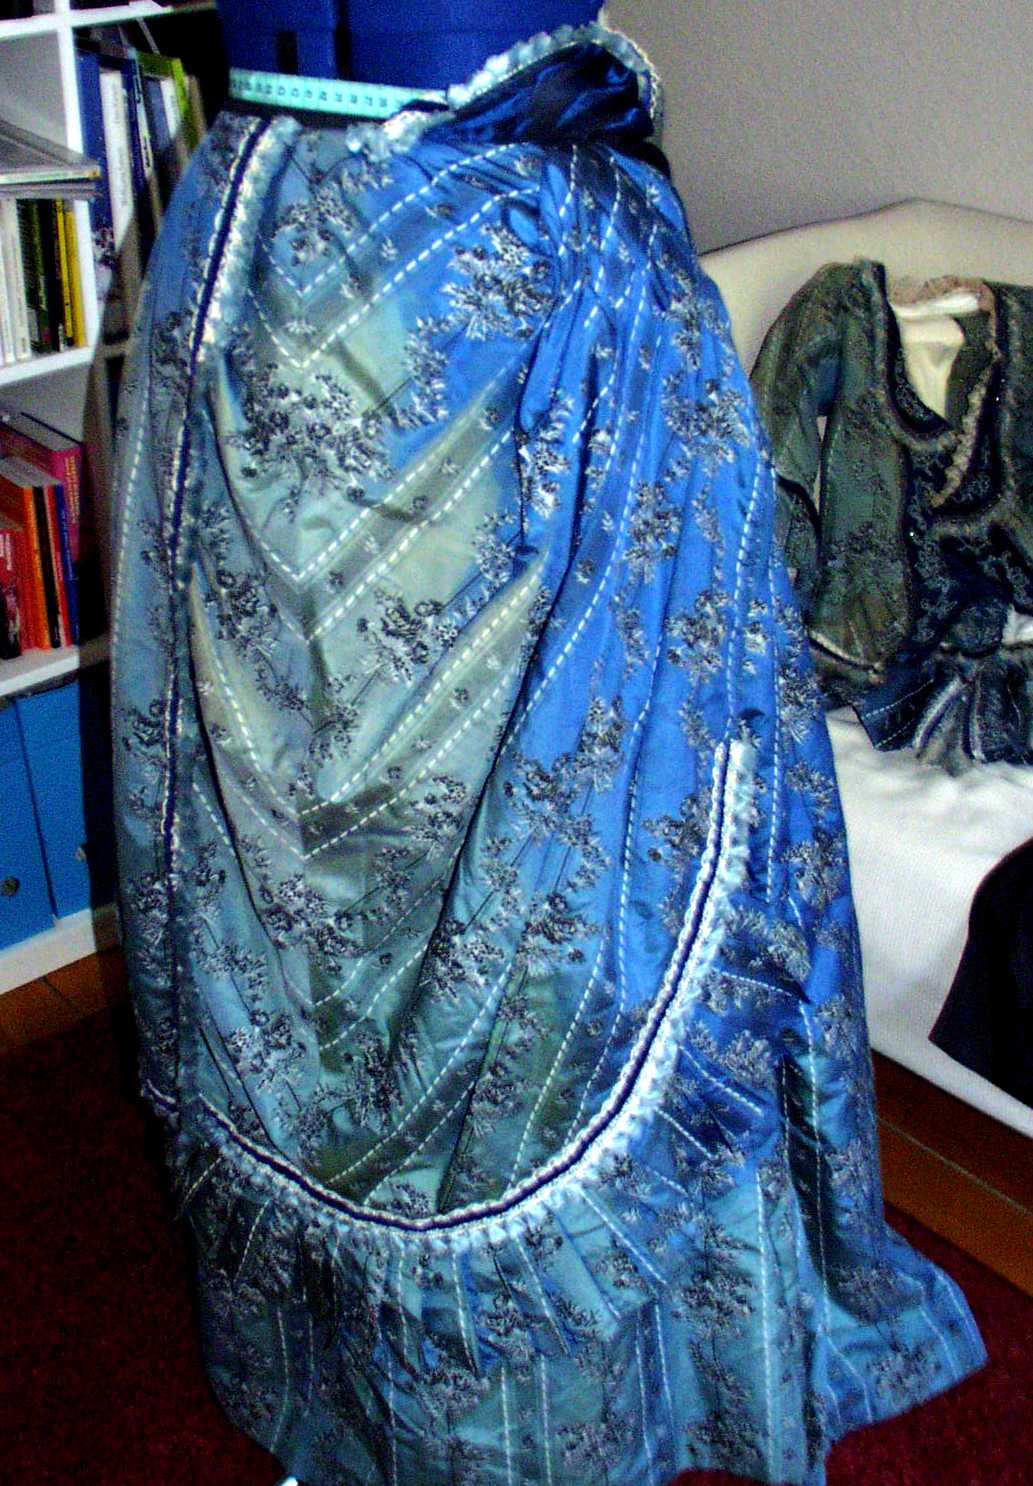
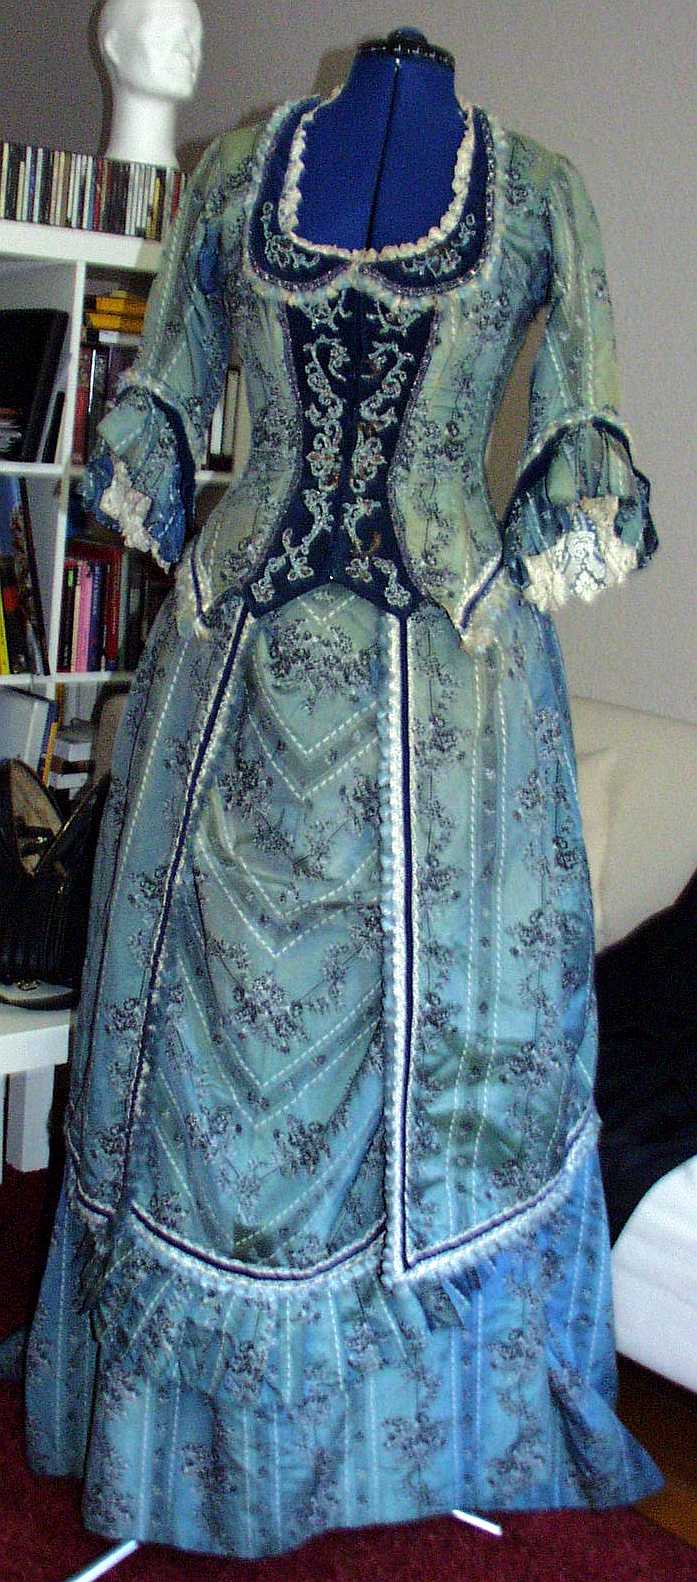 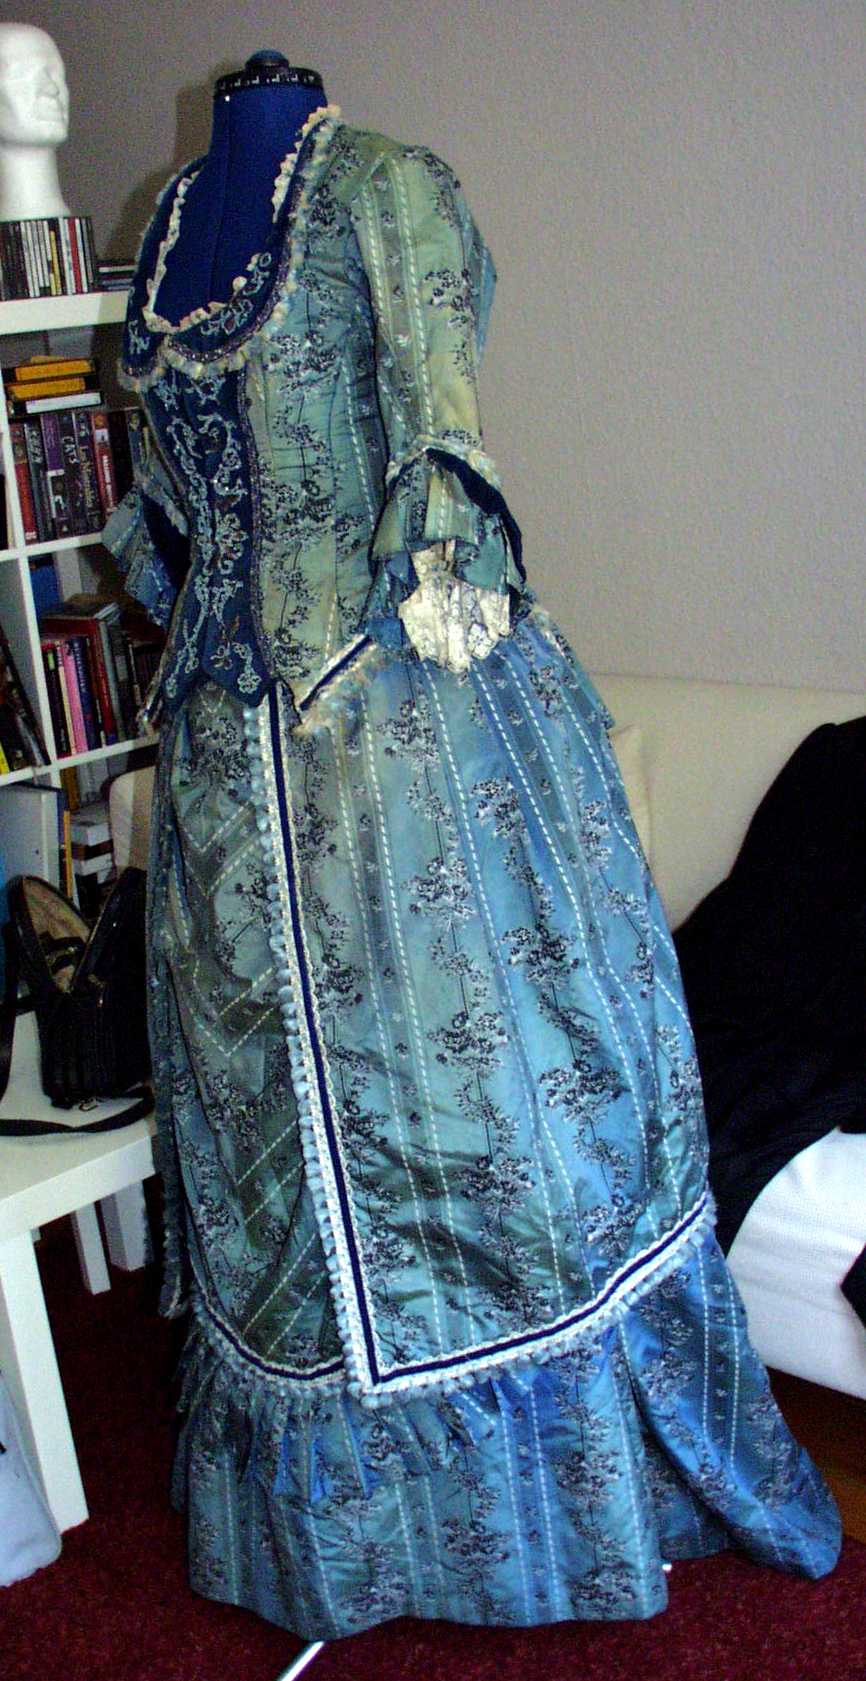 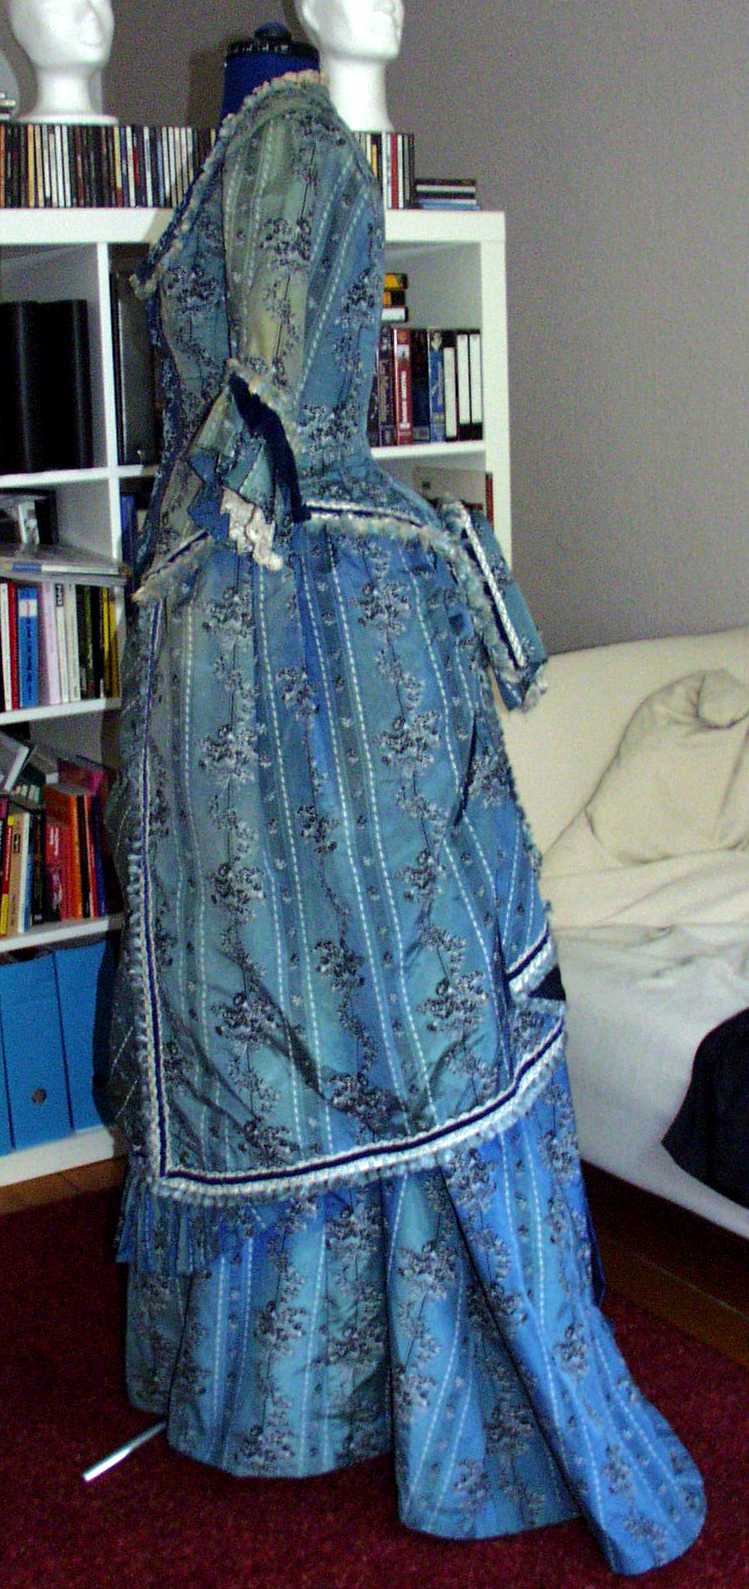 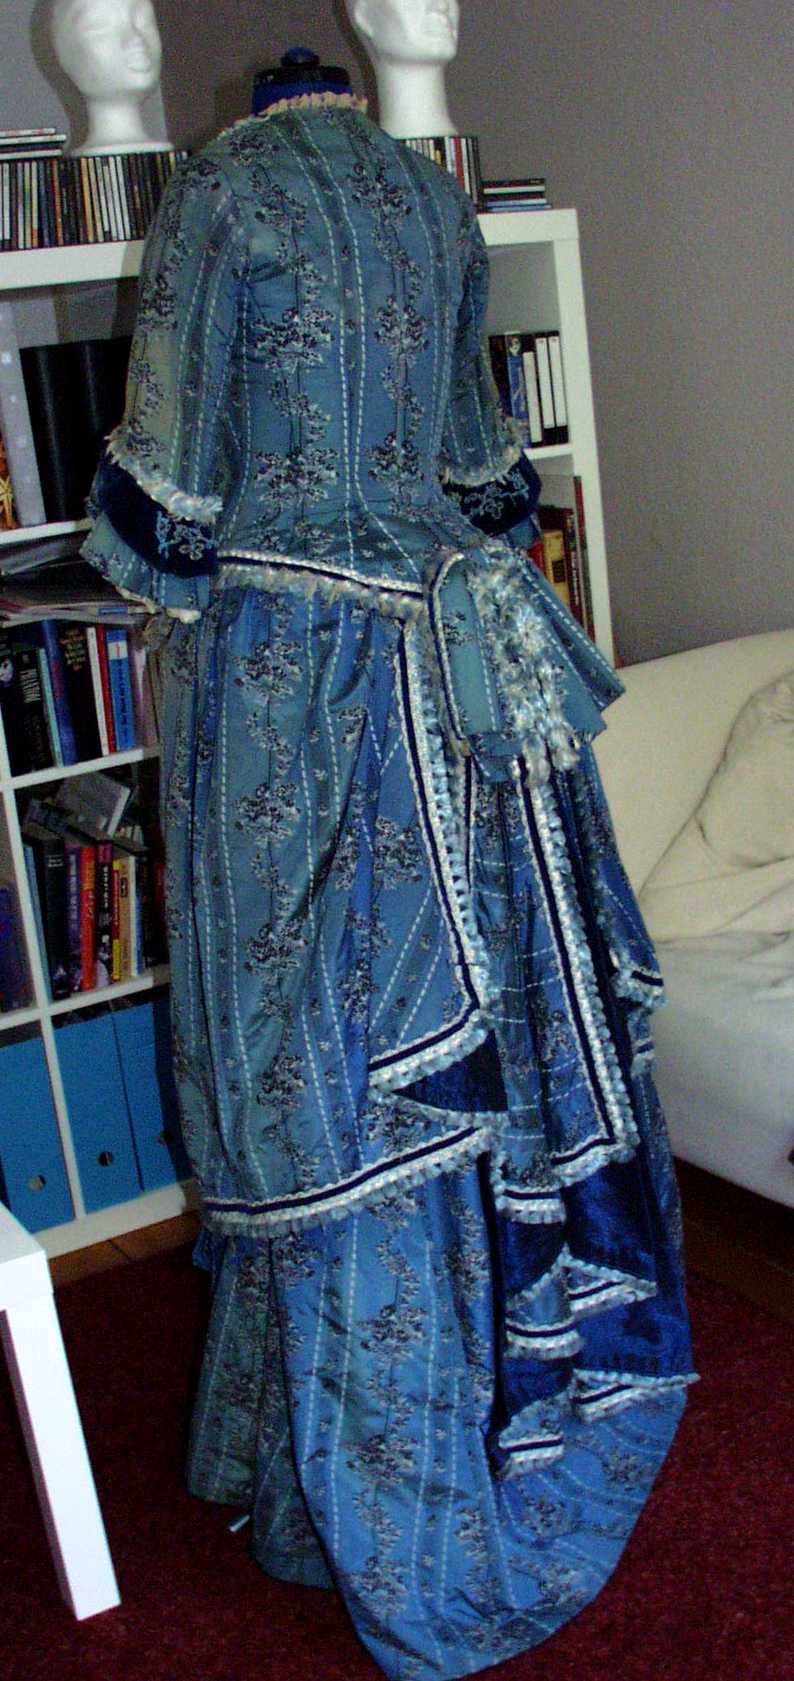 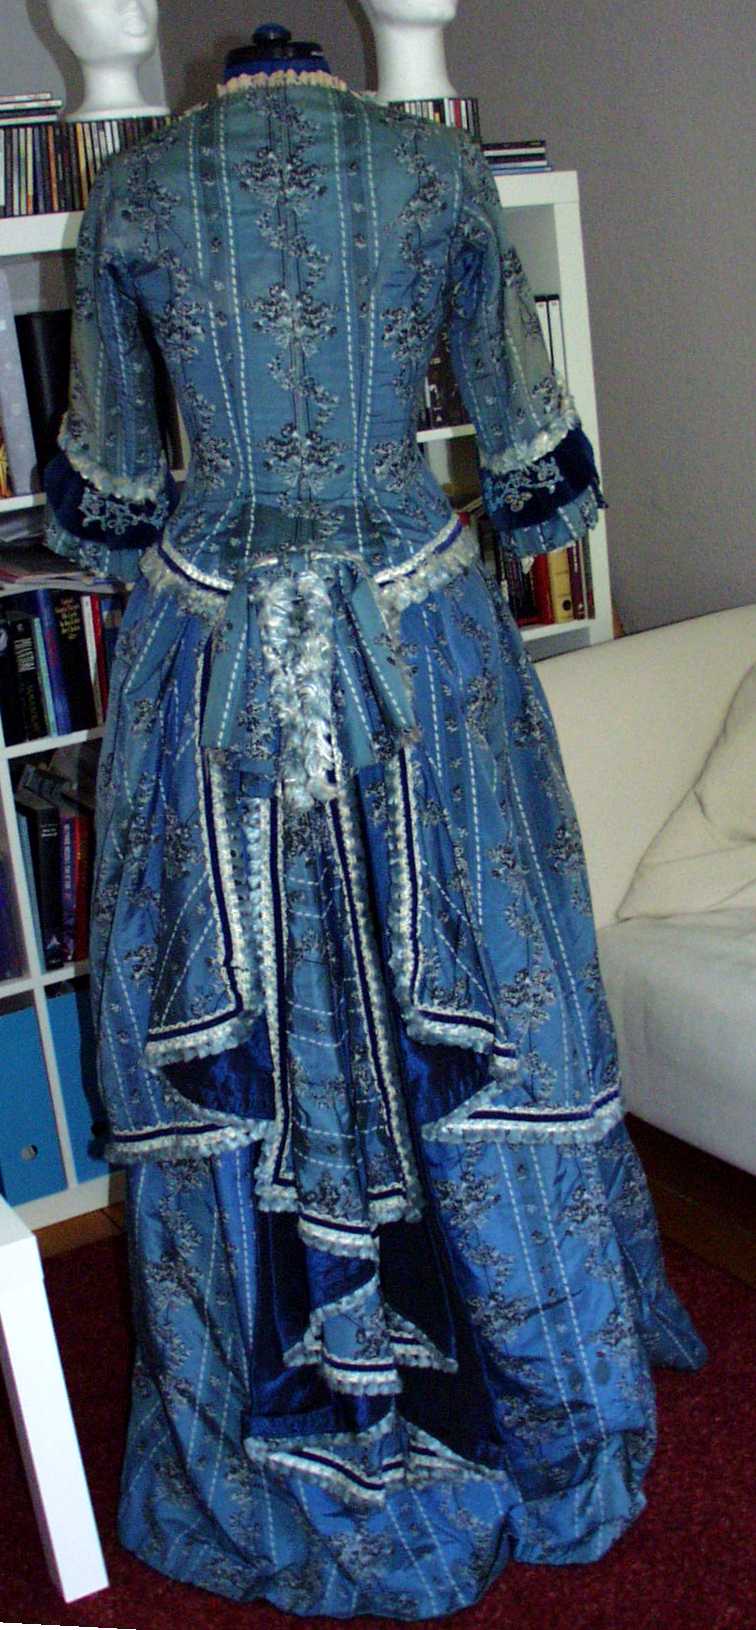 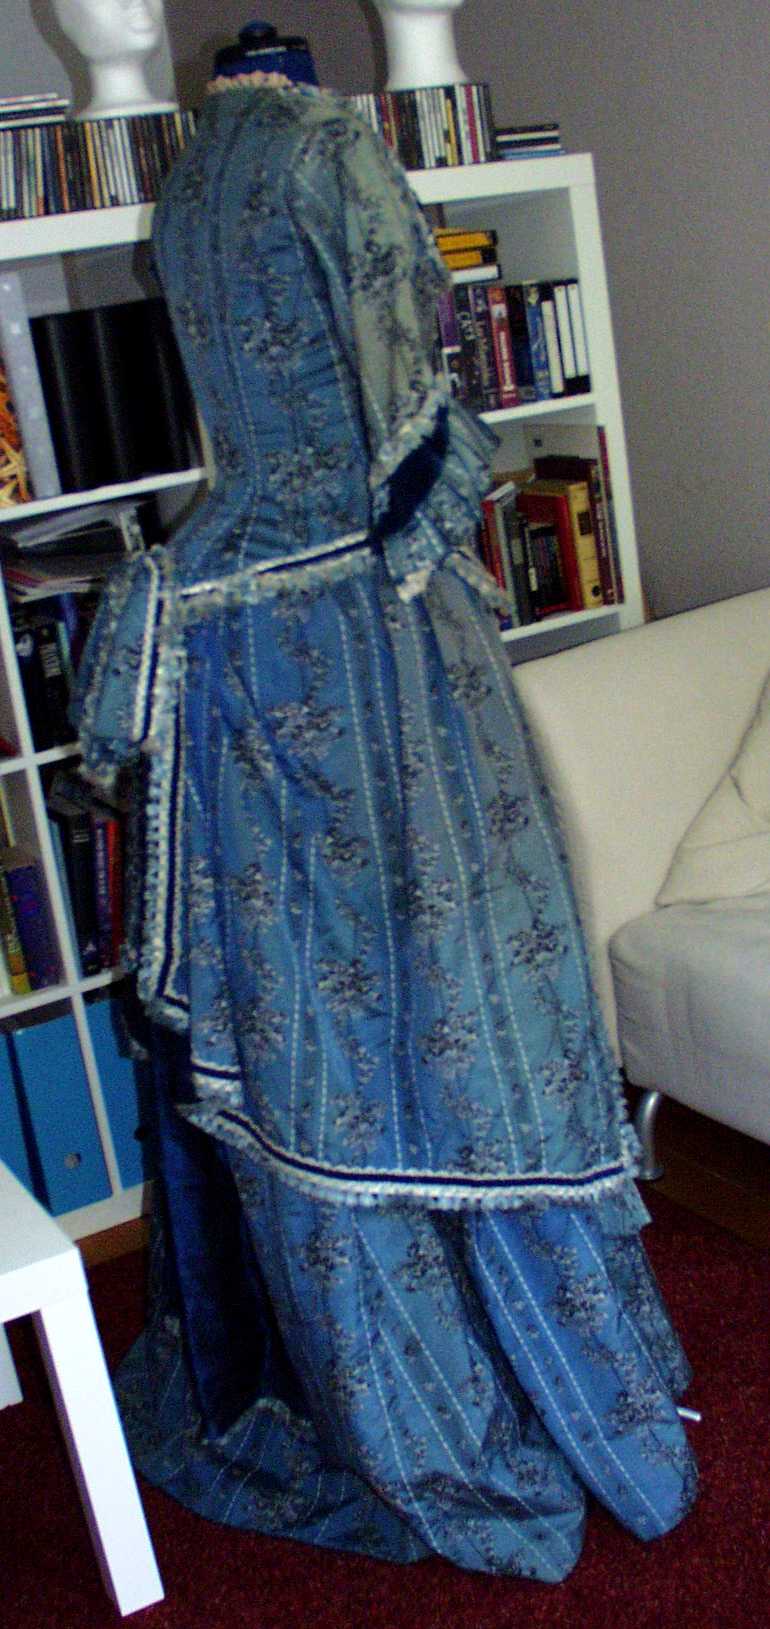 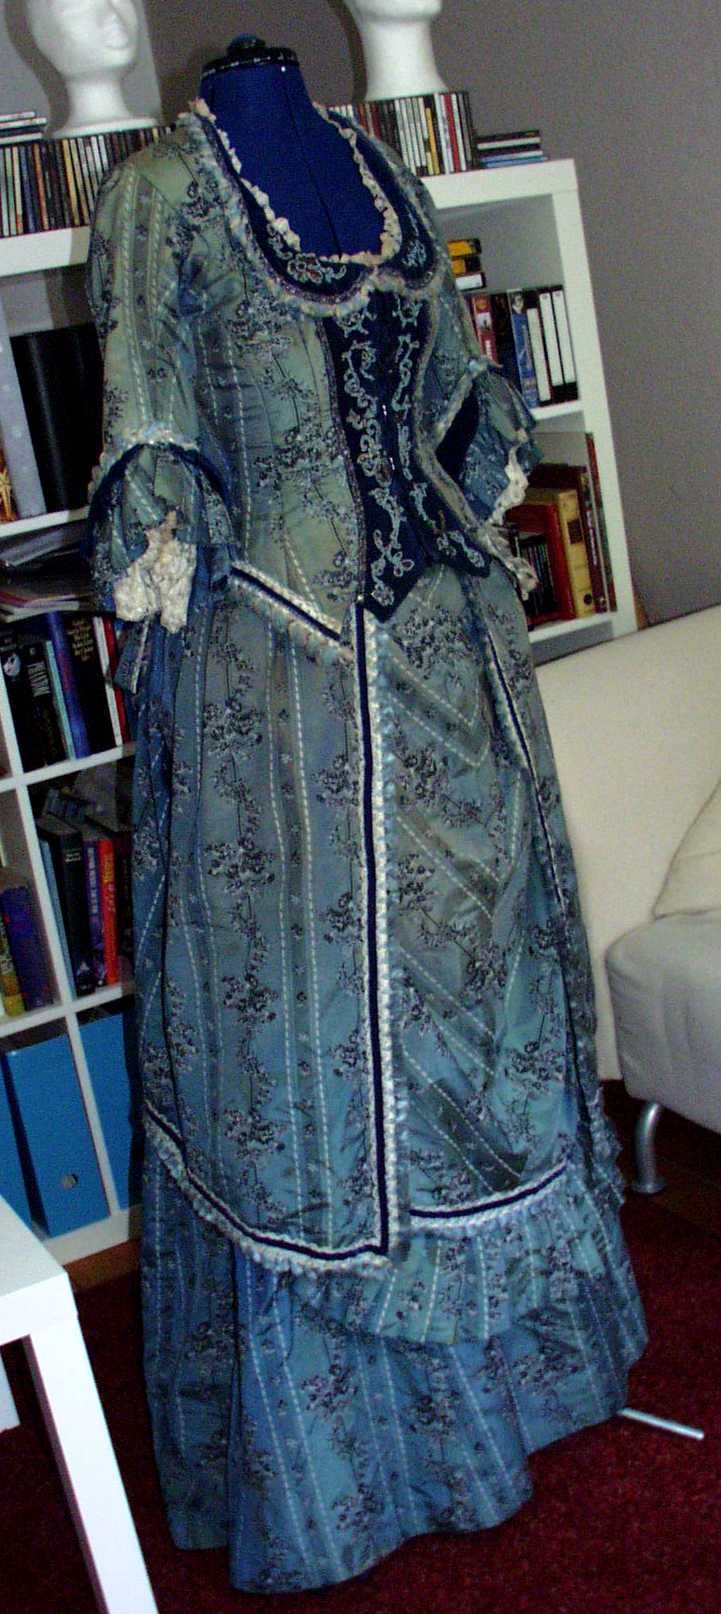 This series of pictures shows the gown from all sides on a dress mannequin. |
|||
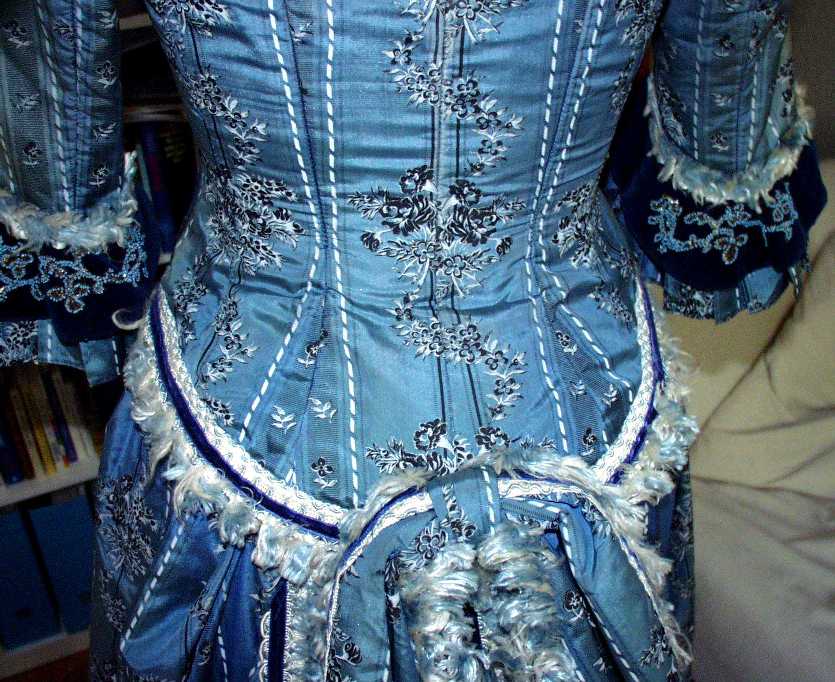
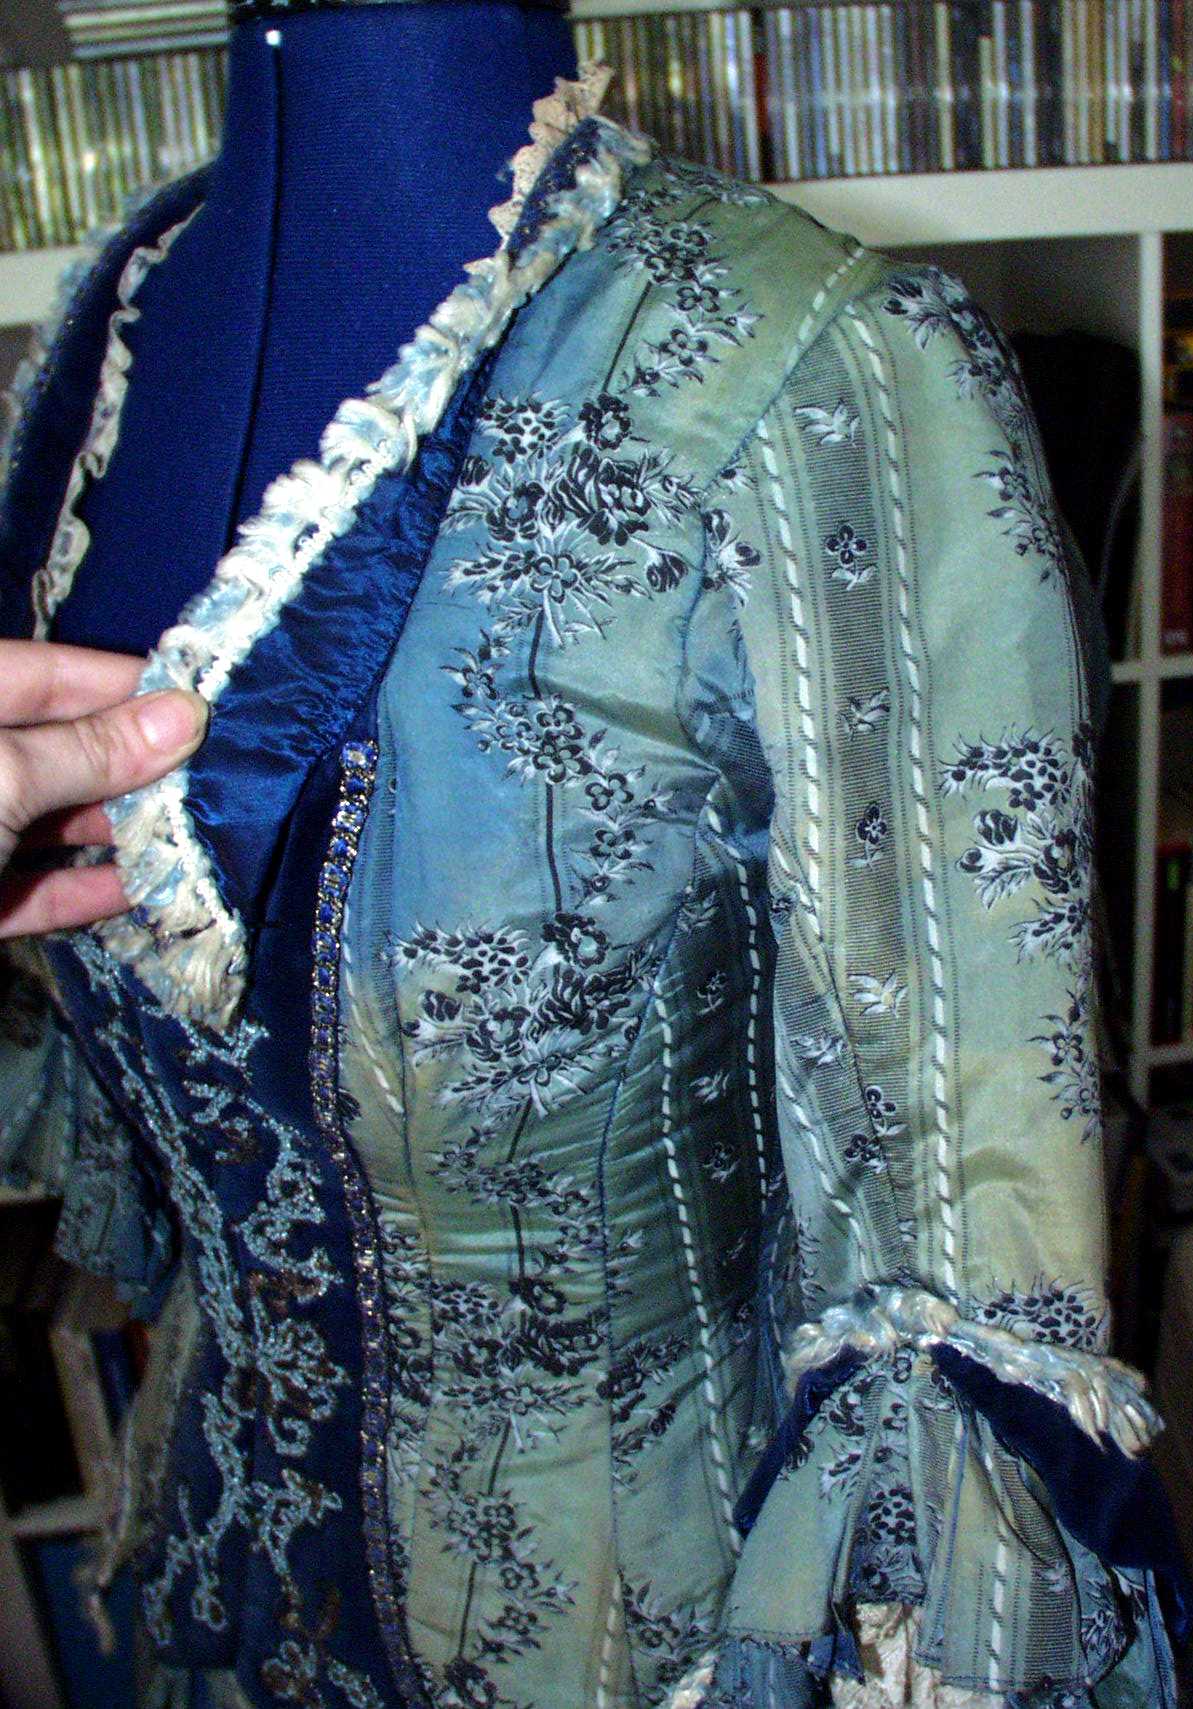 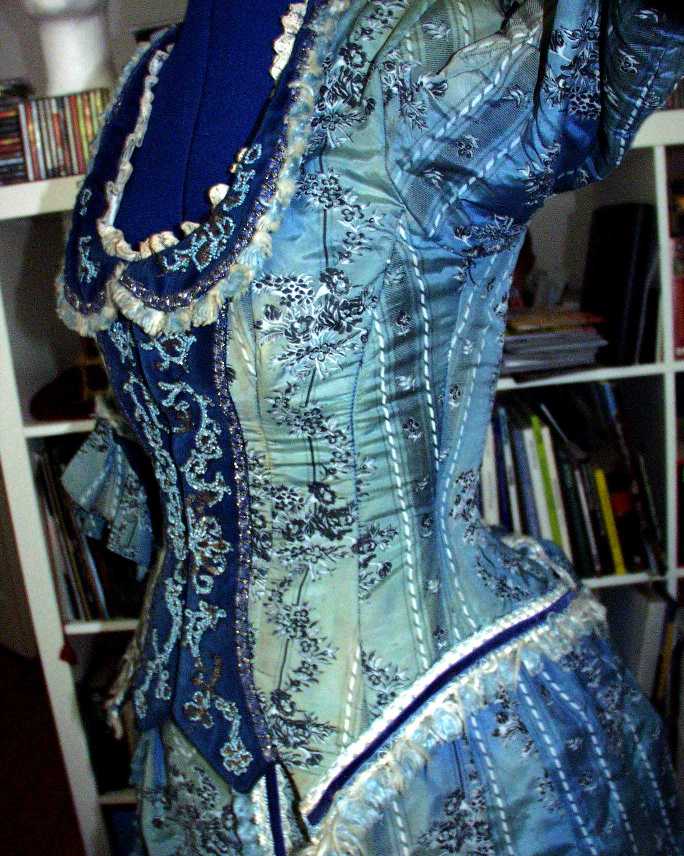   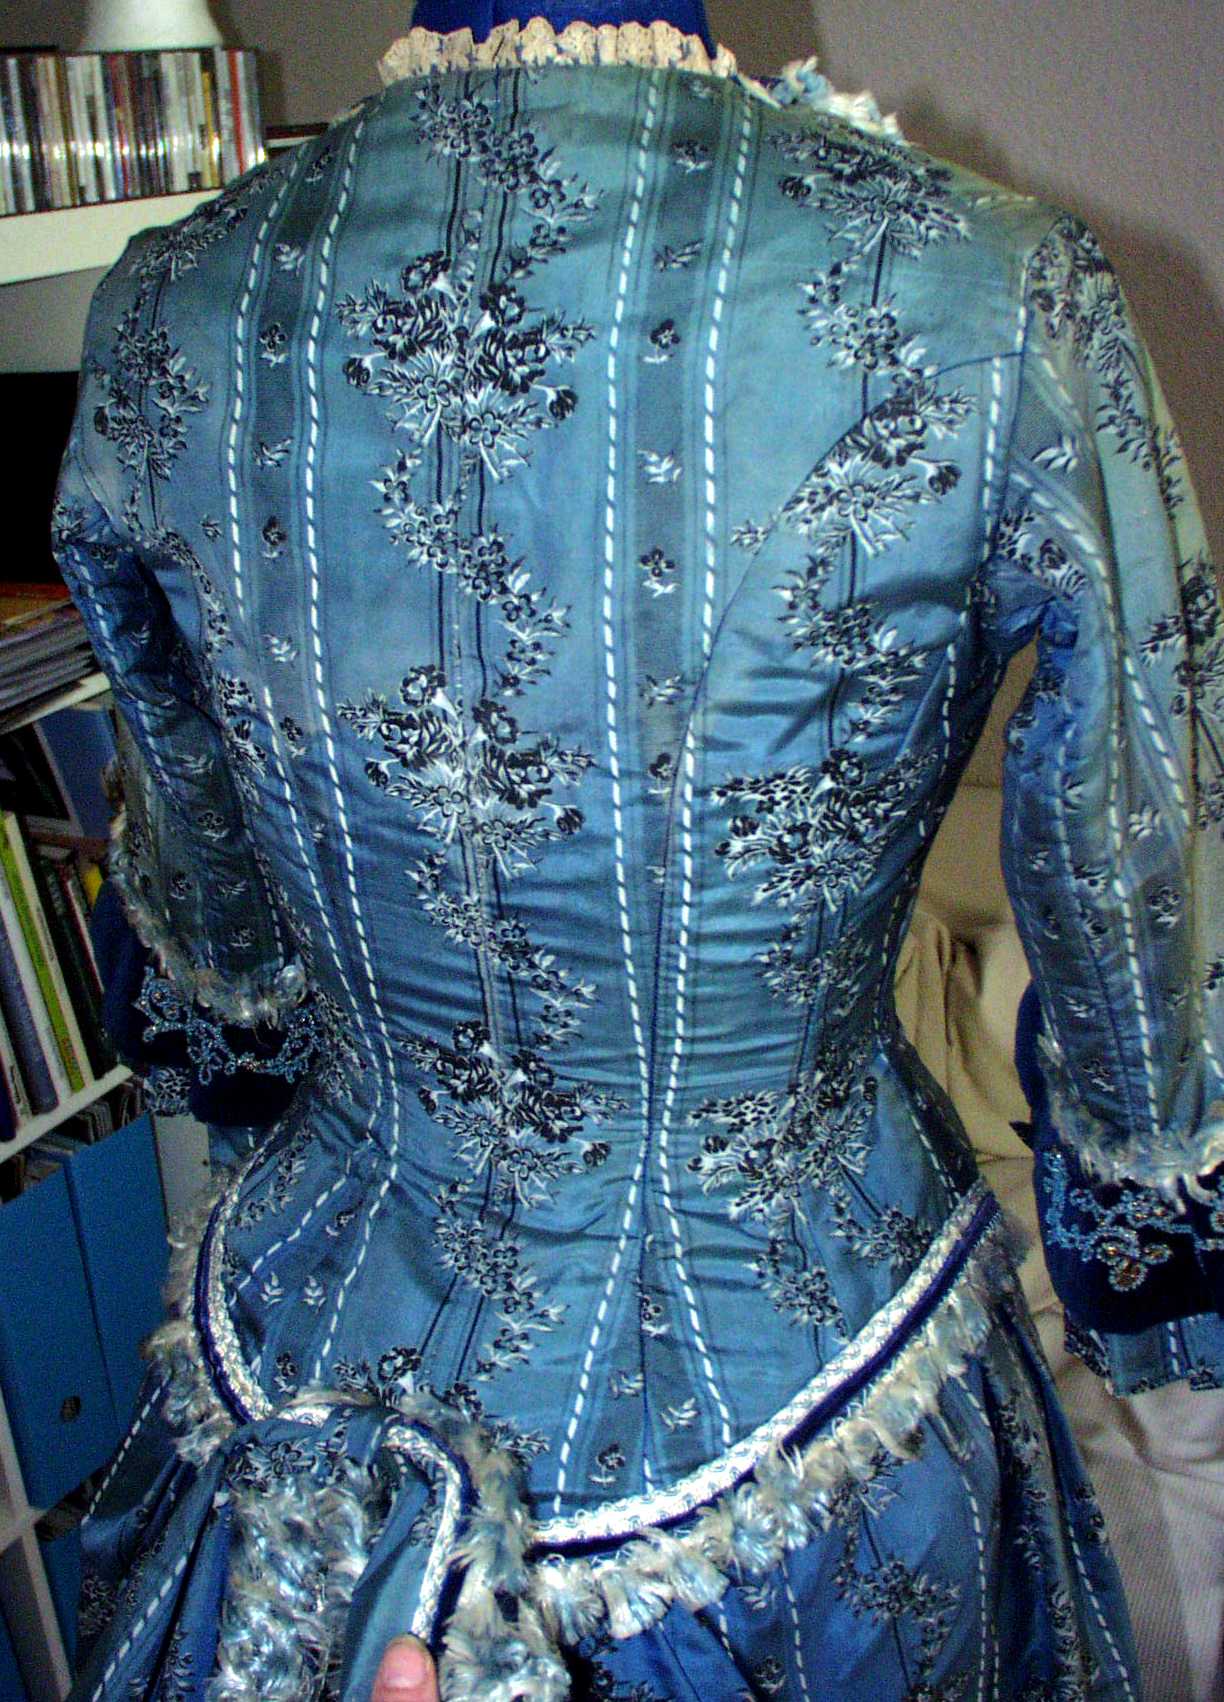 Some pretty clear shots of the bodice on the dress mannequin. |
|||
 |
 |
 |
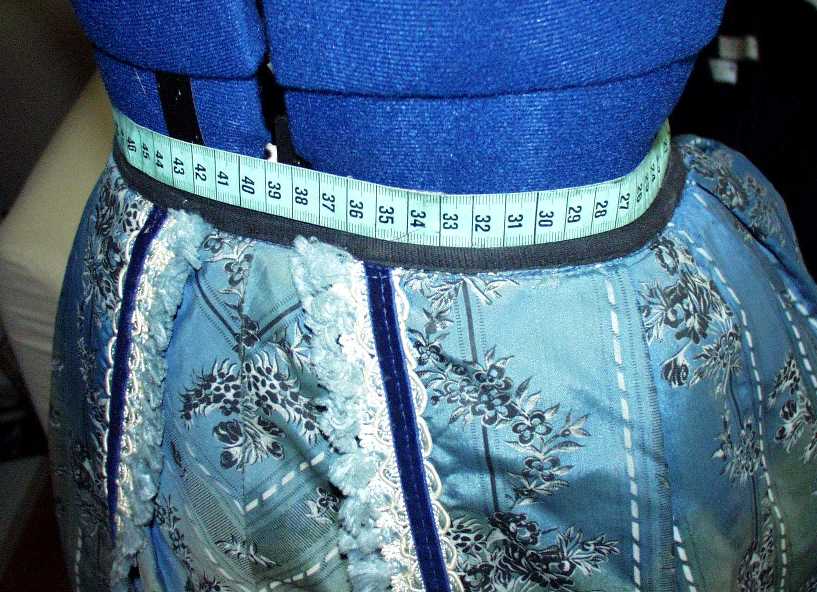 |
| Bodice center back. Note in comparison with the next picture… | …which was taken from above, how the velvet collar ends at the shoulder seams which are, historically correct, moved to the back. | Back of the bodice with attached bow. | Bodice skirt front with paniers sewn to the black twill waistband. Yes, there’s a measurement tape around the waist – I placed it there. |
 |
 |
||
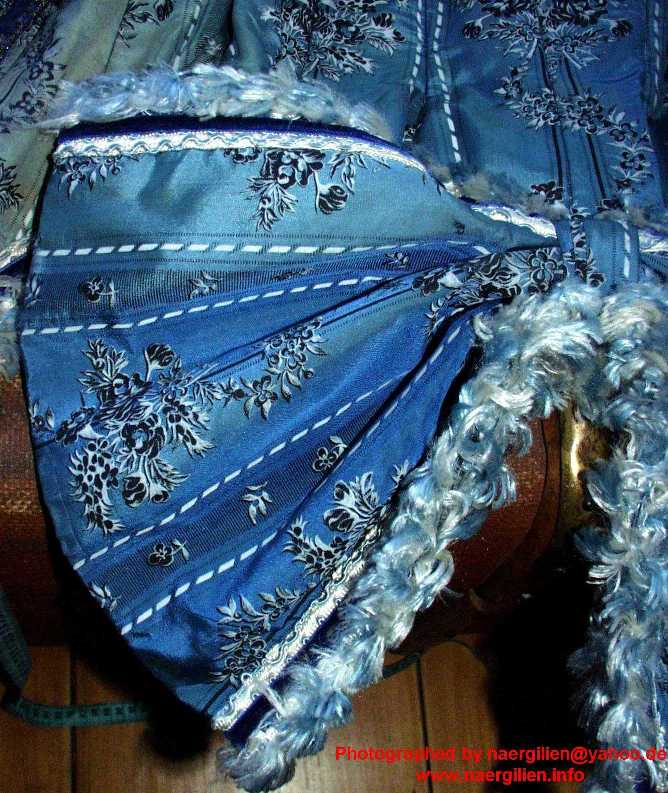
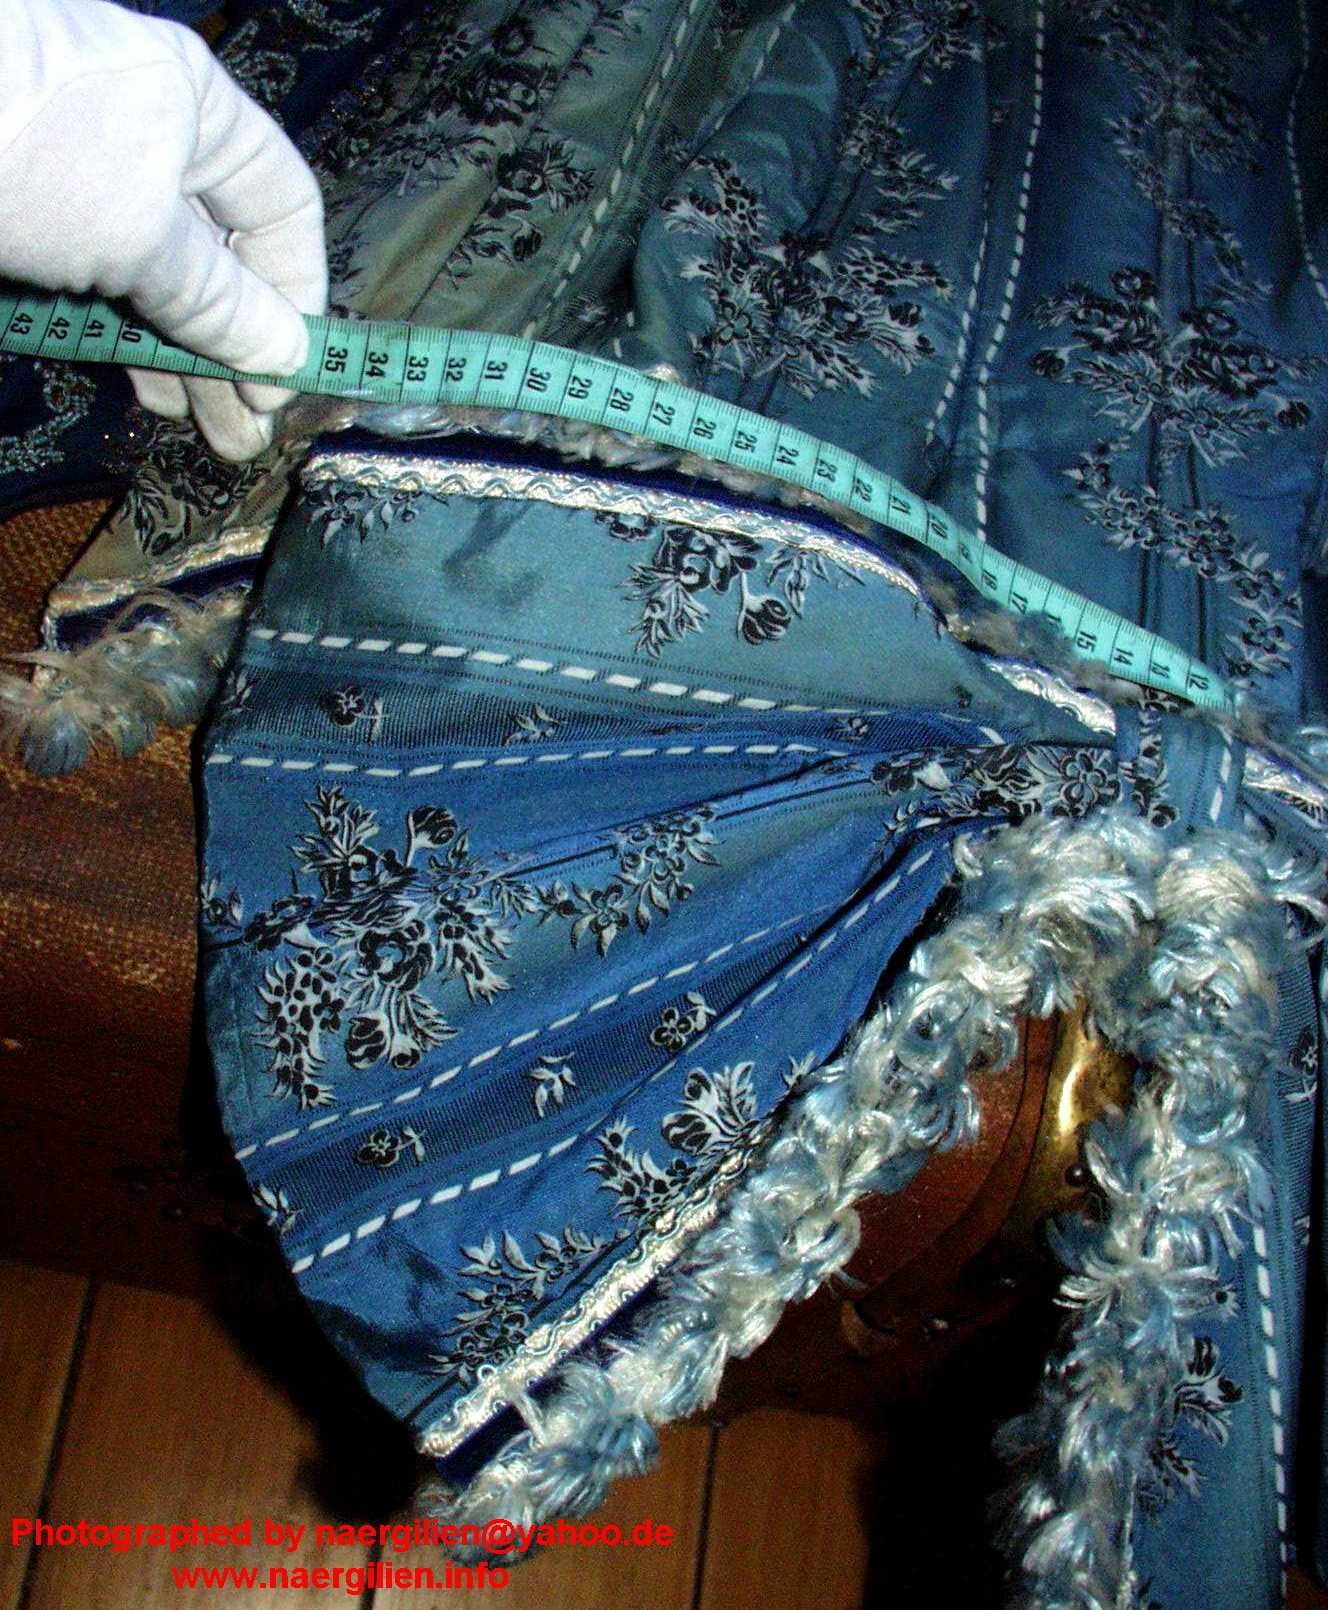
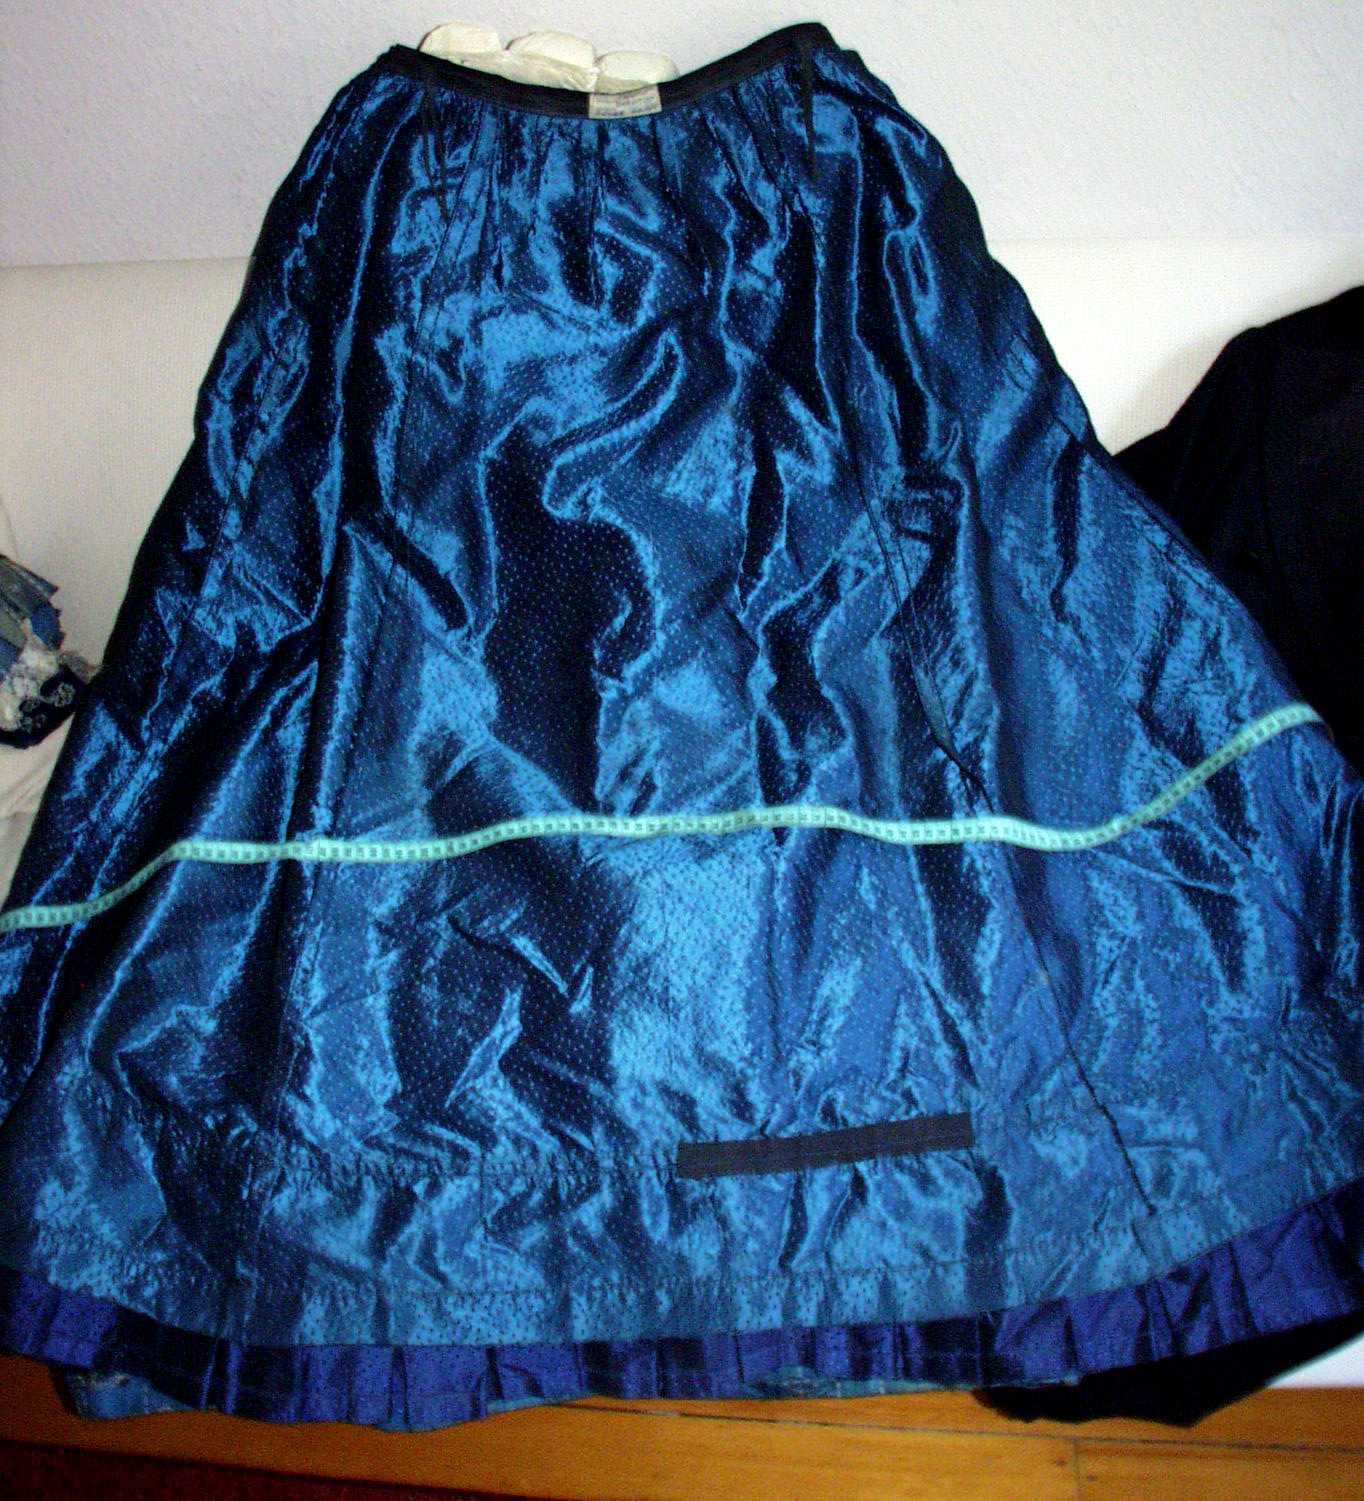
| Paniers flapped back, showing the apron attached below, | Clear shot of the diamond-patterned taffeta underskirt turned inside out. The short black twill tape at the bottom is an obvious repair. | ||
Some other costumes
One of Raoul’s jackets
 |
 |
 |
 |
 |
 |
 |
 |
 |
 |
||
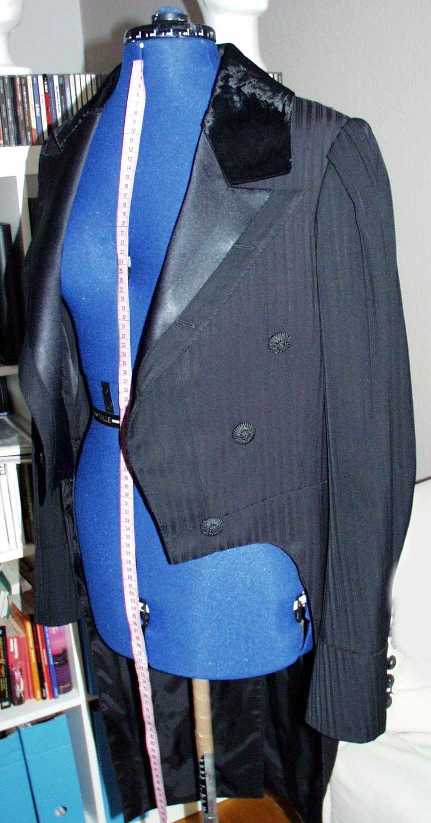
The Phantom’s costume
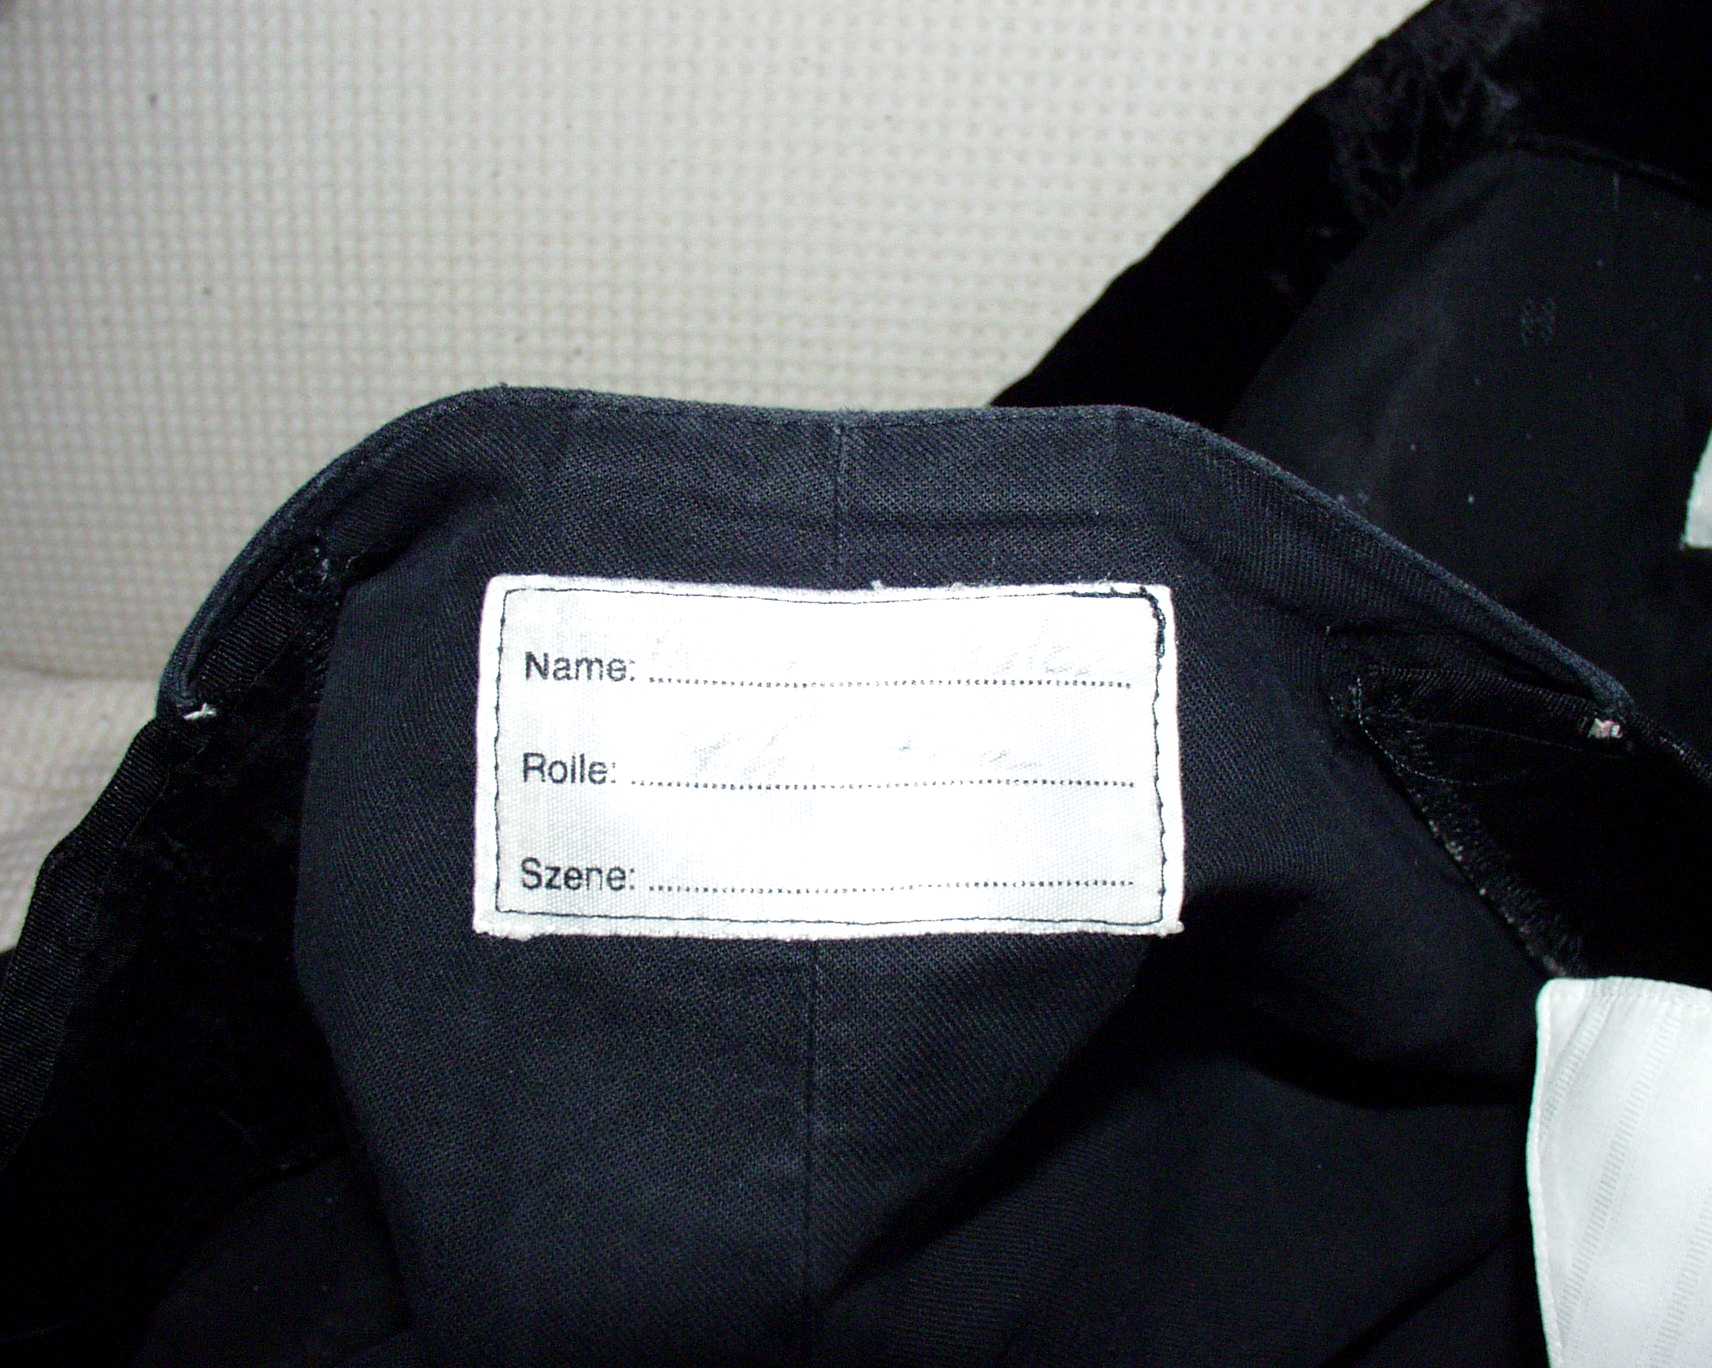
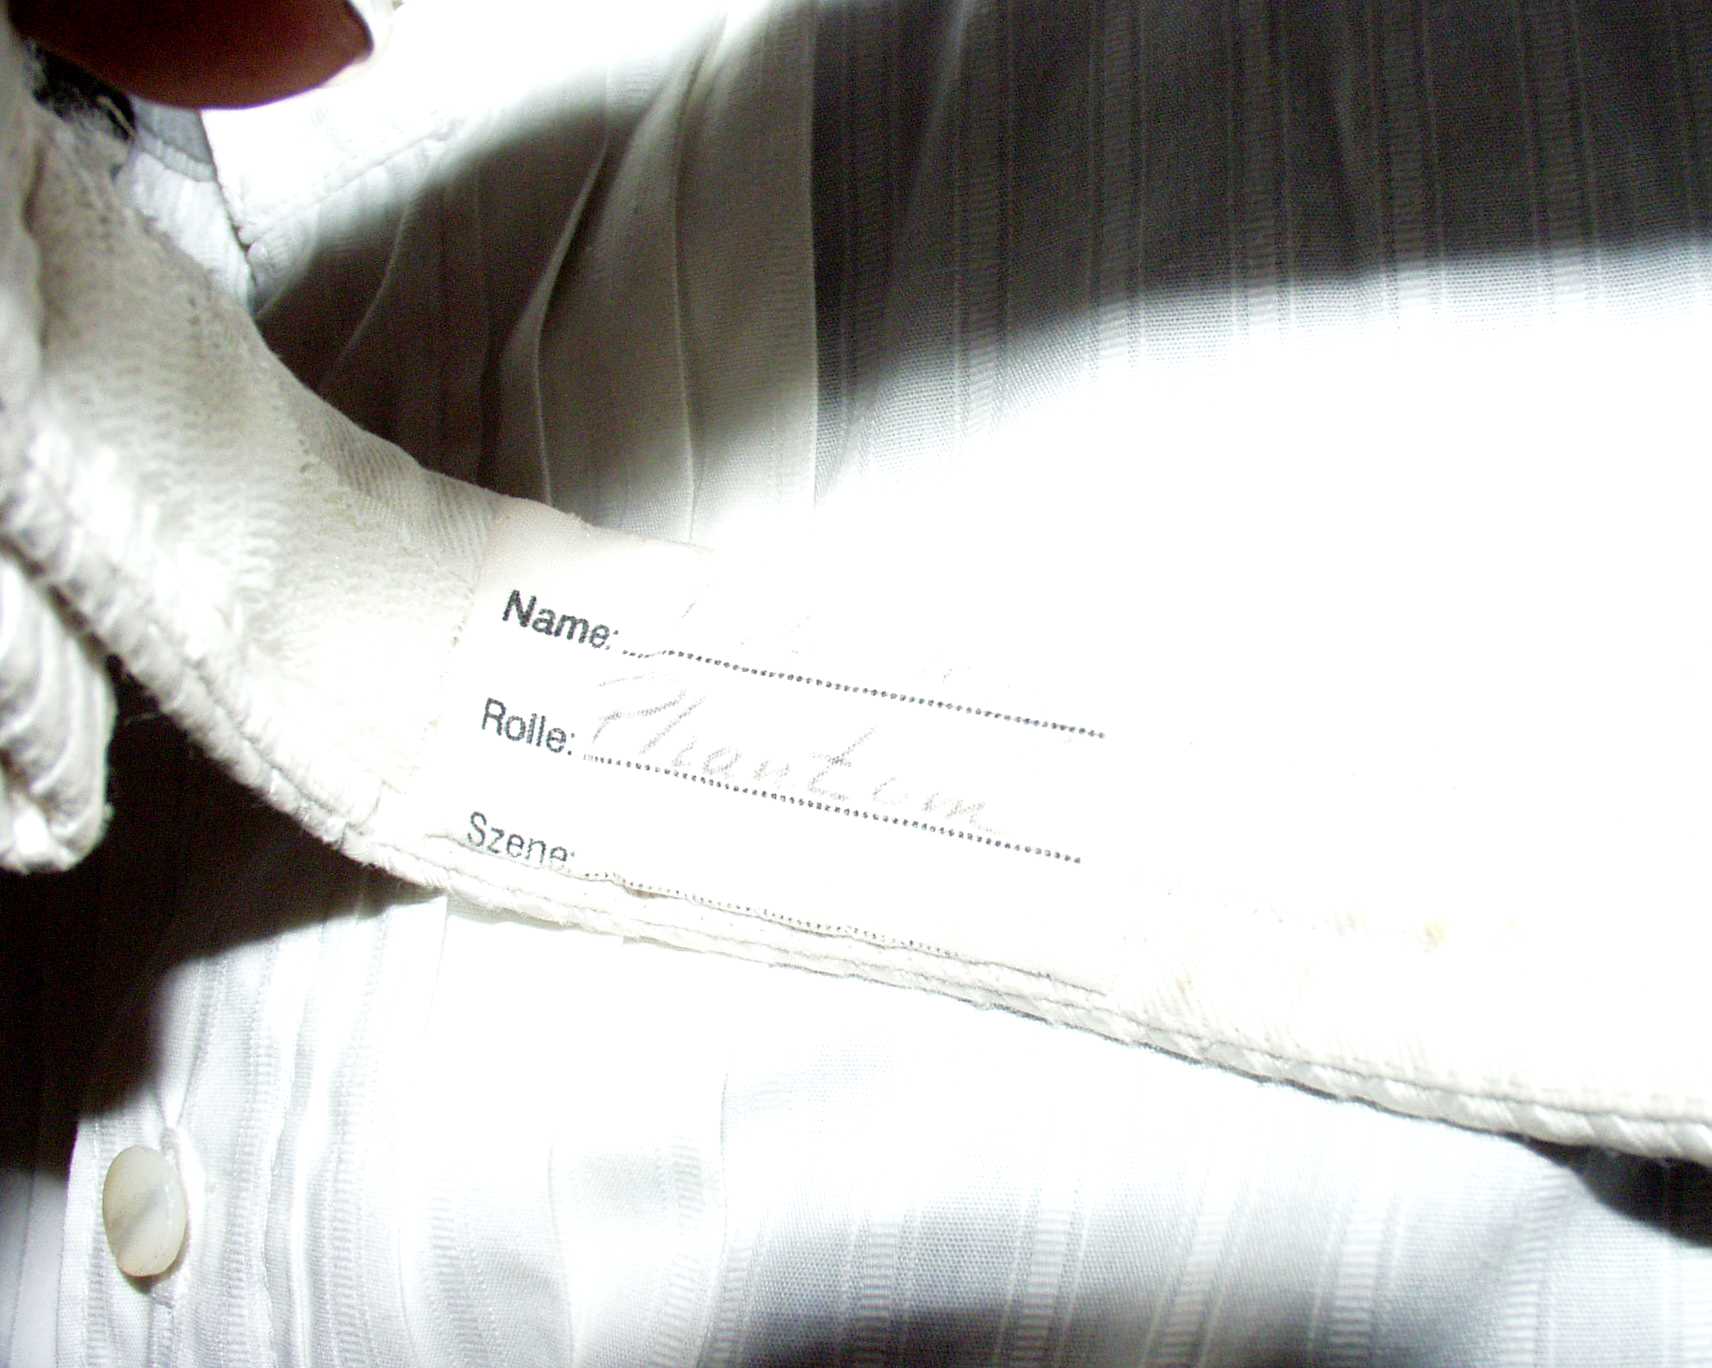
This multi-part costume, though obviously ‚belonging‘ to each other, was combined from several different clothing items that were taken from different actors of the play – that’s at least what the tags inside the different items tell me, which name different actors as original wearers of the costume.
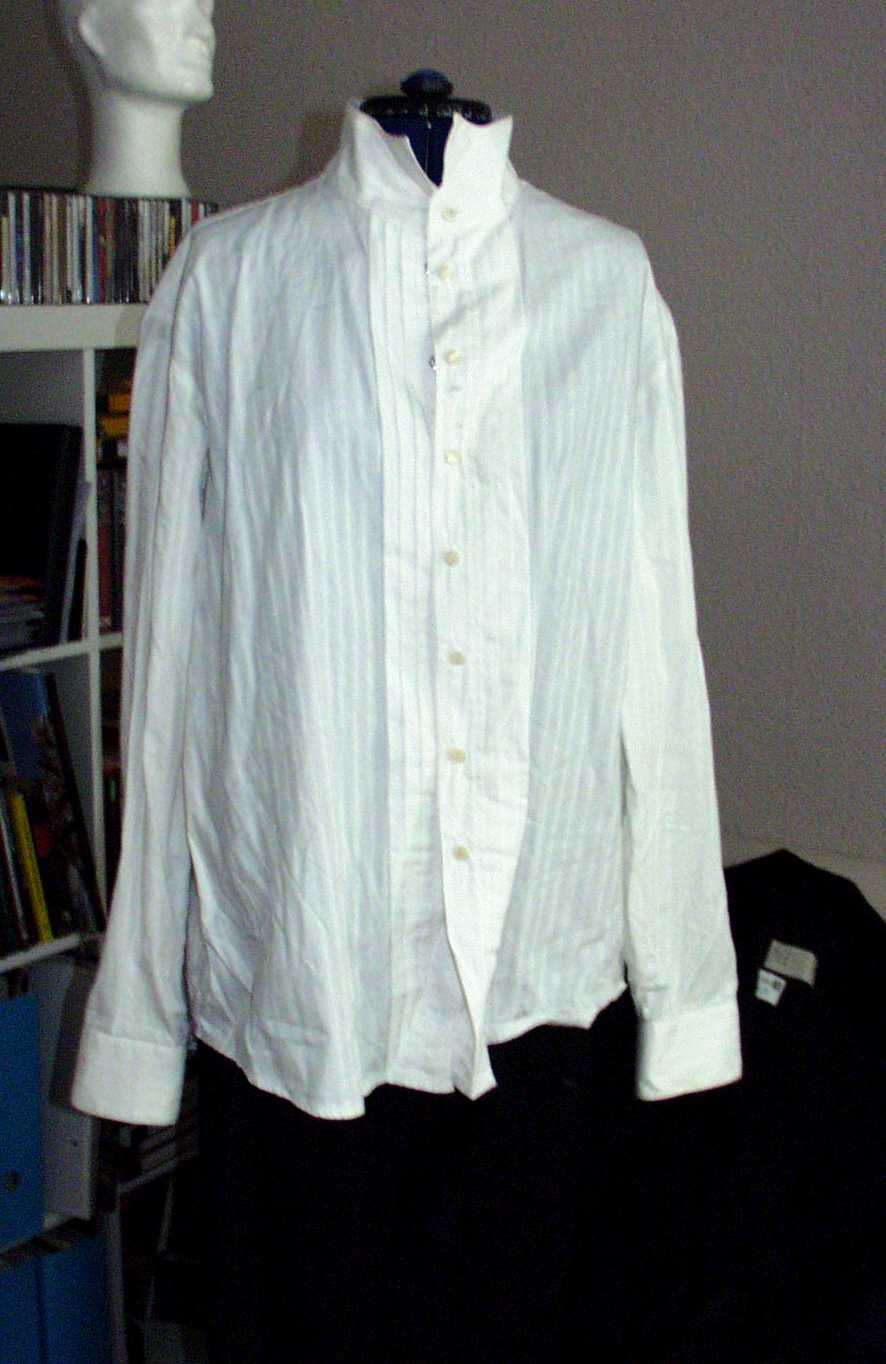
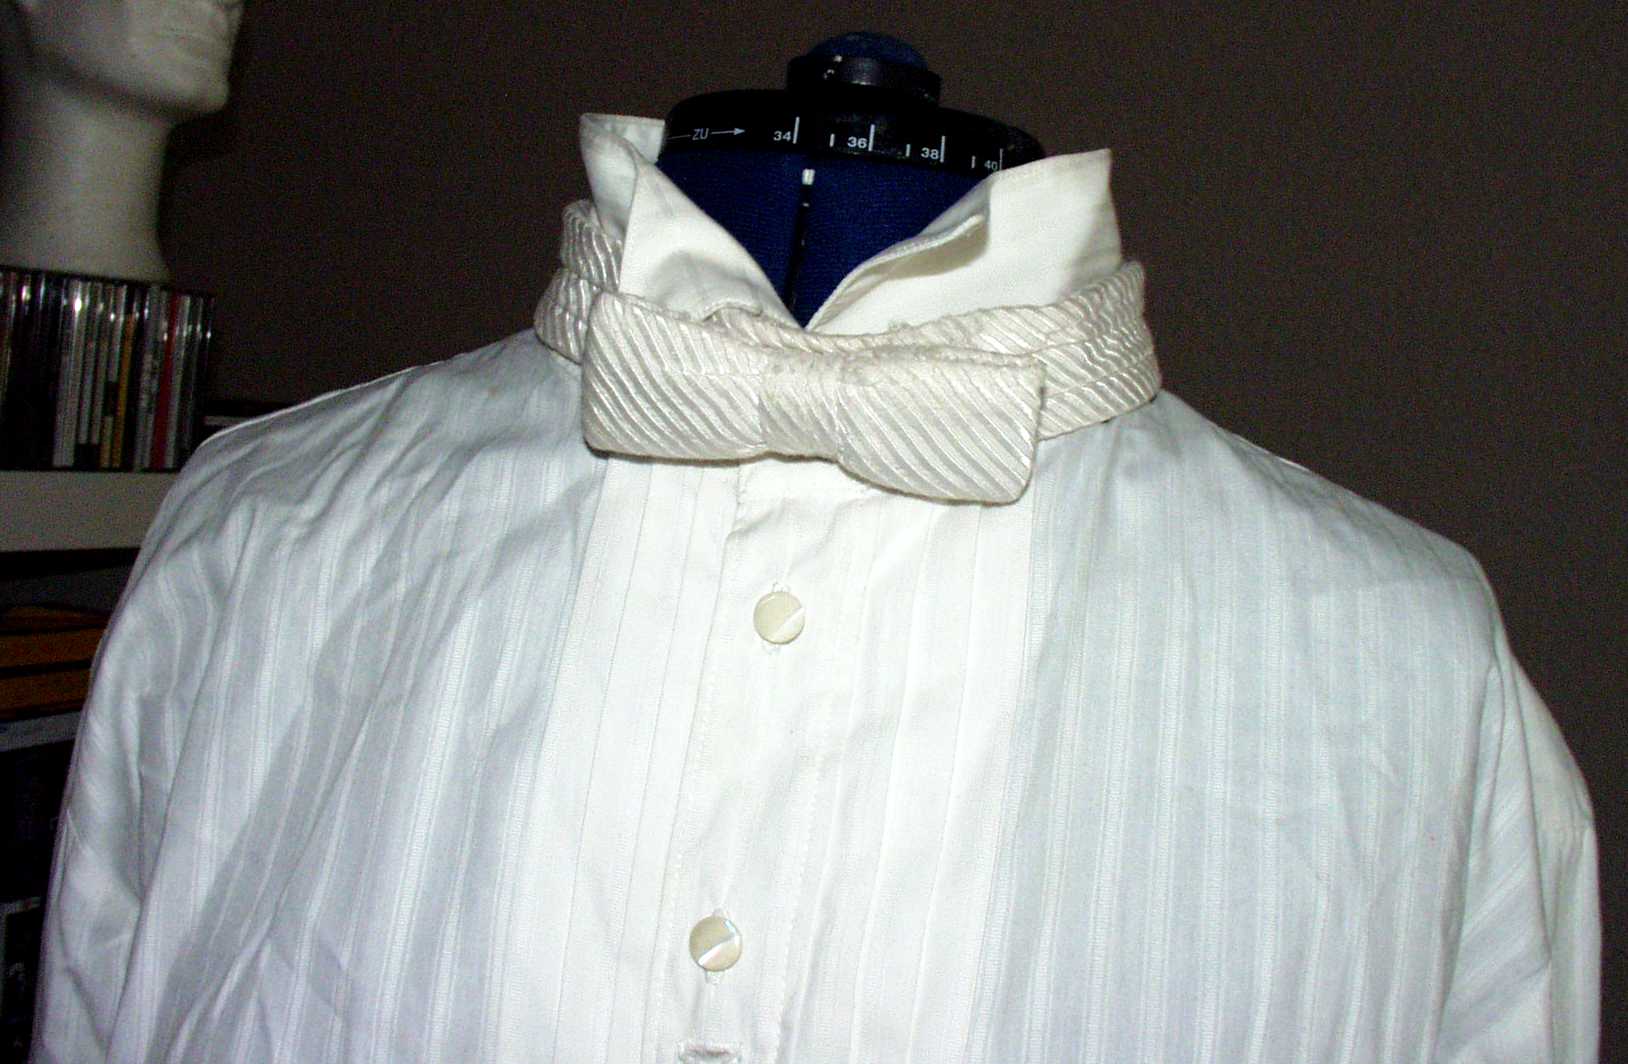
I dressed the mannequin as good as I could, though I resisted from stuffing the shirt into the trousers; this is why it might look weird.
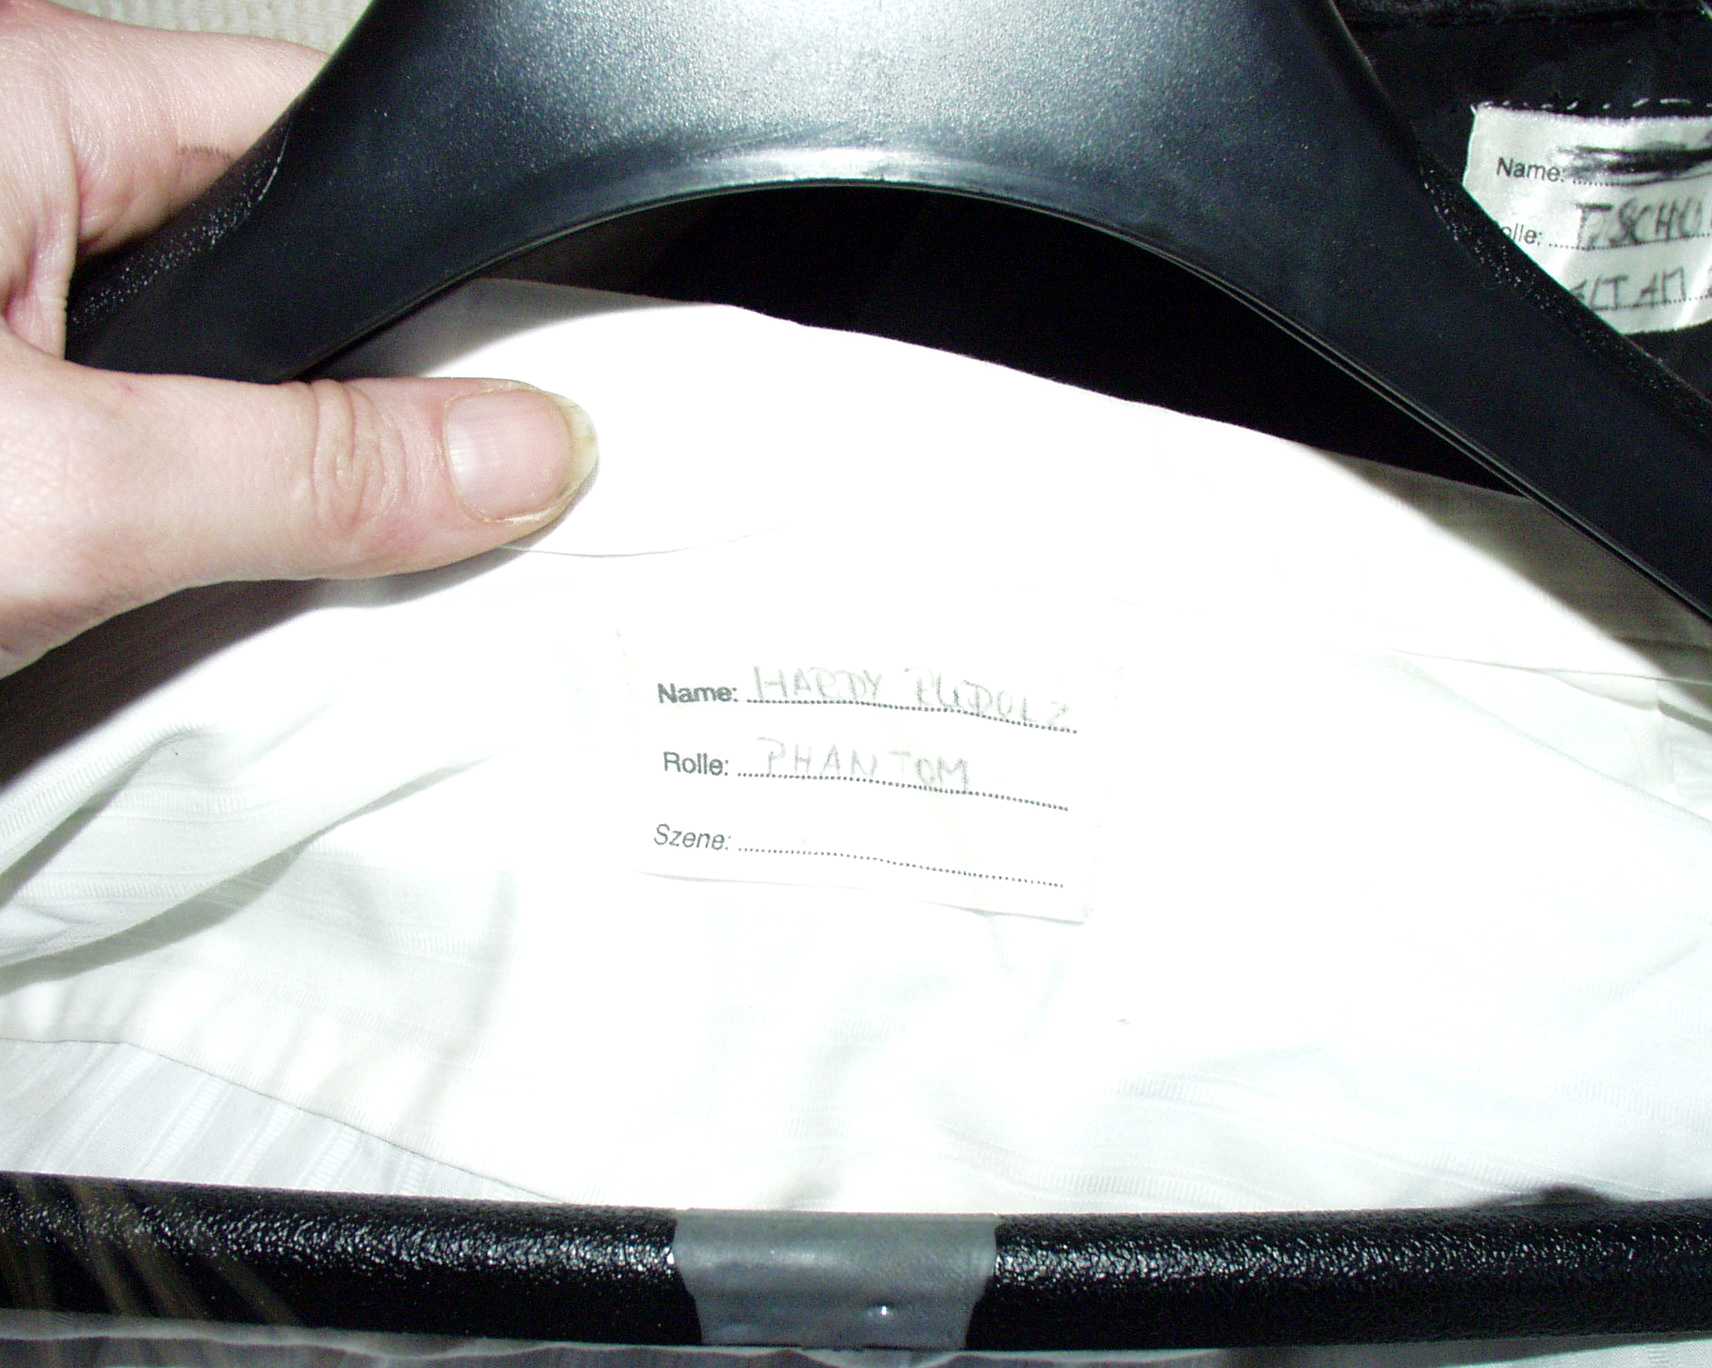 Tag in the shirt |
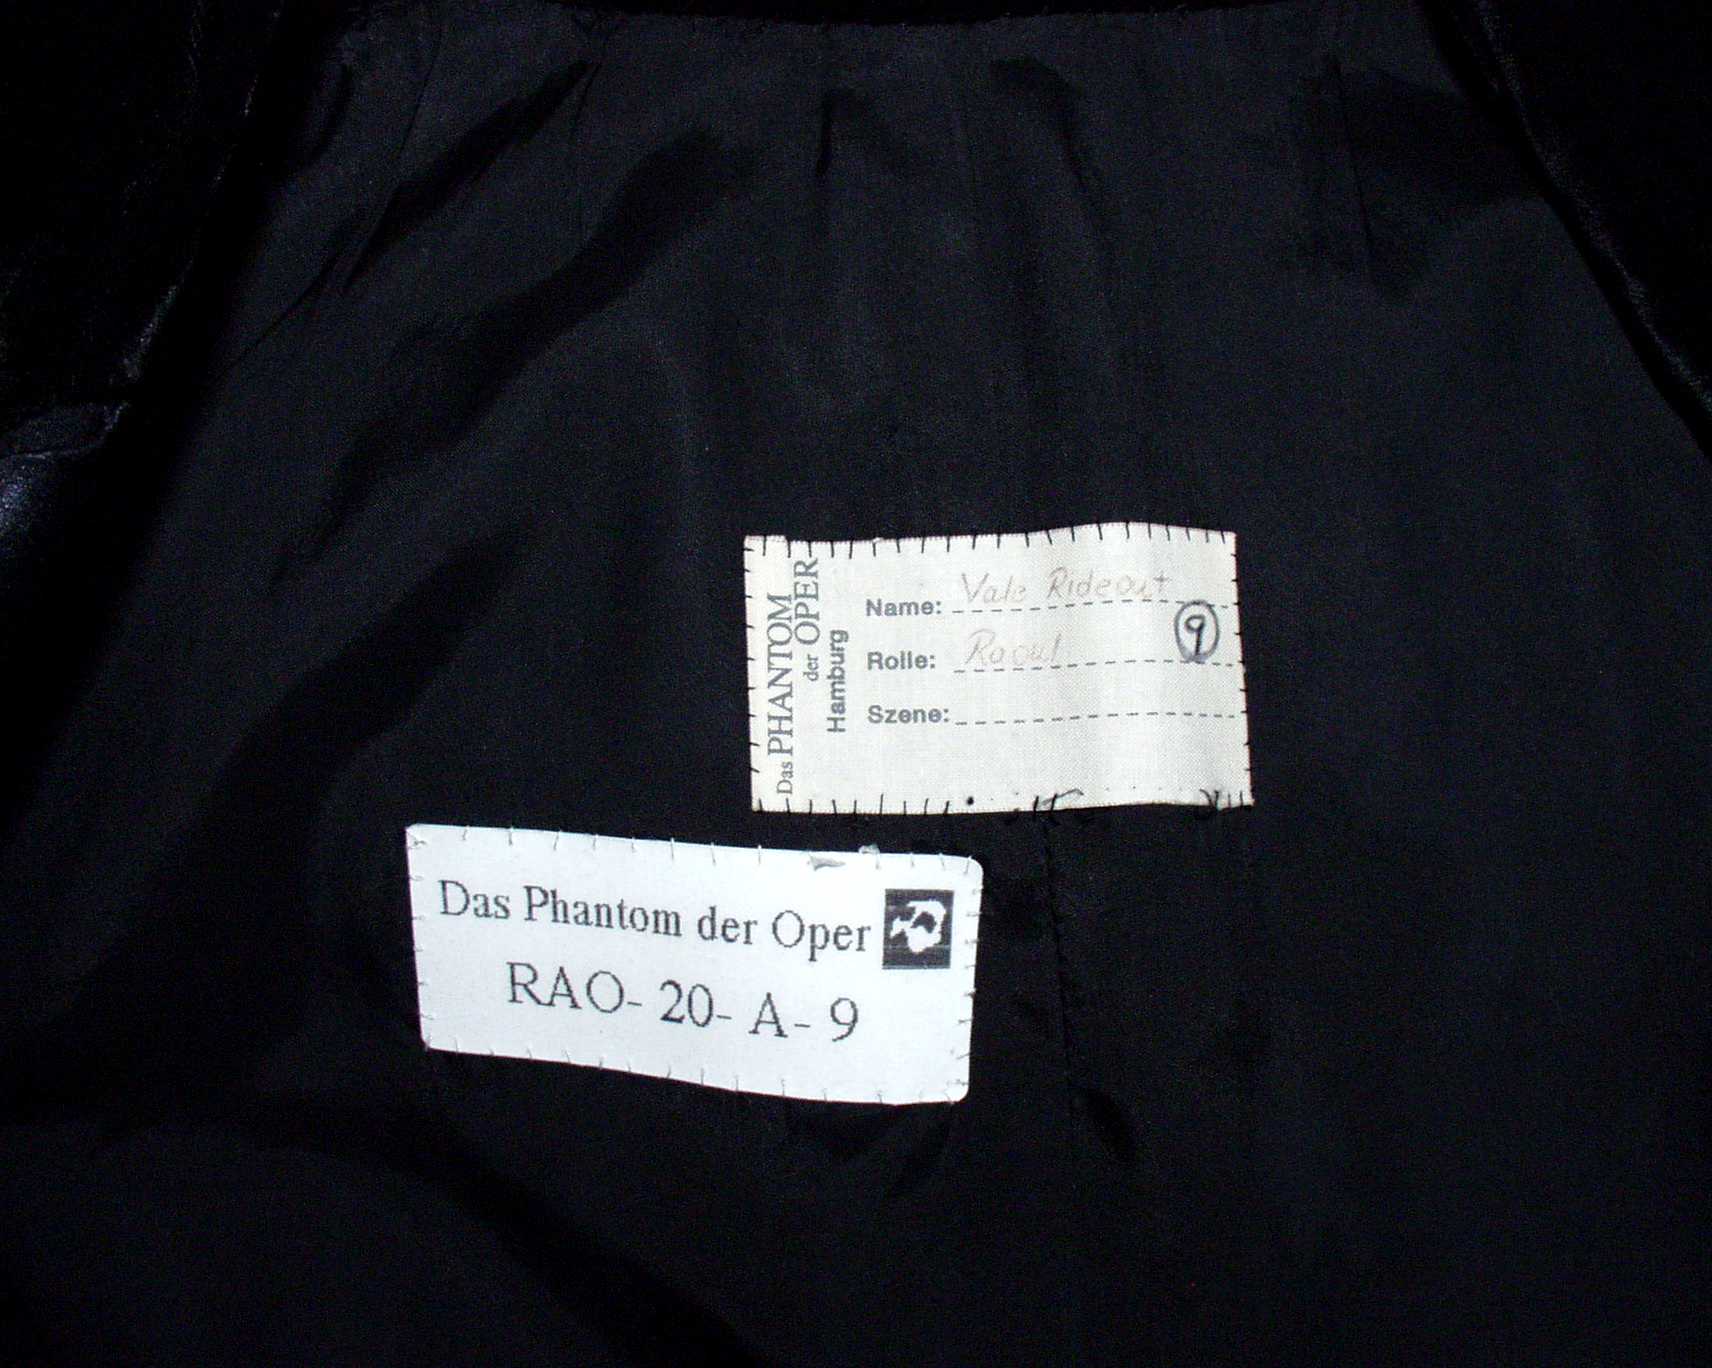
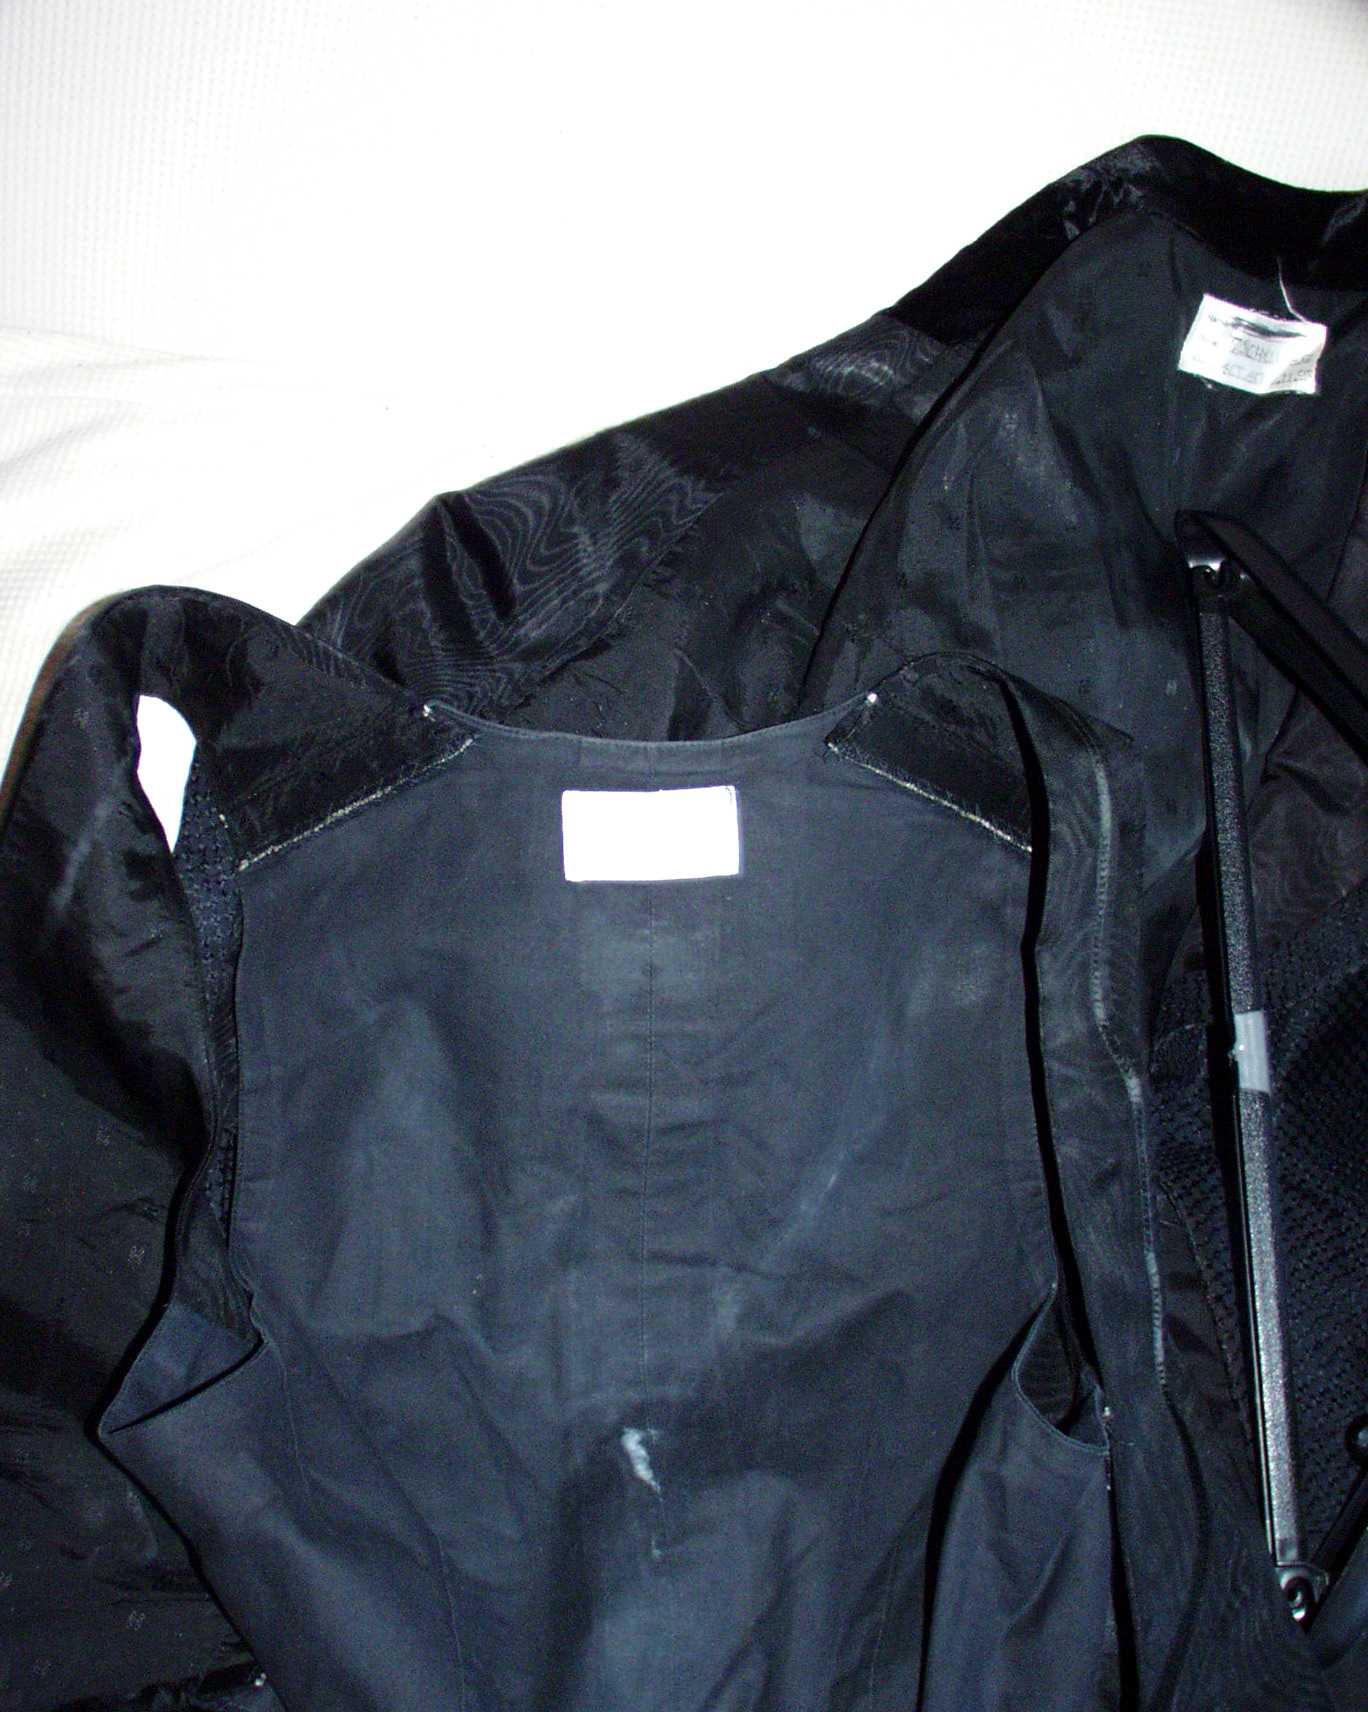
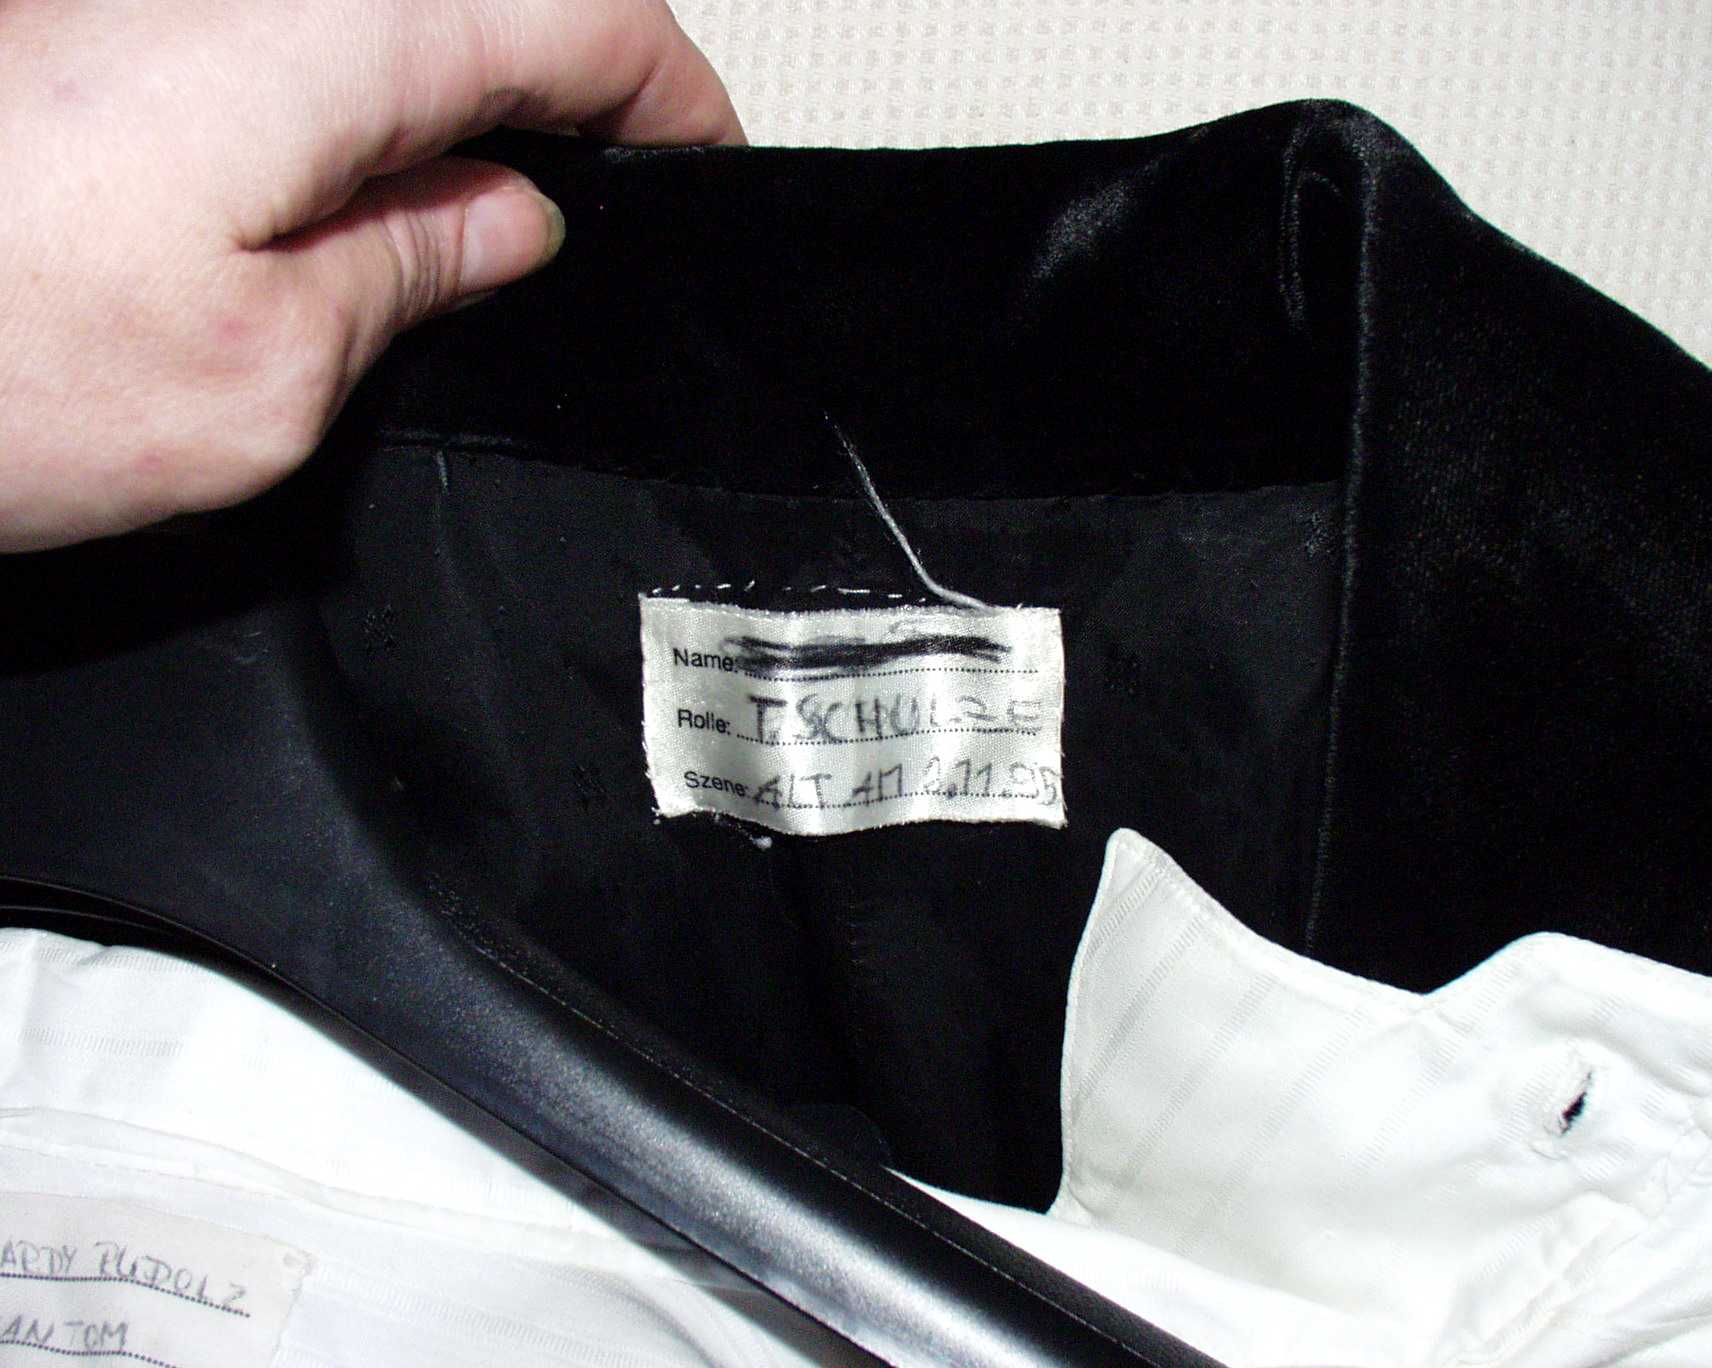 Tag in the jacket |
 Tag in the vest |
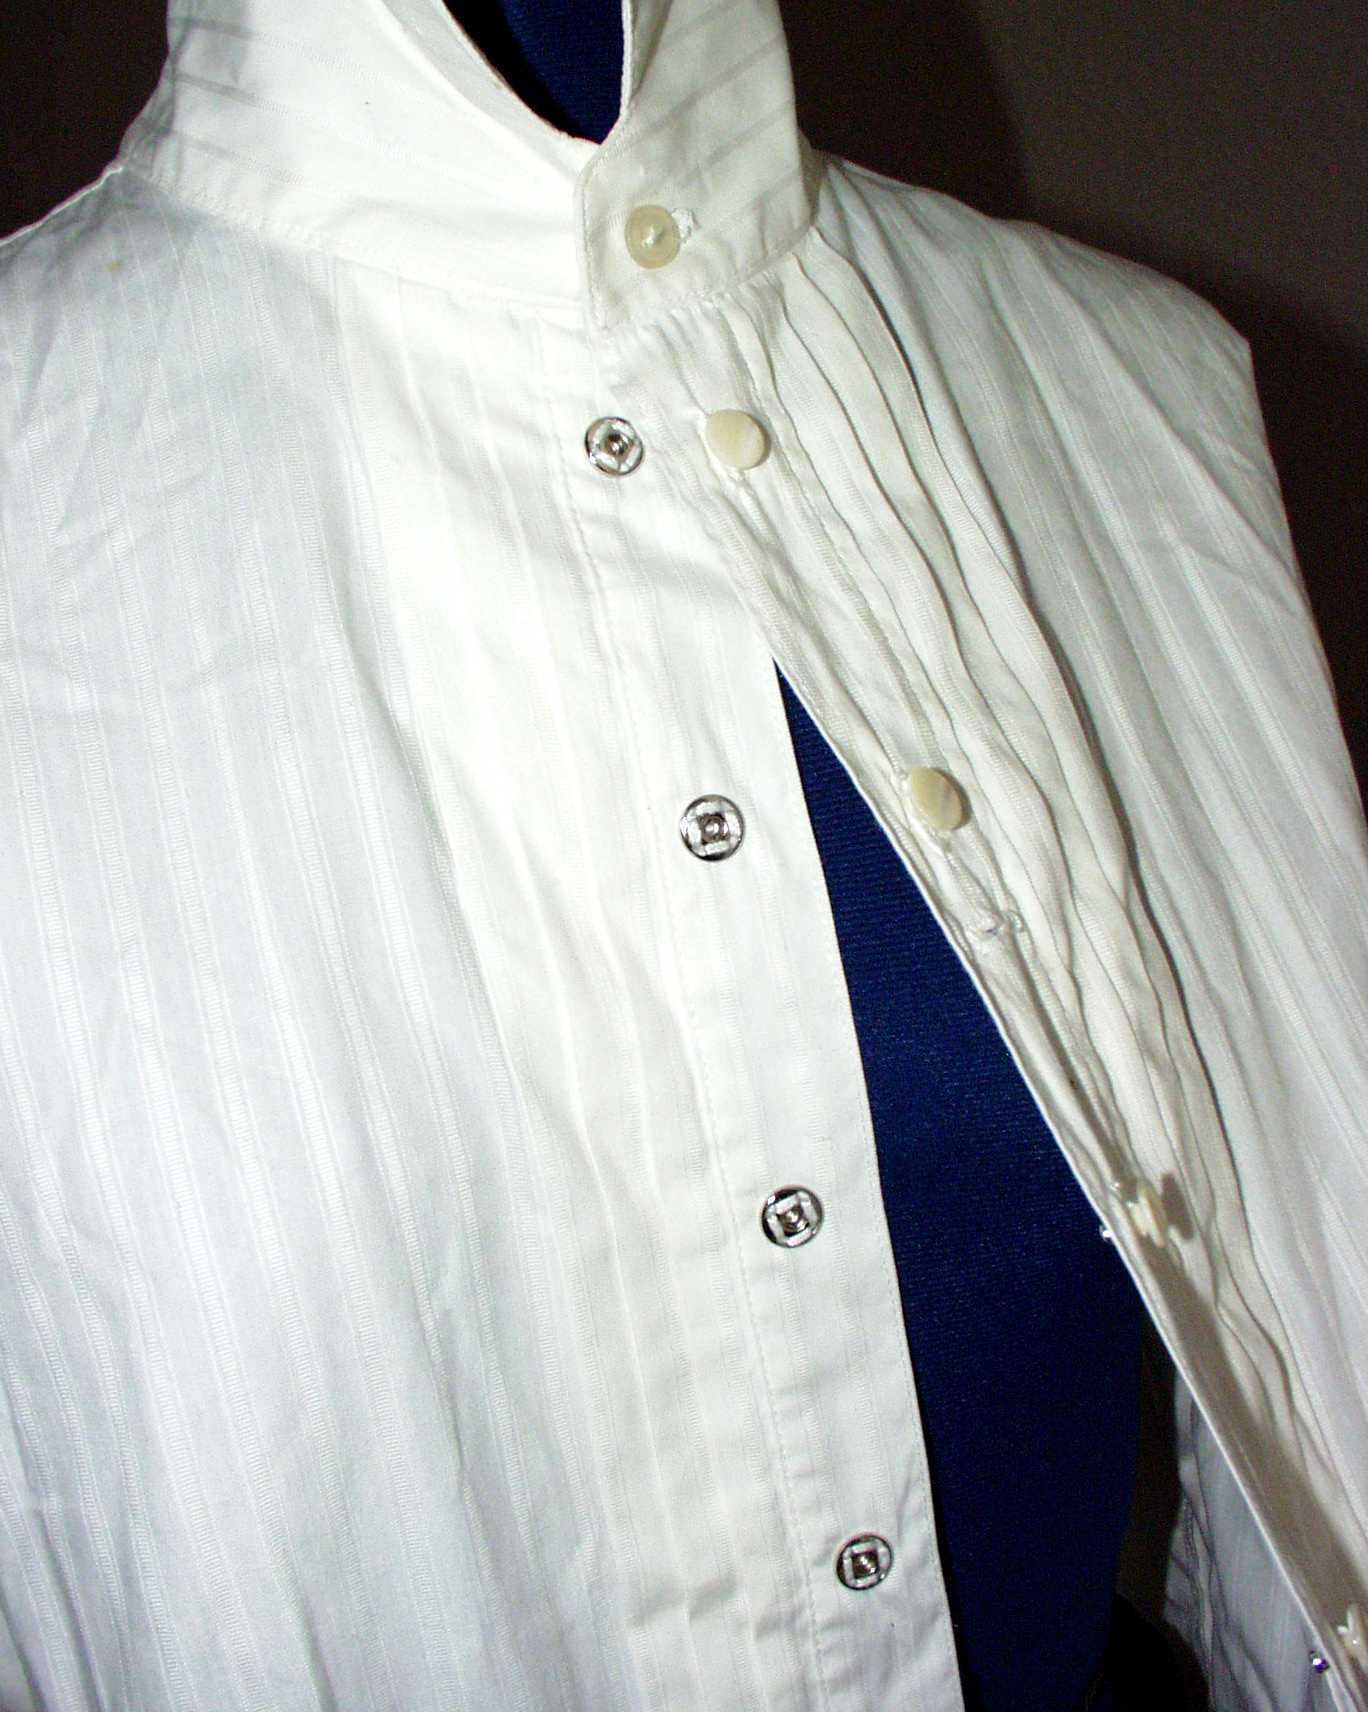 Shirt, showing the pressing studs with which it is closed |
 |
 Tag in the bow |
 |
 |
 Vest made of bengaline |
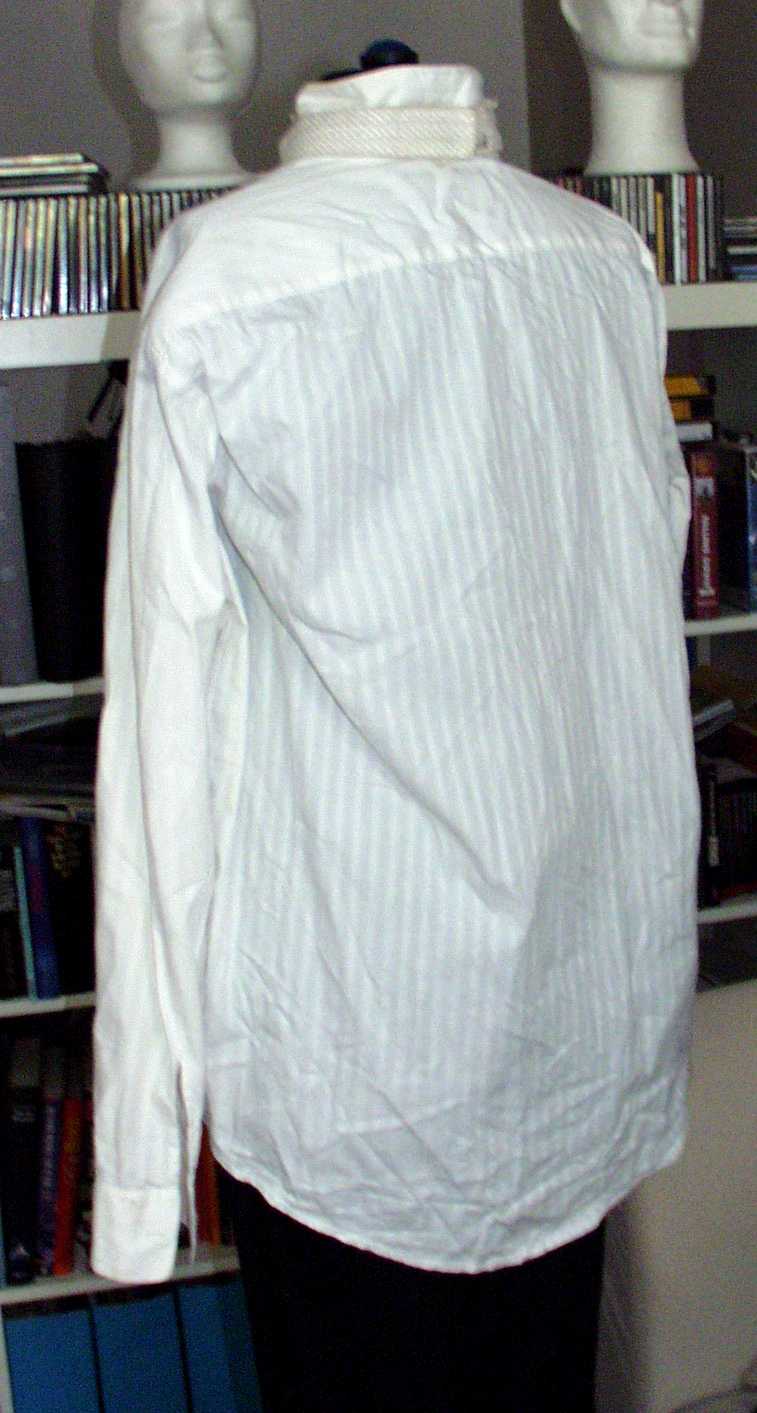
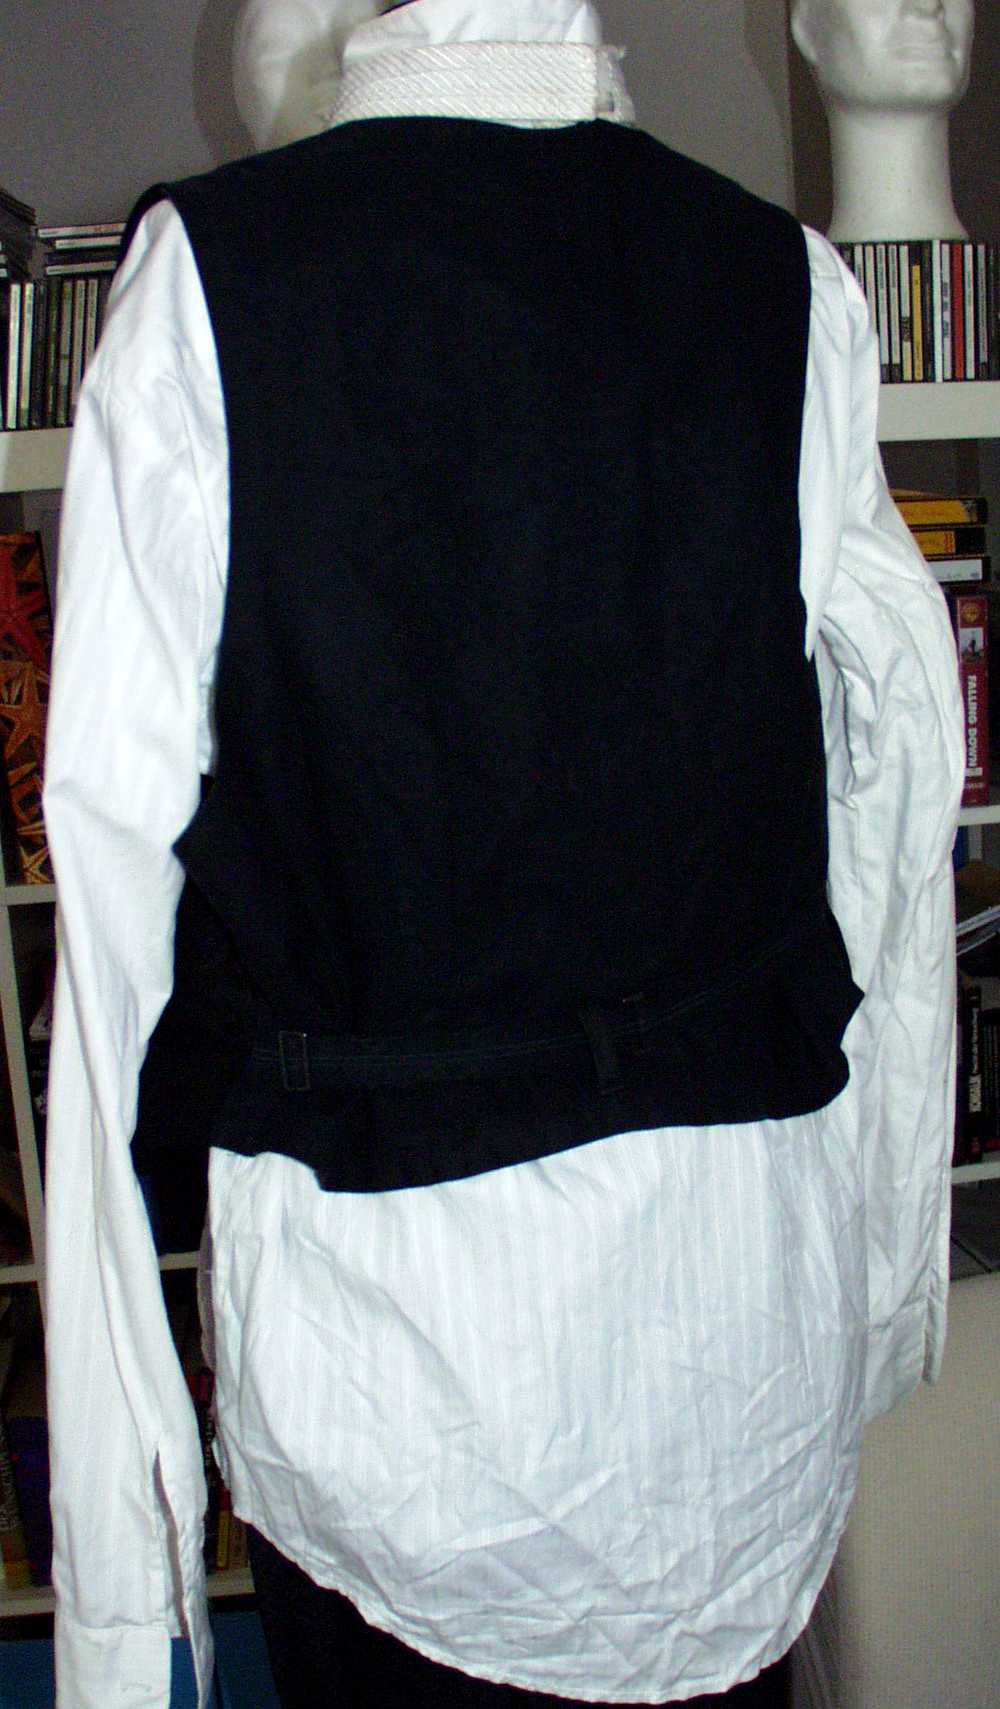 Shirt with vest, back |
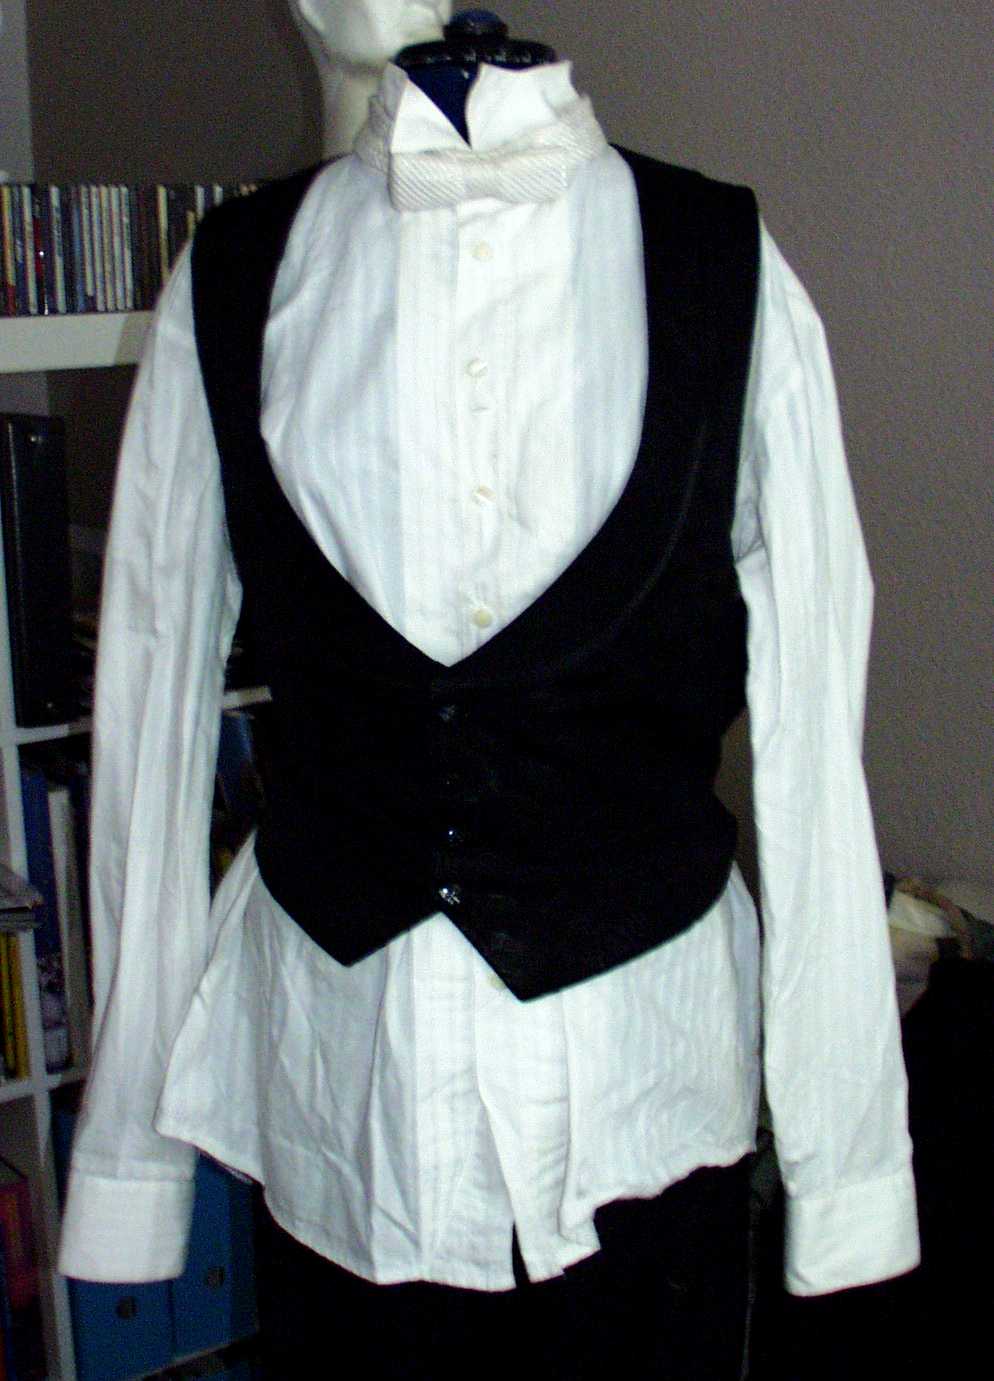 Shirt with vest, front |
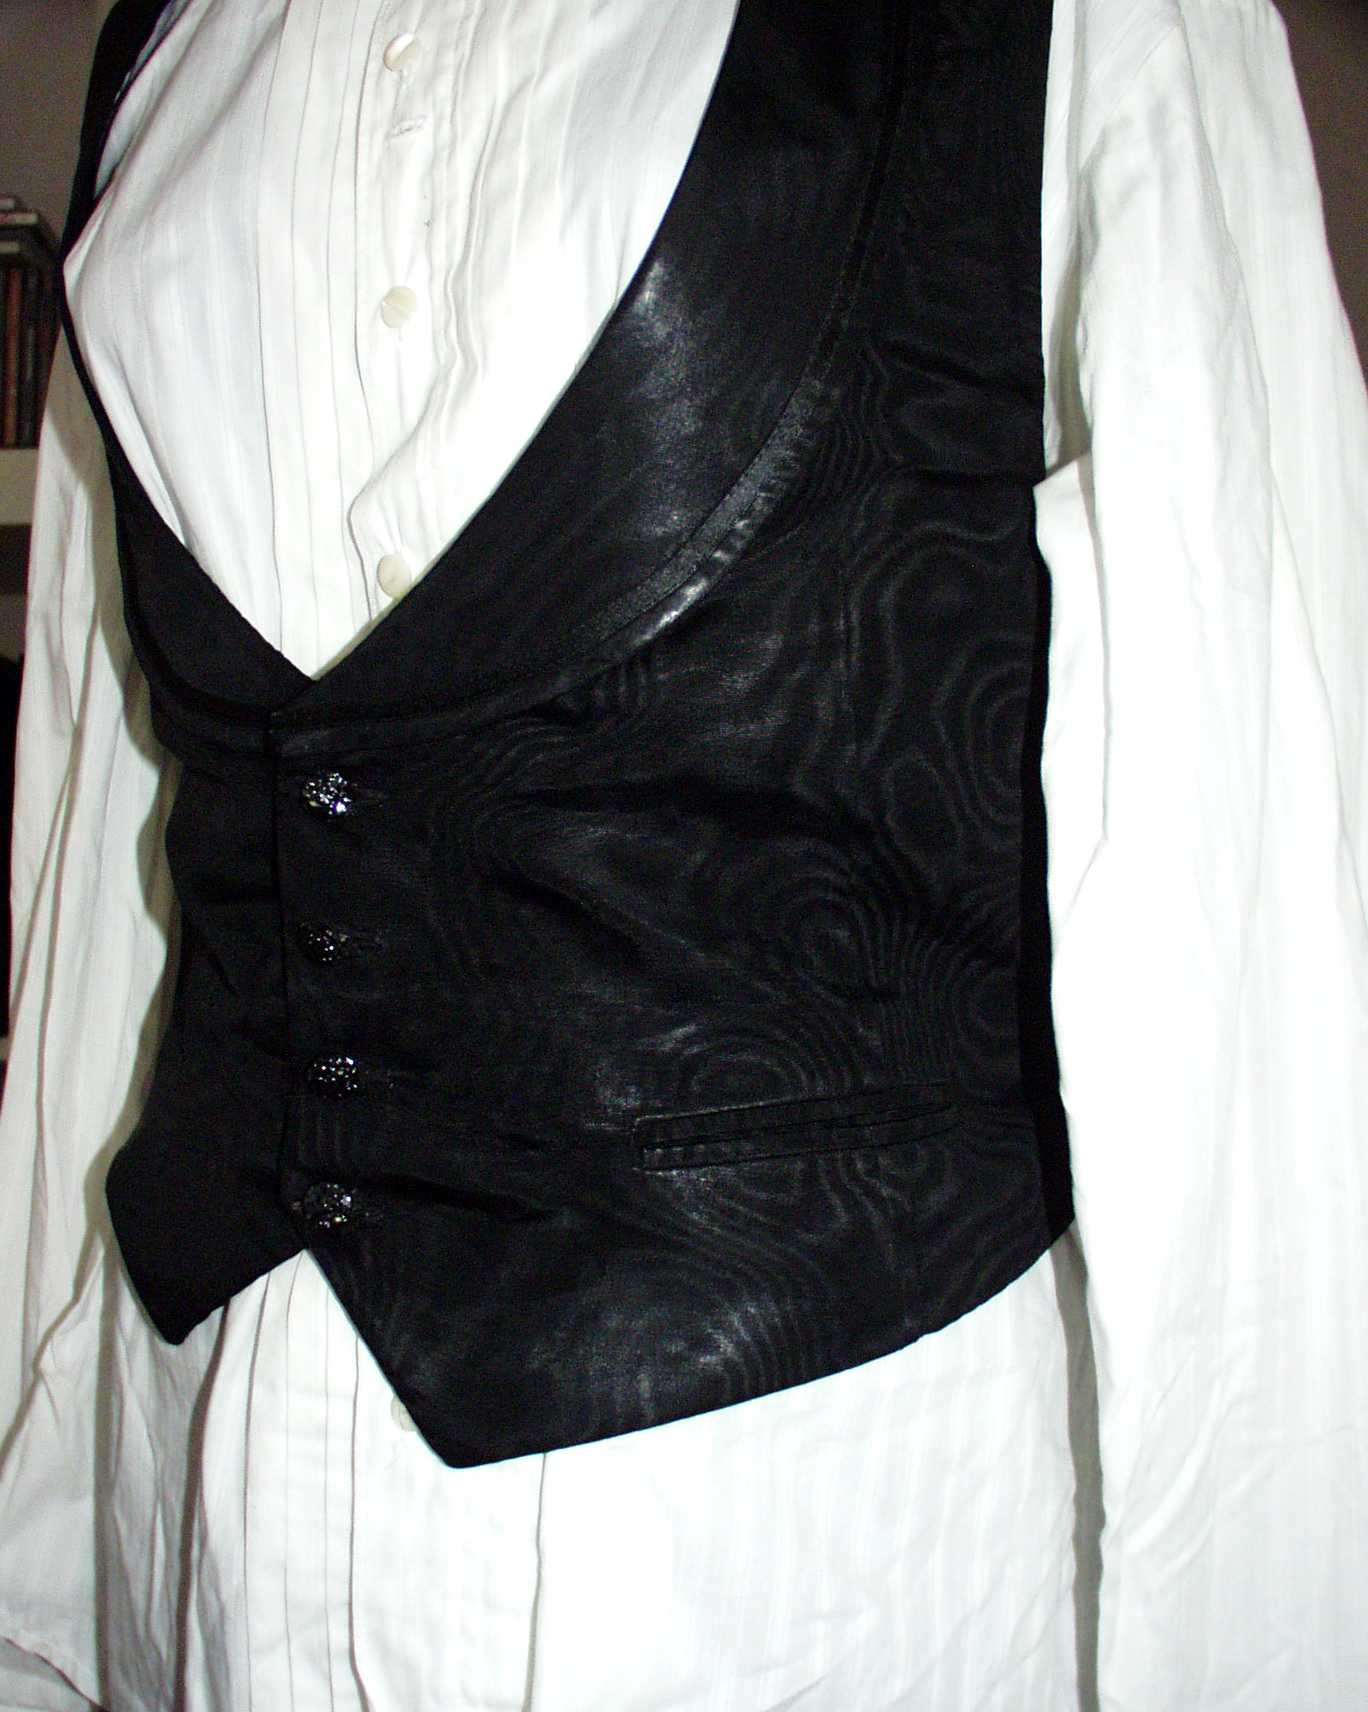 Shirt with vest, closeup |
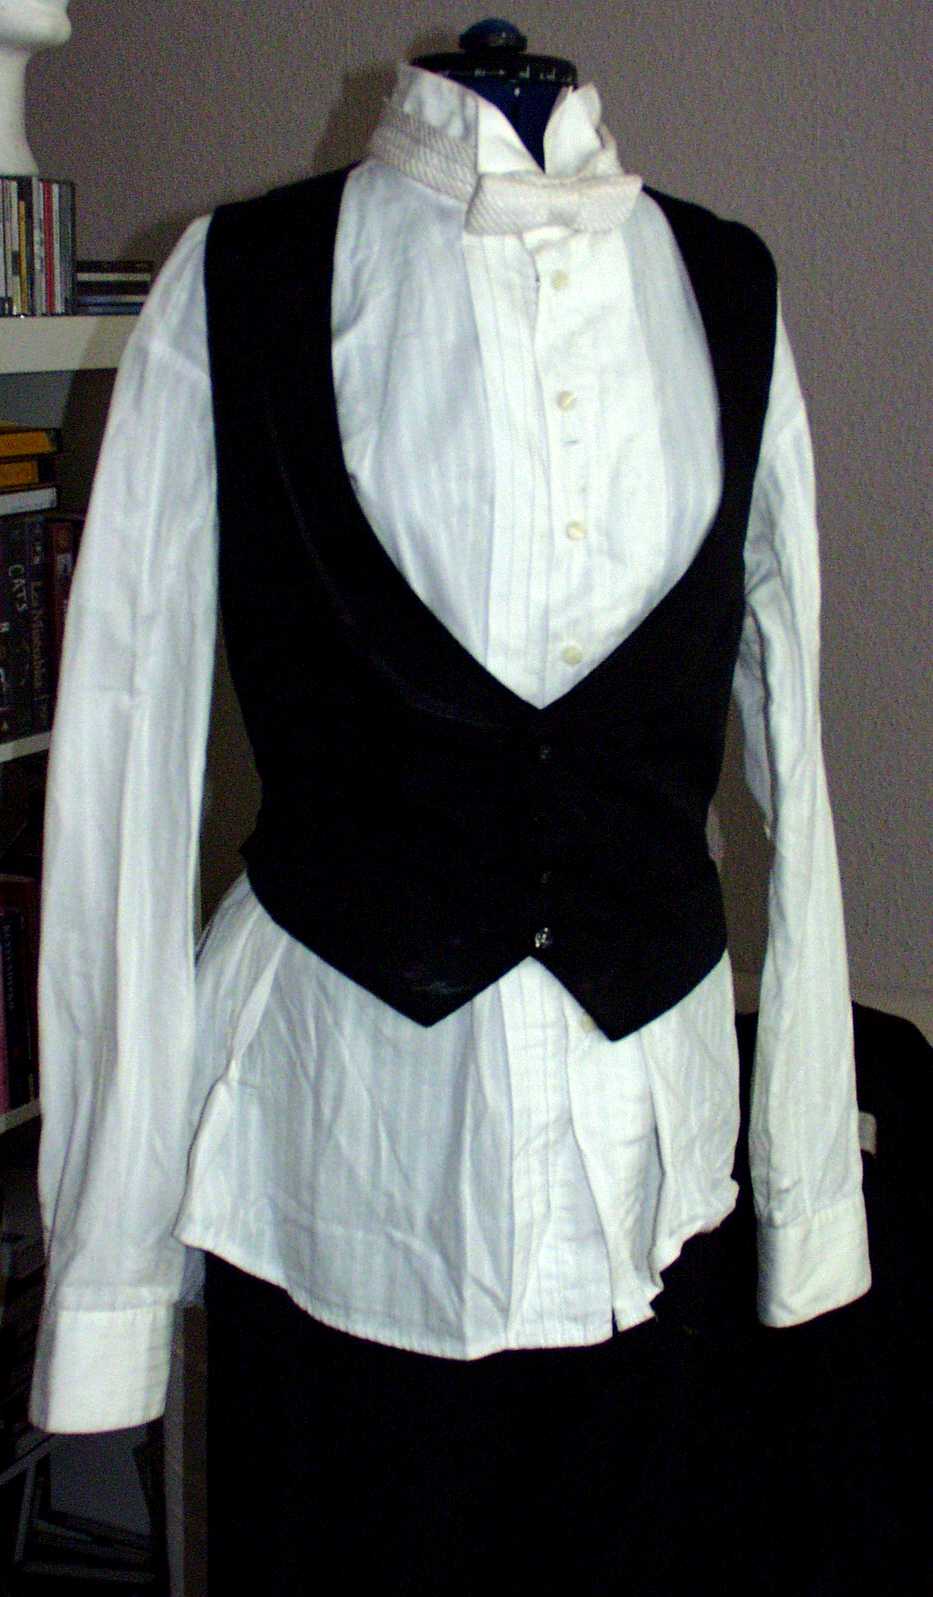 Shirt with vest, front |
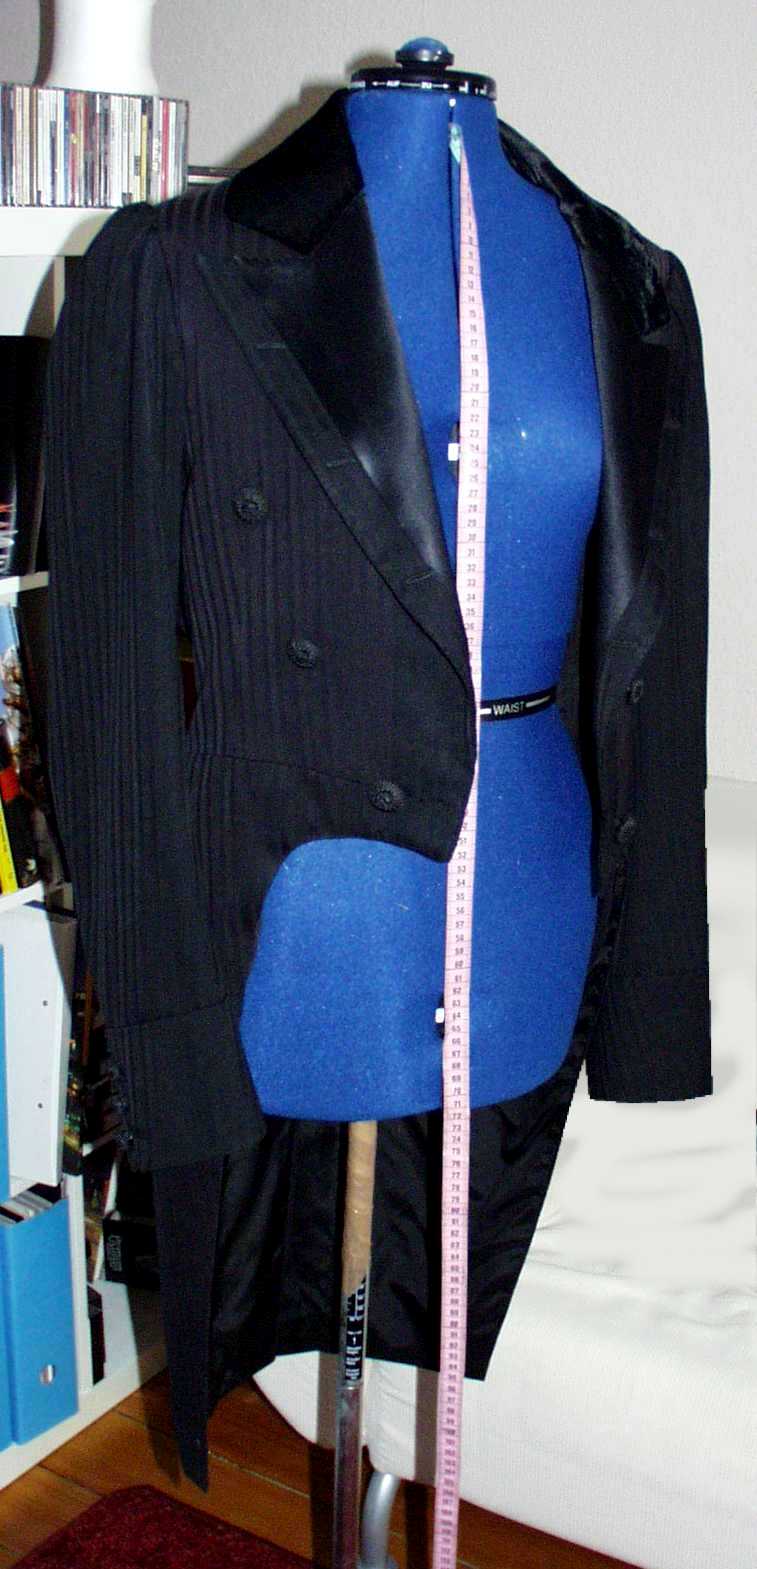
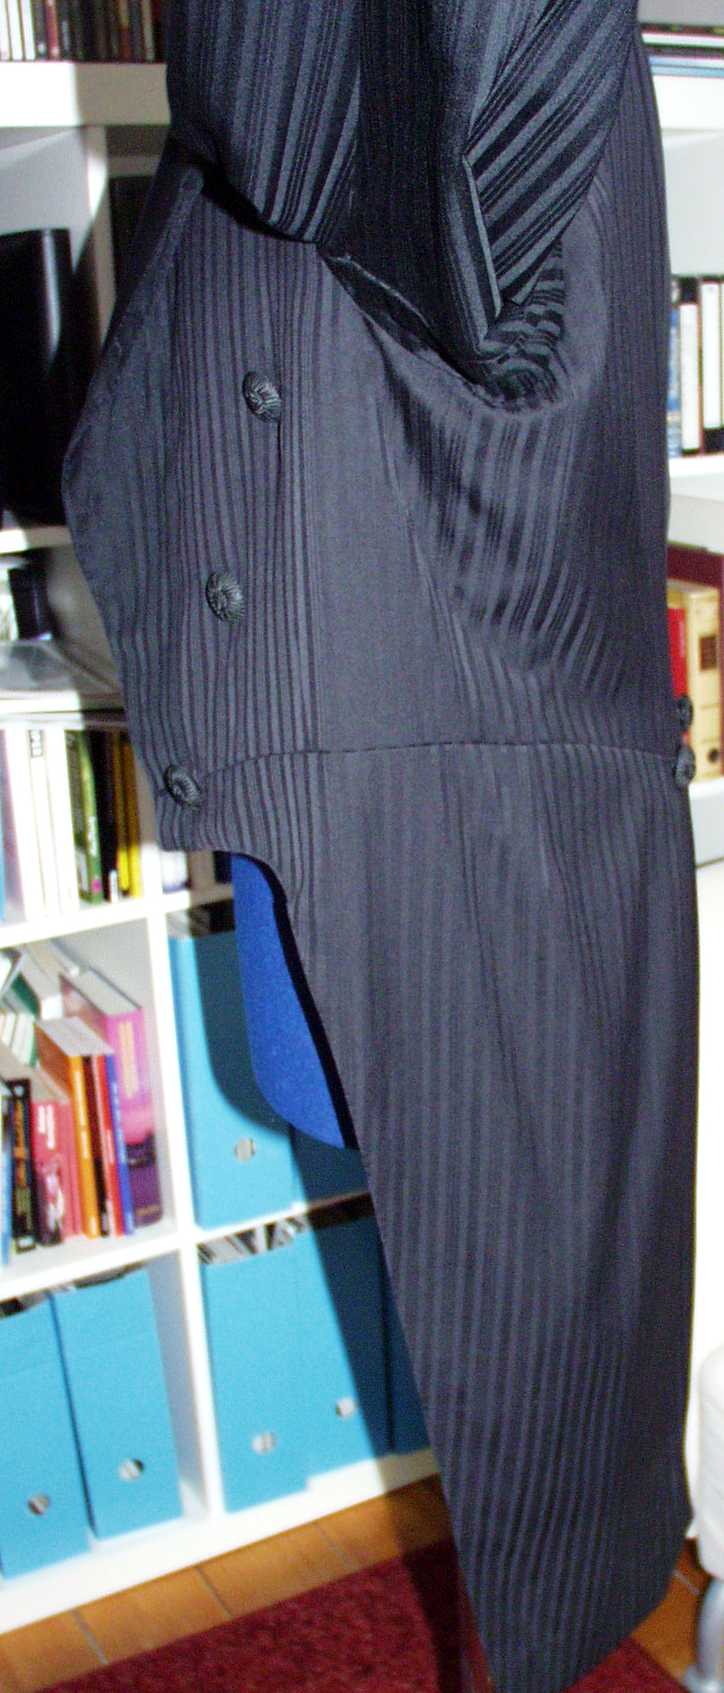
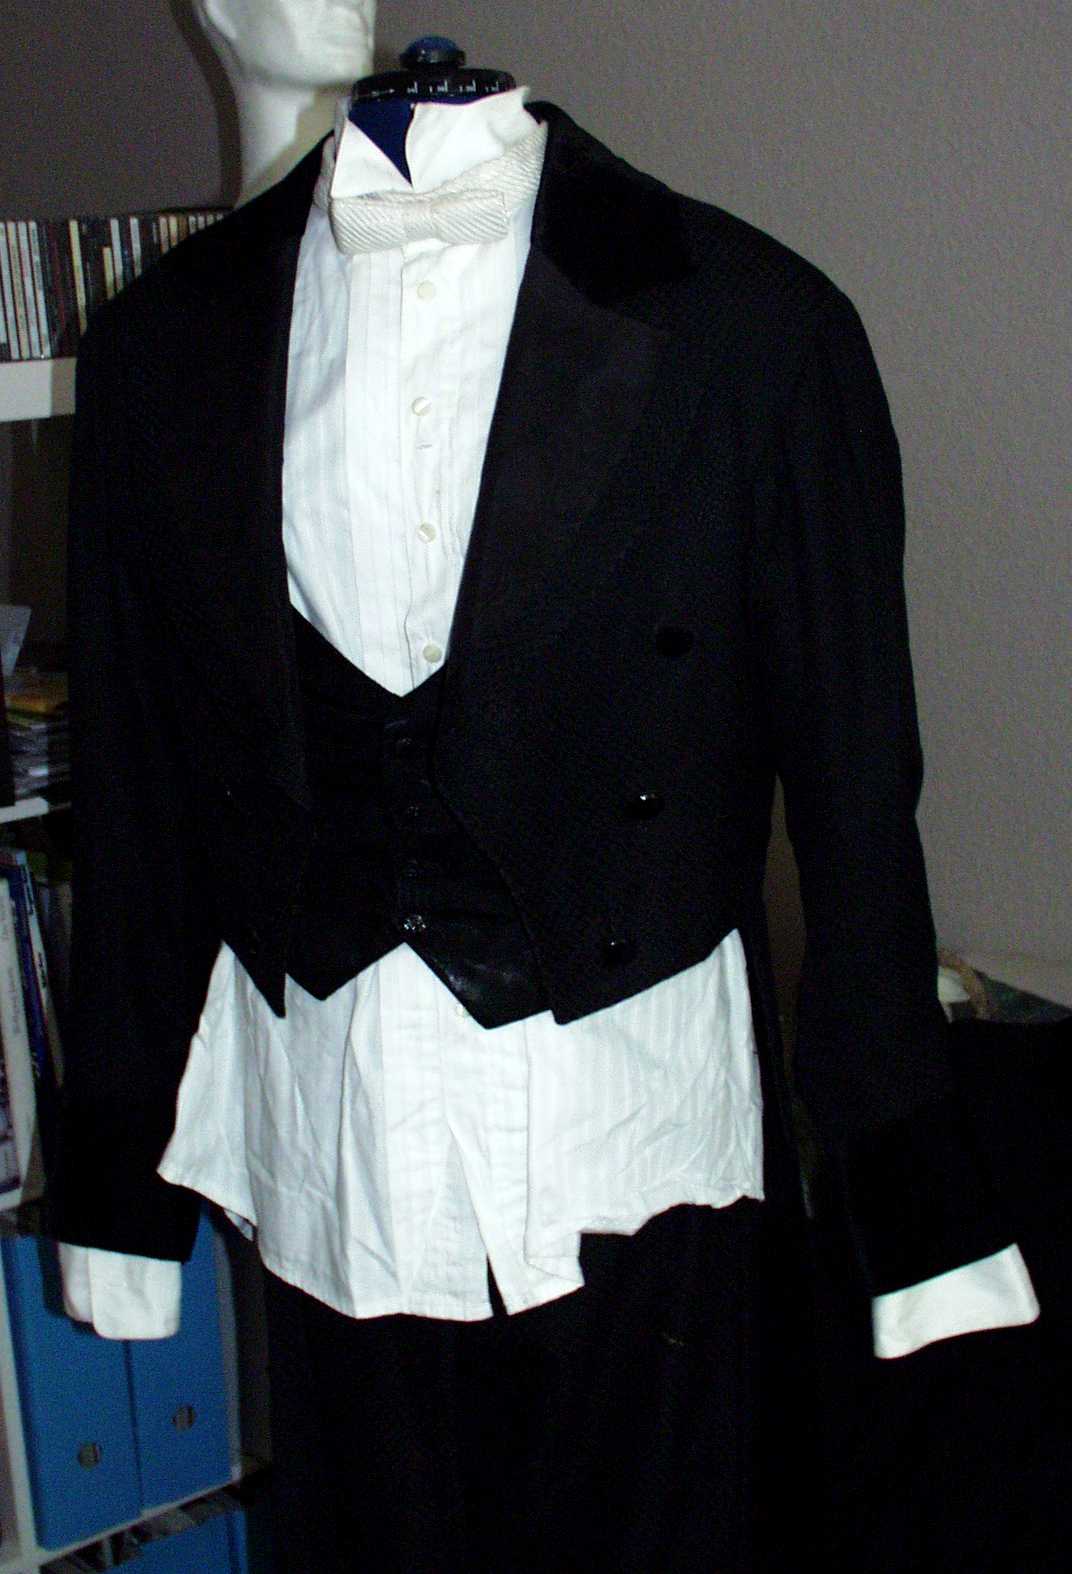 Shirt, vest, jacket, trousers. Shirt is, as mentioned above, not tucked into the trousers. |
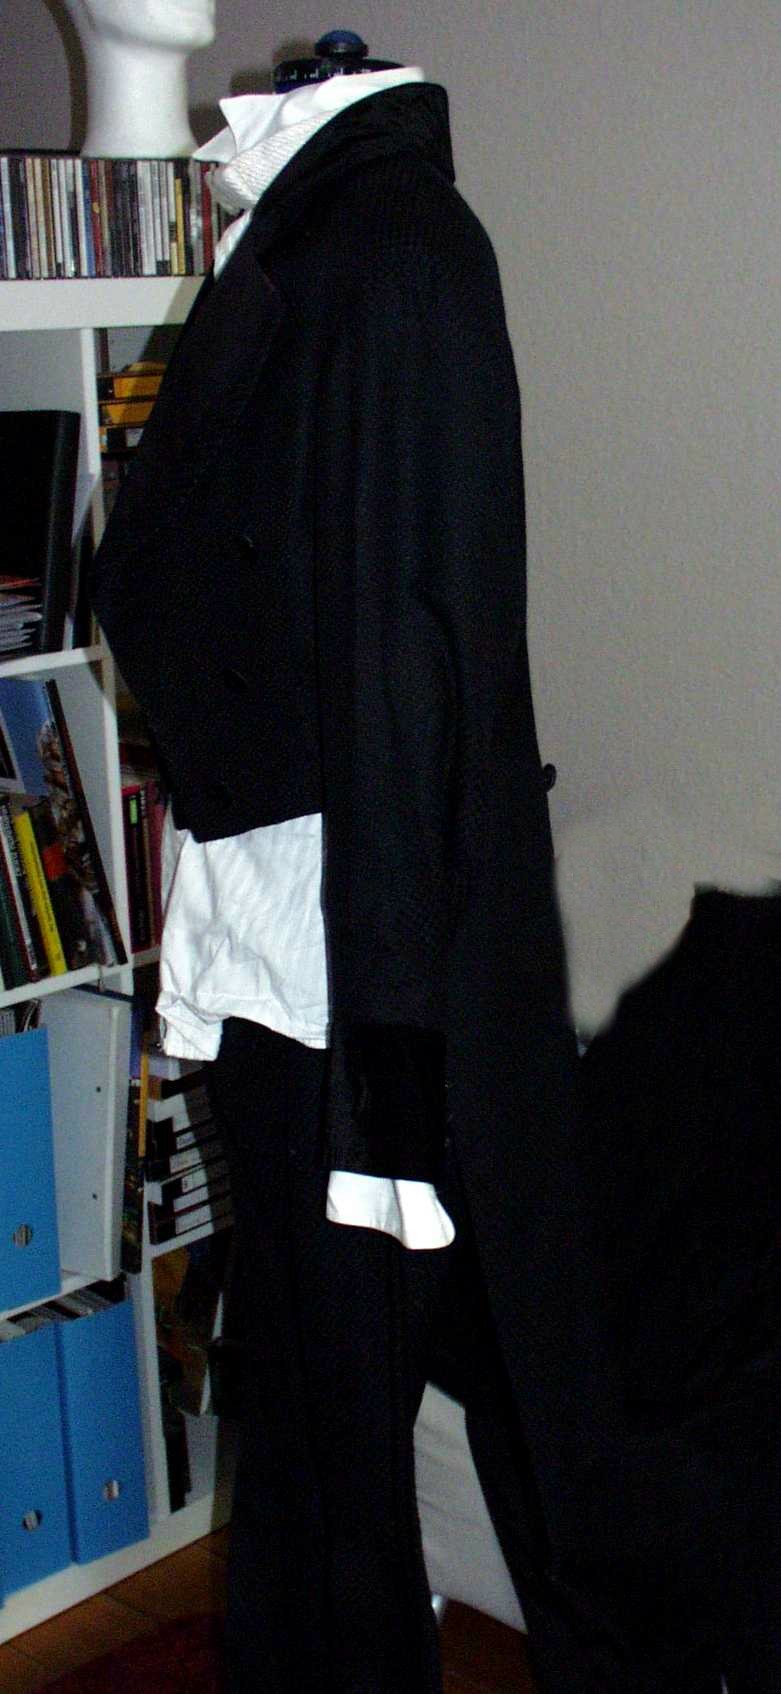 Shirt, vest, jacket, trousers. Shirt is, as mentioned above, not tucked into the trousers. |
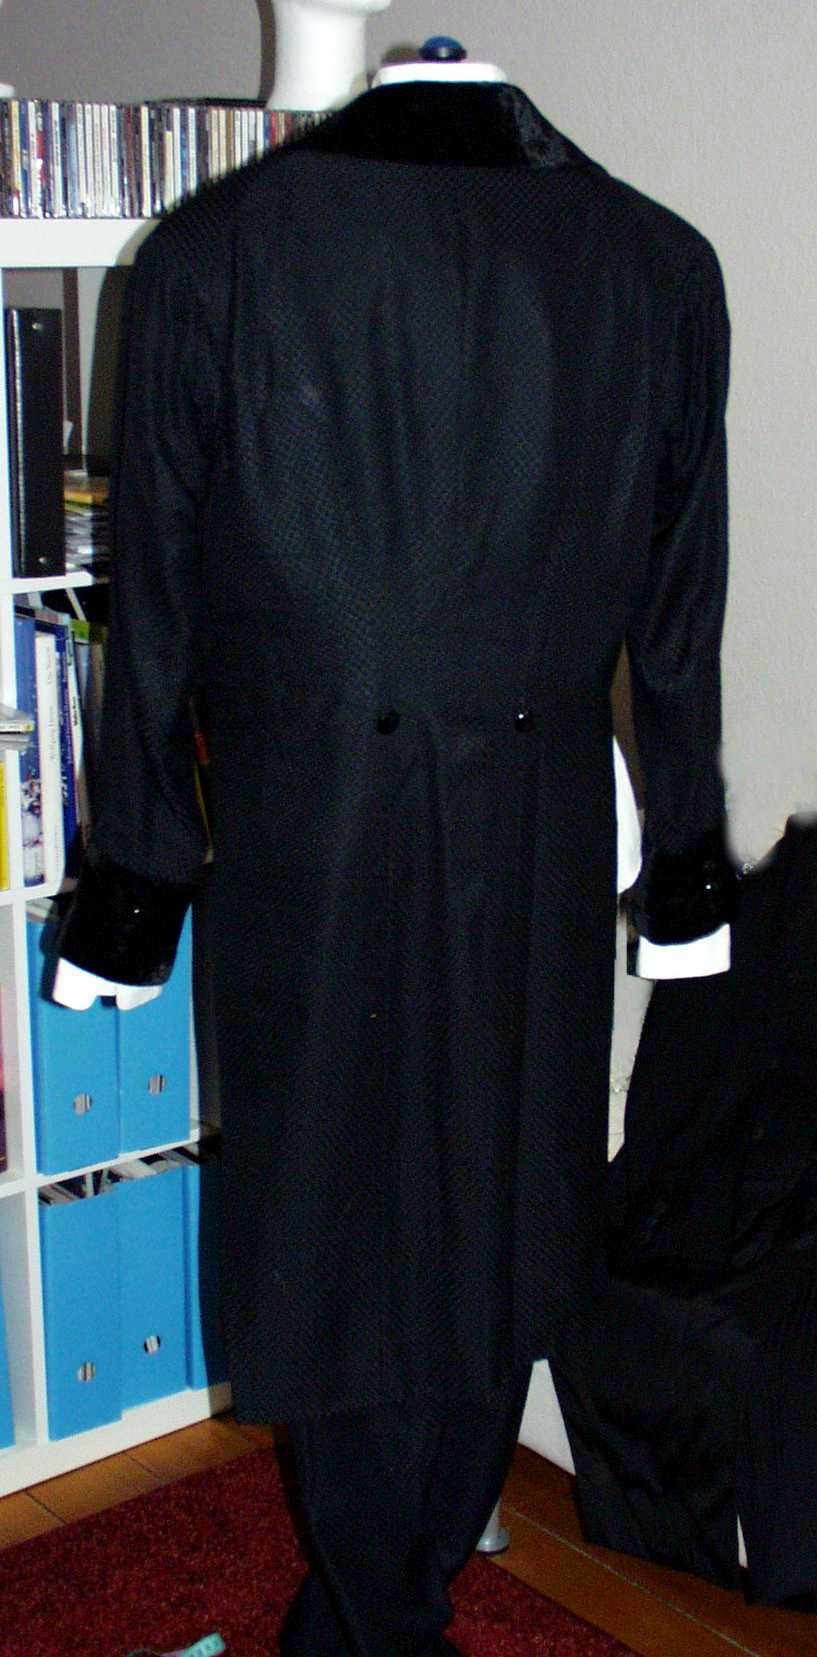 Shirt, vest, jacket, trousers. Shirt is, as mentioned above, not tucked into the trousers. |
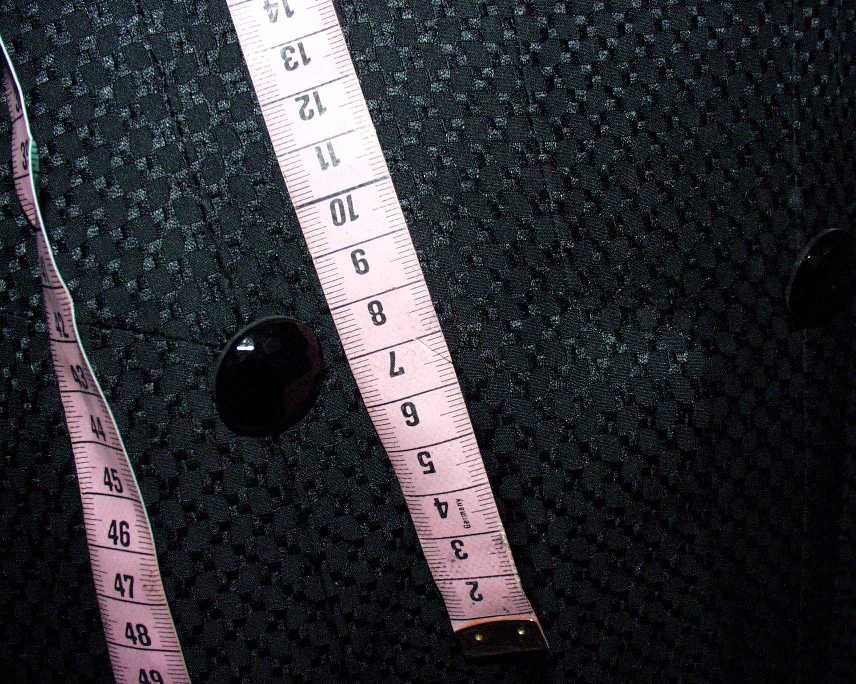
 Jacket fabric closeup |
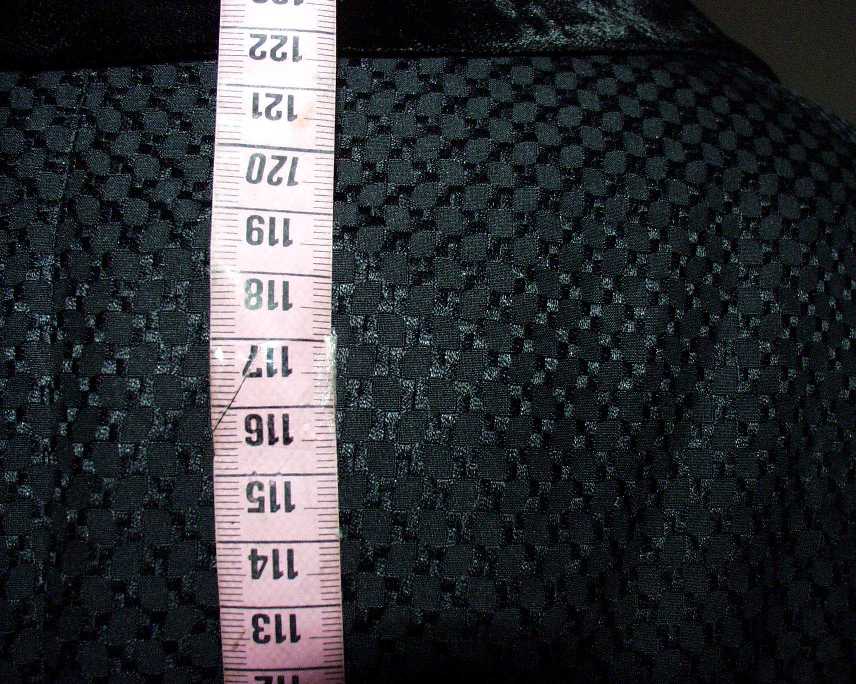 Jacket fabric closeup |
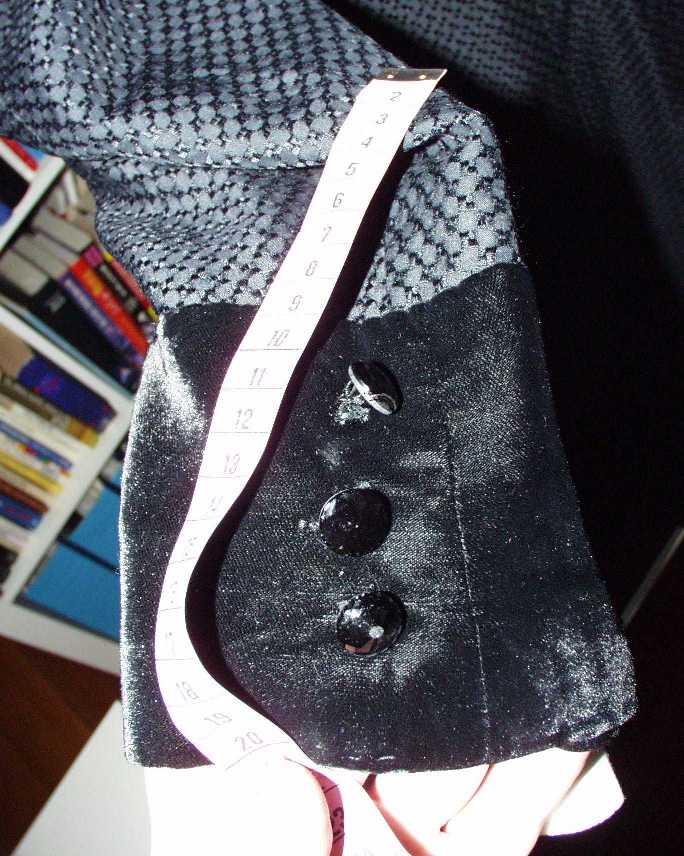 Jacket sleeve cuff closeup. |
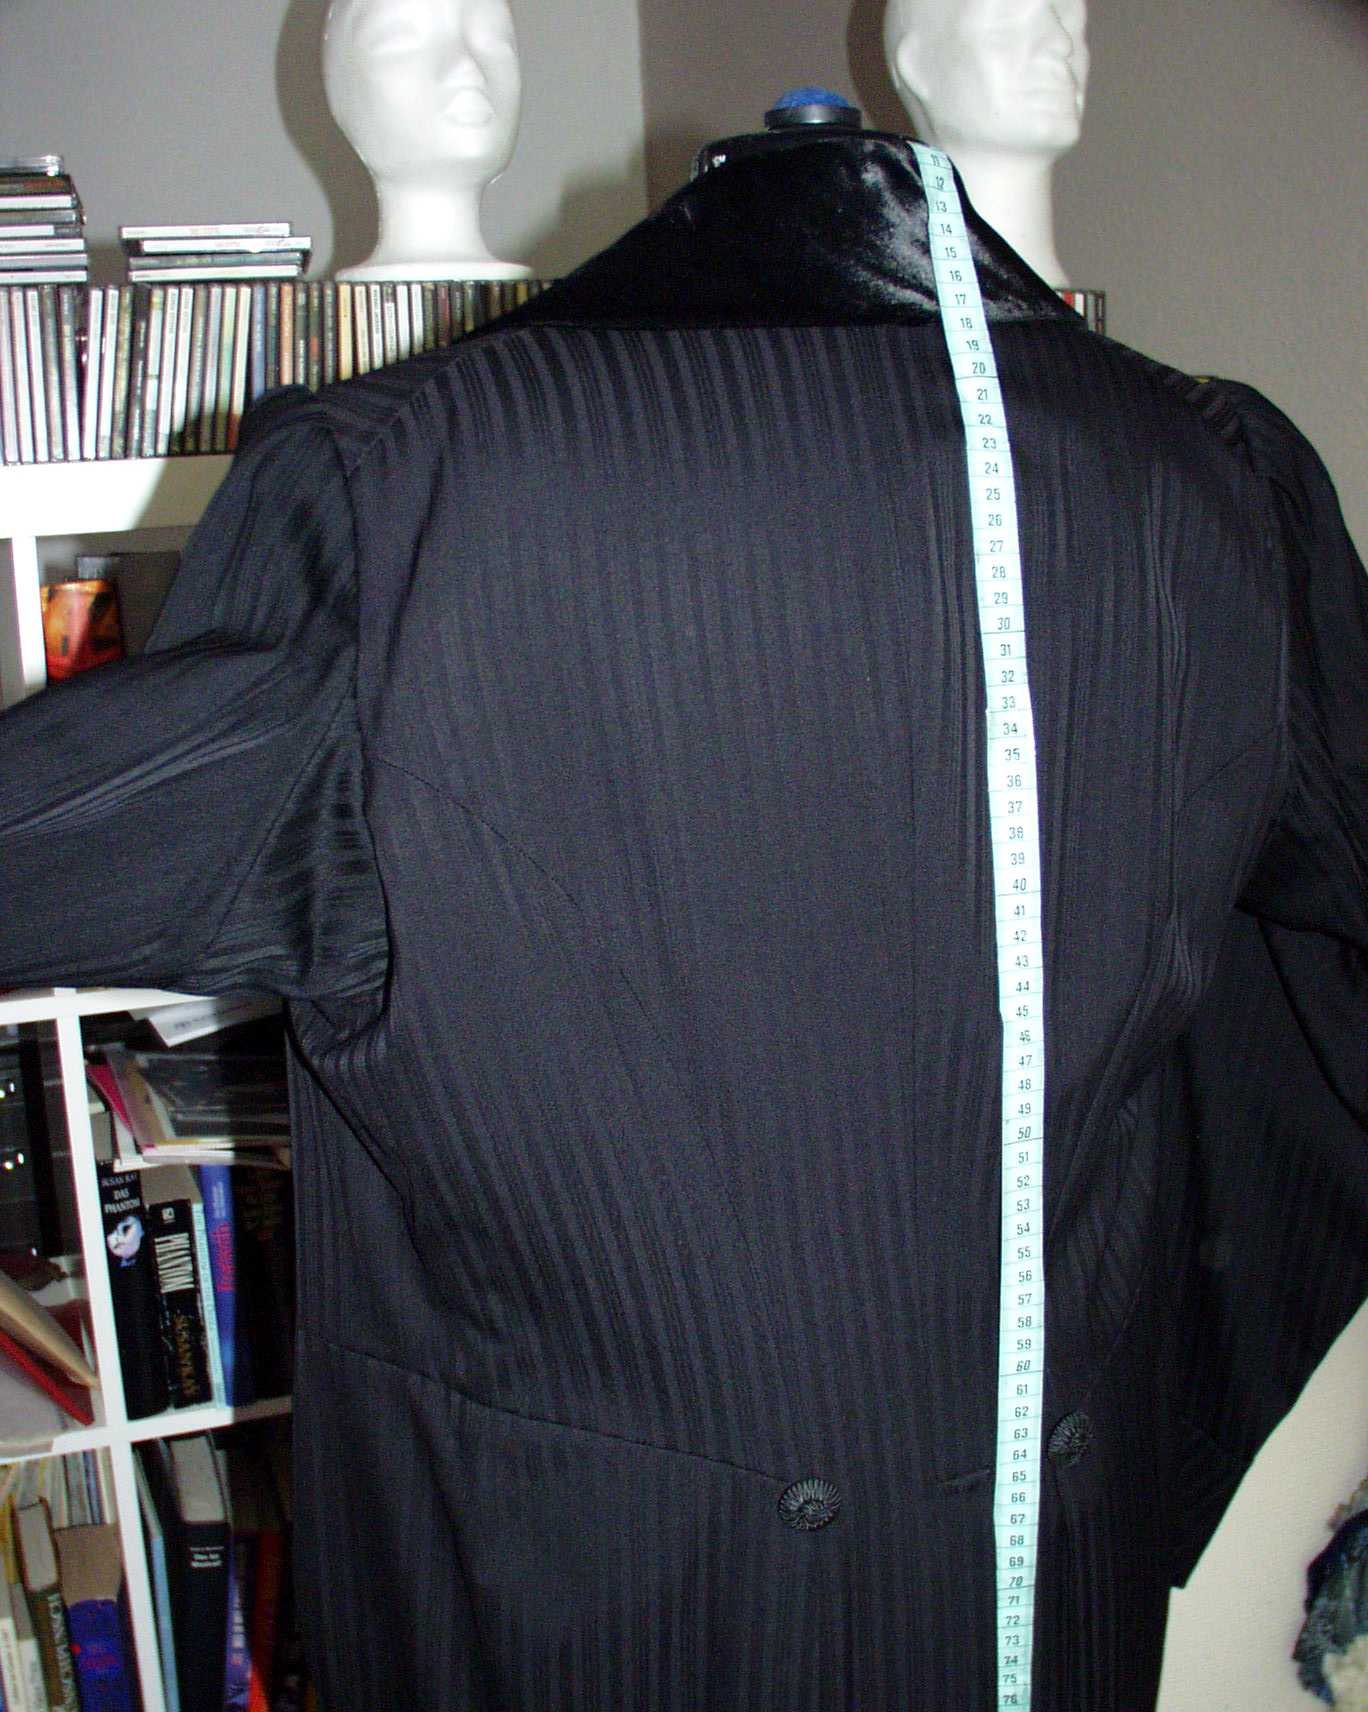
 Jacket back buttons closeup. |
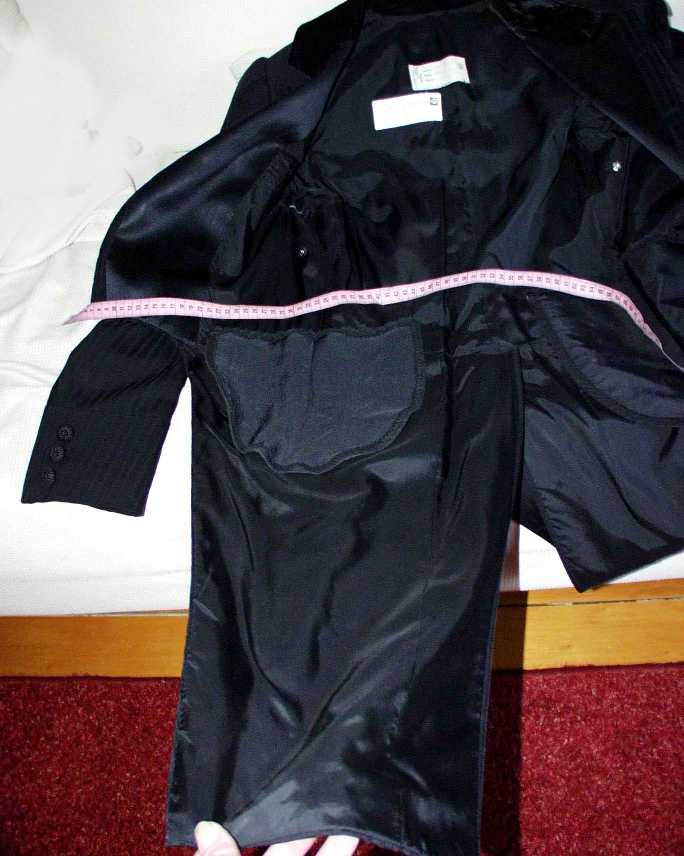
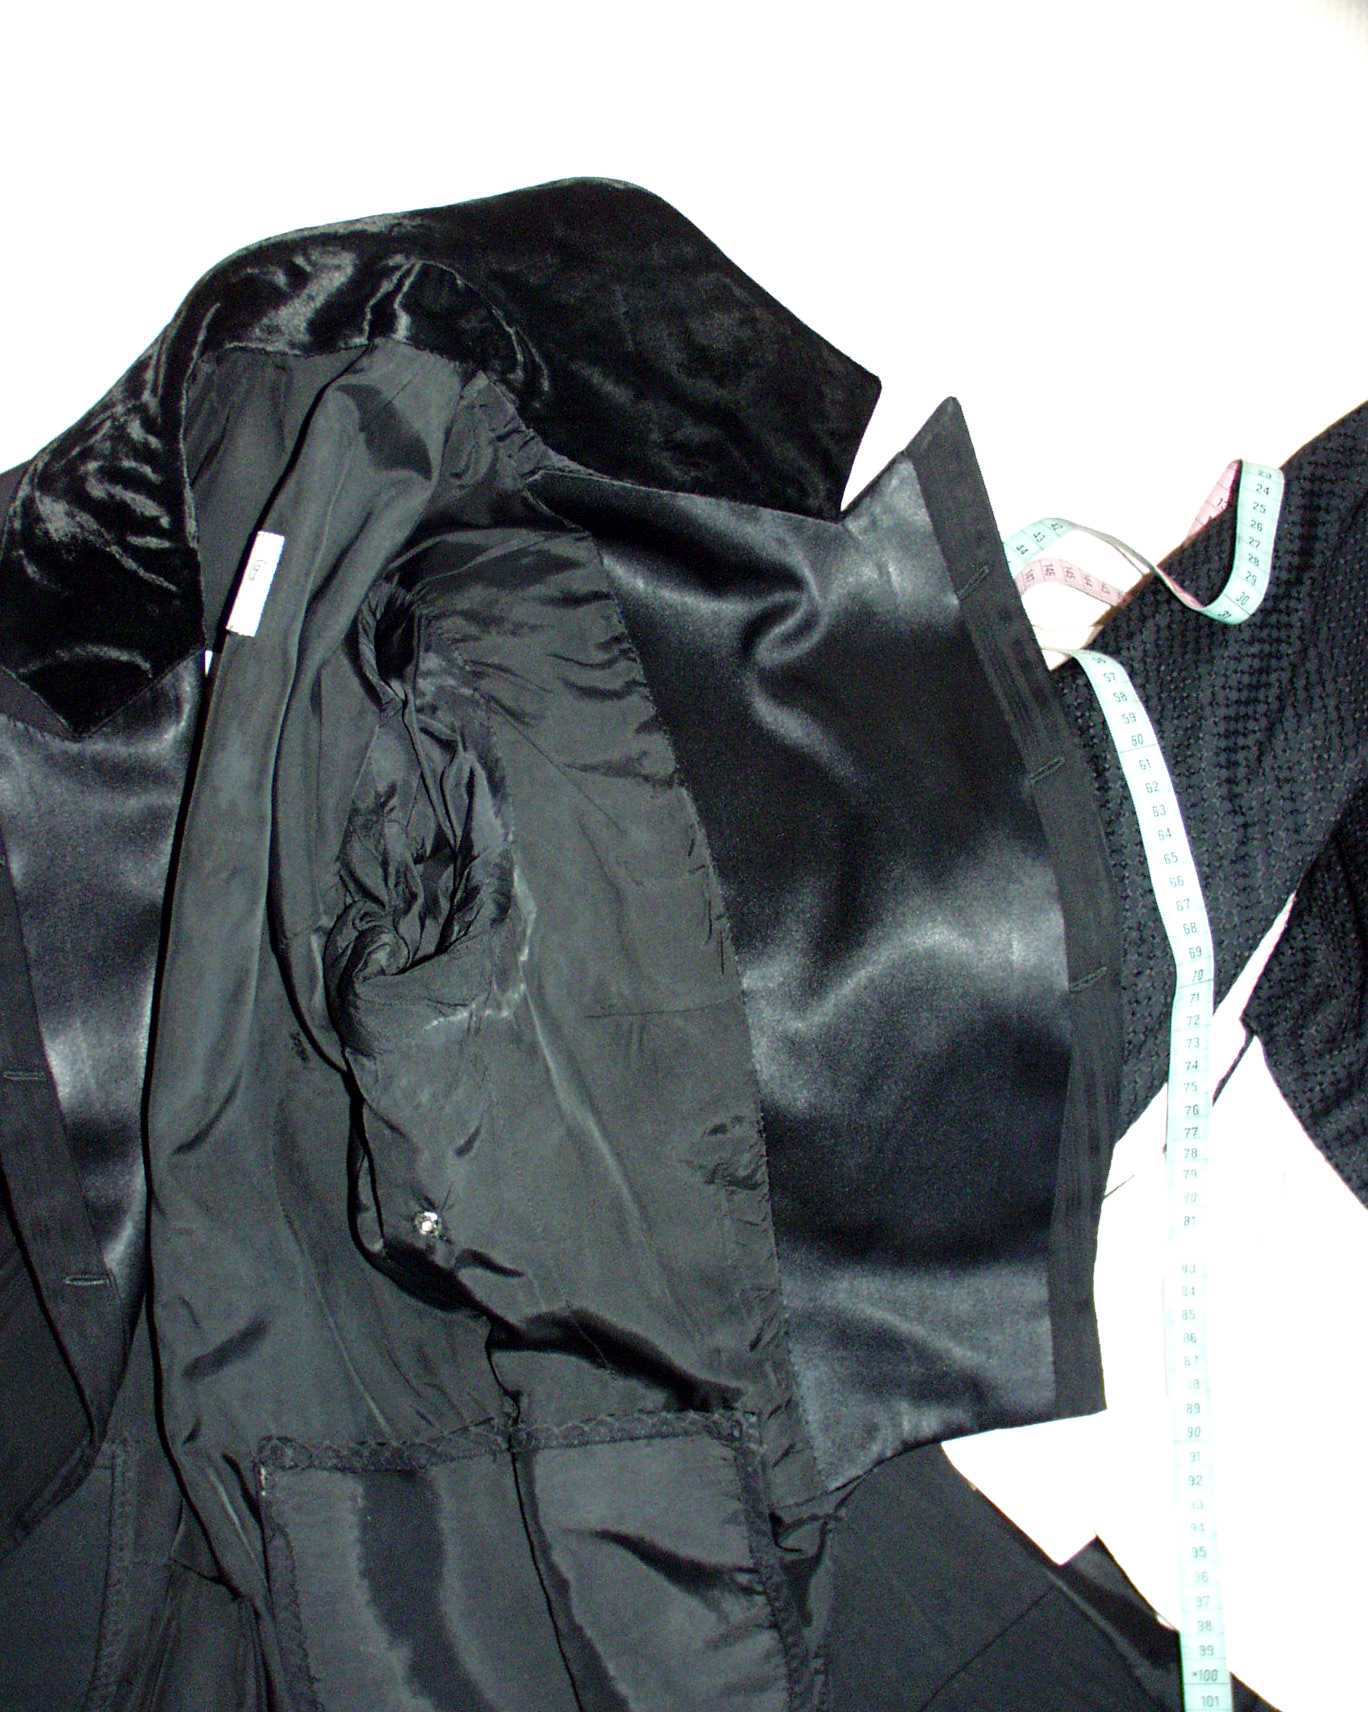
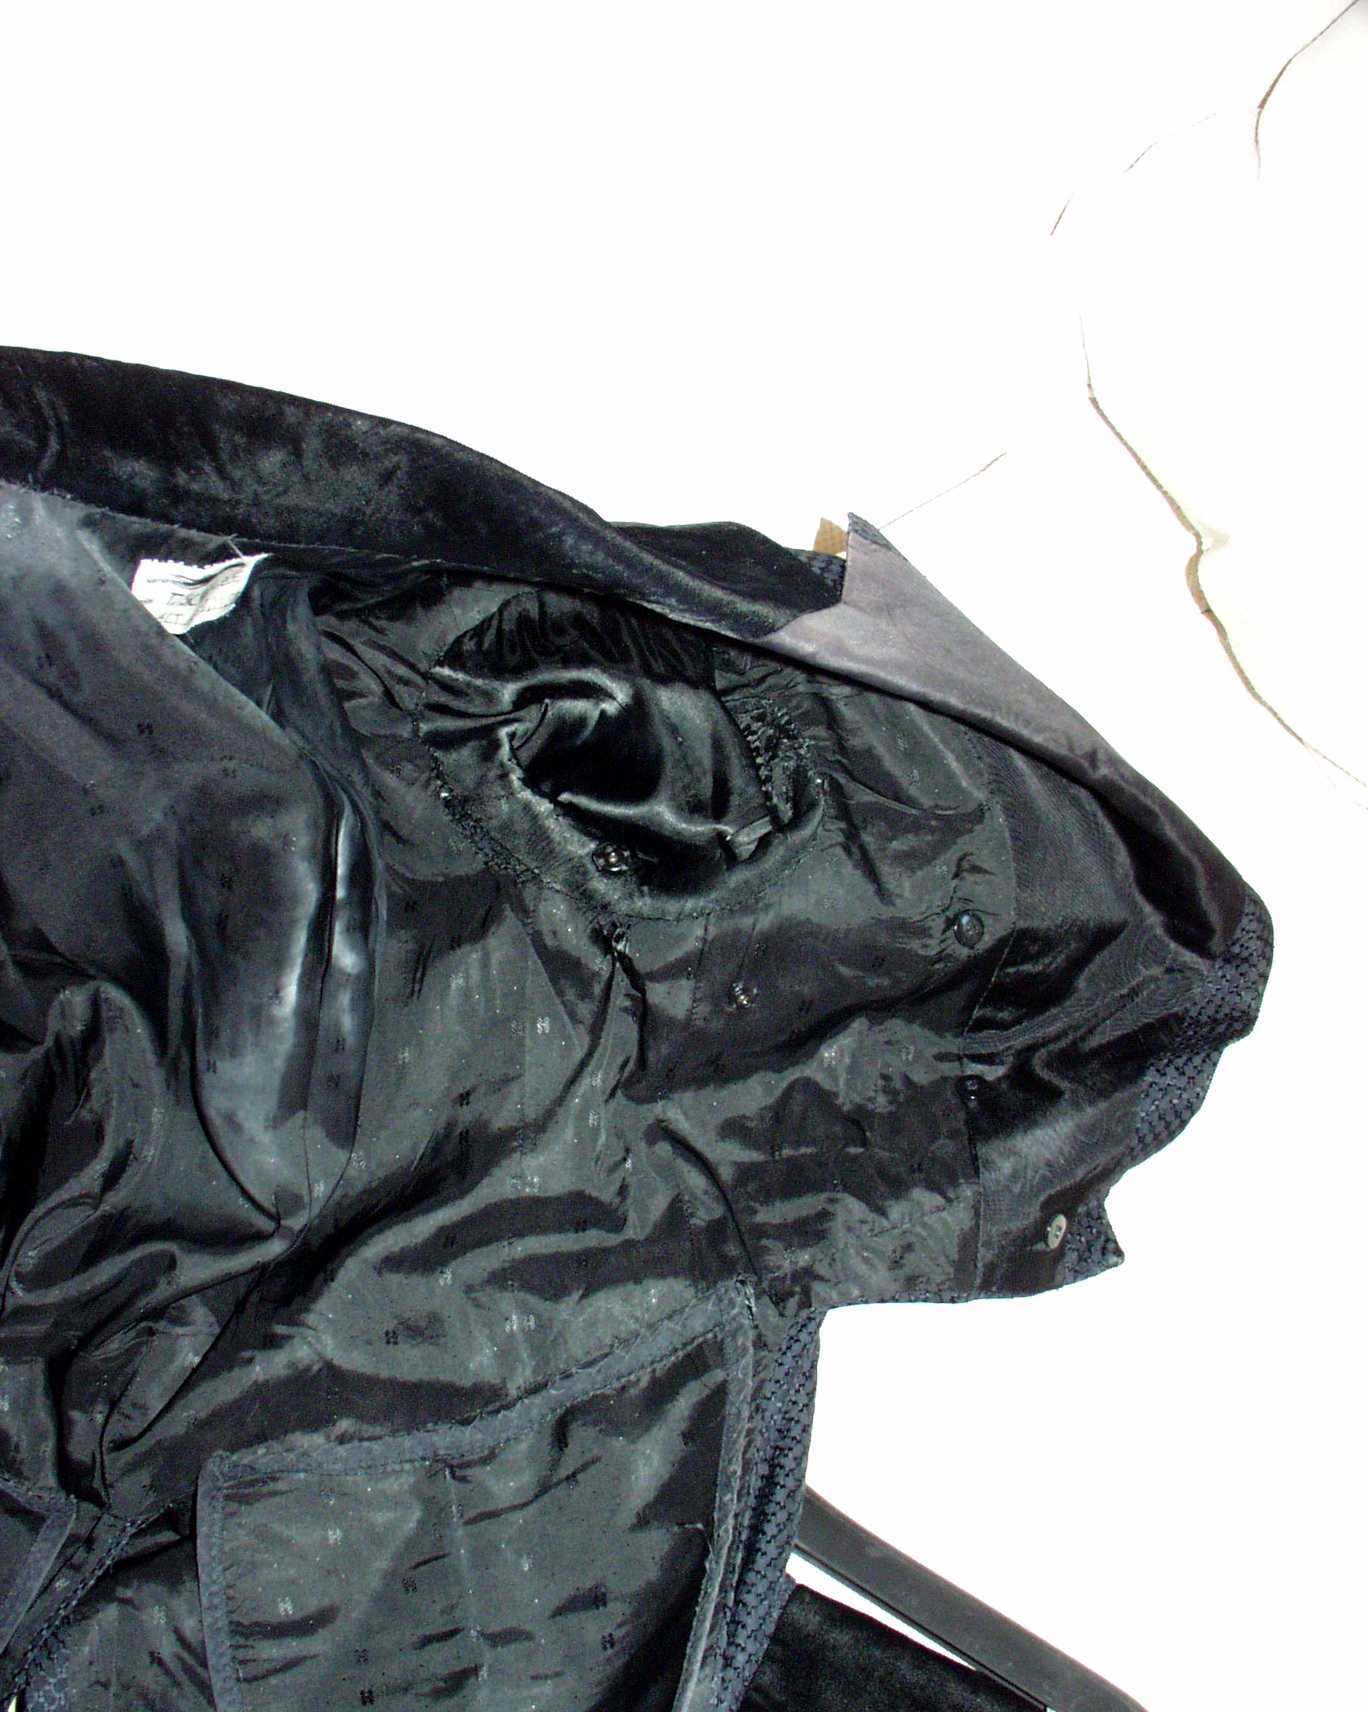 Jacket inside shot. |
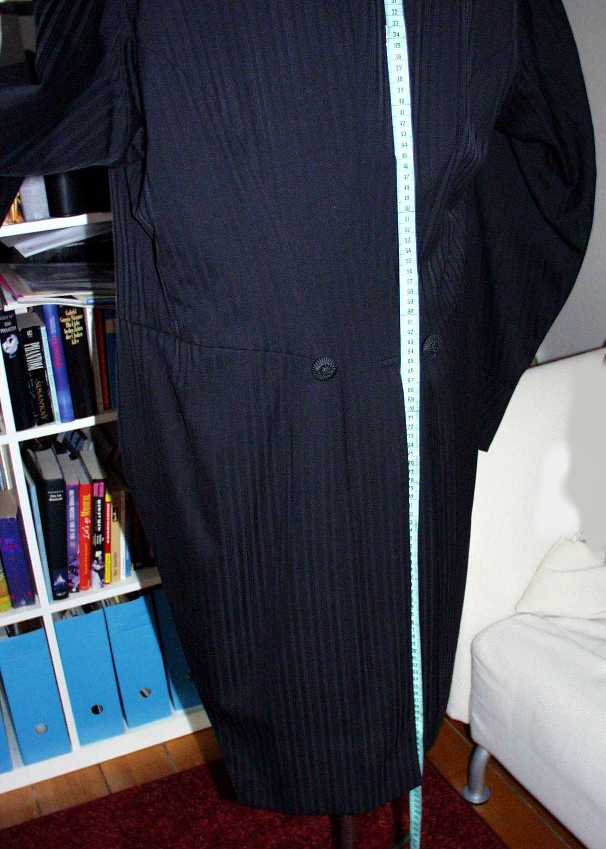
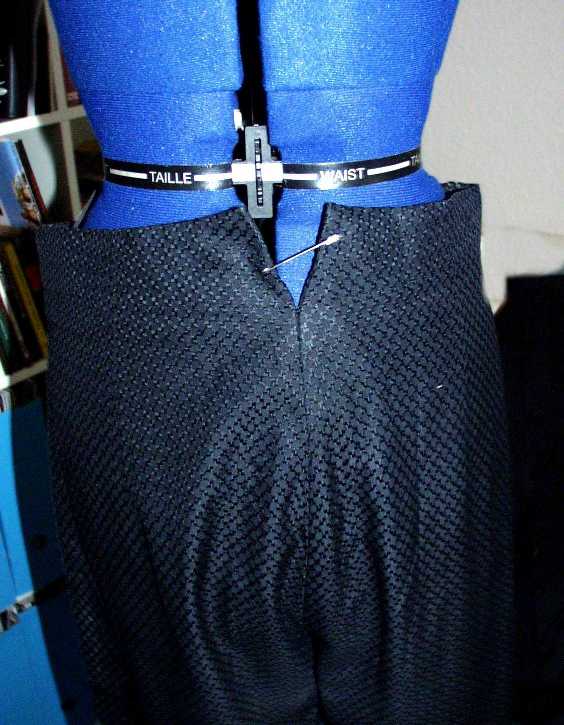 Back of trousers, note historically accurate back center slit which is not so historically accurately closed with a safety pin. |
I very much appreciate your stating you do not own the copyright on the fabric’s design. It was designed by Vanessa Hopkins of London, England, who took the design from an antique in her and her husband’s collection. Consider how many years Phantom of the Opera has run; she and her husband joke that Phantom of the Opera put their son through Cambridge. The original fabric, which I have I quantity of, is indeed silk taffeta. The design is printed, as you’ve seen from your inspection. Alan and Vanessa Hopkins are professors of The School of Historic Dress in London, England.
I can sympathise with you over the copyright issues, Its really annoying ,I have it happen from time to time and though I never mind other bloggers using my blog images its annoying when bussinesses do it and claim credit for your work (we have a romanian tv compnay use ten of our images then add copyright xxx to the btoom of the page ,,,Well done for naming and shaming ,,(sometimes webmasters will remove copyrighted images if you ask for names to pursue legal; action against )
Again I love your blog and thanks for all your hard work
Thank you 🙂
Hi Mam ,Would you be willing to sell the Phantoms outfit so it could be put in my own personal collection?
I’m sorry, but I do not personally own any of the three examined costumes on this page so of course I can’t sell either of them.
I was just allowed to study, photograph and take the patterns from them in 2006.
As far as I know all three are now in private collections.