The fabric required for this particular tunic is available here at Spoonflower; but of course you could also use any other fabric to make it!
So – I love tunics. Airy, light, beautiful tunics that can be worn with jeans, skirts, leggings. I also love that tunics are generally unimpressed by any change of body size.
I also happen to love peacocks.
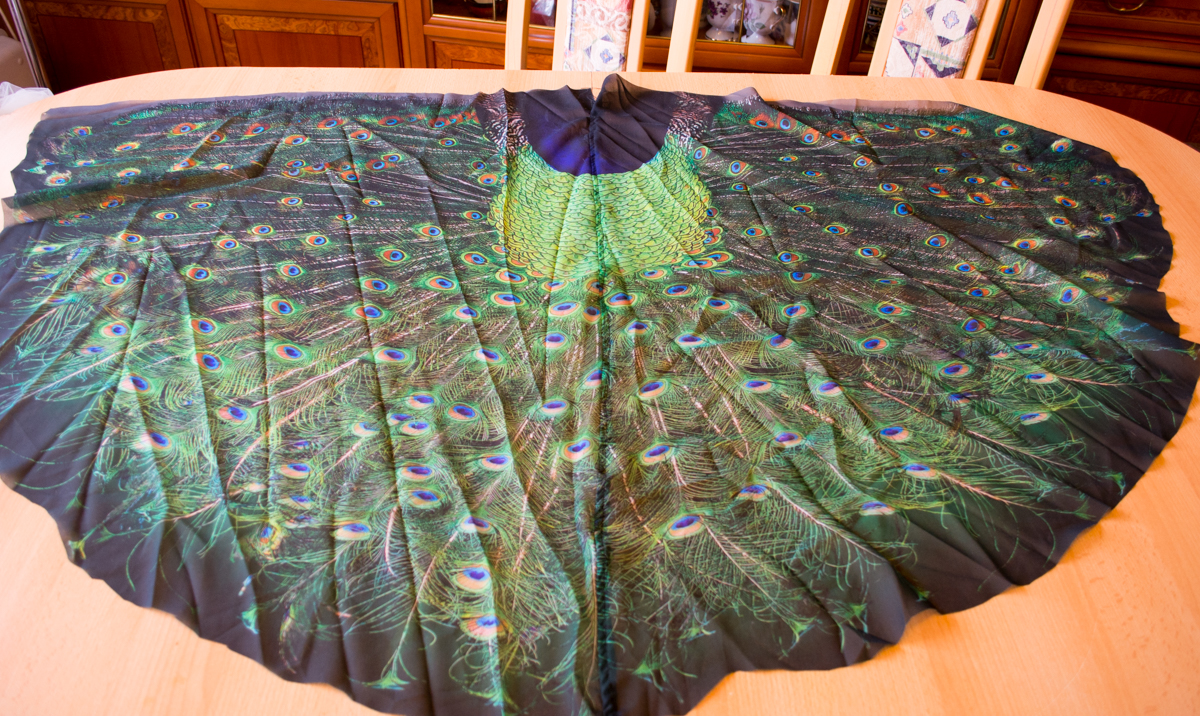
As a „tunic“ is basically nothing else but a large rectangle of fabric with a hole for the head, I thought, great – why not combine that with a peacock’s wheel and use a large circle instead?
I eventually came up with this two yards large design:
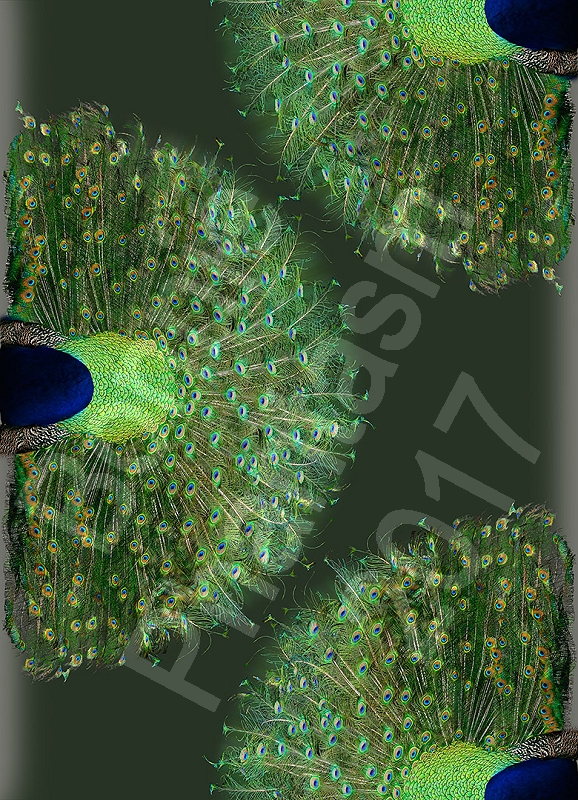
As Spoonflower just introduced the new Chiffon fabric, I decided to use that (instead of the Poly Crepe de Chine I originally wanted to use). The design is made for 52 inches wide fabric (like the Poly Crepe de Chine); the Chiffon is wider at 54 inches; so that still works. So basically you can have this design printed on any fabric that is at least 52 inches wide.
After receiving my fabric, I first washed it. Seriously, that’s what you should do with ALL washable fabric before cutting and sewing it because washing will prevent your finished clothing from shrinking.
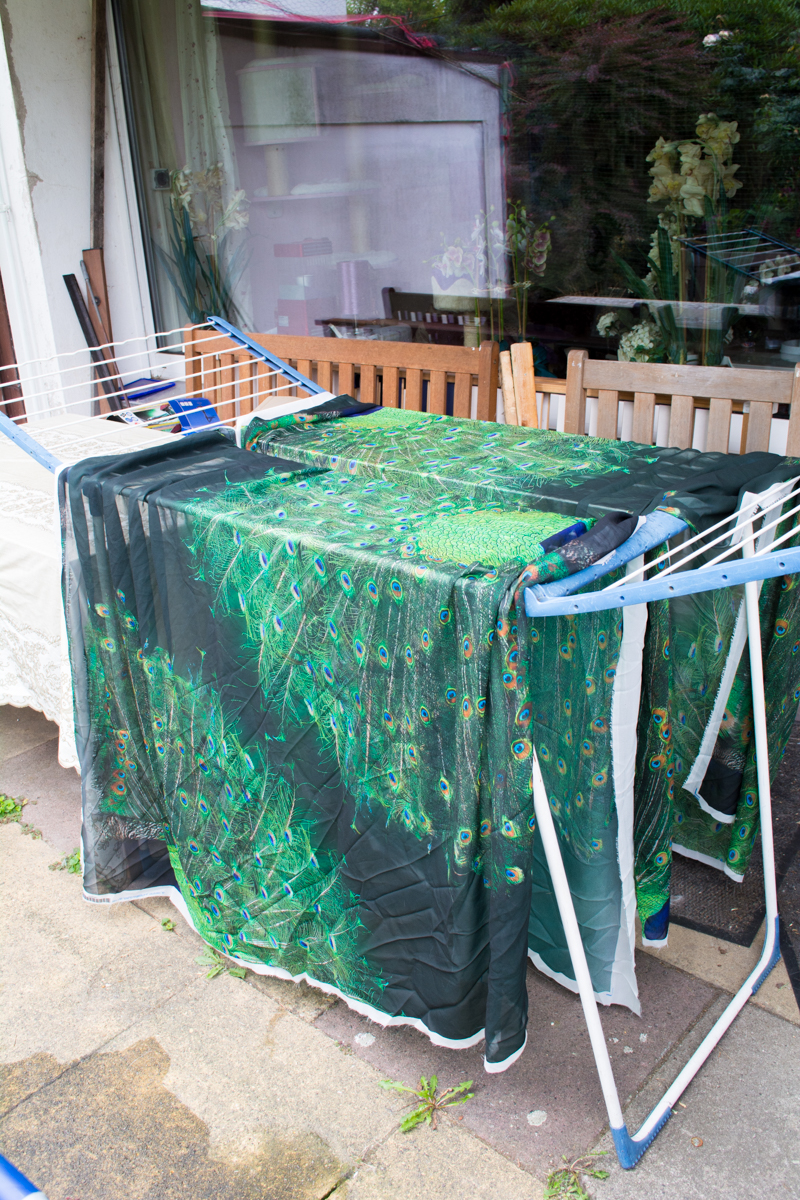
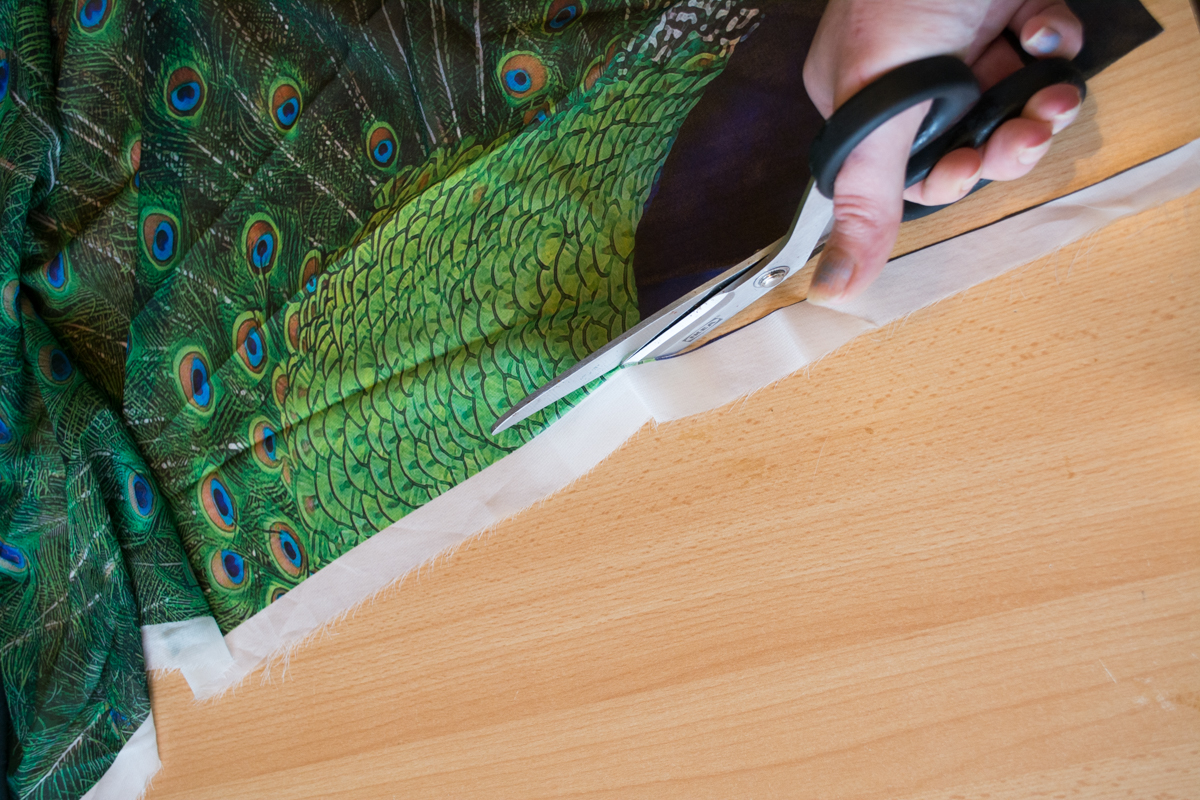
When the fabric had dried, I cut the edges.
First the selvage on one side…
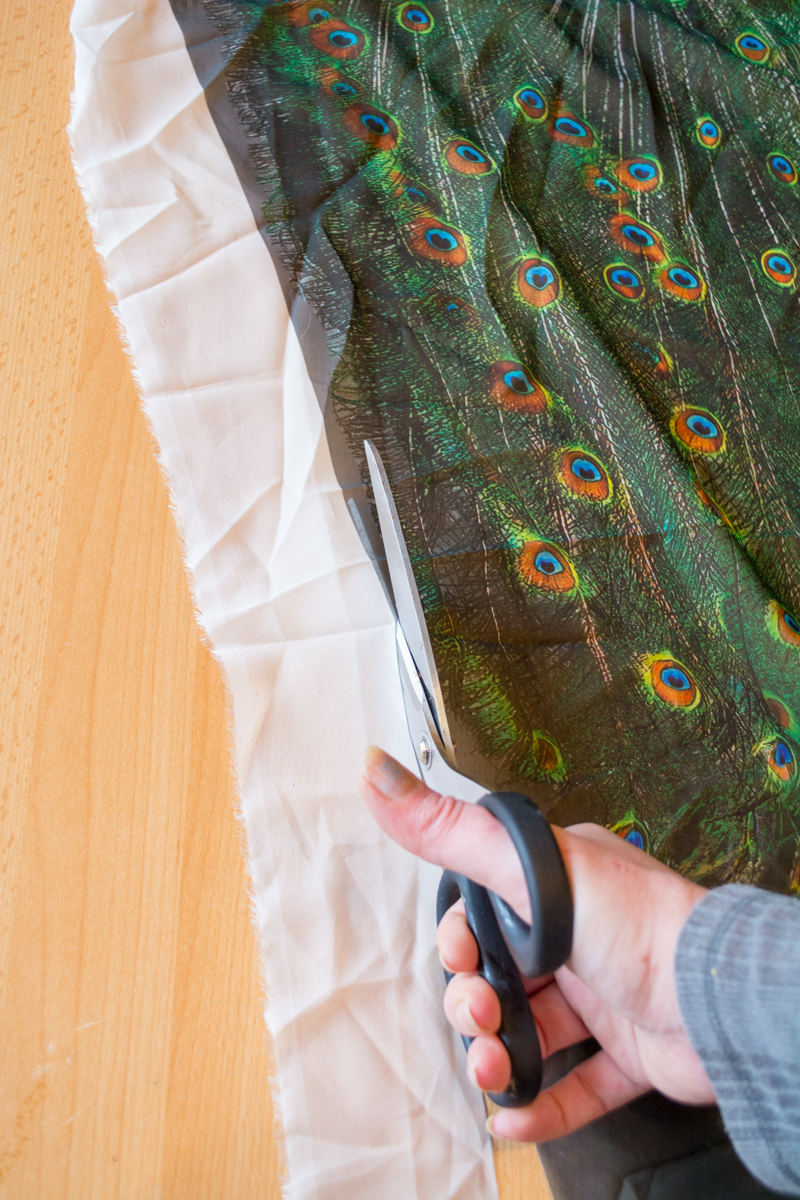
…then on the other side, where the design, as it’s made for 54 inches wide fabric, starts to repeat.
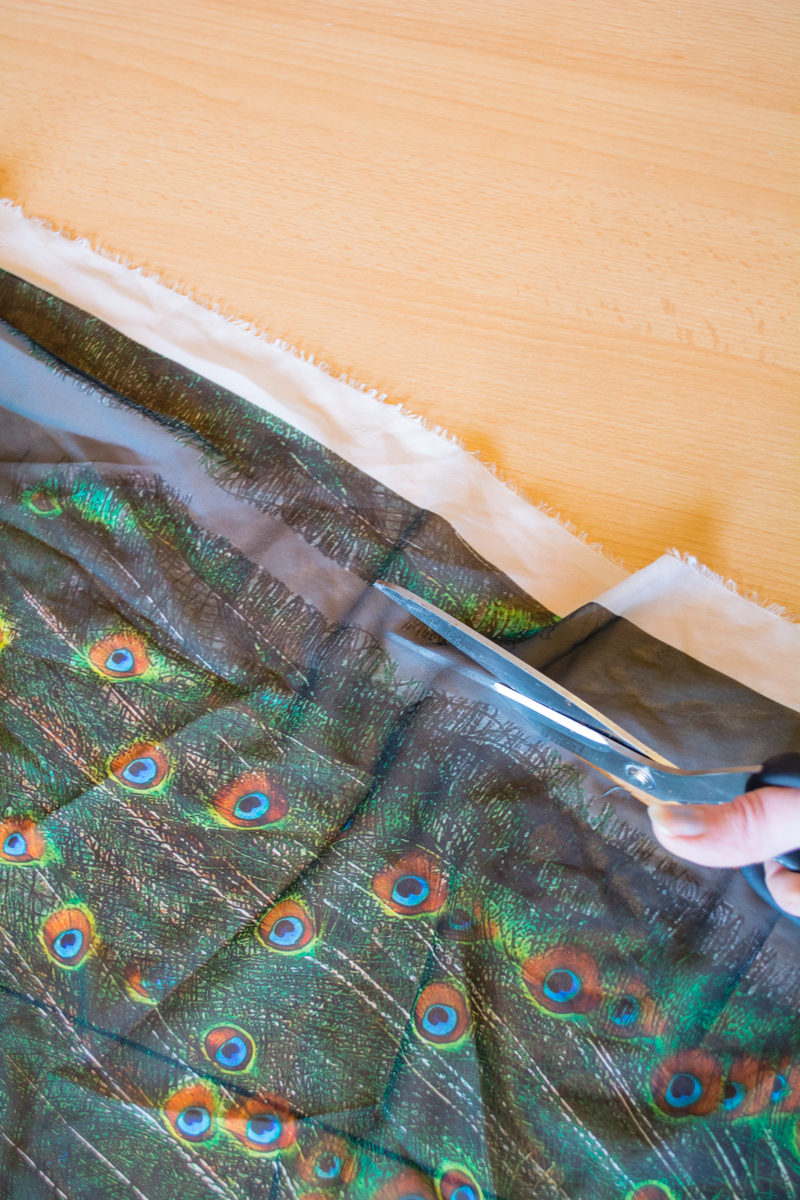
Last not least, the cut sides of the printed fabric (where Spoonflower leaves about an inch of unprinted white fabric):
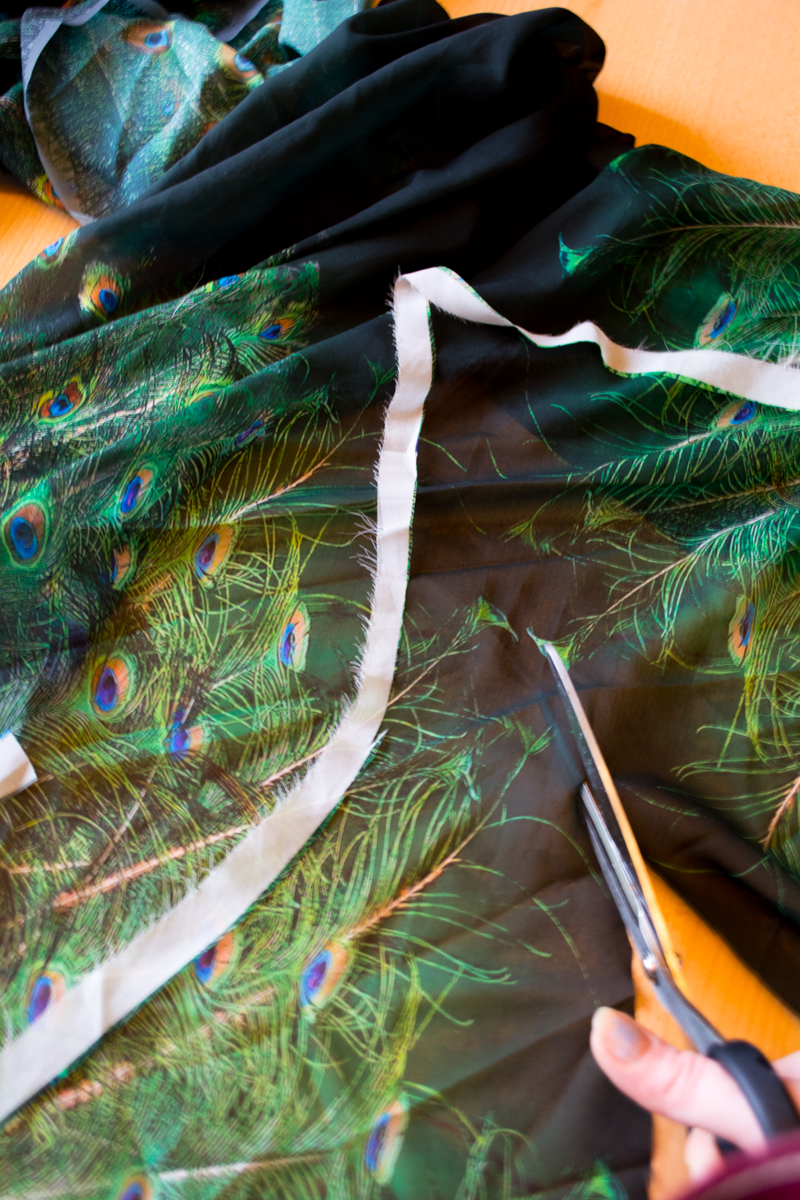
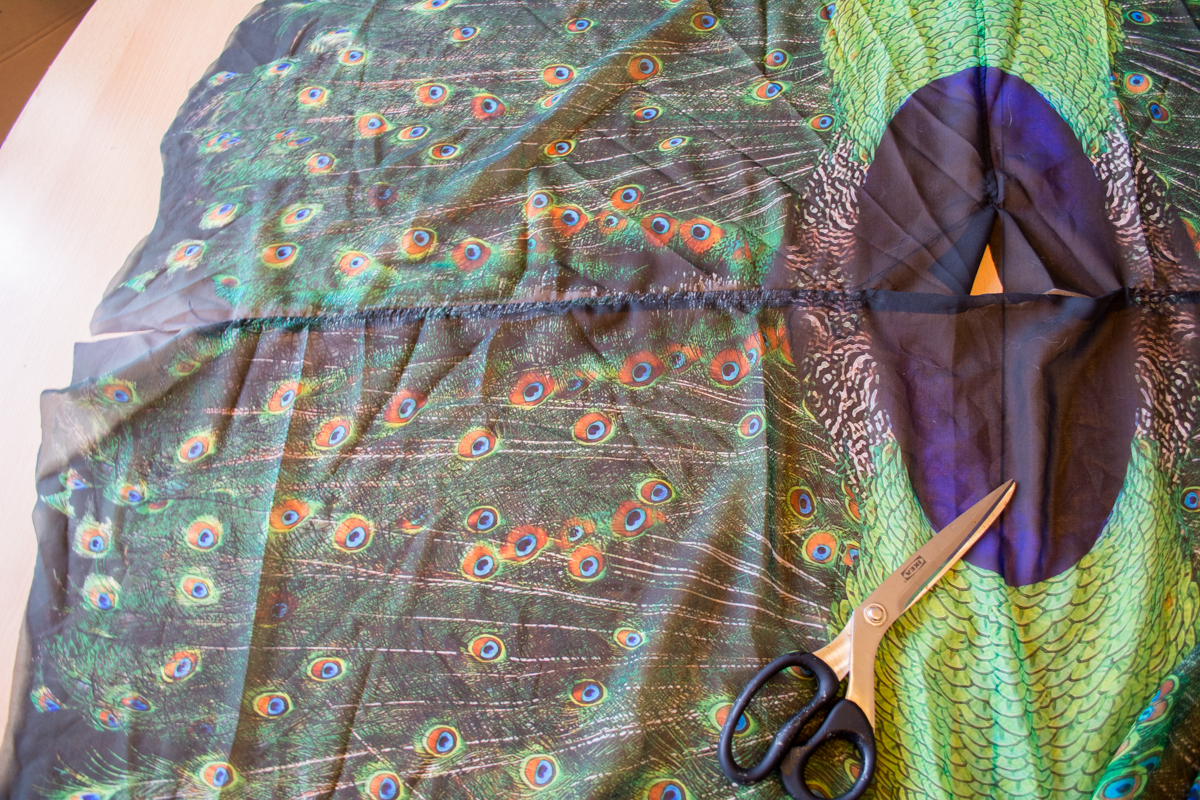
Then I cut the „Peacock wheels“ out.
At this point you should decide whether you want perfect half circles along the peacock wheel, in which case you should serge or do a rolled hem (I’ll get back to that later), or if you want an irregular hem following the edges of the feathers on the wheel more closely, in which case you either want to do a really complicated rolled hem or just singe the cut edges with a flame, which works perfectly on polyester fabrics. I decided for the latter; hence I cut a lot closer (and irregularly) to the feathers.
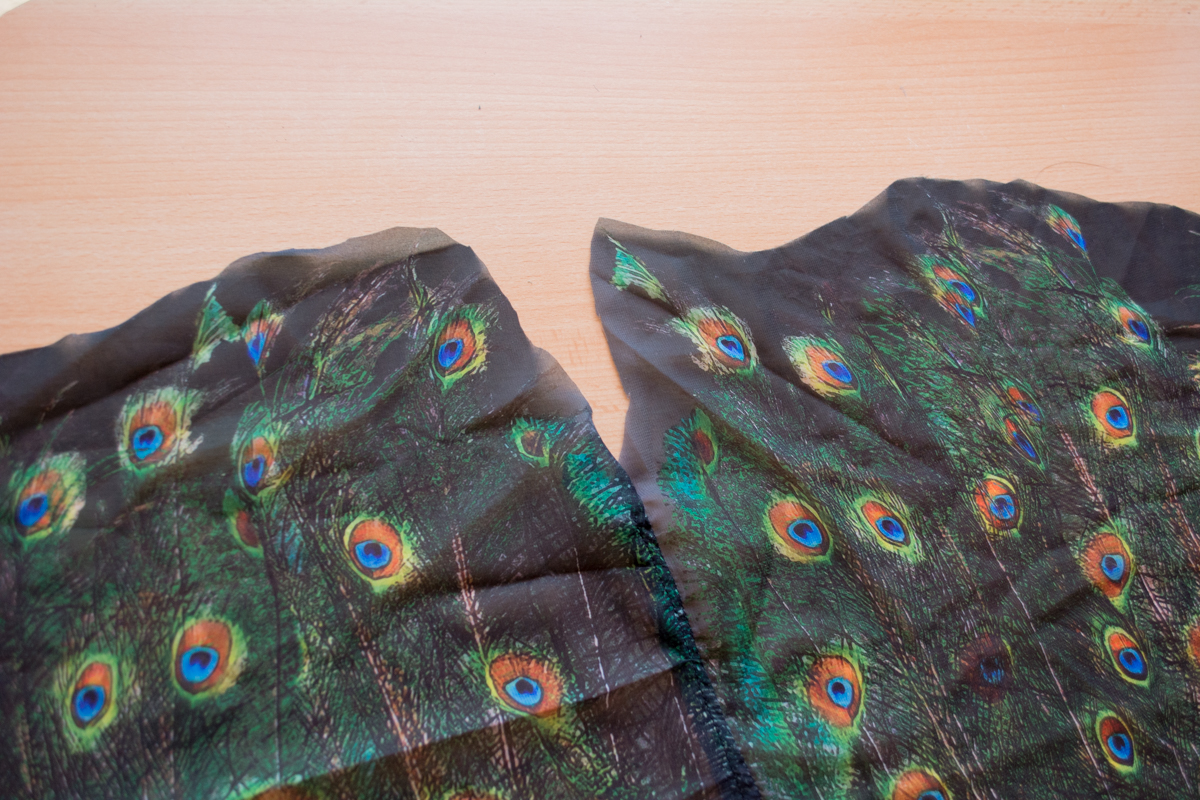
After cutting, I ended up with a few scraps and three main pieces: The front piece…
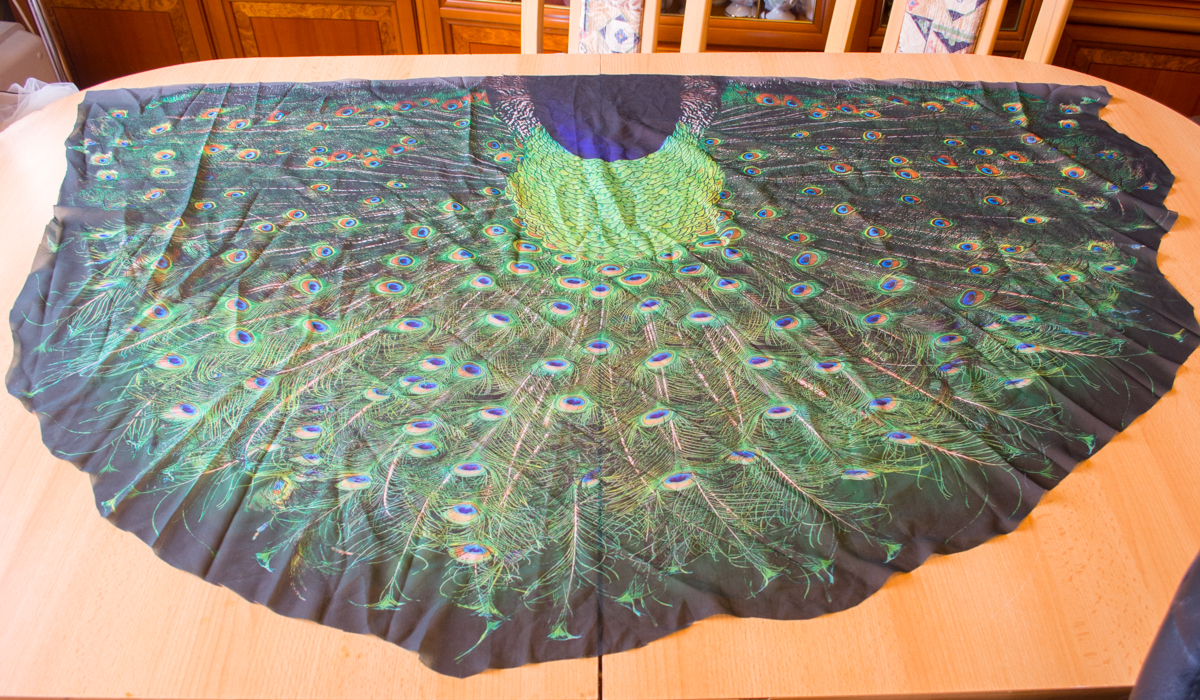
…as well as the two back pieces, on which the design overlaps about half an inch at the center back:
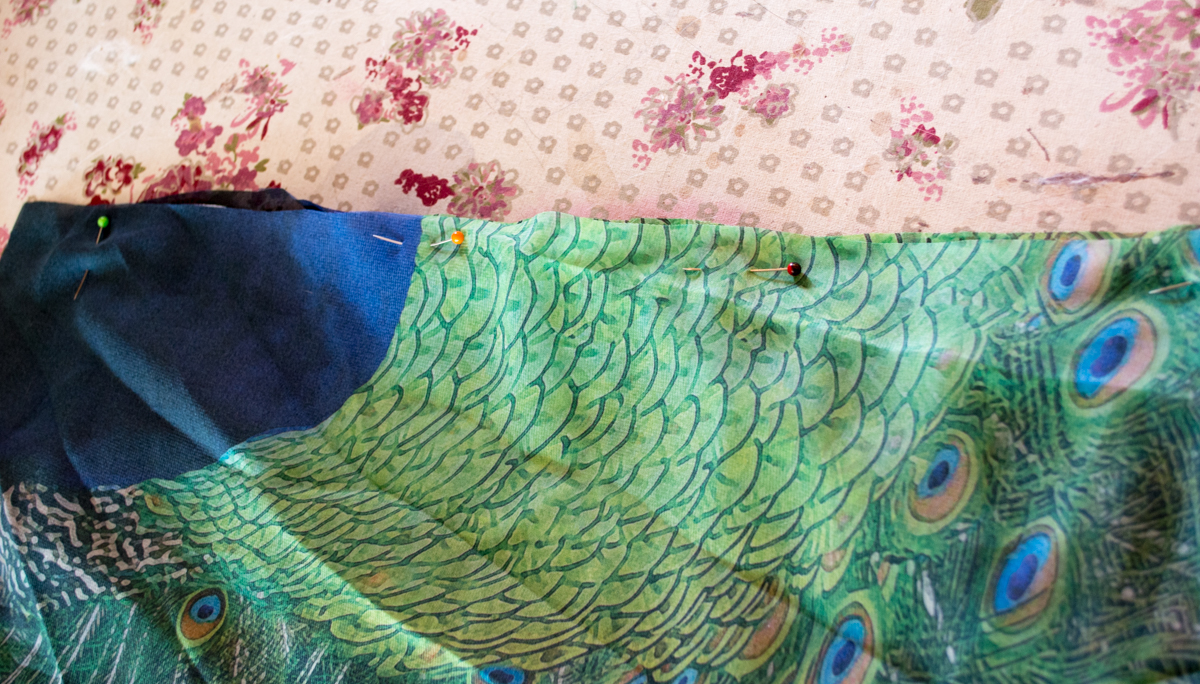
After that, I pinned the two halves of the back right sides together with an approximately half inch seam allowance starting about 2 1/2 inches down the neckline (that’s the „blue“ part):
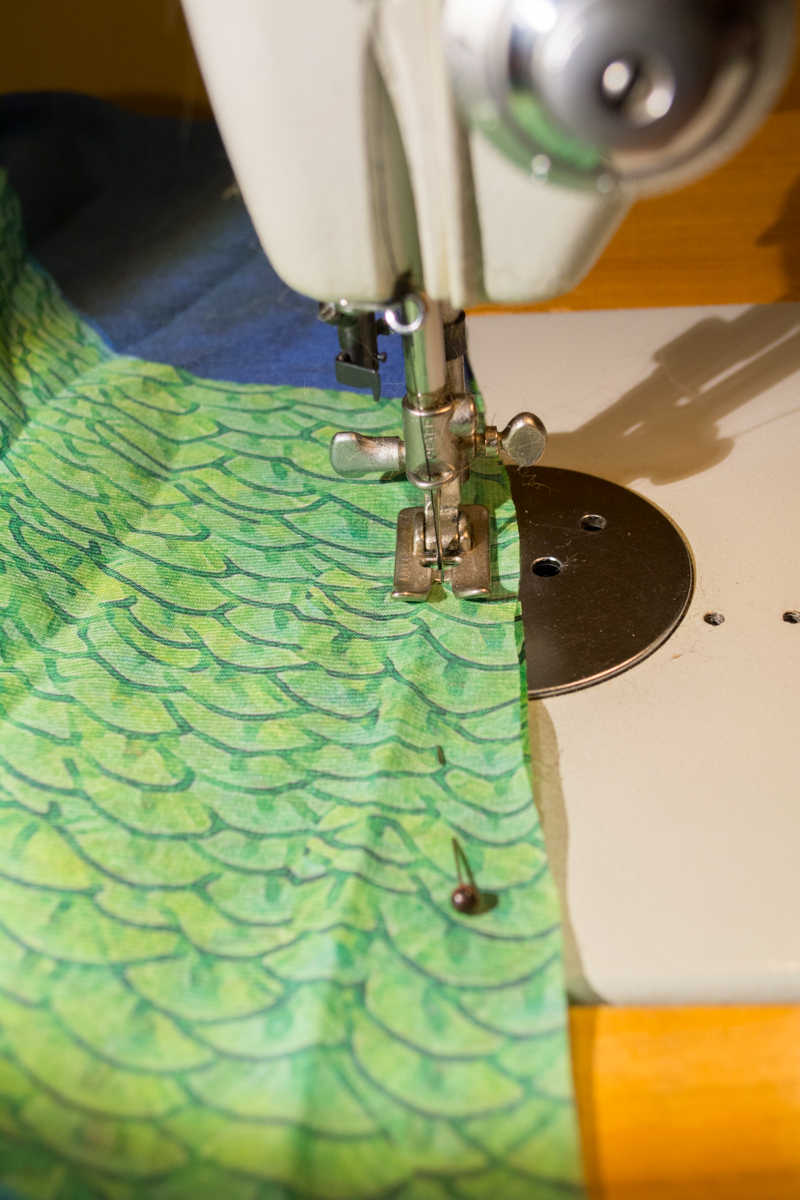
and sewed along that line.
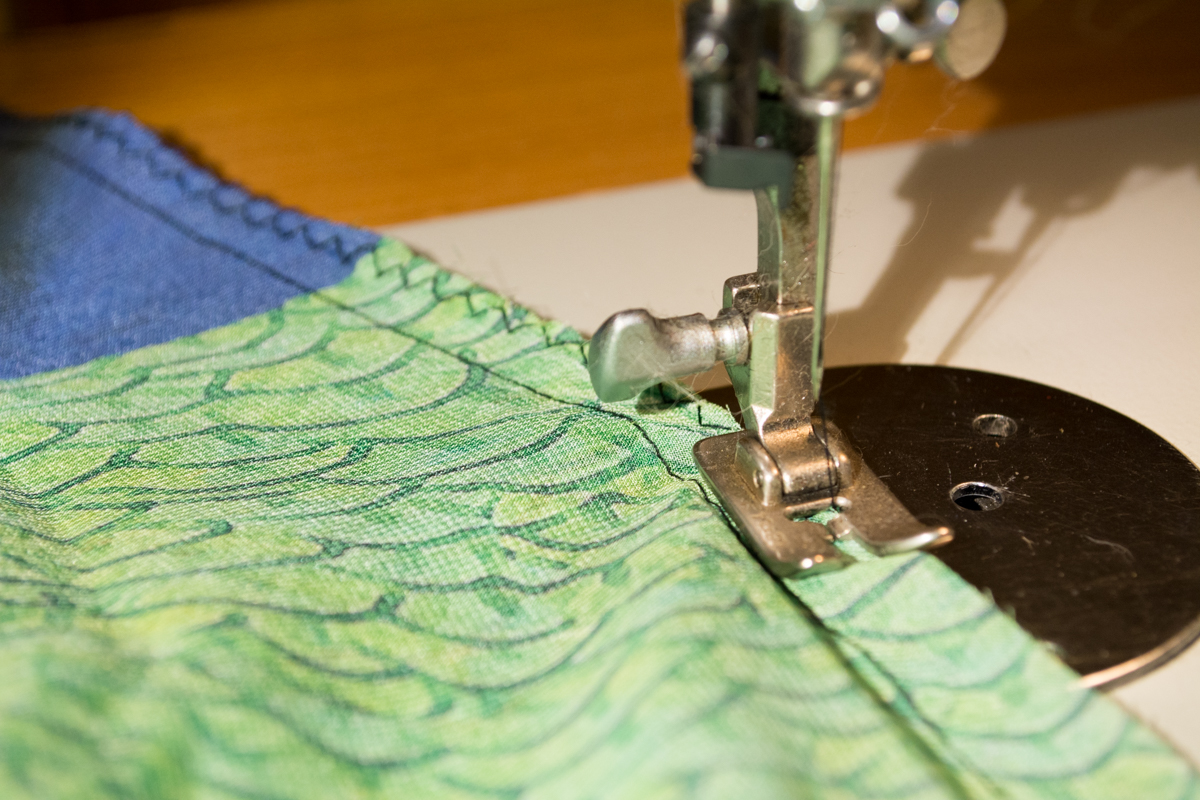
Then I finished that edge with a zigzag stitch (you could also use a serger, or the candle-singing method).
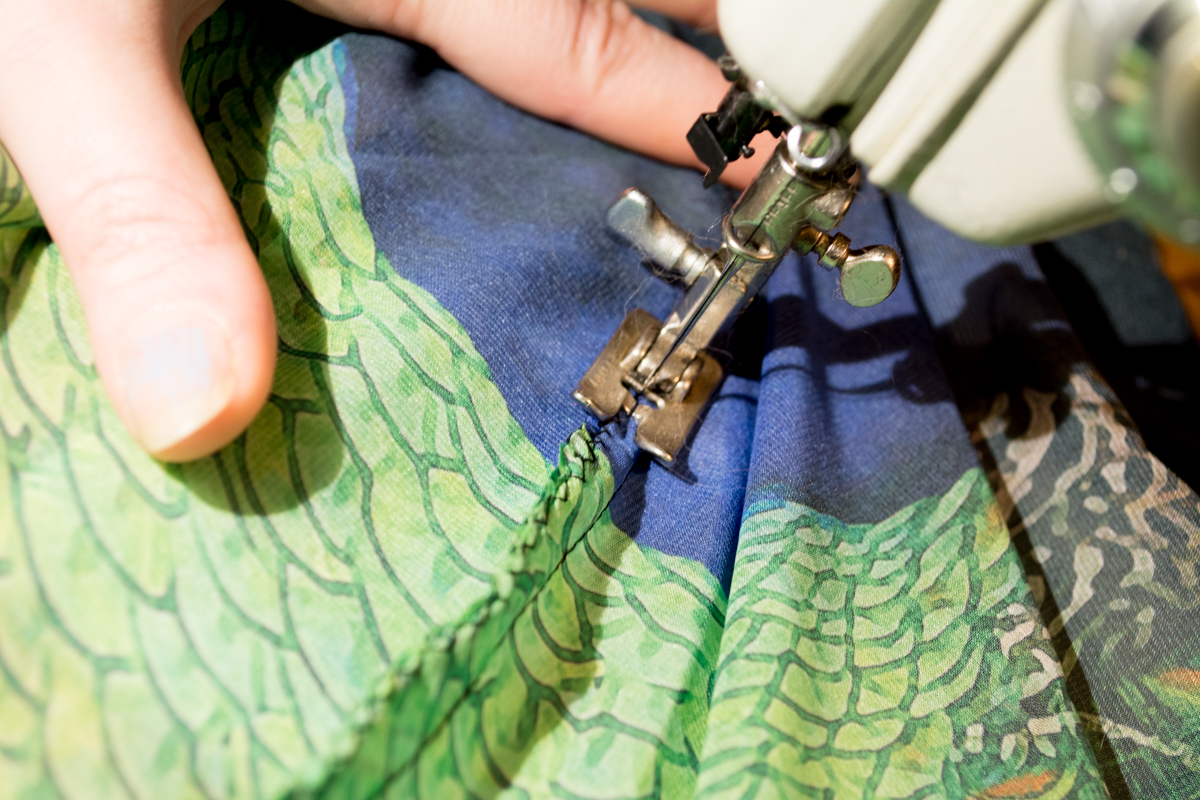
To take the stress away from that seam, I also flat-felled it.
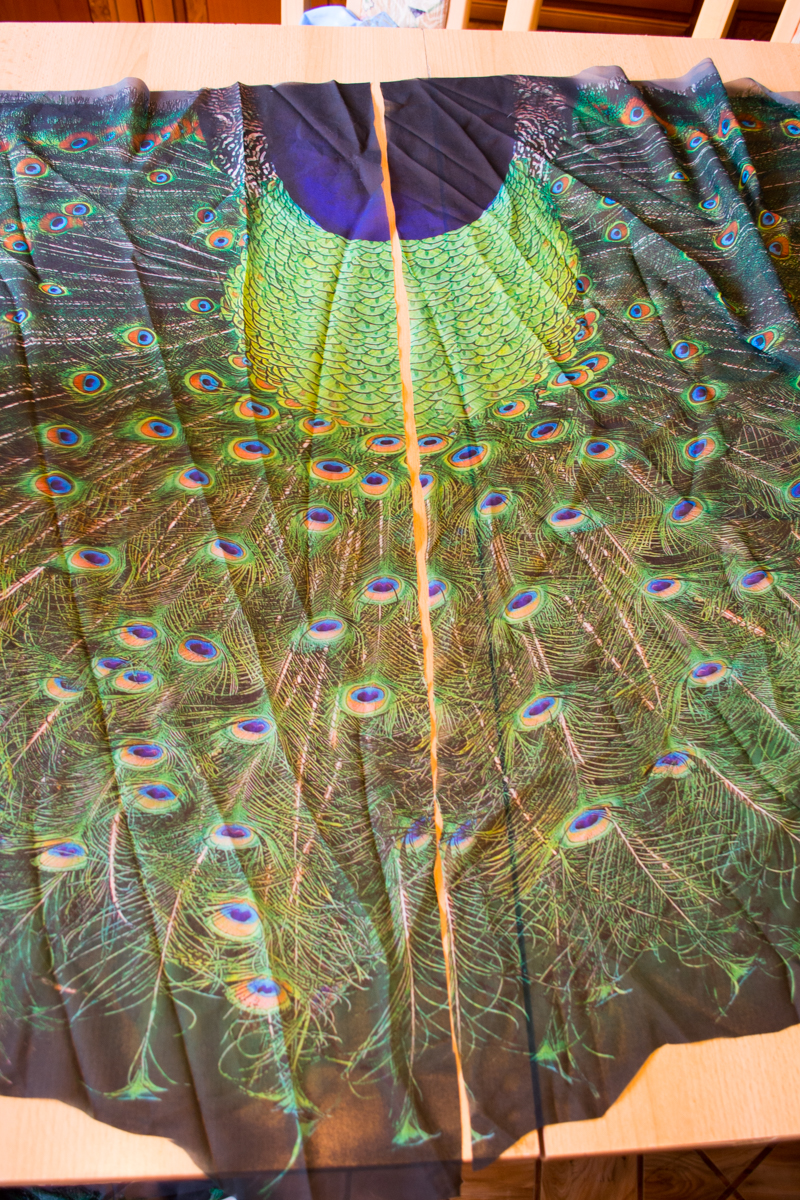
This is what the finished backside of the tunic looks like – as you can see, the design is now seamless along the center back seam:
 :
:
Now it’s time to join front and back pieces.
First I pinned the two halves right sides together at what will be the „shoulder/sleeve seams“; from „where the outer wheel of the peacock curves nicely“ to „where the neckline will be“ (the center blue half circle) on both left and right side.
I then sewed the two sides, excluding the neckline part, on both sides the same way as I sewed the center back seam: First a single line, then zigzagging the allowance, then flat-felling the seam to take the stress away from it.
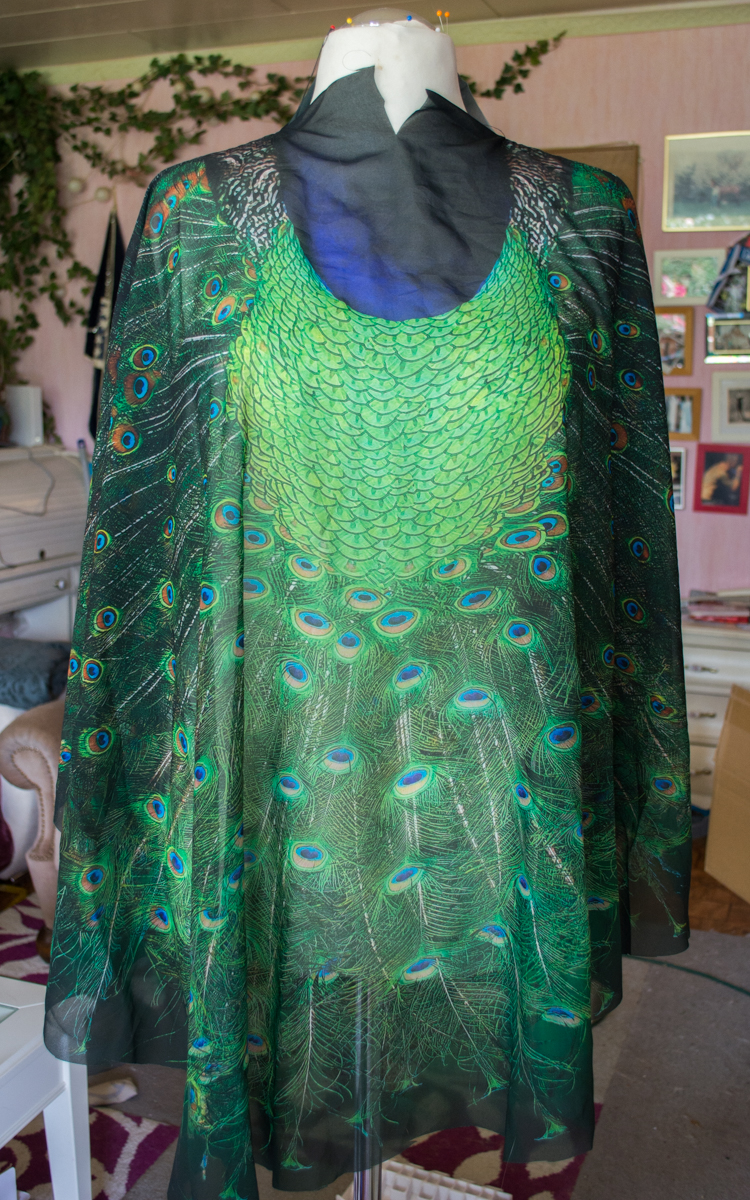
The finished (by now) full circle now looks like this:
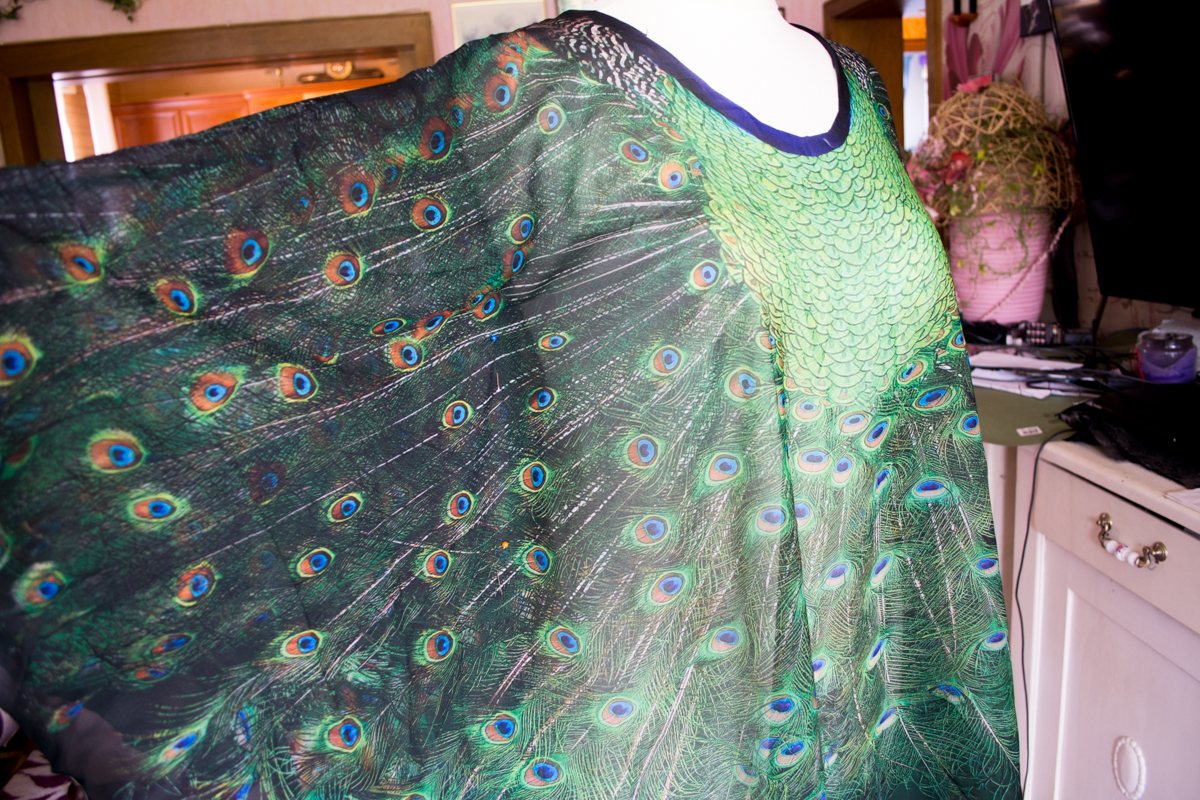
Now it’s time to cut the „hand / arm covering part“ properly. I cut it like this, so it basically splits over my hand / arm:
It’s finally time to cut the neckline!
I put the finished „full circle“ on my dress mannequin, cut just a little down the front neckline so it will actually fit…
…then cut down as far as I wanted the neckline to be. Of course it’s up to you how far down you cut – you could cut even further down, or less far down. Remember – you can always cut further down; but closing that cut if you decided to cut too far down is, well, basically impossible.
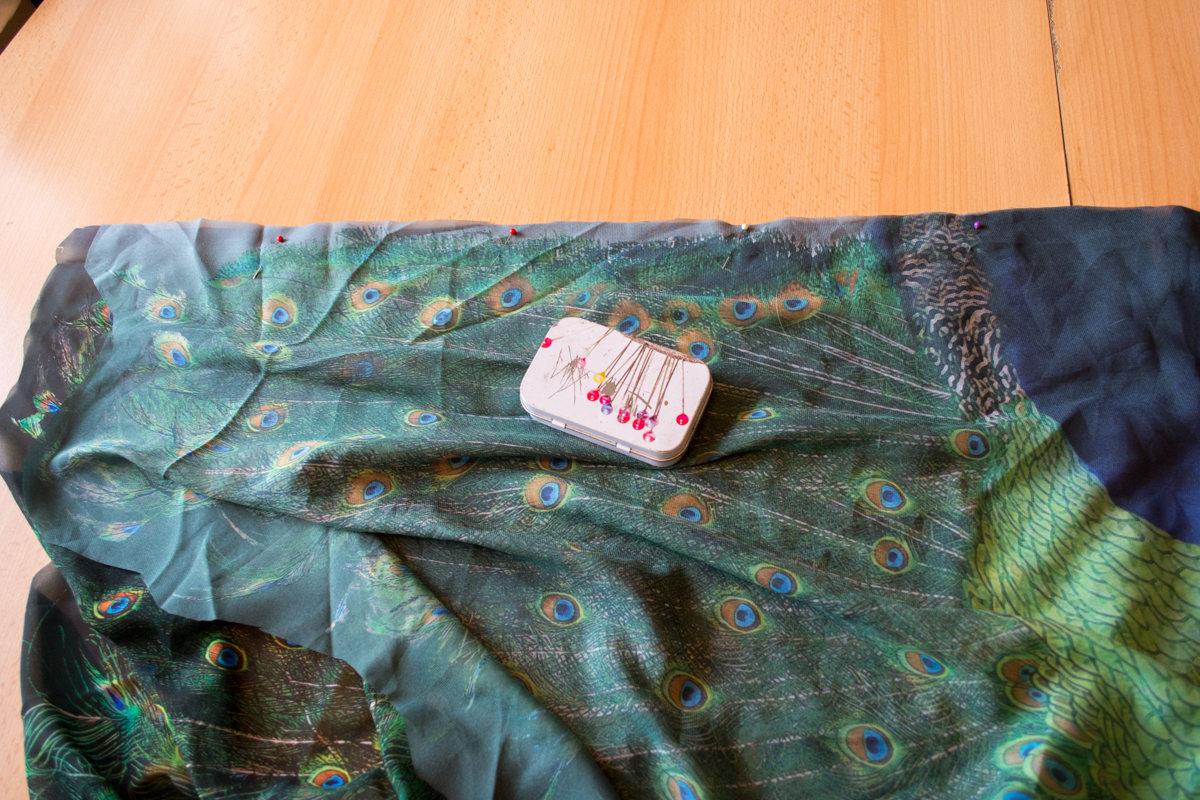
I then cut that neckline perfectly round, and also pinned the sides. Unless you want to make a poncho (which wouldn’t have side seams), you pin twice down the sides, below chest level, to achieve two symmetric vertical seams down the tunic sides.
Don’t pin too tight – you still have to be able to put that tunic on and off. And yes, with the pinned sides, NOW would be a perfect time to at least once try it on to see what it looks like on yourself (and if you can still put it on / take it off even with the pinned sides).
THIS is the reason why this tunic basically has a real „one size fits all“ – size: Because the side seams, which are really the only important thing in sizing this tunic, are pinned according to your own body size.
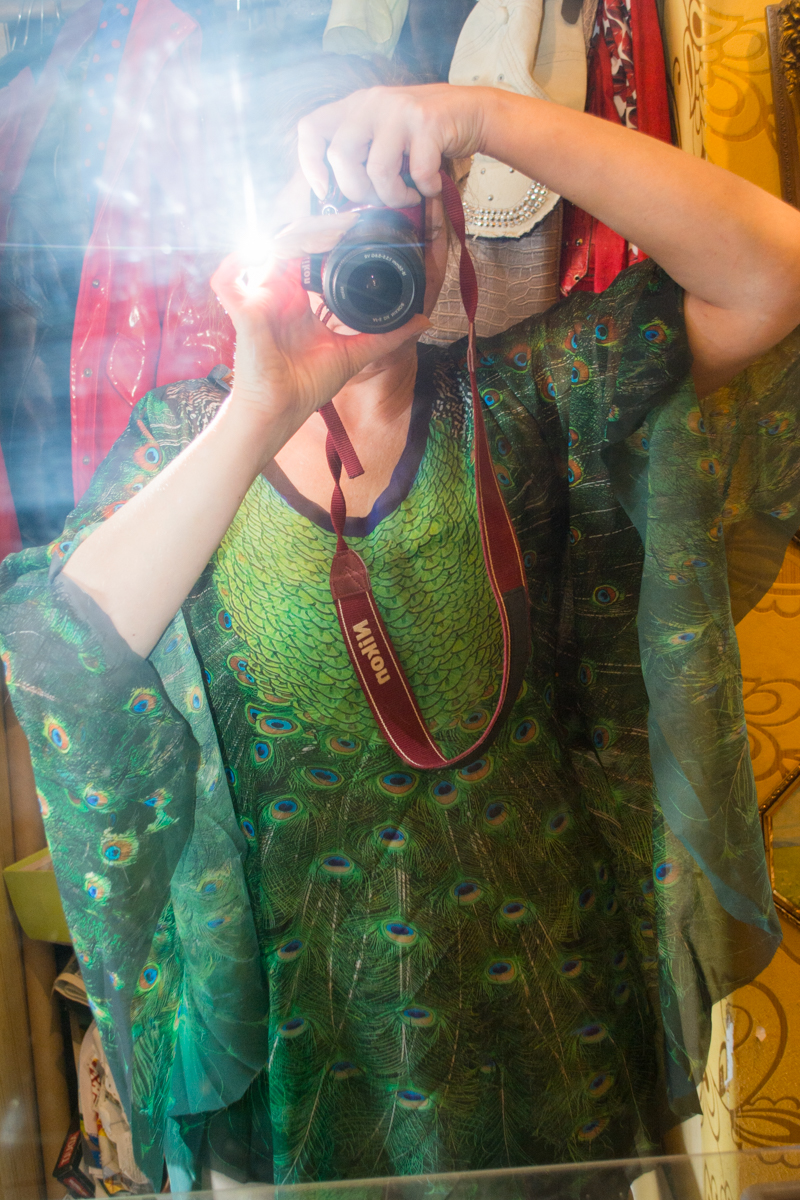
It’s also not the worst idea to pose in front of a mirror to check the look. Not the worst opportunity for a DSLR selfie either 😉
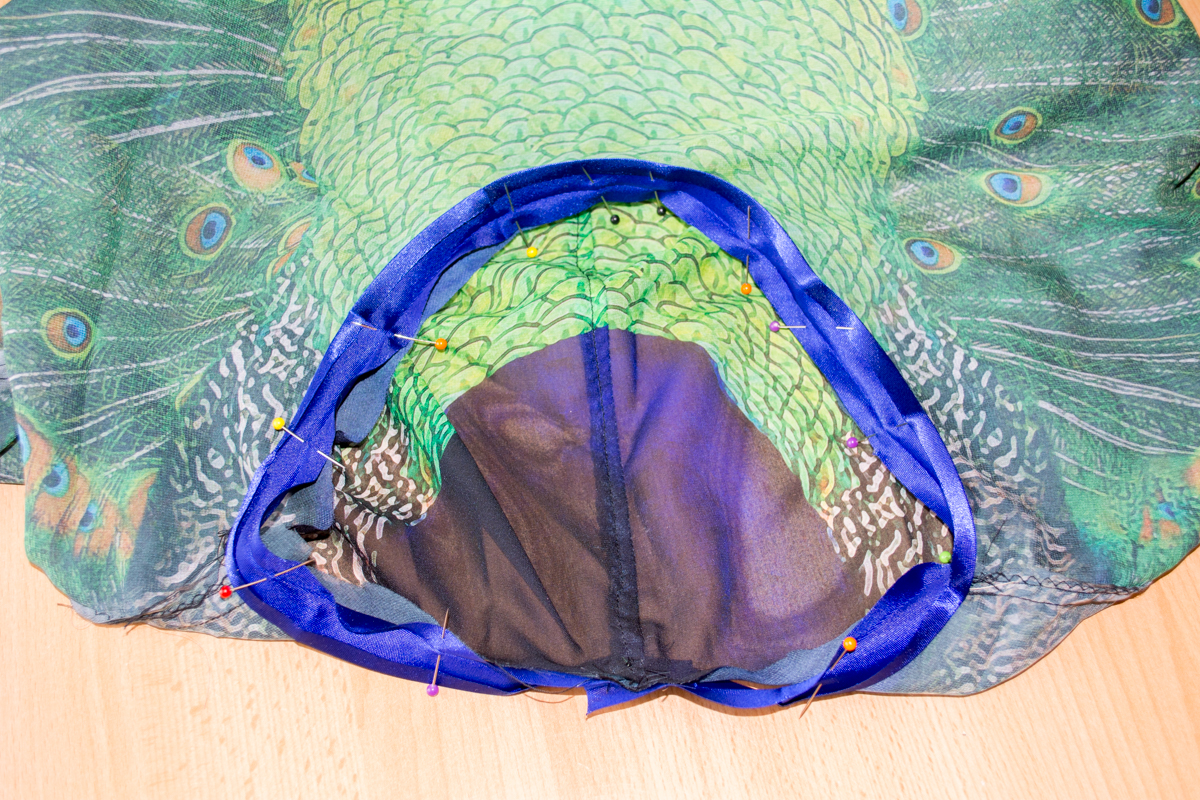
The pinned tunic should look approximately like this when laid out flat. I’ve marked the pins, which are still in the fabric, with arrows just so you can see them better. The dotted red lines indicate where you will need to sew a line to sew front and back sides together:

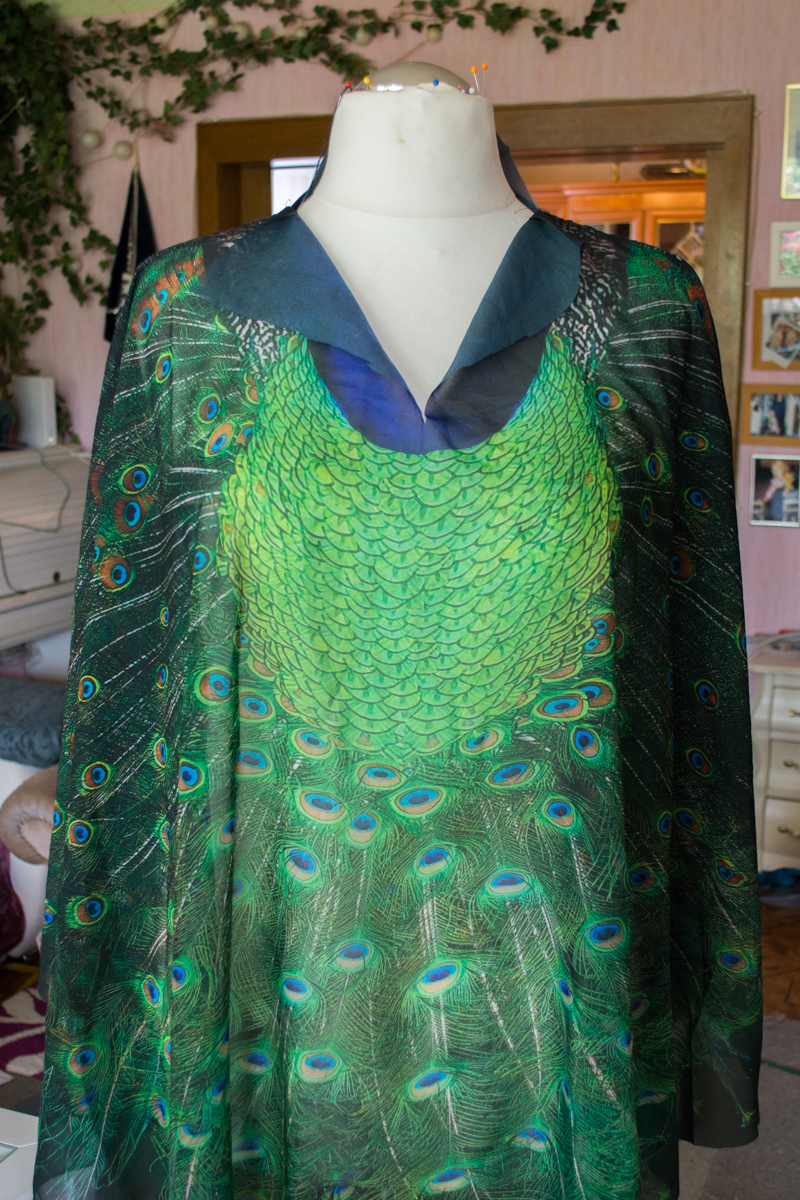
Now it’s time to finish the neckline. You can of course choose whatever finish you want, but…
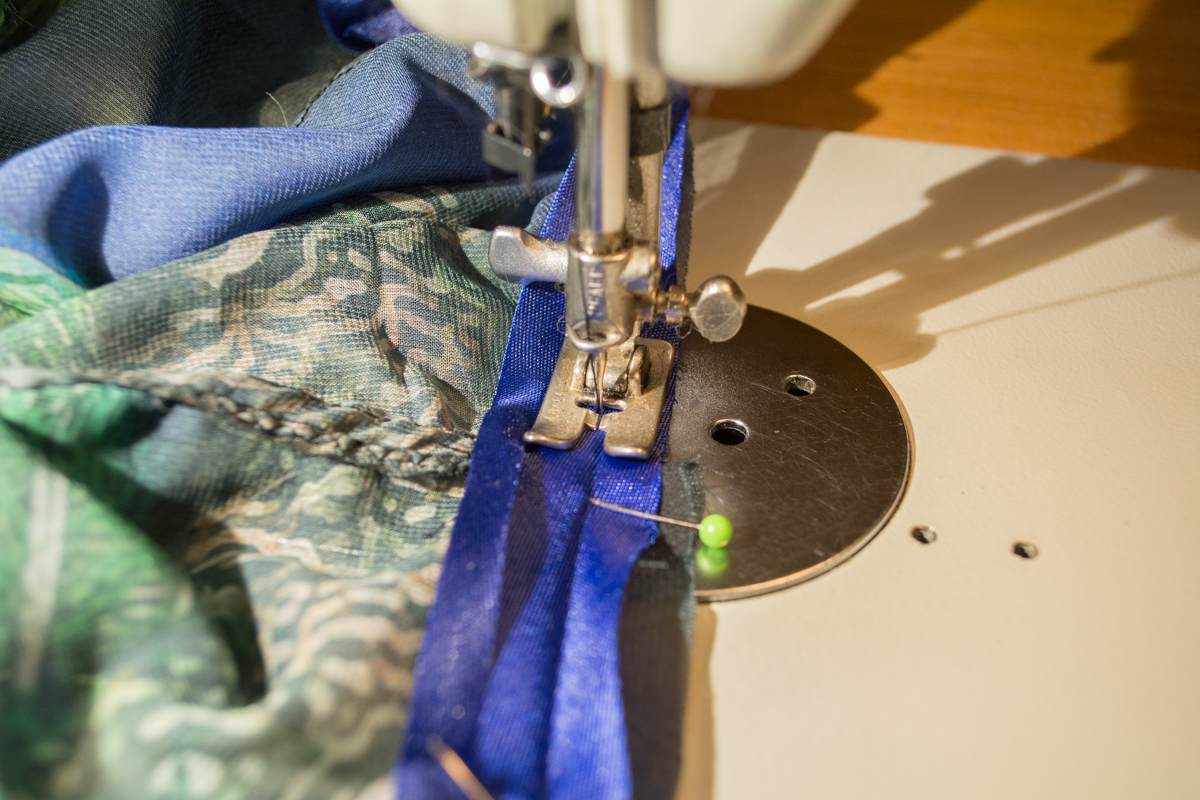
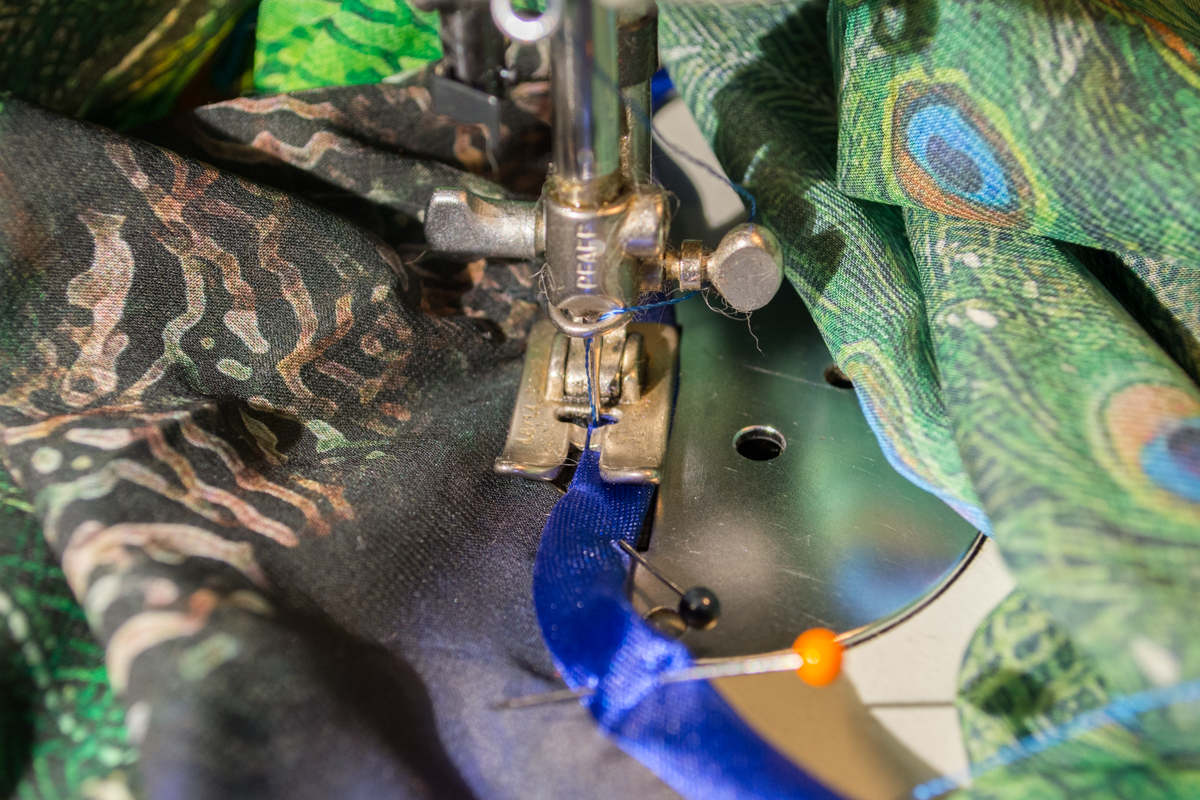
I first pinned saphire blue bias tape to the neckline I cut…
…then sewed that down from one, …
…then from the other side.
Besides tunics and peacocks, I also happen to love having myself a little bling.
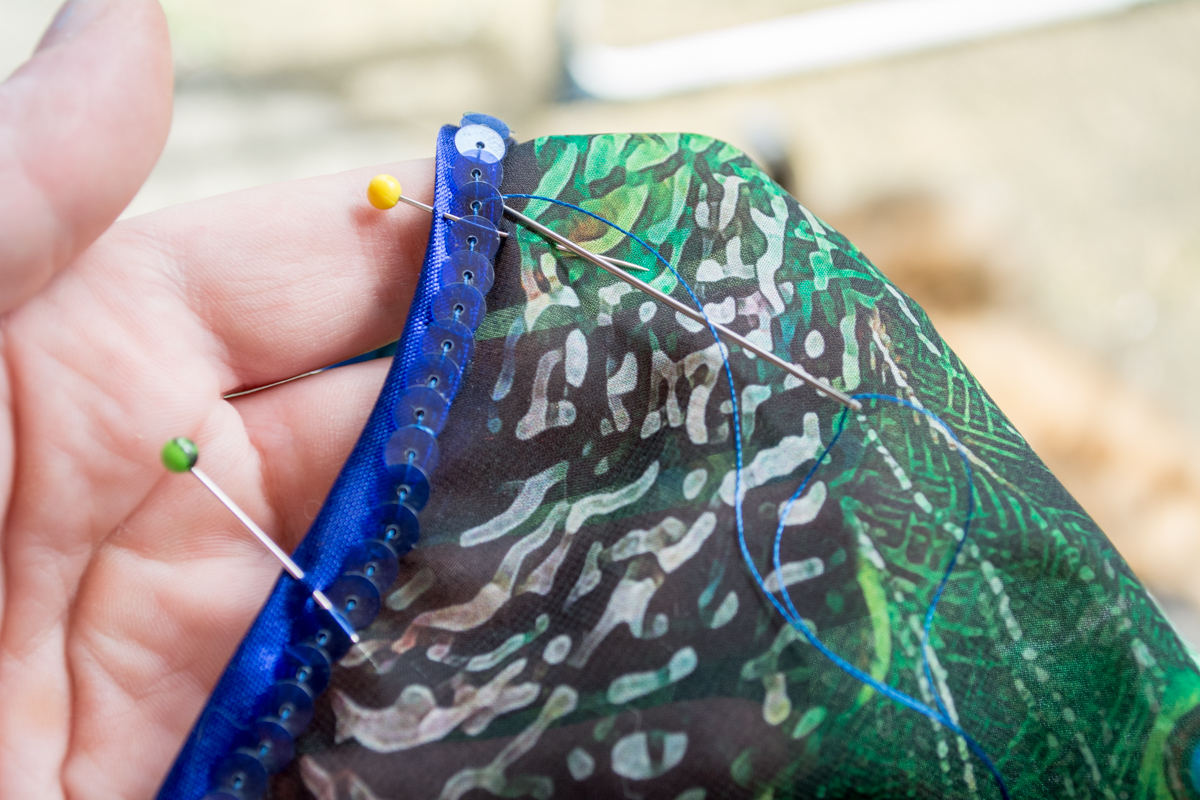
So I first pinned down a single line of sheer pearlescent blue sequins down the neckline…
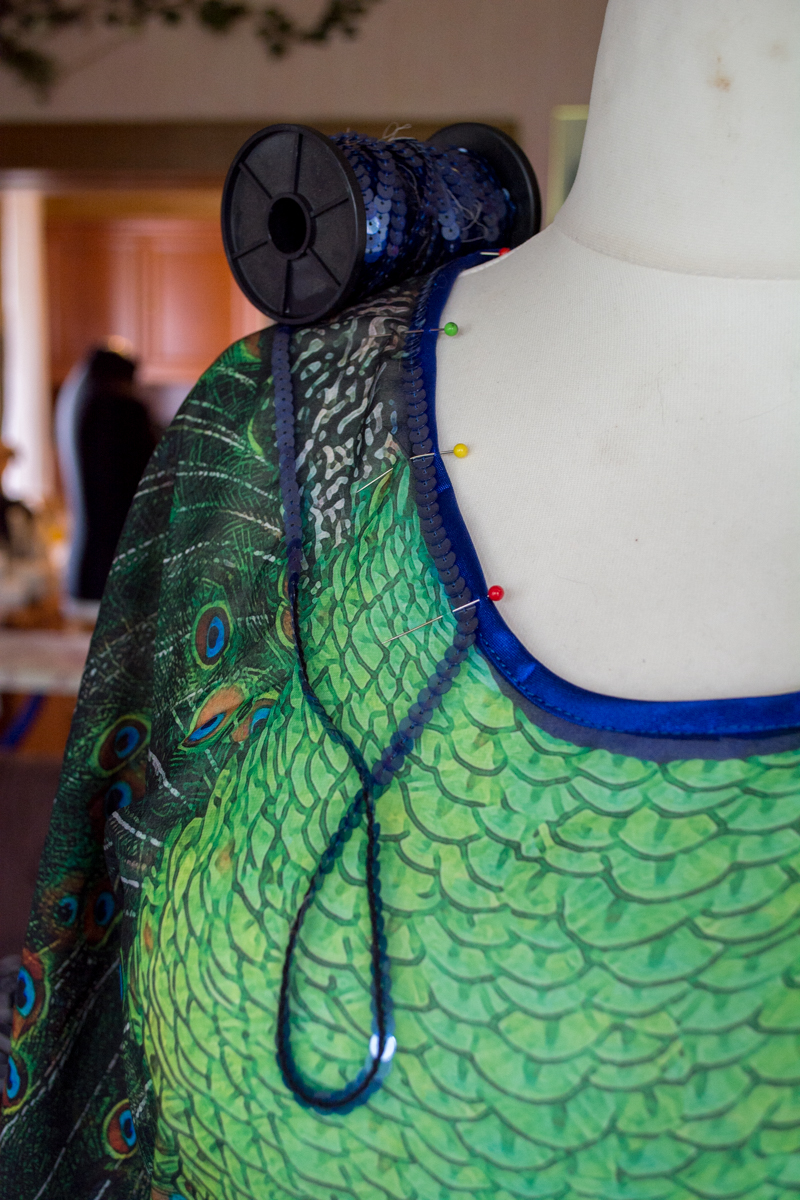
…then sewed those down by hand:
Last not least, finishing of the edges of the wheel.
As I already mentioned, you can either serge that, or sew a rolled hem (by hand or machine) – or you can just singe the edges along a candle. The latter – on artificial fibers, like polyester – will seal the edges so they cannot fray.
Here is a video on Youtube (not mine!) that demonstrates this technique.
If you do this, you do it at your own risk. Don’t hold me responsible if something goes wrong.
Note that I do NOT recommend this on light (white etc) fabrics, as the singing can leave darker spots on the fabric. On those, it’s better to basically cut the fabric using a soldering iron on a piece of glass (for example, the top of a glass table or a ceramic hob field). That, too, will seal the edges. Here is a video on Youtube demonstrating this (she does it along the edge of a board, but you can also do it freehand).
You MUST practice this. You still have the scraps from cutting this tunic? Good, because you can use those to practice this technique. Nothing worse like doing this without practice and have your just finished tunic catch fire. I can’t quite demonstrate that in a photo, because I need one hand to hold the camera.
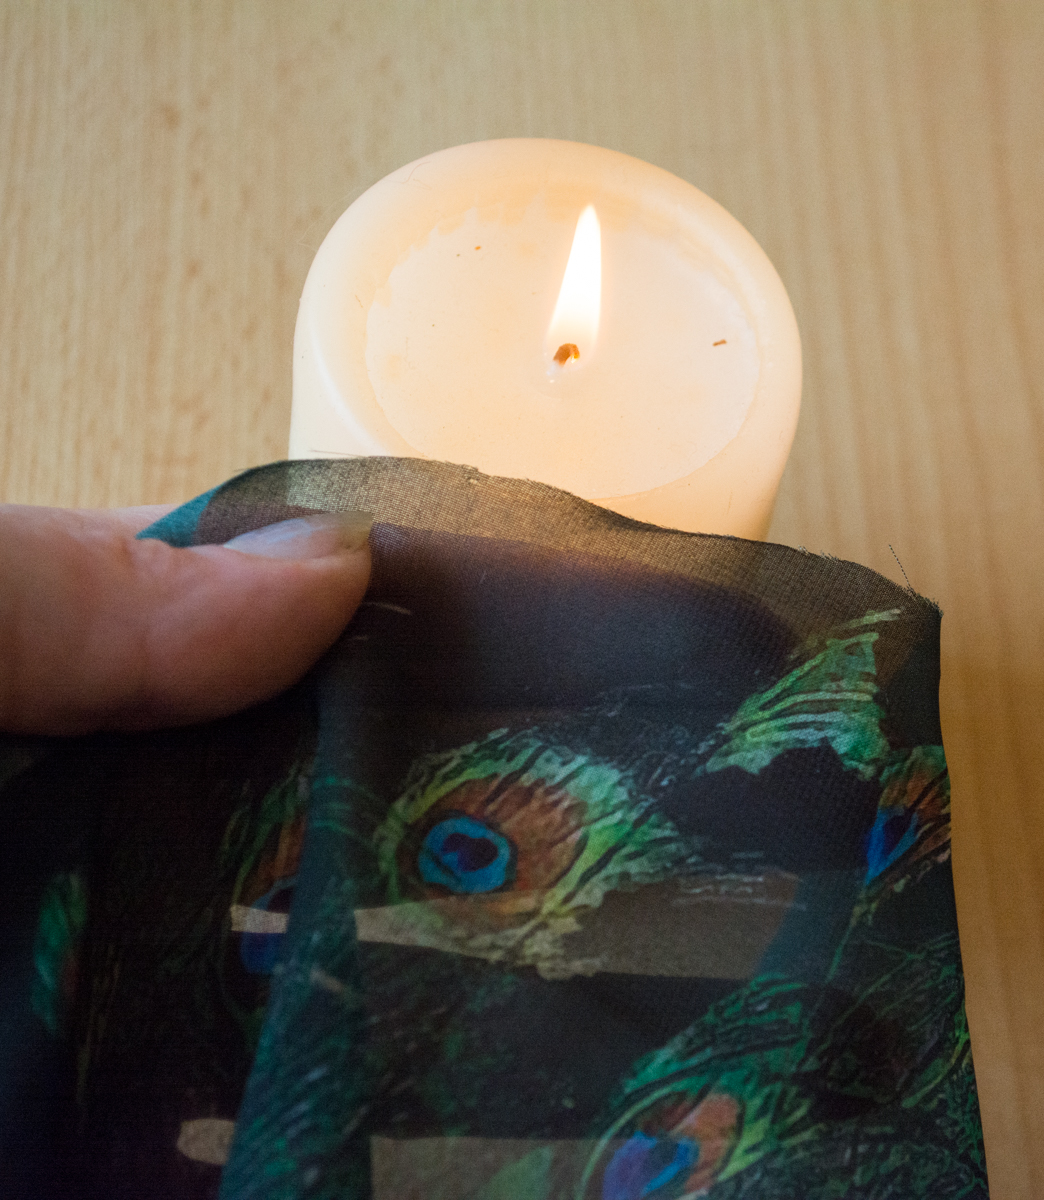
Pull the cut edge along the flame of the candle at moderate speed (approximately six inches per second).
Three important things:
First, you should do this outside (fumes and chance of fire!).
Second, ALWAYS have a wet cloth and a pot of water handy in case any of your fabric catches fire.
Third, always hold the edge of fabric that you’re singing between two hands.
PLEASE be careful when using the singing technique.
After all singing (serging, sewing, etc.) is done, your tunic will look like this:
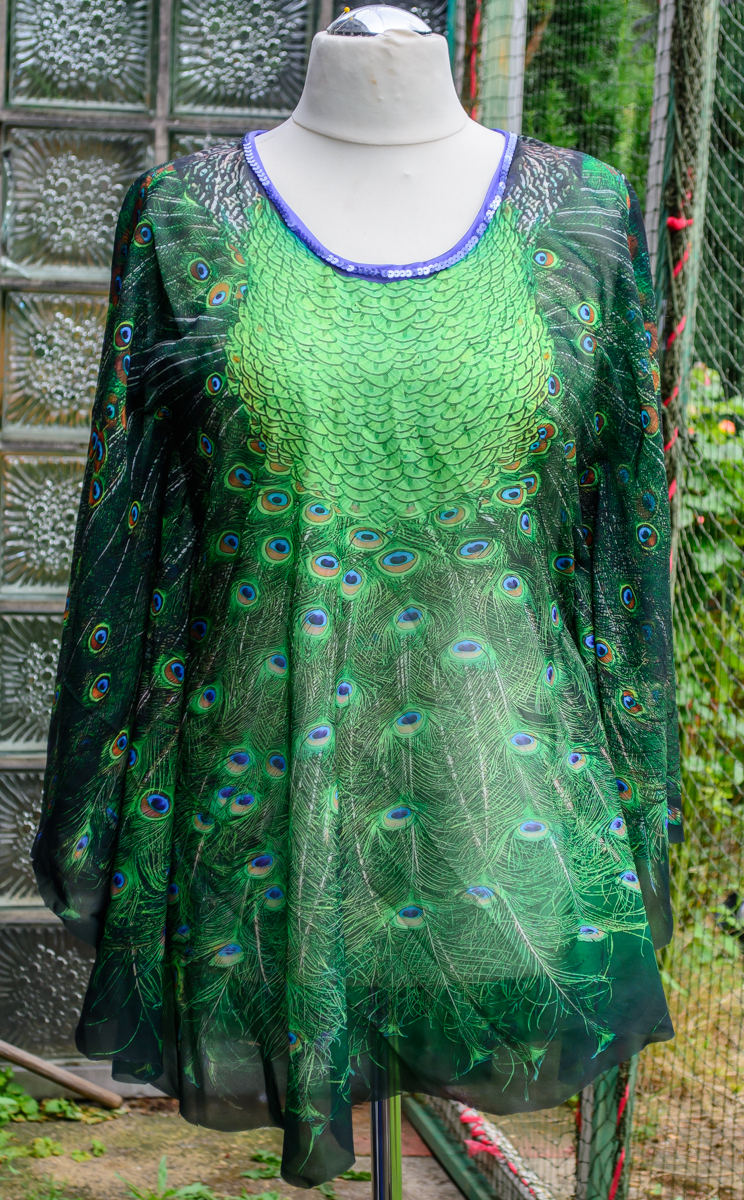
Yay, finished, wearable pretty peacock tunic! Now I just need to get an opportunity to take better photos of the tunic with me inside of it 😉