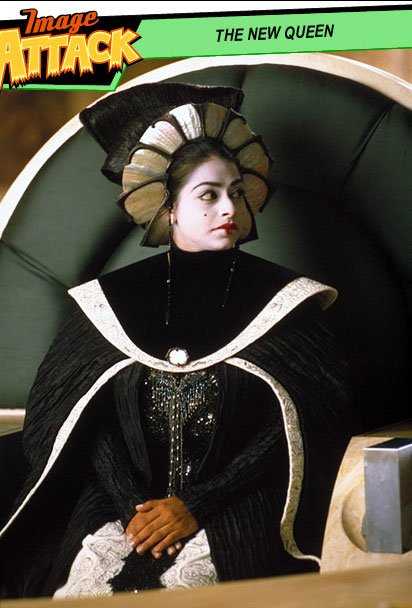
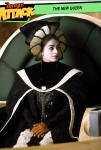
Star Wars Episode 2 – Naboo’s Queen Jamillia
Some observations and thoughts on the original gown considering the task at hand – I have written them down over a considerable amount of time, so some of the information may seem doubled, but actually they all contain some new information.
I always do this sort of brainstorming before I start working on a gown while I just stare at various pictures and, if given the chance that it’s a movie costume, I watch the scene several times and write down notes over a time span of several days or even weeks, the time depending on me being satisfied with my musings.
Such a brainstorming would read like this:
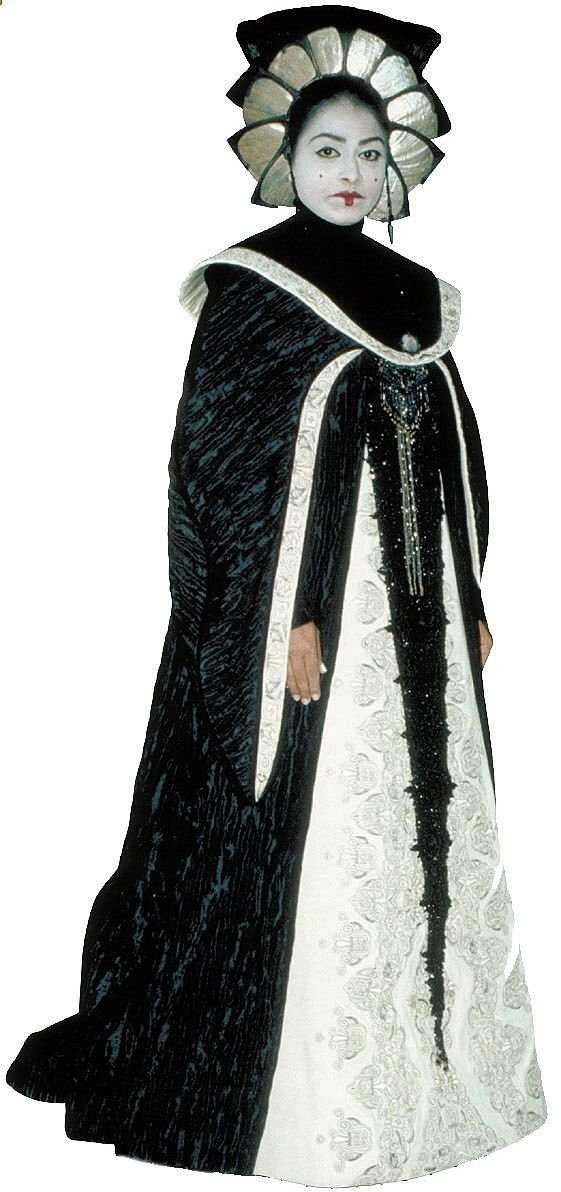
- The white ‚underdress‘ – or kirtle – goes up far over the waist, can therefore not simply be substituted with an Elizabethan petticoat. My first thought was to make a petticoat plus bodice, but that wouldn’t work. Therefore, I’ve decided to make a kirtle; which makes sense – after all, the complete look of the costume strongly resembles an Elizabethan loose gown plus kirtle.
- The sleeves of the black overdress of the Jamillia gown are so *not* period Elizabethan. Though at first sight they look like a crossover between hanging and Spanish sleeves, closer examination shows that they have a completely different shape. Also, it seems as if the sleeves and the black overdress are separate pieces – the sleeves seem to be connected, and are worn like a shrug over the black overdress.
- The hanging, beaded, center front piece could be connected to the large, non-period black velvet collar.
- …so could the sleeves. In theory, at least.
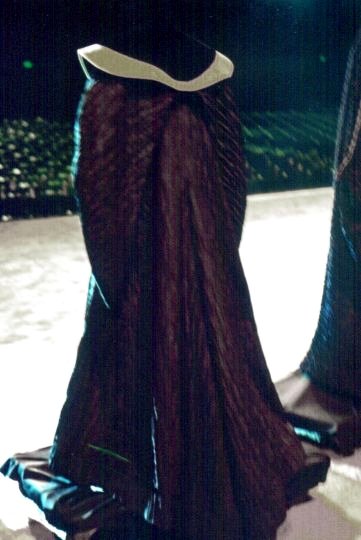
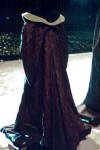
- The back of the overdress looks much like a kirtle or loose gown with a gore at the complete center back, starting from about mid-back (the gore, that is). Unfortunately there only seems to be ONE picture available that shows the gown from the backside.
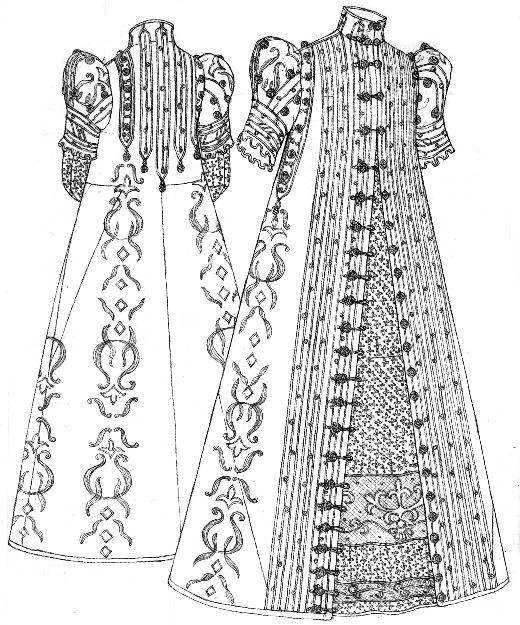
- The outer shape of the whole gown, if I leave off the collar, middle piece and sleeves in my mind, much resembles two gowns described in Janet Arnold’s „Patterns of Fashion – The cut and construction of clothes for men and women c. 1560-1620“:
namely the kirtle and the loose gown from the Germanisches Nationalmuseum, Nuremberg, 1570/90 on pages 109 – 112 (this combination is also to be seen on the left side of the cover of this PoF book).
Compare (I have flipped the illustration from PoF here to make it better comparable to Jamillia’s gown):
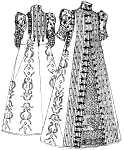
Looks quite similar, doesn’t it?
I think I should use those two gowns as basic patterns for the under- and overdress, then construct a separate, detachable collar with the ‚Jamillia‘ sleeves.
- To determine the exact size of hoopskirt I need, I just need to apply basic math knowledge about how to calculate circles (and, yes, thank you – I know why I paid attention in my maths class):
Assuming Jamillia is as tall as I am, which would be 178cm with shoes – then I can say by looking at the picture that shows the complete Jamillia that her skirt is about 1/2.5 of that size wide; which would be about 71.2cm.
By multiplying this with Pi (3,14159265358979) I can now calculate that the hem circumference of her skirt must be about 224cm. The closest size of a finished bridal hoopskirt to that (because I don’t want to construct an own hoopskirt for that gown – *sometimes*, buying is easier!) is 220cm – this is why I have decided for that size.
- To construct the skirt of the kirtle, which lies quite flat over the hoopskirt, I think I would be safe by making the skirt bottom circumference 10 cm wider than the hoop circumference is – meaning that it will have to be about 230cm wide.
- (Note: This part is something I’ve had to revise. There are no diamond shapes on the front piece. You can clearly see it in larger exhibit pictures at Padawansguide. I’ve also revised this planning when I beaded my triangular piece; but just for the sake of having the brainstorming complete, I’ll leave my initial thoughts here.)
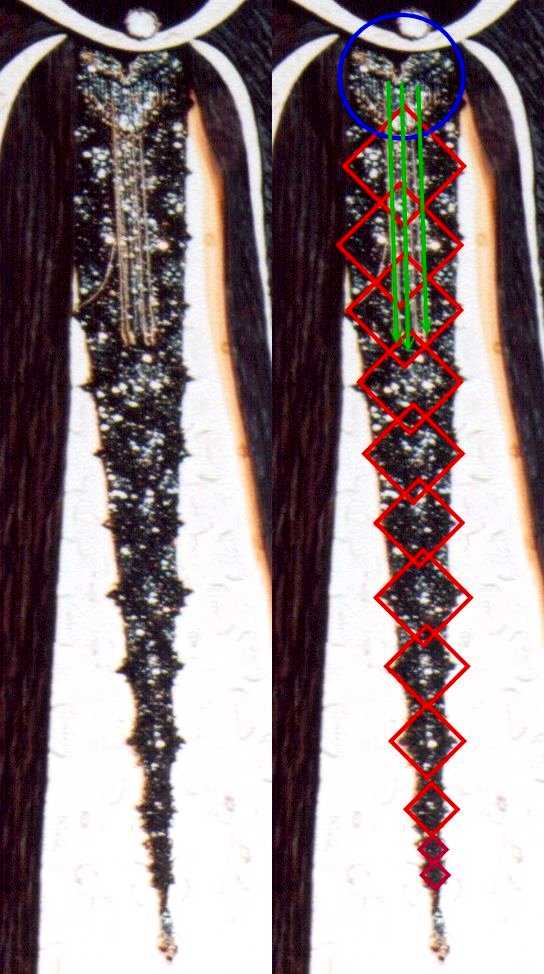
I think (though I may be wrong) that the front middle piece is basically beaded with black and dark golden sequins (which would make it easy for me – I’d just go and buy a yard or so of sequined fabric and use that as the basic material), and over those black sequins they have pinned diamond shapes made of black jet cut pearls. These diamond shapes are bigger at the top and smaller at the bottom; plus they overlap at the top. Here’s what I mean:
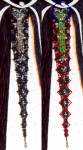
Left = unedited version; right = marked version.
The red diamonds, in my opinion, mark the diamond shapes of pearls, overlapping at the top, at the bottom they are smaller. They also have either a rhinestone or clear crystal pearl in their centers.
The blue circle at the top marks the top shape which seems to be round (plus has something likely to a wing- or heart symbol in silver beads in it).
The green arrows mark the loose strands hanging down from the top piece.
Well, that’s at least what I *think* I can see here. The diamond shapes should be simple to construct with wire and pearls, but it will probably be quite time consuming… well… as I have no particular date to which I would like to wear that gown, I can take myself time…
- After enlarging the kirtle pattern I came to a skirt circumference for the original kirtle in my size of c. 260cm – quite close to what I first calculated; 40cm are not much when it comes to the circumference of a skirt hem….
However, now I know that I have to look for a 250-cm-hoopskirt instead of a 220-cm-one.
I should also look out for one that has at least three stable hoops. If I indeed should make the loose gown turn-able with a velvet in- or outside (depending on which side I’m wearing out…), then there will be a considerable amount of weight on the hoops. To avoid them starting to „escape“ through the front gap of the loose gown, I’d better choose some strong ones that will carry the weight without ‚complaining’….
(and here, too, a revision of my initial thoughts took place in the end. I’ve used the farthingale of my Pelican gown for this dress; which happens to have just the right size 😀 )
- I have to find a solution for the mother of pearl elements of the headpiece.
Mother of pearl elements are so expensive that I could cry, and I have not seen *one* yet that *has* the size of just one of the original elements.
It took me from 2005 to the end of 2011 to actually come up with a useable idea for that substitute, by the way. Google „Drum Wrap“; or look at my Drum Wrap tutorial 😉
- Pattern wise, there is some kind of ‚giant forepart‘ on the kirtle from Patterns of Fashion.
Well, it’s of course not a real forepart, but a piece of „soft ivory silk with fine silver threads in the weft (…), embroidered with couched black silk thread resembling buttonhole twist and 3mm (1/8) spangles in bluish grey metal“1, sewn to the front portion of the gown. This is the part of the kirtle that would show below the loose gown.
Planning finished:
After the above written brainstorming, I came to this finished plan:
- Construction of a kirtle and loose gown from the above mentioned „Patterns of Fashion“ patterns.
- Sleeves will be made as a „shrug“ to be worn over the loose gown.
- The underdress will be made from the PoF-kirtle-pattern. I will make it of the white jacquard I still have. If I should still have the nerve to do so, I will embroider the center front and the trims on sleeves and collar (which have to be embroidered on short-piled cotton velvet, like the original!) in a likely way to how Jamillia’s gown is decorated.
Jamillia wears narrow crushed taffeta sleeves under the wider ones:
So I will make a pair in crushed taffeta, the other of more period „Elizabethan“ material. I can exchange them by the lacings which are also on the original gown, in case I ever want to wear the kirtle with a more period loose gown.
I am not certain yet about the „full gown forepart“ described in the brainstorming – I guess I will see what I make here during the making process.
- For the gown I will use my ‚Pelican‘ gown farthingale. Yes, it’s red, but that’s just decadence 😉
- The collar, ‚Jamillia‘ sleeves and the ‚Jamillia‘ front middle pieces will be made as single pieces.
- The Jamillia headdress will be made… somehow. I honestly don’t have many ideas yet how to make it, but I will. Thanks to the person who has invented Fimo, I will also complete that particular task, I guess

After this planning stage is finished, I can now construct the kirtle as soon as I find time to do so and have the nerve *sigh*….
After the latest exhibit pictures it became clear that the white underskirt is not decorated with lace, as I had thought, but that it is indeed embroidered.
Not that I would want to do that… really, no… however, just to keep myself entertained, I have programmed the embroidery from the exhibit swatch pictures.
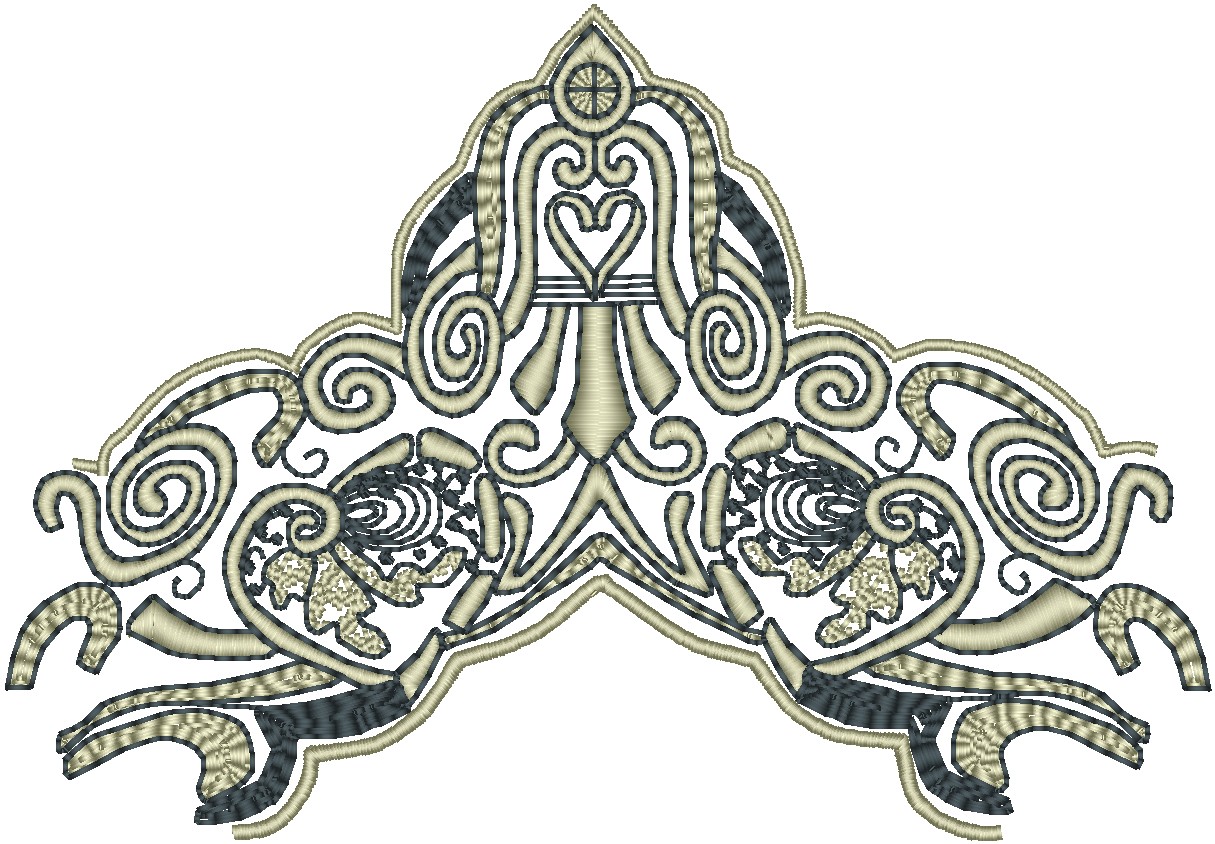
In the embroidery software, the preview looks like this:
I think it’s a quite close match.
And as I’m currently in an awfully good mood – you can download the zipped embroidery file here.
You’ll need a Brother embroidery machine to use that file, though; or any other high end embroidery machine and/or software that can convert a *.pes file. The file is made for the larger embroidery hoop – 18x13cm (about 7×5 inch). If you don’t have that larger hoop, you’ll have to resize the embroidery with your software; but be aware that this CAN lead to undesirable results (just like upsizing it, by the way).
The skirt itself has variations of that swatch pattern.
Since much of the embroidery is covered by the black, triangular beaded piece and by the overdress, I had to basically „piece“ the embroidery together from various exhibit photos (because some that were taken from certain angles show parts of the embroidery which are hidden by the overdress and / or the triangular piece when seen from the front).
Here’s what my pieced-up collage of the embroideries looks like. Note that the images, if you click them to see the full size, are HUGE – they’re basically lifesize:
Center front, complete – red line indicates the center; note that I only pieced up HALF of the embroideries (left side) because the other side is symmetrically mirrored:

Front side (left side, to be precise) turned straight – again, the red line indicates the center front (which, since I turned the embroideries, is at an angle)

Bottom center front:

And here’s the preview of the embroideries that I’ve digitized from that collage. Again, the images are huge, but not as large as the ones above. Red lines indicate a) the center front and b), in some cases, where I have to change the hoop for the embroideries (remember, those are MACHINE embroideries!). Of course you’re free to compare those previews to the original, pieced collages above; and, in case you find apparently huge mistakes, I hope you’ll point them out to me.
Front side:

Center front:

Also, I have digitized the embroidered sleeves trim as well.
I’ve digitized a repeat of 26cm (about 10 inches), which fits into the hoop four times. The space between the trim strips is just so that I have a selvage (and the red lines indicate where I can cut it). I’ll embroider this on the bias of the fabric, so I have the possibility to slightly curve the trim where I need to when it’s done:

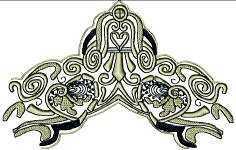
Of course I’ve also digitized the collar. That was, in my opinion, the hardest part to digitize, since the pictures don’t show the top of the collar; so that’s where I had to guess the embroidery.
The preview pic is probably a bit confusing. The back of the collar is on the left side, the center front is towards the right. The red lines indicate the outline of the collar trim; the one long red line is indicating the grain of the fabric. There are also tiny notches in the red outline, those indicate matching notches on the black velvet (to which I have to attach the white velvet collar trim); as well as some lines which indicate the brooch placement at the center front. I don’t need the latter to attach the brooch, I needed those lines when I digitized the embroideries from photos.

And just for the statistics, as usual… here’s the raw embroidery data, which I got from my embroidery software’s statistics (I use Brother’s PE-Design 6, by the way, to digitize my embroideries; and the machine that I can use can take frames up to 10×6 (16x26cm)) for the single embroidery files.
| Embroidery piece |
Stitches |
Has to be embroidered… |
Results in … stitches |
| Front side |
222,956 |
twice (x2) – left and right side |
445,912 |
| Center front |
44,587 |
once (1x) |
44,587 |
| Trim for sleeves |
44,039 |
four times (since each frame gives me a bit more than a yard of trim to work with, and each sleeve will take approximately 2 yards) |
176,156 |
| Trim for collar |
40,210 |
twice (2x) – left and right side |
80,420 |
| Result |
747,075
(Yes, that’s almost
eight hundred thousand
stitches!) |
Also, just for the statistics:It took me about 14 days to digitize all these embroideries.
I will have to change the position of the fabric on the hoop (20x for sides + 2x for center front + 4x for trim + 10x for collar (the latter is just a rough estimate!)) = 36 times.
That’s 36 times for things to go awfully wrong 🙁
Also, in case you have no idea about the time frame:
Each frame takes approximately an hour to to 90 minutes to embroider; but I can’t concentrate on watching the embroidery for more than 2 frames per day (just because it’s something you have to concentrate on HARD, to catch the machine in case the thread breaks, or the lower bobbin is empty, or the needle breaks, or, or, or. You just have to sit and WATCH that thing – which makes as much noise as a starting jet! – and do nothing else!).
That basically means that IF I embroider two frames per day, it will STILL take me more than TWO WEEKS to finish the entire embroidery, IF I don’t take a single day of break.
And that’s JUST the embroidery; no sewing done yet! |
Besides the white velvet (~2.5 meters, 150cm // 60 inch wide) and the embroidery threads, by the way, this particular embroidery project will also „swallow“ approximately 3 meters of 1 meter wide sticky interfacing (which I need to be able to exactly position the fabric on the hoop when changing it) and the same amount of clear, water-soluble „topping“ (which has to be put OVER the velvet while embroidering it, so it basically crushes the velvet pile down beneath the embroidery).
Concerning embroidery threads, which are a HUGE factor in this project:
My calculations, done with an embroidery digitizing software which is able to estimate thread usage, I calculated that I will need approximately 5,500 yards of white / cream thread and approximately 2,750 yards of black metallic thread, which, by the way, is most likely to have been Madeira’s „Super Twist 30“ in „Black Pearl“, color #264 on the original gown, plus approximately 7,000 yards of bobbinfill thread).
Plus, because metallic thread tends to wear needles out faster than other thread, I think I will need two packages of Schmetz TopStitch needles (there are five needles in each package).
Just the threads and needles alone are worth approximately $110, if bought on large bulk spools!
Just good that it takes some time to have those bulk spools and needles delivered to me; so the first actual thing I did on the Jamillia gown is to bead the triangular front piece; so that’s how this dress diary continues 🙂
1: from Janet Arnold’s „Patterns of Fashion c. 1560-1620“, page 110 |
Navigation for this part
of the page:
|