~Please also have a look at my other Star Wars costume reproductions! ~
Navigation menu for this costume:
Analysis of the costume – Making the headdress – Making the gown
Queen Amidala – Red Invasion / Theed Throne Room Robe
Analysis & How-to
Egads.

I seriously eyed this costume for a VERY long time; but was never sure if I would be able to tolerate the weight of the headdress.
But after making my Queen Apailana costume, I came to the conclusion that somehow I’d be able to make this gown WITHOUT the headdress weighting a ton (which would bother me immensely); last not least because said Apailana headdress made me develop new manufacturing techniques using Styrofoam and epoxy resin, which, in combination, are pretty lightweight.
After all, wearing a costume like this at conventions, events etc. isn’t exactly like wearing it on a film set. There are no breaks, no possibility to say ‚oh let’s just sit down for a few minutes and take this thing off‘. If you’re at an event or convention, you’ll be wearing a thing like this for 6-10 hours straight. And you still have to smile for photos, have to be able to tolerate the noise and heat that is inevitable when moving among a crowd.
So, in other terms, if you’re not planning to wear something like this just for a very brief photo shoot, it better be comfortable (or at least tolerable for a longer time).
Let’s start with an analysis of the original costume.
Materials:
The Robe:
- Panels (those are the wide ’straight lines‘ that run vertically down the skirt and sleeves):
If you look at the exhibit pictures very carefully, you’ll see something like this (click to enlarge):
 As you can probably see, there are tiny ‚ribs‘ all over the fabric, resembling grosgrain.
That’s, therefore, a ‚ribbed‘ fabric, called ‚Bengaline‘.
Note that Bengaline also comes as ‚Moiré Bengaline‘ (with an imprinted Moiré pattern); but that’s not what this is. This is just ‚Bengaline‘, also known as ‚Faille Bengaline‘ (Faille being an old expression for this type of fabric).
Also, of course, ‚Bengaline‘ just describes the type of weave of this kind of fabric. It can be woven from fibers like silk (which it apparently was for the movie dress), or from polyester, or rayon. But the weave itself is called Bengaline. - Piping between the panels (you can see those as thinner, vertical lines between the aforementioned Bengaline panels):
Again, look at the last picture. You can see that said piping (which is a cord sandwiched in a folded-over strip of fabric that was cut on the bias, then sewn into the seam between the panels) doesn’t have the ‚ribs‘ of the Bengaline fabric. Instead, it’s smooth and shiny. Therefore, it must be a satin. Again, for the original dress, this satin weave was apparently woven with silk fibers, making it a silk satin. But it could also be woven from polyester, rayon, acetate, etc. - Embroidered tabard and collar:
Looking at this picture:
 you can still see the ribbed Bengaline fabric of the panels in the lower left corner; but if you compare that to the under-collar, the collar (with the cording embroidery – I’ll get back to that in a moment) and the embroidered tabard, those, just like the piping, are missing the ribs of the Bengaline. Therefore, those, too, have to be made from a satin weave.
 - The collars and the hood
Now, this is something I discovered when studying the Amidala Bust by Gentle Giant closely.
There’s, obviously, an upper- and a lower collar. I’ve marked them with green (upper collar) and blue (lower collar) arrows in this picture (click to enlarge and see both arrows):
 That part is pretty obvious, and I wouldn’t have needed the bust for it.
I also didn’t need the bust (but just exhibit pictures) to notice the small ‚hood‘ like thing at the bottom part of the collar on the backside, which LOOKS as if it was attached to the UPPER collar in all exhibit pictures:
 But with this bust, which has no arms, I had the chance to study the underside of the collar. Imagine my surprise when I discovered this (again – click to enlarge. Also, again I’ve marked them with green (upper collar) and blue (lower collar) arrows:


Nothing so spectacular in this picture – the lower collar ‚disappears‘ beneath the upper collar at approximately shoulder level. BUT!…. …if you look at THIS picture, particularly at the area marked with a yellow circle, you can see that the hood is actually formed by the LOWER collar, which, at the back side, crosses ‚over‘ to the upper collar! And actually… if you know that it’s there, you can even SEE that lower collar ‚flipping over‘ to become the ‚hood‘ thingie in the exhibit pictures!
As I said, I didn’t notice this before I studied the bust closely. - Cording embroidery on the collar:
 As already mentioned in the last paragraph, there’s cording embroidery on the upper collar. You can see that pretty well in this picture. The cording is (probably hand-) basted down to the collar fabric. Since the satin beneath it is sort of puckering and three-dimensional, I presume that there is a thorough amount of batting beneath the satin (and whatever is beneath *that* batting) to achieve that effect.
 - Under-sleeve:
There’s a tight under-sleeve beneath the robe’s outer and inner, fur-trimmed sleeves. You can see it in this picture:

where it’s covering the top of the hand. Because of the sheen it has, I presume that it’s the very same satin weave that was used on the collars and embroidered tabard. - Fur:
The fur on the robe – according to Wookiepedia, this is fur from a Potolli – is neither brown nor black. It’s actually a reddish brown with black tipping. You can see that very well in this picture:
Also, from the appearance, I’d bet my left hand that this is artificial fur; looking like an acetate fur. The ‚hair‘ length would be approximately 1/2 inch, maybe a bit less (1cm). - Embroideries on the tabards:
 This is indeed embroidery, done in golden thread. Apparently these are appliqués, meaning that they were embroidered on some other than the red satin fabric the tabard is made of, and then sewn down on said tabard. You can, in some pictures, even see the ’stitching down‘ thread which is running around all the embroideries.
 - Glowing ‚eggs‘:
Wookiepedia knows that these are known as ‚Sein Jewels‘, and are supposed to be self-illuminating stones.
Actually, as much as they may look like eggs from afar, they’re not ‚eggs‘. Look at this picture, particularly at the ‚egg‘ on the left:
 There’s some kind of ‚dent‘ right above the dark part of the egg (blue arrow). Also, judging from the sheen (yellow egg), there seems to be some kind of vertical ‚dent‘ right at the center of the ‚egg‘ too.
In other words, those don’t really look like eggs, but more like ladybugs:
 The „Dressing a Galaxy“ book knows this about those shapes:
„The lights were in a vac-formed Perspex, color-washed with French enamel varnish.“
I can totally relate to that. I even think that each shape may have been made from TWO shapes; one being the darker one at the bottom, and the other one being the lighter one on top; both would slightly overlap where they meet.
The color-wash they mentioned would probably have been done from the inside of the shapes, to retain a very smooth outside.


The headdress:
- One COULD think that the headdress is in one piece, meaning hair and the ‚golden / silver / red parts are one piece.

 However, there’s an exhibit pic that shows weird gaps between the headdress and the hair:
 Left: Unedited exhibit picture (from here); center: Same picture, with arrow pointing to the weird gaps; right: picture of the headdress in the movie with arrows pointing to the very same places (which doesn’t have the strange gaps).
So, in other words, I think that the hair part and the golden / silver / red parts aren’t one piece; I think the hair part is some kind of wig, and the other golden / silver / red thing is, well, a headdress. It’s entirely possible (and actually very likely!) that both are connected by / with something (hooks, maybe?); but it’s also very obvious that said connection CAN be severed. - That having said, the headdress / wig portion consists of…
- a ridiculously large ‚hair roll‘ with a smaller, ‚knotted‘ ponytail in the back:
Said hair roll, by the way, isn’t massive; meaning it isn’t only made from hair.
You can see that pretty well in this exhibit picture on the left side, where you can see the mesh that forms the hollow roll of hair beneath the hair:

What you can also see in this picture is, obviously, an elastic strap beneath the ponytail. This, I think, is what is holding the cap part of the headdress in place. - two ’sword-like‘ things at both sides of the head; those are actually in two pieces:
 Alright, look at the image above, from left to right.
- First, there’s a whiteish-golden part of the sword. That’s a geometric pattern on it; the golden parts are raised, while the white parts are ’sunken in‘. That can easily be achieved by first leaf gilding that three-dimensional pattern; then washing over it using white enamel, and after that, wiping said enamel off the raised parts (using a firm sponge).
- Second, there’s a second part, in bright shiny gold, covered with red bobbin lace with floral motifs (Bobbin lace! This is different from crocheted- or any other lace!). You can see how shiny and smooth the gold beneath the bobbin lace is if you look at the very right edge of that (in the picture) left sword from top to bottom and vice versa.
- Last not least, you can see that those are two pieces by looking at the very right of the picture, where you can see the edge of the sword on the other side of the headdress. They’re right on top of each other, and you can see the thickness by looking at those edges.
- The ‚ear eggs‘ at both sides of the headdress:
 These, opposed to the whiteish-golden ’sword‘ parts mentioned above, are just covered in gold, without any ‚whitewash‘ – you can see that very well since parts of one of the swords are in this picture too. Also, the three-dimensional pattern is different from that of the sword – it’s rather ‚floral‘ than the ‚geometric‘ appearance of the sword pattern.
Also, the ‚ear eggs‘ aren’t really ‚eggs‘; they look more like ‚inverted drops‘. - The ‚cap‘ on top of the head, which ‚holds‘ the hair roll:
 Lots of stuff going on here. The cap is made from materials using the three different textures that I already listed for the swords and the eggs: floral three-dimensional pattern in gold; white-golden geometric pattern, and plain gold with floral bobbin lace overlay.
The extension that goes over the hair is ending shortly after the highest point of the hair roll in the back:
Just of course that the red lace-covered center strip apparently does not extend beyond the center peak towards the back. You can see that very clearly from the backside in this exhibit pic – no red!
- Also, there’s the center jewel in a cross-shaped setting at the very front; in the Star Wars universe, this is known as the ‚Jewel of Zenda‚.
Now, let’s get really costuming geeky.
Natalie Portman’s height, according to IMDB, is 5′ 3″ (1.60 m). Let’s presume that she’s wearing a 1 inch (2.5cm) heel with this dress, that would make her 1.625m (5’4“) when she wears this dress.
If I use the grid method (described below in „Analysis of the shape and pattern“), I get the following (approximate!) size for the original jewel (centimeters, just because that’s much easier for me to calculate: The width (=front view) is 26mm; the depth (=side view; approximate because of the golden setting) is ~1.5cm.
Note that this is the approximate size of the original jewel; taking the tiny height (160cm / 5′ 3“ IS tiny!) of Natalie Portman into consideration. If you want to make a reproduction of that headdress and are taller than her, your jewel has to be bigger, too (just so it looks proportionally correct on you!). - On top of the cap, there’s this interesting ‚peak‘:
 From bottom to top this time.
At the very bottom, you can still see parts of the aforementioned headdress cap’s extension that partially wraps around the hair roll.
Over that, there’s a cone-shaped thing covered with the golden floral three-dimensional design that was already used on the cap and the swords.
At the very base and top of that cone, there are rows of pearls – smaller on top (original size approximately 2mm), bigger (original size approximately 4mm) at the base.
Over those, there’s what seems to be a carved wooden ball, decorated with the Chinese ‚Longevity‘ symbol. This ball is actually a carved red cinnabar bead (and yes, you can google that!). Again, using the grid method, I can calculate that the size of the original bead must be approximately 22-23mm.
On top of that cinnabar bead, there’s a short cylinder, decorated with flat rhinestones in gold and red – original size of those rhinestones: approximately 4.5mm (red) and ~4mm (yellow). The short cylinder seems to be slightly tapered at the top towards the next thing, which is
another row of the smaller pearls. Those surround the base of what seems to be
a golden ‚crown‘ like thing, decorated what seems to be glued-on, red glass seed beads. Last not least, on the very top, there’s
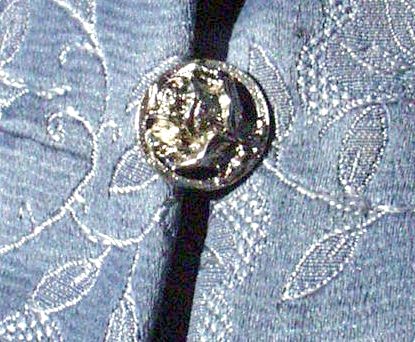
a silver thing (bead? Part of a shank button, maybe?) that somewhat resembles the upper side of a flower bud.
I can tell you how I got the funny idea of the latter maybe being part of a shank button – I’ve once used likely tiny buttons on a costume; they looked like this:
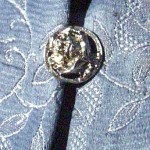 If you’d cut off the bottom portion of that ‚rosebud‘ shank button, it would greatly resemble what can be seen on the very top of this headdresses‘ peak.
- a ridiculously large ‚hair roll‘ with a smaller, ‚knotted‘ ponytail in the back:


Descriptions of the dress that are wrong on several websites:
There are a few things that awfully bothered me about some descriptions of this dress that were in the press, and I’d like to point those things out.
- The description in the book ‚Dressing a Galaxy‘, which can be found on several websites describing this dress.
Said description (which can be read in full here, for example) contains like this:
„I chose instead a fine silk-satin cord, which was mounted on a more densely-woven silk prior to construction, and each panel (approximately twenty-five in the dress and fifteen in each sleeve) was self-piped. “
Alright, firstly, it’s NOT „silk-satin cord“. It may have been SOLD as ’silk-satin cord‘, but the actual name of that weave is ‚Bengaline‘, as already pointed out at the beginning of this page.
Secondly, a dress either has ’25 panels in the dress and 15 in the skirt‘ – or it has not. It doesn’t have an ‚approximate‘ numbers of panels. Particularly not if you’re the maker of this dress and are being interviewed about it.
One should think that the maker of a dress that cost – according to the Vogue magazine, of which parts of that article can be read here! – US-$ 60,000 to make KNOWS how many panels there were in the sleeves and in the dress. There’s no ‚approximate‘ in the actual number of panels used; period.
I’ll get back to the actually used number of panels in both dress and sleeves in a moment; and, sadly enough, the numbers 25 and 15 are wrong. - Also in the aforementioned Vogue article; this part can be found here:
„According to the April 1999 issue of Vogue magazine, the robe of the „Throne Room Costume“ is made of embroidered corded silk and faux fur.“
As already described at the very beginning of this page (and verified with photos of the dress!), the two only things on the dress that could pass as ‚embroidery‘ are the cording embroidery on the collar, and the golden appliqués on the tabards. None of both, however, was done oncorded silkBengaline but instead on a satin weave. - From a description on the official Star Wars website (which can be read in full here):
„And while the costume was originally going to be velvet, lighting issues mandated a change to silk.“
No. No, no, no, NO.
That’s a typical beginner’s mistake; and one has to wonder how it ended up on the OFFICIAL WEBSITE, where you’d think the people who ‚know things‘ write stuff.
‚Velvet‘ is a weave. It can be woven from many different fibers, like silk, cotton, polyester, wool, etc. – or from a blend of those fibers.
‚Silk‘ is a fiber. It can be woven into many different weaves, like velvet, satin, taffeta, chiffon, and so on.
To say that something ‚was going to be velvet, but then changed to silk‘ is like saying that „a cake was originally going to be a cheesecake (which is made from many different ingredients), but (whatever) mandated a change to flour (which would be just ONE of the possible ingredients)“.
I guess you see the difference in case you’re not familiar with weaves and fibers if you consider the cheesecake / flour analogy. - Another description, of which I don’t know the source but which happens to be on several websites goes like this:
„The gown is accented with gold embroidery and shed Potolli fur cuffs, and seven Sein jewels illuminated by plasma gas circle the hem.“
While I’m fully aware that this is a fictional description (since in the real world no ‚Sein jewels‘ and / or ‚Potolli fur‘ exist), they could have gotten at least the NUMBER of jewels right.
I’ll get back to that in the following…
Analysis of the shape and pattern
- Let me first introduce you to ‚lantern counting‚, a follow-up on issue #4 I posted above.
Click the image to enlarge!
 So…
So…
From the front, you see three jewels. Let’s call the center front one ‚1‘, and the one to its right ‚2‘.
From the side, you can still see 1 and 2, but also a 3 and 4.
From the back, you can see 3 and 4, which then, symmetrically, continue to the other side to the dress.
So if you would look at the dress from the top (with no sleeves blocking your view ;-)), you’d see this:
 Count with me: 1, 2, 3, 4, 5, 6.
SIX lanterns / ’sein jewels‘. Not seven. Not even ‚approximately‘ seven. There are six lanterns on the dress. Period. - Number of panels, a follow-up to issue #1 posted above:
Knowing the number of lanterns, you can take whatever picture of the dress you want (no matter from what angle) and see the following:
 What you’re seeing here is that in between the centers of two ‚lanterns‘, there are four panels. This is really consistent between all lanterns on the dress; no matter if front, side, or back. But of course you’re free to verify this by looking at the exhibit pictures.
That results in the following panel layout if you’d look at it from above (the black ’spacer‘ lines indicating the piping between the panels, not the center of the panels, of course!):
 Count (or calculate) with me – 6 jewels, with 4 panels between each of them. 6×4=24.
24 panels. Not „approximately“ 25. Just 24. Period.
(Seriously, if I had constructed this dress first, I’d have remembered that precise number.) - Overall shape
Also, and keep that in mind when you continue reading, the bottom of the dress (to at least hip level) is round. Perfectly round to be precise. Just thought I should mention that in case it isn’t obvious from the pictures above, because in the following explanation for calculating the panels, we’ll use circle calculations. - Shape of the panels
The bottom of the skirt has an interesting shape. Some call it a ‚bell shape‘, and others even call it an ‚A-Line‘. Both is wrong, because the shape is actually that of a trumpet:
 This, while being a very unusual and complicated-to-stabilize shape, is also just a matter of mathematical calculation for each panel.
Let me use my ‚proportional‘ calculation method, which is basically a mix between what I explained in my ‚cage crinoline‘ tutorial and what I wrote about proportional enlarging on the ‚Emperor Palpatine‚ page.
Why is proportional calculation important? Here’s why:
 Note the measurement tape between the first and the second figure. It’s color coded; each color = 10cm / approximately 4 inches.
First: Natalie Portman, as ‚usually‘ displayed in that image.
As already written earlier on this page, her natural body height is 5′ 3″ (1.60 m). Let’s presume that she’s wearing a 1 inch (2.5cm) heel with this dress, that would make her 1.625m (5’4“) when she wears this dress. Also, her head (obviously!) can’t extend above the cap of the headdress.
My own body height is 5 ‚ 8.70″ (1.745m) with just a 1 inch heel; so I’m considerably taller than Natalie.
Second: That’s what I would look like if I would wear the very same dress with just the skirt length and top width adjusted. You see how this, compared to the first, is lacking – the tabard is too short, the collar not wide enough, the sleeves are too short, the headdress is too small.
Third: That’s what the dress would look like if it’s proportionally adjusted to my size, including everything down to the size of the lamps. Compare that to the second, and you’ll see the differences.
Also, comparing the second and third, you’ll notice that ’something‘ seems to be off; but if you wouldn’t have the possibility to compare to the exact proportions, you wouldn’t be able to put your finger on *what* seems off.
I’ve seen quite a few very good reproductions, but, for example, the lamp size and / or the headdress size is off pretty often on reproductions, which leads to the strange feeling of something being ‚weird‘ when looking at the costume. So it’s definitely important to do the ‚proportional‘ resizing when reproducing a costume, just to avoid that weird oddness of some parts being disproportionally resized.
Now that we’ve discussed the ‚why‘, here’s the ‚how‘:- Digitally add a grid to an image that shows an exact front view of the dress.
 This grid of mine is a 10×10 centimeters grid (approximately 4×4 inch – 1 inch = 2.54cm) – occasionally, in the lower parts of the ‚trumpet‘, I added more lines, so those are a 5x10cm (2×4 inches) grid. The grid in this picture is a representation of what the dress would look like if it was worn by someone having my very own body height (your own grid, if you would want to use this method, would of course depend on your own height!); I already explained this on the ‚Emperor Palpatine‚ page.
 - Calculate the circumference of the panels at various heights (those marked by the lines of the grid, to be precise – as described in the ‚Cage Crinoline‘ tutorial) results, for me, in the following circumferences (noted at the very left side of the picture):

- Then I draw a line along the side of the entire dress shape, with notches in the places where that line meets the horizontal grid lines:

- Afterwards, I straighten that line out to become vertical, but still maintaining the (particularly on the bottom) *diagonal* distances between the notches. This is important, because otherwise, the panels will become too short.
Also, I divide ALL the circumference measurements that I calculated in step 2 by 24 (the number of panels) to find out how wide each of the panels is at those particular ‚heights‘. I then proceed to draw shorter, horizontal lines at the notches with said calculated widths of the panel.
Then I draw a line along the edges of those shorter horizontal lines, and voilà, there’s the shape of the panel:
 Don’t worry about the length. It seems way too long. But that’s just because the lower trumpet-shape takes up a large amount of length.
 - Here’s that panel again, rotated by 90 degrees, just so you can see it better:
 Of course, while the bottom circumference (to about bust height) is correct, this panel will still need work on top, along the neckline, the shoulders, under the arms, and on the back. But it gives me a base to work with, and the appropriate length of the panels.
In case you feel unable to construct said neckline, shoulders, armholes and so on, you could always go ahead, just calculate what I wrote in 1-4up to bust height, and then use a different pattern (say, a blouse pattern!) which you cut off at bust height, then tape the panels to it, and cut the upper part of the panels from that blouse pattern. Very simple, you just need some time to draw what I drew and calculate everything to fit your own measurements!
- Digitally add a grid to an image that shows an exact front view of the dress.
- The bell-shaped sleeves
- By basically doing the very same thing that I did for counting the dress panels (looking at pictures from all angles etc.) I came to a number of 16 panels.
- I then proceeded with the same method I used for the dress to calculate the width and height of those sleeves from shoulder-to-bottom (using the grid with a side view of the dress, to be able to also calculate the differing lengths of front and pointed back).
Here’s the pattern I came up with for the 16 panels. Note that it already contains the ’shoulder‘ and ‚underarm‘ shaping at the very top:

- Collars, inner sleeves and tabards
I used the very same methods (grid, calculating, drawing…) to make the pattern pieces for the outer- and inner collar, both pairs of under-sleeves (fur-trimmed and tight – for those, I basically joined the UPPER edges of my aforementioned sleeve pattern to maintain the shoulder shape, then drew the pattern for those under-sleeves with the very same shoulder line as the outer sleeve to be able to set all three sets of sleeves into the very same armhole of the dress) and the tabards.
Also, I calculated some sort of ‚underskirt‘, which will help provide the shape for the ‚trumpet‘ and which is firmly sewn into the dress. - The resulting, complete pattern
Alright, this looks like a SERIOUS mess, and in fact, it is – if you have no idea what you’re looking at.
Here’s the sewing pattern that I developed for the gown (or rather, half of it – one side except for the tabards, which are shown full).
I NEVER had to develop a pattern that had so many pattern pieces (just for the base dress and outer, bell-shaped sleeves: all around, 56 (fifty-six!) panels that have to be sewn together; not including tabards, collars, inner fur-trimmed- and the tight sleeves!); and the fur-trimmed under-sleeve as well as the very tight sleeve beneath that aren’t even IN this pattern yet (but the gown, the stabilizing, sewn-in underskirt, the sleeve, the collars and the tabards are!).
Click to enlarge to see the chaos, aka the ton of pattern pieces:


Where to get the materials and what will they cost?
A complete guide to finding the right materials for this gown, as analyzed above.
Note that I am trying to go the route of a reproduction that’s very close to the original dress. So while I am willing to substitute silk faille with polyester Bengaline, I’m not willing to use, say, an even cheaper fabric just because it’s cheaper.
Hence my materials list below doesn’t precisely take the ‚very-small-budget‘ costumer into consideration, sorry.
Also, the prices I listed here are valid for the stores *I* found, and the fabrics *I* have decided to use. The stores YOU will find and the fabrics YOU want to use may differ.
- Google ‚red Bengaline fabric‘.
- When you found a shop selling it, look if they have satin, better: Duchess (also misspelled ‚Dutchess‘) satin, in the very same color (and fiber content).
I recommend Duchess satin since it’s a bit thicker and more stable than most satins (particularly if you’re looking at a polyester-containing fabric!), and will therefore work better. - If the shop carries both, and you’ve verified (by mail or by even ordering swatches!) that both ARE actually the very same color, order your material. Maybe they even have a slightly cheaper, matching lining fabric; order that too.
For myself, and I’m 5’8“ from head to toes, I’d need at least 7.2 meters / 8 yards of Bengaline (at $9.95 / yard = $79.60 for 8 yards), 10.1 meters / 11 yards of satin / Duchess (never underestimate how much fabric that enormous amount of piping will eat up!) at $9.95 / yard = $109.45 for 11 yards), plus shipping for all these fabrics = $50! ; all valid for a fabric width of approximately 50-54 inches width.
That results in a first fabrics and shipping price of $239.05.
Just to prove the amounts of fabric that will be required (green vertical stripes denoting 1 yard each):
Fabric cutting layout for the Bengaline:
 Fabric cutting layout for the satin (with huge rectangle reserved for bias strips for the piping – I calculated that I’m going to need at least 80 meters / 88 yards of those…):

- Find (and order) a sturdy backing fabric for your panels and for the stabilizing underskirt.
That, in case you ordered Bengaline, Duchess and lining woven with polyester or acetate fibers, should be made of ALL NATURAL fibers, like cotton or linen. You’ll need approximately 10 meters / 11 yards of this. At $5 per yard, that’s $55, plus shipping of $10, that’s $65. - Batting for the upper, cording-embroidered collar. About a yard will do, maybe even less, depending on the width of the batting. Shouldn’t cost more than $5.
- After receiving your fabrics – IF they are either Polyester, cotton or linen – wash them before doing anything else, just so you pre-shrink them and are later able to wash the dress too.
However, if your fabrics contain silk or acetate as well as some variations of rayon (test wash!), you just want to deliver the uncut fabrics to the dry cleaner of your choice. That’s because even dry cleaning can shrink fabrics, and just so you don’t have a ’shrunken‘ surprise when taking the finished costume to a dry cleaner… have the dry cleaner clean the uncut, unsewn fabrics before you start to sew. - Find (and order) fake fur that matches the description above.
If you’re using fur trim (should be about 3-4 inches wide), you’ll need about 15 meters / 16 yards.
If you’re using yardage ‚fabric‘ fake fur, you’ll have to calculate how much you need (by using the aforementioned 3-4 inches trim width and a length of 15 meters / yards, in combination with the width of the fabric you would like to order).
Fake fur should, before sewing, either be hand-washed, washed in the machine at a wool cycle or, you probably already guessed it, have a meeting with the dry cleaner before it goes into the costume.
For my dress, I would need 2 meters of ‚fabric‘ type fur, at $19.90; resulting in $ 39.80; plus $10 shipping = $49.80. - Find (and order) red cording for the embroidery; making sure that the color matches the fabric you found. Hand wash it when you got it.
I’m not yet sure how much you will need, but just to be safe, order at least 10-15 meters / 11-16 yards.
15 yards, in case of the cording I found, costs me approximately $15. - Find (and order) floral bobbin lace. If it’s made from cotton, rayon or silk threads, you can dye it and just need to look for a ‚white‘ (or near-white) lace. Your main focus should be on the pattern, which should be similar to that used on the actual headdress. Again… wash before doing anything.
A nice vintage lace tablecloth, doilies or place-mats from bobbin lace shouldn’t cost more than approximately $15 on Ebay, including shipping. - For the ‚lights‘ on the dress, either get ‚plastic egg halves‘ in the appropriate size and use those, or, in fact, use Perspex, create your own shape for vacuum forming, and then make those lights yourself. Don’t forget the enamel to color wash them!
Also, get LED lights, preferably battery-operated. You have to use several, and strong, LED diodes for this dress – and yes, there are several different kinds available; test what works best for you.
I recommend a yellowish / orangeish shade of LED lights for this dress; maybe you could also combine several LEDS in various colors inside the ‚eggs‘ to achieve a nice effect.
Oh, also, learn how to solder and wire LEDs. Google has plenty of help.
Estimated costs for making the light shapes and the LEDs for my dress: approximately $80. - If you don’t have an embroidery machine and / or the software to digitize the embroideries:
Find an embroidery service that will digitize the embroidery pattern of the appliqués for you, and also embroider it (maybe on felt) for you. Ask for an extra spool of the golden embroidery thread to come with your finished appliqués, so you can sew them down to the satin tabards.
Just to show you what kind of price range you’re looking at with this particular task; I have no idea what services charge for digitizing the embroidery (I heard ~$50 for 40,000 stitches are the approximate price range).
I usually digitize myself, and digitizing *this* particular pattern took approximately 8 hours – that does NOT contain embroidering it; just digitizing it from photos (=making an embroidery file that my embroidery machine can use to embroider it!).
But I do know that embroidery services usually charge around , and that this particular design (at least the way *I* digitized it, taking the slightly ‚puffy‘ appearance into consideration while digitizing!) has around 115,000 stitches (they’re basically embroidered ‚on top of each other‘, to eventually form the three-dimensional appearance of the appliqué).
So, just for the digitizing, that would be ~120,000 stitches divided by 40,000 (priced at $50) results in $150 just for digitizing.
Then the embroidery service charges for the actual embroidery. I heard ~$1.50 are realistic for 1,000 stitches; for 120,000 stitches, that would be $180.
That results in a pricing of ($150 for digitizing + $180 for embroidering =) $330 for digitizing and embroidering the appliqués.
Of course… if you have a machine but no software, you’d just pay for the digitizing; but be sure to tell the digitizer which precise machine you’re using, how large your largest hoop is, and how large you need the appliqués to be (use the grid method to calculate this!)
And if you have the software but no machine (unlikely… but possible…), you could always digitize the design yourself and hand it over to an embroiderer.
Also there’s the possibility of using ready-made appliqués. They won’t have the EXACT shape, but they’re much cheaper and readily-available; it’s just a matter of how original you want your reproduction to be and, of course, what your budget is.
Of course you could also always be lucky and find someone who has already digitized the design; and you could ask that person to embroider the appliqués for you (at the ‚embroidering‘ price).
Approximate costs for me (I have an embroidery machine AND have already digitized the embroideries!): $30 in stabilizers and embroidery thread. - Cording for the piping
You’ll need at LEAST 80 meters / 88 yards of cording for the piping (I recommend getting more like 90 meters / 100 yards, since it will probably shrink!). Any cording that can be washed and has the approximate required diameter of the piping will work; I do recommend hemp cording since it also works as a stabilizer.
WASH the cording in advance before using it for the piping. It WILL shrink. Best toss it into boiling water, then rinse with ice cold water. That will shrink the cording, so it won’t shrink later, when you wash / dry clean the finished dress. In case of THIS amount and placement of piping, shrinking of the cording would be the ultimate desaster.
Price for really simple cording: No more than $ 0.20 per yard; resulting in $20; including shipping. - For the headdress you’ll need skills, epoxy resin, polymer clay, Styrofoam, leaf gold, white enamel, and patience.
I guess for those materials, you’ll pay approximately $50.
Then you’ll need a Swarovski jewel, large, for the center front ‚Jewel of Zenda‚.
I recommend Swarovski style 1201 – of which even the faceted cut is similar to the original! – available in 27mm diameter (close to the original size) and 35mm (which would be suitable for taller costumers like me). Costs for that jewel: around $5-10; shipping not included. Color should be somewhat dark red; Swarovski offers several shades of dark red (and personally, I’ve decided for ‚Red Magma‘). Note however that Swarovski 1201 isn’t a ‚flat back‘ rhinestone. It has a pointed backside (resulting in a more pretty ‚fiery‘ faceted appearance if seen from the front), so it needs a proper setting. You can easily sculpt that using wire (as a stabilizing base) and polymer clay.
Also, smaller Swarovski rhinestones. In my case, I need 6.4mm (30SS) red flat back rhinestones and 4-5mm (20SS) yellow flat back rhinestones for my own reproduction to decorate the ‚peak, since I’m pretty tall‘.
Furthermore, polymer clay to shape the ‚Chinese bead‘. And loose white pearls – 5mm and 3mm – and smaller seed beads (red transparent glass, 4mm)to decorate the peak. Costs of rhinestones, polymer clay and pearls: approximately $15, including shipping.
In case you’d like to use a ready-made bead for the chinese bead, google „carved Chinese cinnabar beads“.
I found this (left: Bead on original headdress; right: the bead I found – click to enlarge!):

(available here), but that size (22mm), while probably working for Nathalie Portman, who’s about one head shorter than I am, won’t work for me; so I still have to carve my own bead (which needs to be 27mm). - Fake hair. Tons of it. No idea about the actual amount, but even for the cheapest but still nice looking fake hair *I* know, I estimate that this will cost at least $40.
- Pattern making paper won’t hurt. Neither will printing paper for the printer (to print out a life-size version of the pattern). Also, new ink cartridge for the printer. Shouldn’t cost more than $20 (ink cartridges are expensive!).
- Notions you will need: Threads, machine needles, hoop steel (at least 20 meters / 22 yards; depending on your size…), stabilizers, Velcro tape, snaps, gas for trips to the local fabrics store (which I GUARANTEE you will make more than once!) – approximately $70.


I don’t think that I have forgotten something, but if I find that I have, I’ll add it when I come to think of it.
And in case you’re asking yourself and are too lazy to calculate yourself ;-), the above list equals to$ 698.85 in materials for this dress.
And that’s just the materials; no work done yet. And not counting in, for example, proper detergents to wash your fabrics (or the costs of a dry cleaner).
Also, it’s not even the ORIGINAL materials (polyester instead of silk Bengaline…), but just extremely likely looking, cheaper materials than the original ones.
Is it possible to create this dress with even cheaper materials than those listed above?
Yes, of course. And if you’re lucky and have time, you may even find the materials listed above at cheaper prices.
Will it still look like the original (or like a reproduction made with the materials listed above) if you make it using different, cheaper materials?
That probably depends on the distance you’re watching it from and / or the materials you’re using to substitute those that I recommended.
Then again, really knowing what precise materials the dress is made of is sheer geekdom.
Do *I* (I, who wrote this, and who would like to make the dress using the aforementioned materials!) look down upon people who use different materials, for whatever reason they may have?
Of course I don’t.
What I described above is my personal way of reproducing things. I’m fully aware that other people have different methods of doing stuff, and I tolerate their ways of making stuff, while expecting that they tolerate my way of making stuff.
Each costumer approaches a project differently, depending on budget, skills, tools and available time; but that doesn’t mean that one costumer is „better“ or „worse“ than another.
And now, if you will excuse me – I seriously have to save up for some materials. In the meanwhile, follow me on the making of the headdress (which I could start because I still had leftover materials from my Apailana headdress).
Navigation menu for this costume:
Analysis of the costume – Making the headdress – Making the gown
~Please also have a look at my other Star Wars costume reproductions! ~
Hello! You mentioned that the gold appliqués be sewn on felt first then sewn on the satin fabric. How does one approach transferring the appliqué from the felt to the satin?
you. are. awesome!! i am not trying to painstakingly recreate the exact dress, but there is nowhere else who give me an accurate rendition of the layers of the dress. the sheer amount of work that went into this article is amazing.. the world needs more passionate people like you!
and thanks for the patterns. you did ease 70% of my work.
live long and prosper 😀
Good evening, I was wondering if you had any advice on how to resize and print the amazing pattern you provided to fit specific human measurements? Is there a scale to use to allow for correct proportioning for all the pattern pieces?
Sorry, but there isn’t.
I’ve redrafted the pattern for actually printing it and can’t tell which size the pattern I posted on the website originally had, as I deleted that particular image from my harddisk.
Then again, it isn’t meant to be printed out by anyone.
It fits me – and just me. I’m rather tall (5’7“ without shoes), have rather long legs and I’m not exactly slim. As there is basically no way to just shorten the dress from the pattern (because the traditional method – shortening it at the hem – would take away some of the circumference of the lower hoop, the result would be dysproportional.
Also, there’s no indication in the pattern which piece connects in which way to the other pieces.
So… printing it, even if I had the correct size it should have when printed, would get you a dress that fits me and cannot be altered.
Sorry!
Great post, really helpful, thank you!
I have a question about the dress patterns you provide: it looks like hood is a part of upper collar on patterns though you explained it should be a part of lower one. Did you do this on purpose as it’s easier? Or do I miss something?
Haha – that’s true! I noticed it when I actually printed the pattern. My solution was to cut the „hood“ part off the upper collar paper pattern piece and to glue it to the lower collar pattern piece before cutting them out.
This is an excellent breakdown of this dress. When I made the dress in 1999 (with far fewer sources!), I remember sitting for hours gridding out the headdress so that it would be properly porportional to my face. It was lots of fun, hard work when I had the time to do so. I wish I had taken the time to also grid out the dress back then, though. I managed to make mine for around $300 back then using locally sourced materials (we didn’t really have internet at my house!), but it isn’t nearly as accurate as a reproduction as this breakdown will produce. Good luck! I can’t wait to see the finished product!
Thank you 🙂
I hope to get started soon; I guess I’ll start with the headdress – I’ve just ordered the jewel 😉